YXSMPS MC2420N10
SRNE MC2420N10 MPPT Solar Charge Controller User Manual
Model: MC2420N10
1. Introduction
This manual provides essential information for the safe and efficient operation of your SRNE MC2420N10 MPPT Solar Charge Controller. This device is designed to manage power flow from solar panels to batteries, ensuring optimal charging and discharging for various battery types, including lithium batteries.
The MC2420N10 features advanced Maximum Power Point Tracking (MPPT) technology for high efficiency and includes communication capabilities for remote monitoring.
2. Safety Information
Please read all safety instructions carefully before installation and operation. Failure to follow these instructions may result in electric shock, fire, or serious injury.
- Ensure all connections are secure and correct before applying power.
- Do not disassemble or attempt to repair the controller yourself. Refer to qualified personnel.
- Install the controller in a well-ventilated area, away from flammable materials and direct sunlight.
- Wear appropriate personal protective equipment (PPE) when working with electrical systems.
- Verify battery voltage and polarity before connecting to the controller.
3. Package Contents
Verify that all items are present in the package:
- SRNE MC2420N10 MPPT Solar Charge Controller
- BT-2 Bluetooth Module (for MC2420N10 with BT-2 variant)
- User Manual
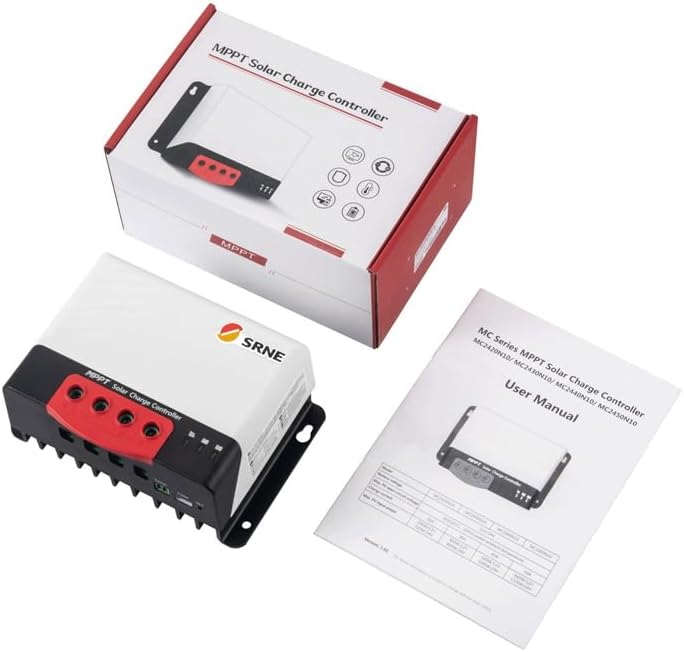
Image: The SRNE MC2420N10 MPPT Solar Charge Controller, its BT-2 Bluetooth module, and the user manual, displayed alongside the product packaging.
4. Product Overview and Features
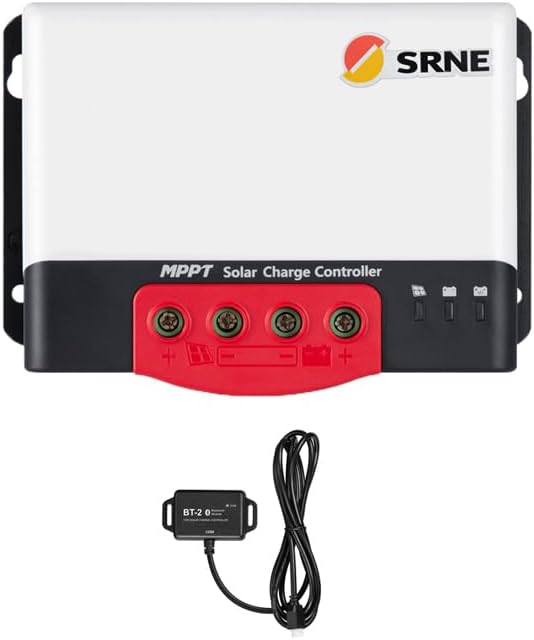
Image: Front view of the SRNE MC2420N10 MPPT Solar Charge Controller, showing the terminals and indicators, with the BT-2 Bluetooth module connected below.
The MC2420N10 is a high-efficiency MPPT solar charge controller designed for robust performance in various solar power systems. Key features include:
- Remote Monitoring: Equipped with BT-2 Bluetooth module for real-time monitoring and parameter adjustments via mobile app.
- Advanced MPPT Technology: Faster response speed and higher tracking efficiency (>99%) compared to traditional methods.
- Multi-Battery Support: Compatible with various battery types, including lithium, colloidal, sealed, and vented batteries.
- Compact Design: Highly integrated to save space and simplify wiring.
- Quiet Operation: Natural cooling design ensures absolutely quiet performance.
- Flexible Solar Panel Configuration: Supports solar panels in series (up to 2) or parallel.
- Communication Interfaces: Supports TTL and CAN (RV-C) communication.
- Comprehensive Protection: Features a complete charge protection mechanism for safe operation.
- High-Quality Components: Ensures stable and reliable operation.

Image: A close-up view of the BT-2 Bluetooth module, showing its "BT-2 Bluetooth Module" label and "Link" indicator, designed for solar charge controllers.
5. Setup and Installation
Proper installation is crucial for the performance and longevity of your solar charge controller. Follow these steps carefully:
- Mounting: Choose a cool, dry, and well-ventilated location. Mount the controller vertically to allow for proper heat dissipation. Ensure there is sufficient clearance around the unit.
- Wiring Sequence: Connect the components in the following order to prevent damage:
- Connect Battery: First, connect the battery to the controller's battery terminals. Ensure correct polarity (+ to + and - to -). The controller should power on.
- Connect Solar Panels: Next, connect the solar panels to the controller's PV input terminals. Ensure correct polarity and that the open circuit voltage (Voc) of the solar array does not exceed the controller's maximum input voltage (100Vdc).
- Connect Load (Optional): If using the load output, connect your DC load to the load terminals.
- Disconnecting Sequence: When disconnecting, reverse the order: Load -> Solar Panels -> Battery.
- Cable Sizing: Use appropriate wire gauges for all connections to minimize voltage drop and ensure safety. Refer to local electrical codes.
- Grounding: Ensure the controller is properly grounded according to local regulations.
6. Operating Instructions
6.1 Initial Power-Up
Once the battery is connected, the controller will power on. The indicators on the controller will show the status of the battery, solar input, and load.
6.2 Battery Type Selection
The controller supports multiple battery types. Use the BT-2 Bluetooth module and the mobile application to select the correct battery type (e.g., Lithium, GEL, Sealed, Flooded) to ensure proper charging algorithms are applied.
6.3 Monitoring with BT-2 Bluetooth Module
The BT-2 Bluetooth module allows for wireless monitoring and parameter adjustment via a dedicated mobile application. Download the app from your device's app store and follow the in-app instructions to connect to your controller.
- View real-time system data (PV voltage, battery voltage, charging current, etc.).
- Adjust charging parameters (e.g., battery type, charge voltage limits).
- Access historical data and error logs.
7. Maintenance
The SRNE MC2420N10 is designed for low maintenance. However, regular checks can ensure optimal performance and longevity:
- Cleanliness: Keep the controller clean and free from dust and debris. Use a dry cloth for cleaning.
- Connections: Periodically check all wiring connections for tightness and corrosion. Re-tighten if necessary.
- Ventilation: Ensure that the ventilation openings are not blocked to allow for proper heat dissipation.
- Battery Health: Monitor battery voltage and health regularly, especially for flooded batteries that may require water replenishment.
8. Troubleshooting
| Problem | Possible Cause | Solution |
|---|---|---|
| Controller not powering on | Battery not connected or reverse polarity; Battery voltage too low. | Check battery connections and polarity. Ensure battery voltage is within operating range. |
| No charging from solar panels | Solar panels not connected or reverse polarity; Insufficient sunlight; PV voltage too low/high. | Check PV connections and polarity. Ensure adequate sunlight. Verify PV voltage is within controller's input range. |
| Overcharging/Undercharging battery | Incorrect battery type selected; Faulty battery. | Verify battery type setting in the app. Test battery health. |
| Bluetooth connection issues | BT-2 module not connected; App issues; Interference. | Ensure BT-2 module is securely connected. Restart app/phone. Move closer to controller. |
9. Specifications

Image: A detailed table outlining the specifications for various SRNE MC series MPPT Solar Charge Controllers, including PV input, battery, efficiency, accessories, and general parameters.
| Parameter | Value (MC2420N10) |
|---|---|
| Model | MC2420N10 |
| Rated Battery Voltage | 12V/24V Auto |
| Rated Charging Current | 20A |
| Max. Voltage of Open Circuit (PV) | 100Vdc |
| MPPT Tracking Efficiency | >99% |
| Communication | TTL, CAN (RV-C), Bluetooth |
| Weight | 0.65kg (1.43lb) |
| Dimension (L*W*H) | 150*105.6*61.5mm (5.9*4.16*2.4in) |
| Protection Degree | IP32 |
| Operating Temperature Range | -35°C to 60°C (-31°F to 140°F) |
10. Warranty and Support
For warranty information and technical support, please refer to the documentation provided with your purchase or contact the manufacturer directly. Keep your purchase receipt as proof of purchase.
Manufacturer: YXSMPS
Ask a question about this manual
Ask about setup, troubleshooting, compatibility, parts, safety, or missing instructions. Manuals+ will review the question and use this page’s manual context to help answer it.