1. Introduction
This manual provides detailed instructions for the installation, operation, and maintenance of the TGPKPGTCTA SDM230 Modbus Energy Meter. The SDM230 is a single-phase, bi-directional, multi-function energy meter designed for measuring active energy, reactive energy, voltage, current, power, frequency, and power factor. It features an RS485 Modbus communication output for integration into monitoring systems. Please read this manual thoroughly before installation and use to ensure safe and correct operation.
2. Safety Information
WARNING: Installation and servicing of this device should only be performed by qualified personnel. Failure to follow these instructions may result in electrical shock, fire, or serious injury.
- Always disconnect power before installing or servicing the meter.
- Ensure all wiring connections are secure and correct according to the wiring diagram.
- Do not operate the meter in environments exceeding its specified operating conditions.
- Protect the device from moisture, dust, and direct sunlight.
- Use appropriate personal protective equipment (PPE) during installation.
3. Product Overview
The TGPKPGTCTA SDM230 Modbus Energy Meter is a compact, double DIN module designed for accurate energy measurement in single-phase electrical systems. Its digital display provides clear readings of various electrical parameters.
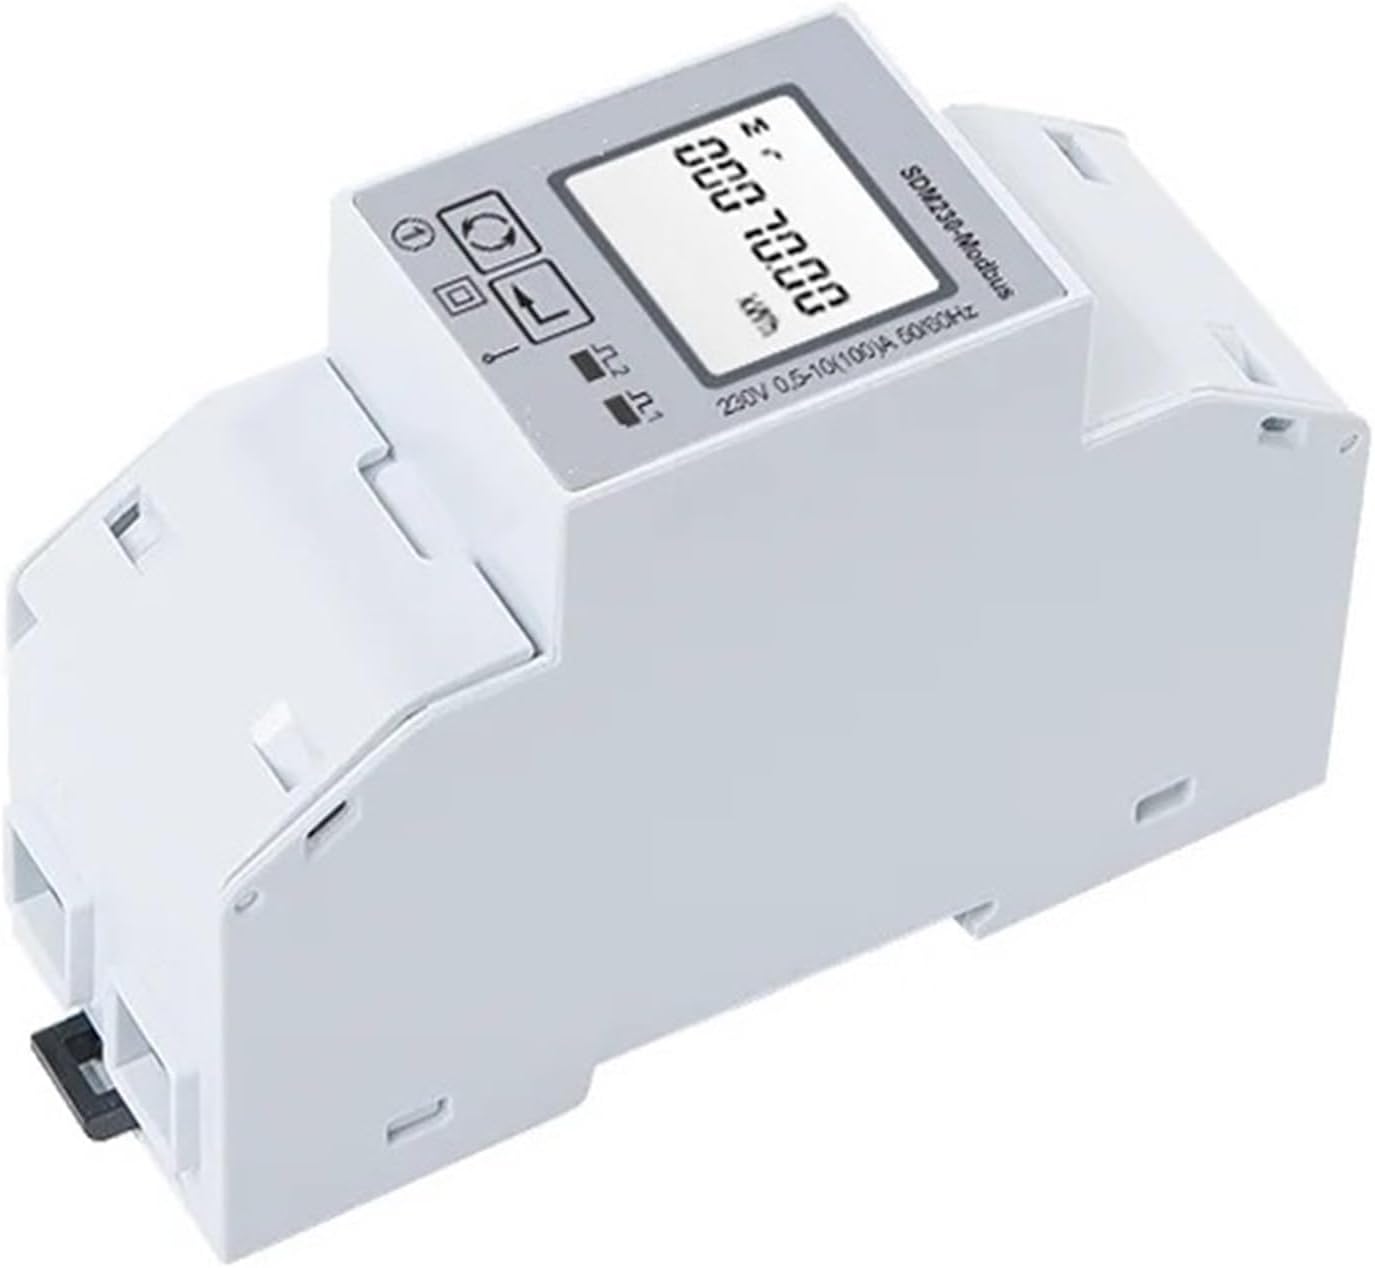
Figure 3.1: Front view of the TGPKPGTCTA SDM230 Modbus Energy Meter. This image shows the meter's digital display, control buttons, and the SDM230-Modbus branding.
Key Features:
- Single-phase, bi-directional energy measurement.
- Measures active energy, reactive energy, voltage, current, power, frequency, and power factor.
- RS485 Modbus communication output.
- Double DIN module for easy installation.
- High accuracy and reliability.
4. Specifications
The following table details the technical specifications of the SDM230 Modbus Energy Meter.

Figure 4.1: Input and Output Specifications. This image displays a table detailing the current (Basic 10A, Max Rated 100A) and voltage (Rated 230V, Operational 80%-120% Un) parameters for the meter.
| Parameter | Value |
|---|---|
| Output Voltage | 230V AC |
| Measuring Energy Range | 99999.99 kWh |
| Phase | Single Phase |
| Max Operating Current | 80A - 99A |
| Rated Voltage | 230V |
| Package Dimensions | 1.18 x 0.79 x 0.39 inches |
| Item Weight | 1.1 pounds |
| Item Model Number | SDM230 |

Figure 4.2: Wiring Diagram and Dimensions. This image shows two wiring configurations for the meter (L-in, N-in, L-out, N-out connections) and a dimensional drawing with measurements (e.g., 100mm length, 63mm height, 35mm width).
5. Installation
The SDM230 Modbus Energy Meter is designed for DIN rail mounting. Follow these steps for proper installation:
- Preparation: Ensure the main power supply to the circuit where the meter will be installed is completely disconnected. Verify with a voltage tester.
- Mounting: Snap the meter onto a standard 35mm DIN rail. Ensure it is securely fastened. Refer to Figure 4.2 for physical dimensions.
- Wiring: Connect the power supply and load wires according to the wiring diagram shown in Figure 4.2.
- Connect the incoming Live (L-in) and Neutral (N-in) wires to the designated input terminals.
- Connect the outgoing Live (L-out) and Neutral (N-out) wires to the designated output terminals.
- For Modbus communication, connect the RS485 A and B terminals to your Modbus network.
- Verification: Double-check all connections for correctness and tightness. Loose connections can cause overheating or malfunction.
- Power On: Restore power to the circuit. The meter display should illuminate, indicating successful installation.
Note: The meter is bi-directional, meaning it can measure both imported and exported energy. Ensure wiring is consistent with the desired measurement direction.
6. Operation
Once installed and powered, the SDM230 meter will automatically begin measuring energy consumption.
Display Navigation:
The meter features a digital LCD display and typically two buttons for navigation.
- Scroll Button: Press this button (often labeled with an arrow or 'M') to cycle through different measurement parameters on the display, such as:
- Total Active Energy (kWh)
- Total Reactive Energy (kVarh)
- Voltage (V)
- Current (A)
- Active Power (W)
- Reactive Power (Var)
- Apparent Power (VA)
- Frequency (Hz)
- Power Factor (PF)
- Reset Button: Some models may have a dedicated reset button (often labeled with 'R' or a circular arrow) to reset certain parameters, such as partial energy readings. Refer to the specific model's detailed instructions for reset functionality.
Modbus Communication:
The RS485 Modbus output allows the meter to communicate with external systems (e.g., PLCs, SCADA systems, energy management software).
- Modbus Address: Each meter on a Modbus network requires a unique address. This is typically configurable via the meter's buttons or Modbus commands.
- Baud Rate: The communication speed (baud rate) must match between the meter and the Modbus master device. Common baud rates include 9600, 19200, etc.
- Data Format: Parity and stop bits must also be configured to match the Modbus network.
For detailed Modbus register maps and communication protocols, refer to the separate Modbus communication protocol document, usually available from the manufacturer.
7. Maintenance
The SDM230 Modbus Energy Meter is designed for low maintenance. However, periodic checks can ensure optimal performance and longevity.
- Cleaning: Gently wipe the meter's exterior with a soft, dry cloth. Do not use abrasive cleaners, solvents, or liquids that could enter the device.
- Connection Checks: Periodically inspect wiring connections for tightness and signs of corrosion or damage. Ensure power is disconnected before performing any physical checks.
- Environmental Conditions: Ensure the operating environment remains within the specified temperature and humidity ranges to prevent damage.
- Firmware Updates: If applicable, check the manufacturer's website for any firmware updates. Firmware updates should only be performed by qualified personnel following manufacturer guidelines.
8. Troubleshooting
If you encounter issues with your SDM230 Modbus Energy Meter, refer to the following troubleshooting guide:
| Problem | Possible Cause | Solution |
|---|---|---|
| Meter display is blank. | No power supply or incorrect wiring. | Check power connections and ensure voltage is present. Verify wiring against Figure 4.2. |
| Incorrect readings or no measurement. | Incorrect wiring, faulty connection, or meter malfunction. | Verify all wiring connections are secure and correct. Ensure the load is connected properly. If the problem persists, contact support. |
| Modbus communication failure. | Incorrect Modbus address, baud rate, data format, or wiring. | Check Modbus wiring (A/B terminals). Verify Modbus address, baud rate, and data format settings on both the meter and the master device. Consult the Modbus protocol document. |
| Meter is hot to the touch. | Overload or loose connections. | Immediately disconnect power. Check the load current against the meter's maximum operating current. Inspect all wiring for loose connections. |
If troubleshooting steps do not resolve the issue, please contact customer support for further assistance. Do not attempt to repair the meter yourself.
9. Warranty and Support
This TGPKPGTCTA SDM230 Modbus Energy Meter comes with a standard manufacturer's warranty. Please refer to the warranty card included with your product or visit the official TGPKPGTCTA website for detailed warranty terms and conditions.
For technical support, product inquiries, or warranty claims, please contact TGPKPGTCTA customer service through their official channels. When contacting support, please have your product model (SDM230) and purchase information readily available.