
1. Introduction
This manual provides essential information for the installation, operation, and maintenance of your ZXKLXYY GA-G31M-ES2C Desktop Motherboard. Designed for LGA 775 processors and DDR2 memory, this motherboard offers stable functionality for desktop computing environments. Please read this manual thoroughly before proceeding with installation or operation.
2. Product Overview
2.1 Key Features
- Optimized power design for efficient performance.
- High-grade storage standards for reliable data management.
- Robust connectivity options for various peripherals.
- Durable construction for extended longevity.
2.2 Motherboard Components
Familiarize yourself with the layout and key components of the GA-G31M-ES2C motherboard:

Figure 1: Overall view of the ZXKLXYY GA-G31M-ES2C Desktop Motherboard, highlighting the CPU socket, RAM slots, PCI-Express slot, and various connectors.
The motherboard features an LGA 775 socket for Intel CPUs, two DDR2 DIMM slots, a PCI-Express X16 slot for graphics cards, and multiple SATA ports for storage devices. The integrated chipset is Intel G31.

Figure 2: Rear I/O panel showing various ports including PS/2, serial, VGA, USB 2.0, LAN, and audio jacks.
The rear I/O panel provides essential connectivity for peripherals, including PS/2 ports for keyboard and mouse, a serial port, a VGA port for display output (requires CPU with integrated graphics support), USB 2.0 ports, an Ethernet port for network connectivity, and audio jacks.
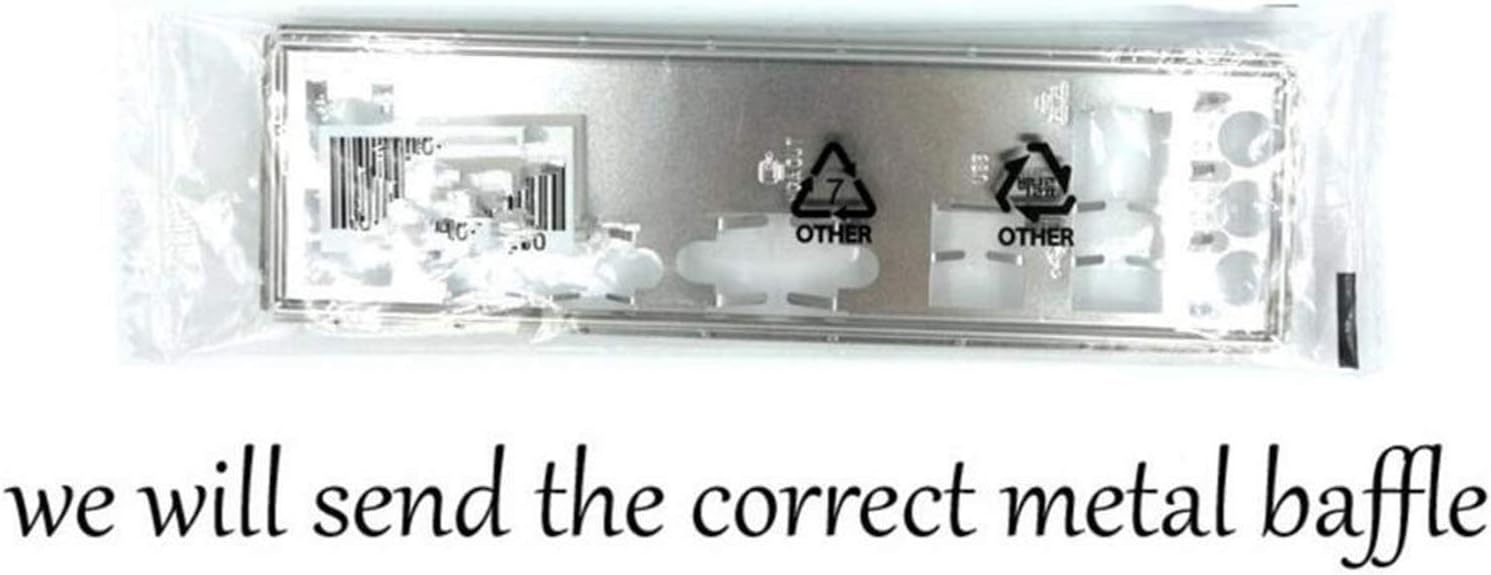
Figure 3: The metal I/O baffle, which is installed into the computer case to align with the motherboard's rear ports.
A metal I/O baffle is included to ensure proper fitment and protection for the rear ports when the motherboard is installed in a computer case.
3. Setup and Installation
Before beginning installation, ensure your system is powered off and disconnected from the power source. Handle the motherboard by its edges to avoid static discharge.
3.1 CPU Installation
- Locate the LGA 775 CPU socket on the motherboard.
- Gently lift the load lever and open the CPU socket cover.
- Align the CPU with the socket, ensuring the notches on the CPU match the keys on the socket. Do not force the CPU into place.
- Lower the CPU into the socket.
- Close the socket cover and push down the load lever until it locks into place.
- Apply a thin layer of thermal paste to the CPU and install the CPU cooler according to its manufacturer's instructions.
3.2 Memory (RAM) Installation
- Locate the two DDR2 DIMM slots.
- Open the clips at both ends of the memory slot.
- Align the memory module with the slot, ensuring the notch on the module matches the key in the slot.
- Press down firmly on both ends of the memory module until the clips snap into place.
3.3 Storage Device Connection
- Connect SATA data cables from your hard drives or SSDs to the SATA ports on the motherboard.
- Ensure power cables from your power supply are connected to your storage devices.
3.4 Power Supply Connection
- Connect the 24-pin ATX power connector from your power supply to the main power socket on the motherboard.
- Connect the 4-pin ATX 12V power connector to the corresponding socket near the CPU.
3.5 Installing into a Computer Case
- Install the metal I/O baffle into the rear opening of your computer case.
- Carefully place the motherboard into the case, aligning the screw holes on the motherboard with the standoffs in the case.
- Secure the motherboard with screws.
- Connect front panel headers (power button, reset button, USB, audio) to the corresponding pins on the motherboard. Refer to your case manual for specific pin assignments.
4. Operating Instructions
4.1 Initial Boot-Up
- After all components are installed and connected, connect your monitor, keyboard, and mouse.
- Connect the power cable to your power supply and turn on the power switch.
- Press the power button on your computer case.
- The system should power on and display the BIOS POST screen.
4.2 BIOS Access and Configuration
To enter the BIOS setup utility, press the DEL key repeatedly during the initial boot-up sequence. Within the BIOS, you can configure various system settings such as boot order, date/time, and hardware parameters. Save changes before exiting the BIOS.
4.3 Operating System Installation
Insert your operating system installation media (e.g., Windows DVD or USB drive) and configure the boot order in the BIOS to boot from the installation media. Follow the on-screen instructions to install your operating system.
4.4 Driver Installation
After installing the operating system, install the necessary drivers for the motherboard's chipset, integrated graphics (if applicable), audio, and LAN. These drivers are typically provided on a CD/DVD with the motherboard or can be downloaded from the manufacturer's website.
5. Maintenance
Regular maintenance helps ensure the longevity and stable operation of your motherboard and system.
5.1 Cleaning
- Periodically clean dust from inside your computer case, especially from fans and heatsinks, using compressed air.
- Ensure the system is powered off and unplugged before cleaning.
- Avoid using liquid cleaners directly on motherboard components.
5.2 Checking Connections
Occasionally check that all cables (power, data, front panel) are securely connected to the motherboard and other components.
5.3 BIOS Updates
BIOS updates can provide improved compatibility, stability, and new features. Refer to the motherboard manufacturer's website for available updates and detailed instructions on how to perform a BIOS update. Exercise caution during this process, as an interrupted update can render the motherboard inoperable.
6. Troubleshooting
If you encounter issues, refer to the following common troubleshooting steps:
- No Power: Ensure all power cables (24-pin ATX, 4-pin ATX 12V) are securely connected. Check power supply functionality.
- No Display: Verify monitor connection and power. Ensure the graphics card (if dedicated) is properly seated and powered. If using integrated graphics, ensure your CPU supports it.
- System Instability/Crashes: Check RAM modules for proper seating. Test memory with diagnostic tools. Ensure CPU cooler is properly installed and functioning.
- Component Not Detected: Re-seat the component (e.g., RAM, expansion card). Check cable connections for storage devices.
- BIOS Issues: If the system fails to boot after BIOS changes, try clearing the CMOS (Complementary Metal-Oxide-Semiconductor) by removing the CMOS battery for a few minutes or using the clear CMOS jumper (refer to motherboard diagram for location).
If problems persist, please refer to the support section for further assistance.
7. Specifications
| Feature | Specification |
|---|---|
| Model Number | GA-G31M-ES2C |
| Socket Type | LGA 775 |
| Chipset | Intel G31 |
| Memory Type | DDR2 |
| Memory Banks | 2 DDR2 DIMM |
| Maximum RAM Capacity | 4 GB |
| Memory Channel | Double |
| PCI-Express Slot | PCI-Express X16 |
| Hard Drive Interface | SATA |
| USB Ports | USB 2.0 |
| Graphics Card Type | Integrated (requires CPU support) |
| Application | Desktop |
| Form Factor | CEB / ATX |
| Item Weight | 3.31 pounds |
| Package Dimensions | 1.18 x 0.79 x 0.39 inches |
8. Warranty and Support
This product is designed for reliable operation. In the event of any issues, please contact our customer support team. We are committed to resolving any problems you may encounter within 24 hours.
For support, please refer to the contact information provided with your purchase or visit the official ZXKLXYY website.