1. Introduction
This manual provides essential information for the installation, operation, and maintenance of the CFguang T-CON Logic Board. This board is designed to ensure reliable performance for your television's display. It is compatible with various Samsung TV models, extending the life of your television by replacing a faulty T-CON board.
Compatible Part Models: BN41-02111A, BN96-30163A, BN96-30162A, BN95-01304A, BN95-01305A, BN95-01305C, BN95-01306A, BN95-02146A.
Applicable TV Models (including but not limited to):
- 32-inch models: UA32J5100AJXZK, UA32J5100AKXXD, UA32J5100AKXXT, UA32J5100ARLSG, UA32J5100ARLXL, UA32J5300ARLSG, UA32J5300ARLXL, UA32K5005AJXZK, UE32J5000AKXMS, UE32J5000AKXRU, UE32J5000AKXUA, UE32J5000AKXXU, UE32J5000AKXZT, UE32J5000AWXBT, UE32J5000AWXXC, UE32J5000AWXXH, UE32J5000AWXXN, UE32J5000AWXZF, UE32J5000AWXZG, UE32J5005AKXRU, UE32J5005AKXXE, UE32J5200AKXKZ, UE32J5200AKXRU, UE32J5200AKXUA, UE32J5200AKXXU, UE32J5200AKXZT, UE32J5200AWXXC, UE32J5200AWXXH, UE32J5200AWXXN, UE32J5205AKXRU, UE32J5205AKXXE, UE32J5250ASXZG, UE32J5270ASXZG, UE32J5373ASXTK, UN32J5003AFXZA, UN32J5003AFXZC, UN32J5205AFXZA, UN32J5205AFXZC, UN32J525DAFXZA, UN32J5500AFXZA, UN32J5500AFXZC, UN32J5500AGXZB, UN32J5500AGXZD, UN32J5500AGXZS.
- 40-inch models: UA40H5500AKXKE, UA40H5500AKXMR, UA40H5500AKXXA, UA40H5500AKXXM, UA40H5500AKXXS, UA40H5500AKXXT, UA40H5500AKXXV, UA40H5500ARLXL, UA40H5500ARXEG, UA40H5500ARXMM, UA40H5500ARXSJ, UA40H5500ARXSW, UA40H5500ARXTW, UA40H5500ARXUM, UA40H5500ARXXM, UA40H5500ARXXP, UA40H5500ARXZN, UA40H5500ASXRD, UA40H5500AWXJG, UA40H5500AWXSQ, UA40H5500AWXXD, UA40H5500AWXXY, UA40H5500AWXZW, UA40H5501TKXXT, UA40H5510AKXXV, UA40H5550AKXXD, UA40H5552AKXXV, UA40H5552ARXXM, UA40H5562AKXXV, UA40H5570AULXL, UA40J5100AKXBG, UA40J5100AKXKE, UA40J5100AKXLY, UA40J5100AKXMR, UA40J5100AKXWT, UA40J5100AKXXA, UA40J5100AKXXD, UA40J5100AKXXT, UA40J5100AKXXV, UA40J5100AKXZN, UA40J5100ARLSG, UA40J5100ARLXL, UA40J5100ARXBG, UA40J5100ARXEG, UA40J5100ARXMM, UA40J5100ARXMZ, UA40J5100ARXSJ, UA40J5100ARXSK, UA40J5100ARXTW, UA40J5100ARXUM, UA40J5100ARXXP, UA40J5100ARXZN, UA40J5100AWXNZ, UA40J5100AWXXY.
2. Safety Information
Please read and understand all safety precautions before attempting installation or repair. Improper handling of electronic components can lead to personal injury or damage to your television.
- Disconnect Power: Always unplug the television from the power outlet before opening the back panel or handling any internal components.
- Static Electricity: Electronic components are sensitive to electrostatic discharge (ESD). Use an anti-static wrist strap and work on an anti-static mat to prevent damage.
- Professional Installation Recommended: If you are not experienced with TV repair, it is highly recommended to seek assistance from a qualified technician.
- Handle with Care: Avoid touching the surface of the board or its delicate components directly. Hold the board by its edges.
- Ventilation: Ensure proper ventilation around the television after installation to prevent overheating.
3. Product Overview
The T-CON (Timing Controller) board is a critical component in LCD and LED televisions, responsible for processing video signals and sending them to the display panel. This CFguang T-CON board is a replacement part designed to restore display functionality.

Figure 3.1: Top view of the T-CON Logic Board, showing the main integrated circuits, ribbon cable connectors, and various surface-mount components.

Figure 3.2: Detailed view of the left side of the T-CON board, featuring power regulation components and additional circuitry. Note the mounting holes for secure installation.

Figure 3.3: Detailed view of the right side of the T-CON board, including additional ribbon cable connectors and various passive and active components.
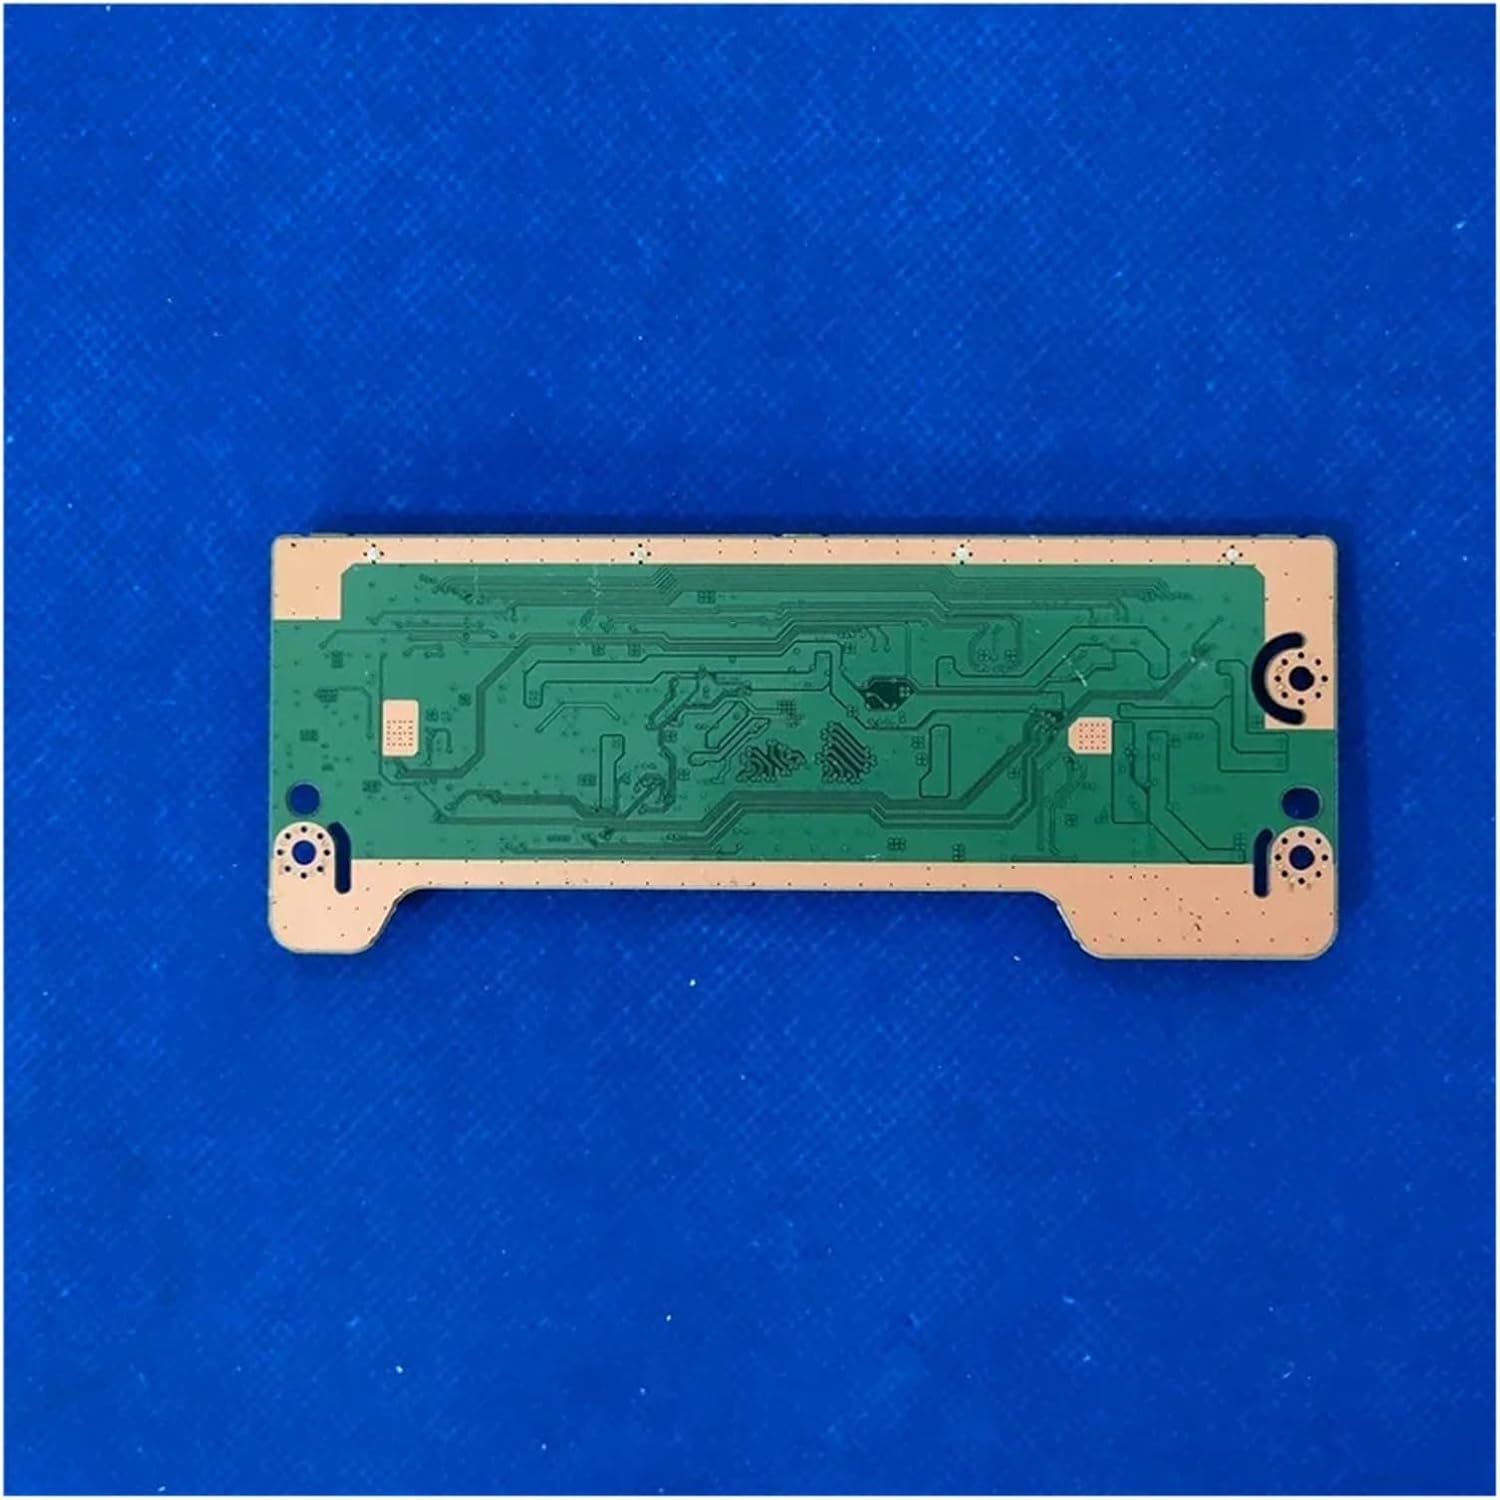
Figure 3.4: Bottom view of the T-CON board, illustrating the circuit traces and the overall layout of the printed circuit board.
4. Setup and Installation
This section outlines the general steps for replacing a T-CON board. Due to the complexity and delicate nature of TV components, professional installation is strongly recommended.
4.1 Tools Required
- Phillips head screwdriver
- Flathead screwdriver (for prying, if necessary)
- Anti-static wrist strap and mat
- Plastic prying tools (optional, to avoid scratching)
4.2 Installation Steps
- Prepare the TV: Ensure the television is completely unplugged from the power outlet and all other connected devices. Place the TV face down on a soft, clean surface to protect the screen.
- Remove Back Panel: Carefully remove the screws securing the TV's back panel. Use plastic prying tools to gently separate the panel if it has clips.
- Locate the T-CON Board: The T-CON board is typically located at the top center of the TV, often under a metal shield. It connects the main board to the display panel via ribbon cables.
- Disconnect Cables: With an anti-static wrist strap on, carefully disconnect all ribbon cables and power cables connected to the old T-CON board. Be gentle with the ribbon cable latches.
- Remove Old Board: Unscrew the old T-CON board from its mounting points and carefully remove it.
- Install New Board: Position the new CFguang T-CON board in place and secure it with the screws.
- Reconnect Cables: Carefully reconnect all ribbon cables and power cables to the new T-CON board. Ensure all connections are firm and correctly seated. Double-check the orientation of the ribbon cables.
- Test (Before Closing): Before reattaching the back panel, temporarily plug in the TV and power it on to check if the display is working correctly. If the display is normal, unplug the TV again.
- Reassemble TV: Reattach the back panel and secure all screws.
5. Functionality Check
After successful installation, perform the following checks:
- Power On: Plug in the TV and power it on.
- Display Verification: Observe the screen for a clear picture, correct colors, and absence of flickering, lines, or distorted images.
- Input Test: Connect a video source (e.g., a set-top box, DVD player) to ensure proper signal processing and display.
If any issues persist, refer to the Troubleshooting section.
6. Maintenance
The T-CON board itself requires no routine maintenance. To ensure its longevity and the overall health of your television:
- Keep Clean: Regularly clean the exterior of your TV to prevent dust buildup, which can impede ventilation.
- Ensure Ventilation: Do not block the ventilation openings on your TV. Adequate airflow prevents overheating of internal components, including the T-CON board.
- Avoid Liquids: Keep liquids away from the television to prevent accidental spills that could damage internal electronics.
7. Troubleshooting
If you encounter issues after installing the T-CON board, consider the following common problems and solutions:
| Problem | Possible Cause | Solution |
|---|---|---|
| No picture, but sound is present | Faulty T-CON board (if not replaced correctly), loose ribbon cables, faulty display panel. | Verify all ribbon cables are securely connected. Ensure the new T-CON board is correctly installed. If problem persists, the display panel or main board might be faulty. |
| Distorted picture, lines, or incorrect colors | Loose or damaged ribbon cables, incorrect T-CON board for the panel, faulty T-CON board. | Check all ribbon cable connections for proper seating and damage. Confirm the T-CON board is the correct model for your TV. |
| Flickering screen or intermittent display | Loose connections, power supply issue to T-CON, faulty T-CON board. | Ensure all power and data cables are firmly connected. Check for any visible damage on the board. |
| TV does not power on | Not related to T-CON board. Likely power supply board or main board issue. | Check power cable, power outlet, and other TV components. The T-CON board typically affects display, not power-on. |
If troubleshooting steps do not resolve the issue, it is recommended to consult a professional TV repair technician.
8. Specifications
- Part Model: BN41-02111A (also compatible with BN95-01304A, BN95-01305A, etc.)
- Brand: CFguang
- Package Dimensions: 1.18 x 0.79 x 0.39 inches
- Item Weight: 1.76 ounces
- ASIN: B0DZVL88MM
- Date First Available: March 9, 2025
9. Warranty and Support
For information regarding warranty coverage, returns, or technical support, please contact the seller or manufacturer directly through your purchase platform. Keep your purchase receipt or order number handy for faster service.