Introduction
Thank you for choosing the HOMCOM Portable Air Conditioner. This 3-in-1 unit provides efficient cooling, dehumidification, and fan functions to enhance your indoor comfort. Designed for ease of use and portability, this manual will guide you through the setup, operation, and maintenance to ensure optimal performance and longevity of your appliance.

Figure 1: HOMCOM Portable Air Conditioner and included accessories.
Safety Information
Please read all safety warnings and instructions carefully before using this appliance to prevent injury or damage. Keep this manual for future reference.
- Ensure the power supply matches the voltage specified on the unit's rating label.
- Do not operate the unit with a damaged cord or plug.
- Always unplug the unit before cleaning or performing any maintenance.
- Do not block air inlets or outlets. Maintain adequate clearance around the unit for proper airflow.
- Keep the unit upright during transport and operation. If laid down, allow it to stand upright for at least 24 hours before use.
- This appliance is not intended for use by persons (including children) with reduced physical, sensory or mental capabilities, or lack of experience and knowledge, unless they have been given supervision or instruction concerning use of the appliance by a person responsible for their safety.
Product Overview
Components
The HOMCOM Portable Air Conditioner comes with the following main components:
- Portable AC Unit
- Exhaust Hose
- Window Slider Kit (adjustable for various window sizes)
- Remote Control (requires 2 AAA batteries, not included)
- Drainage Hose
Key Features
- Powerful 14,000 BTU Cooling: Efficiently cools spaces up to 700 sq. ft. with auto-swing air blades for even distribution.
- Three-in-One Versatility: Offers Cooling (59-88 °F), Dehumidifying (75 pint/day), and Fan functions with three adjustable speeds.
- Smart Performance: Features a 24-hour timer for automatic on/off scheduling, Sleep mode for quiet operation (51 dB), and Auto mode for energy savings.
- User-Friendly Controls: Equipped with a dual LED display, touch control panel, and a remote control. Includes a child lock function.
- Easy to Move: Designed with wheels, a handle, and a cable organizer for convenient relocation and storage.
- Easy Maintenance: Removable and washable filter for efficient cleaning.
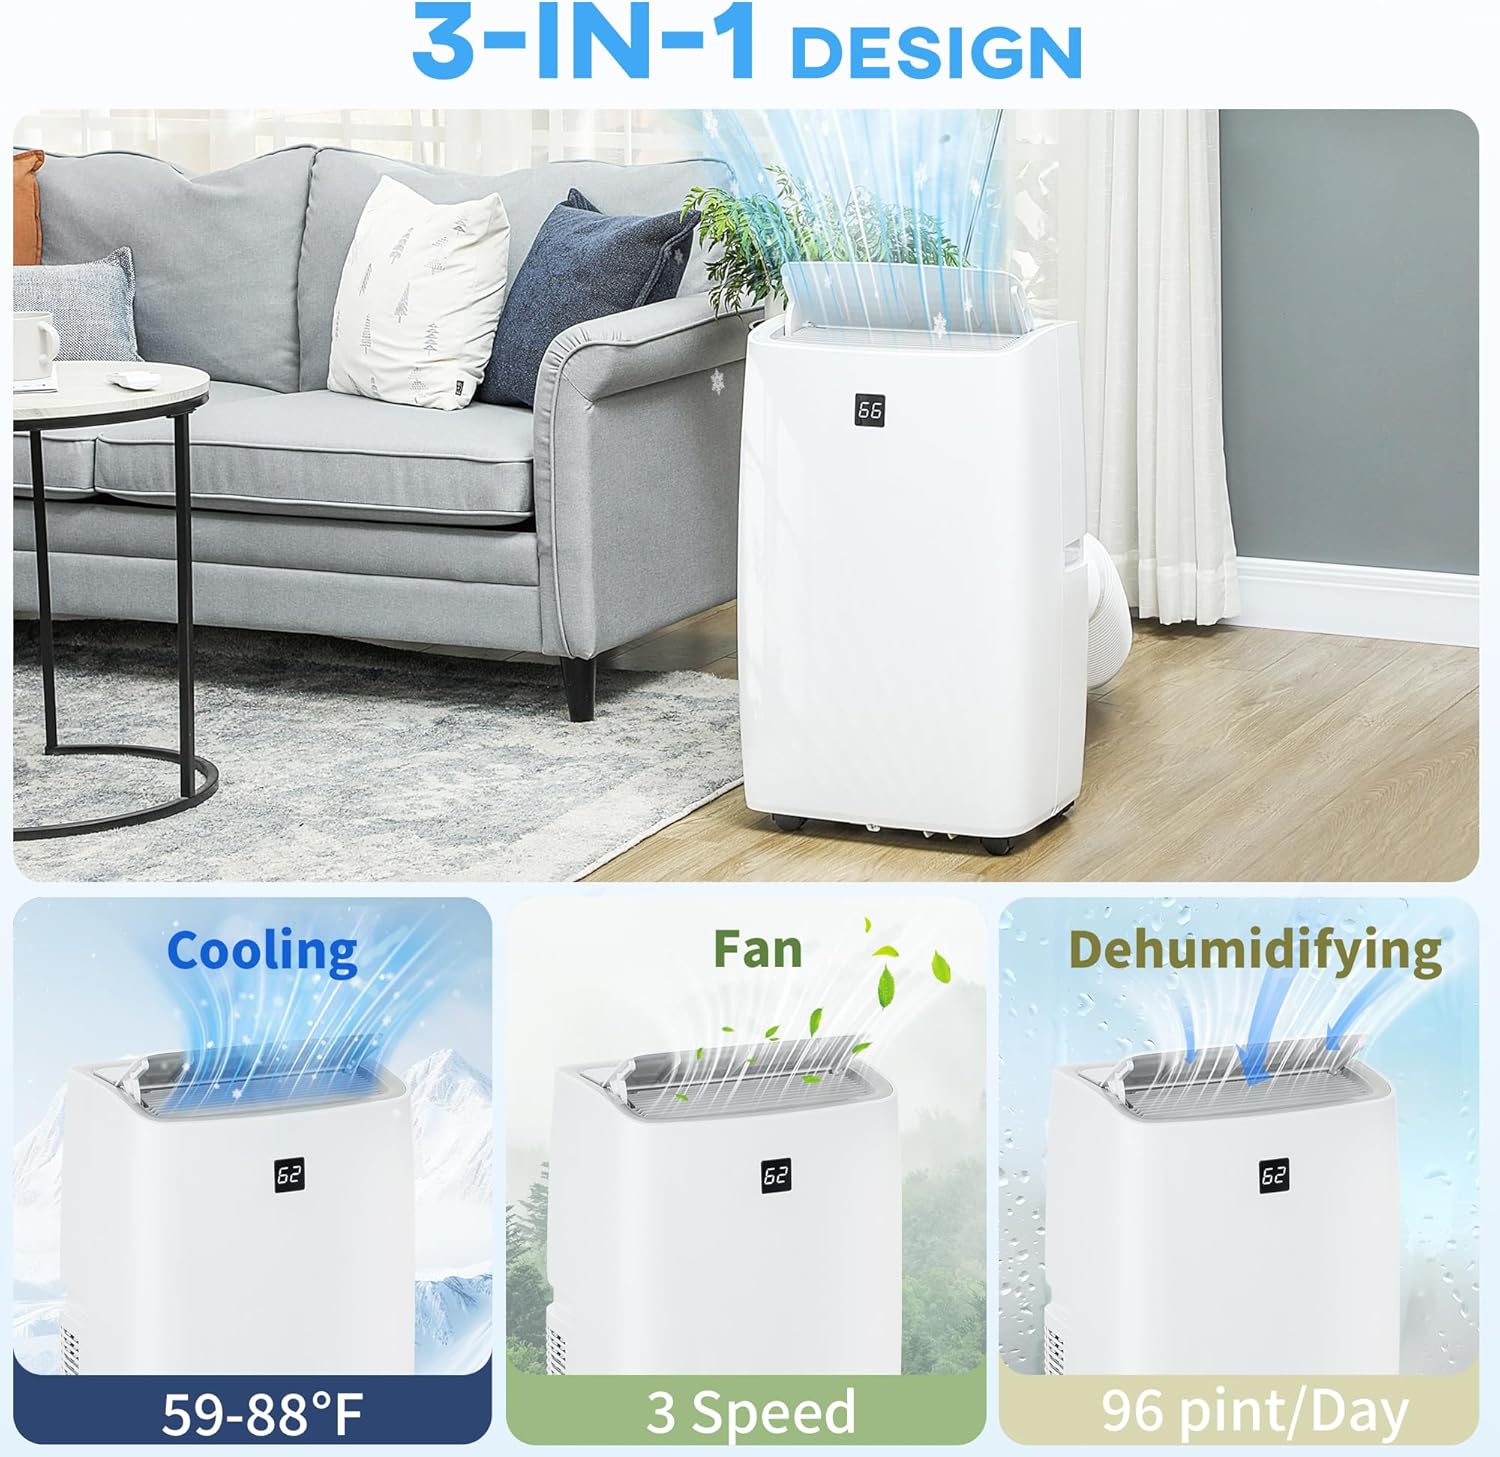
Figure 2: The unit's 3-in-1 functionality: Cooling, Fan, and Dehumidifying.

Figure 3: Recommended room area coverage for the 14000 BTU model (485-700 sq. ft.).
Specifications
| Attribute | Value |
|---|---|
| Brand Name | HOMCOM |
| Model Number | 823-069V81WT |
| Cooling Power | 14000 British Thermal Units (BTU) |
| Coverage Area | Up to 700 Sq. ft. |
| Dehumidification Capacity | 75 pint/day |
| Noise Level | 51 dB (Sleep Mode) |
| Product Dimensions | 13.2"D x 16.1"W x 31.5"H |
| Item Weight | 64 pounds |
| Voltage | 115 Volts |
| Wattage | 1495 watts |
| Material Type | ABS Plastic |
| Included Components | Remote, Window Kit |
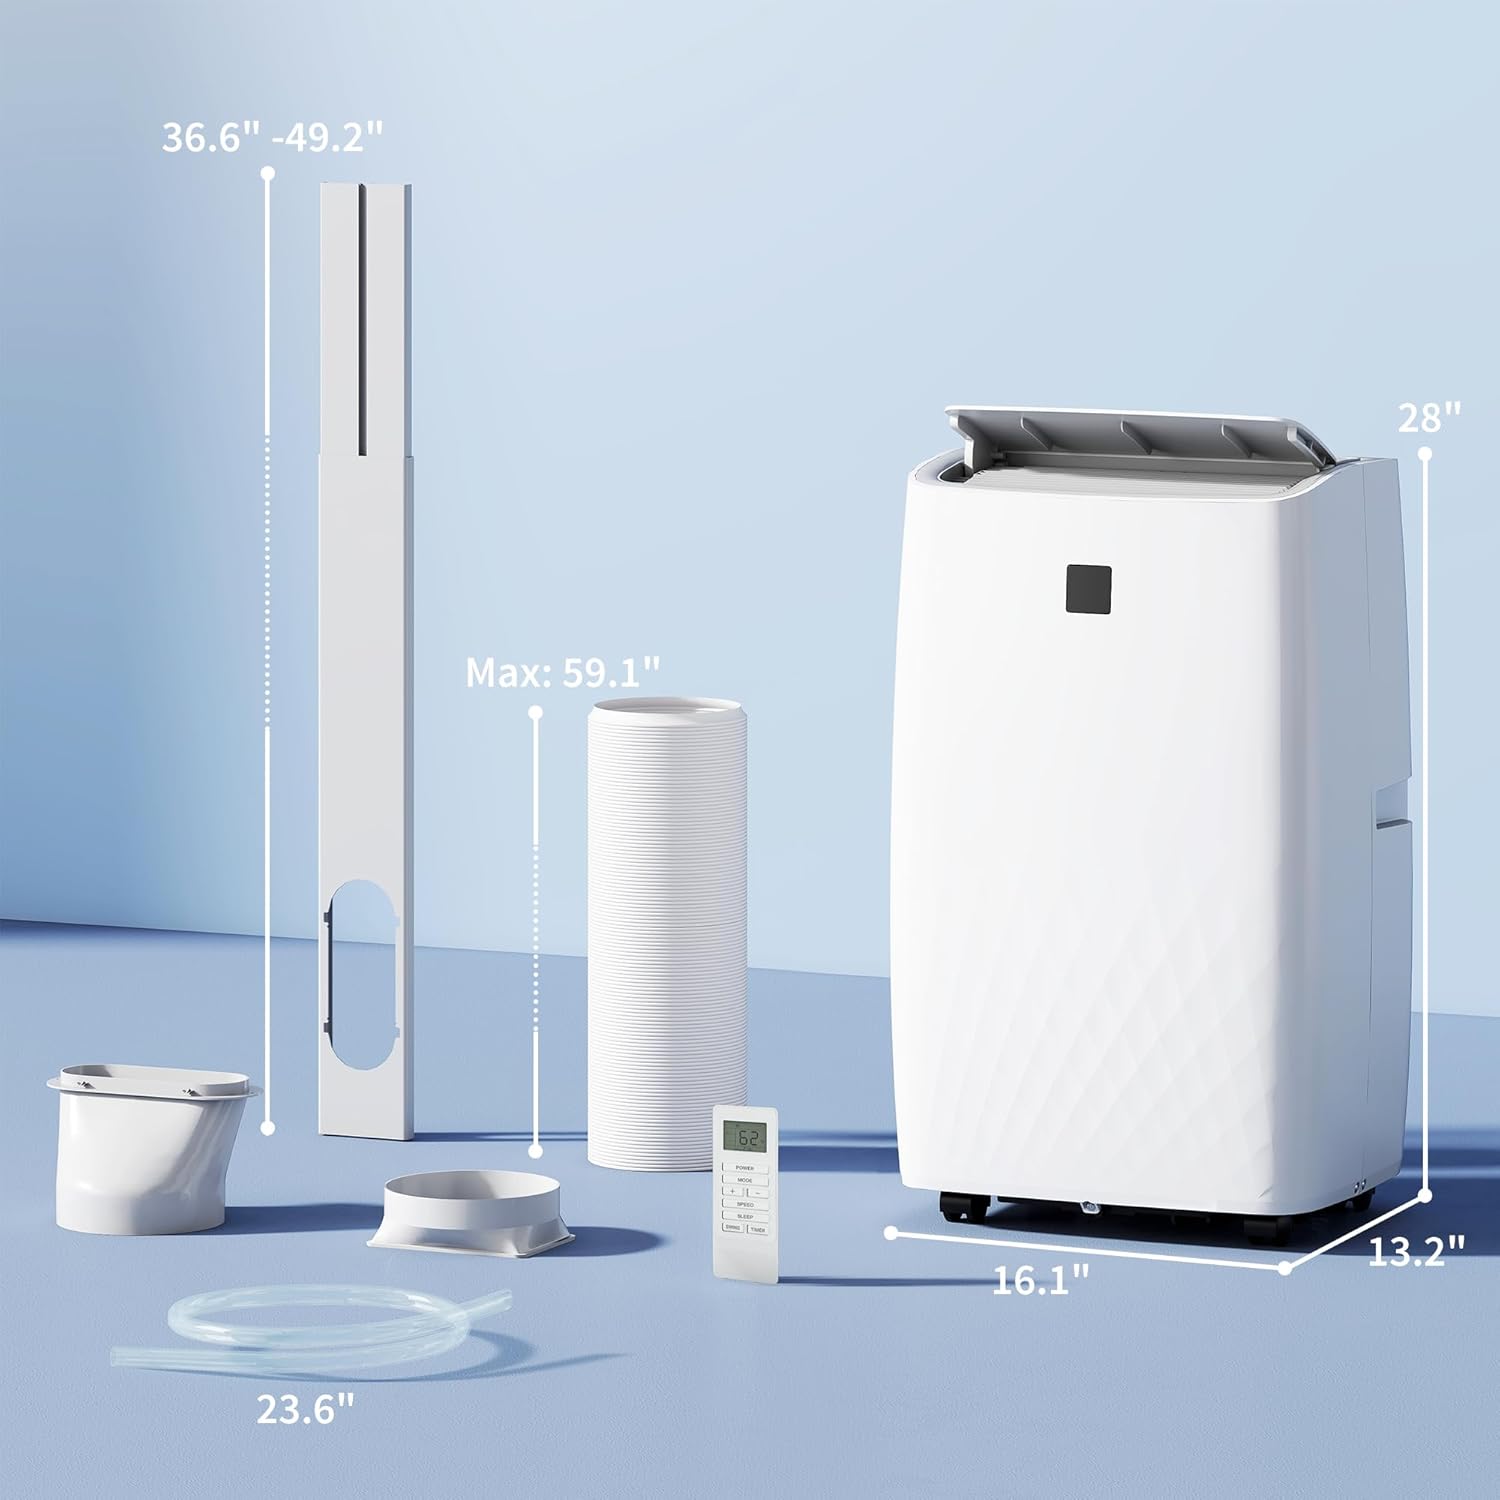
Figure 4: Detailed dimensions of the unit and its components.
Setup and Installation
Follow these steps to properly set up your portable air conditioner.
- Unpacking: Carefully remove the unit and all accessories from the packaging. Ensure all components listed in the "Components" section are present.
- Positioning: Place the unit on a flat, stable surface near a window. Ensure there is at least 20 inches of clearance around the unit for proper airflow.
- Window Kit Installation:
- Assemble the window slider kit to fit your window opening. The kit is designed for sliding windows.
- Attach the exhaust hose to the unit's exhaust port.
- Insert the other end of the exhaust hose into the opening of the window slider kit. Ensure a secure fit to prevent air leakage.
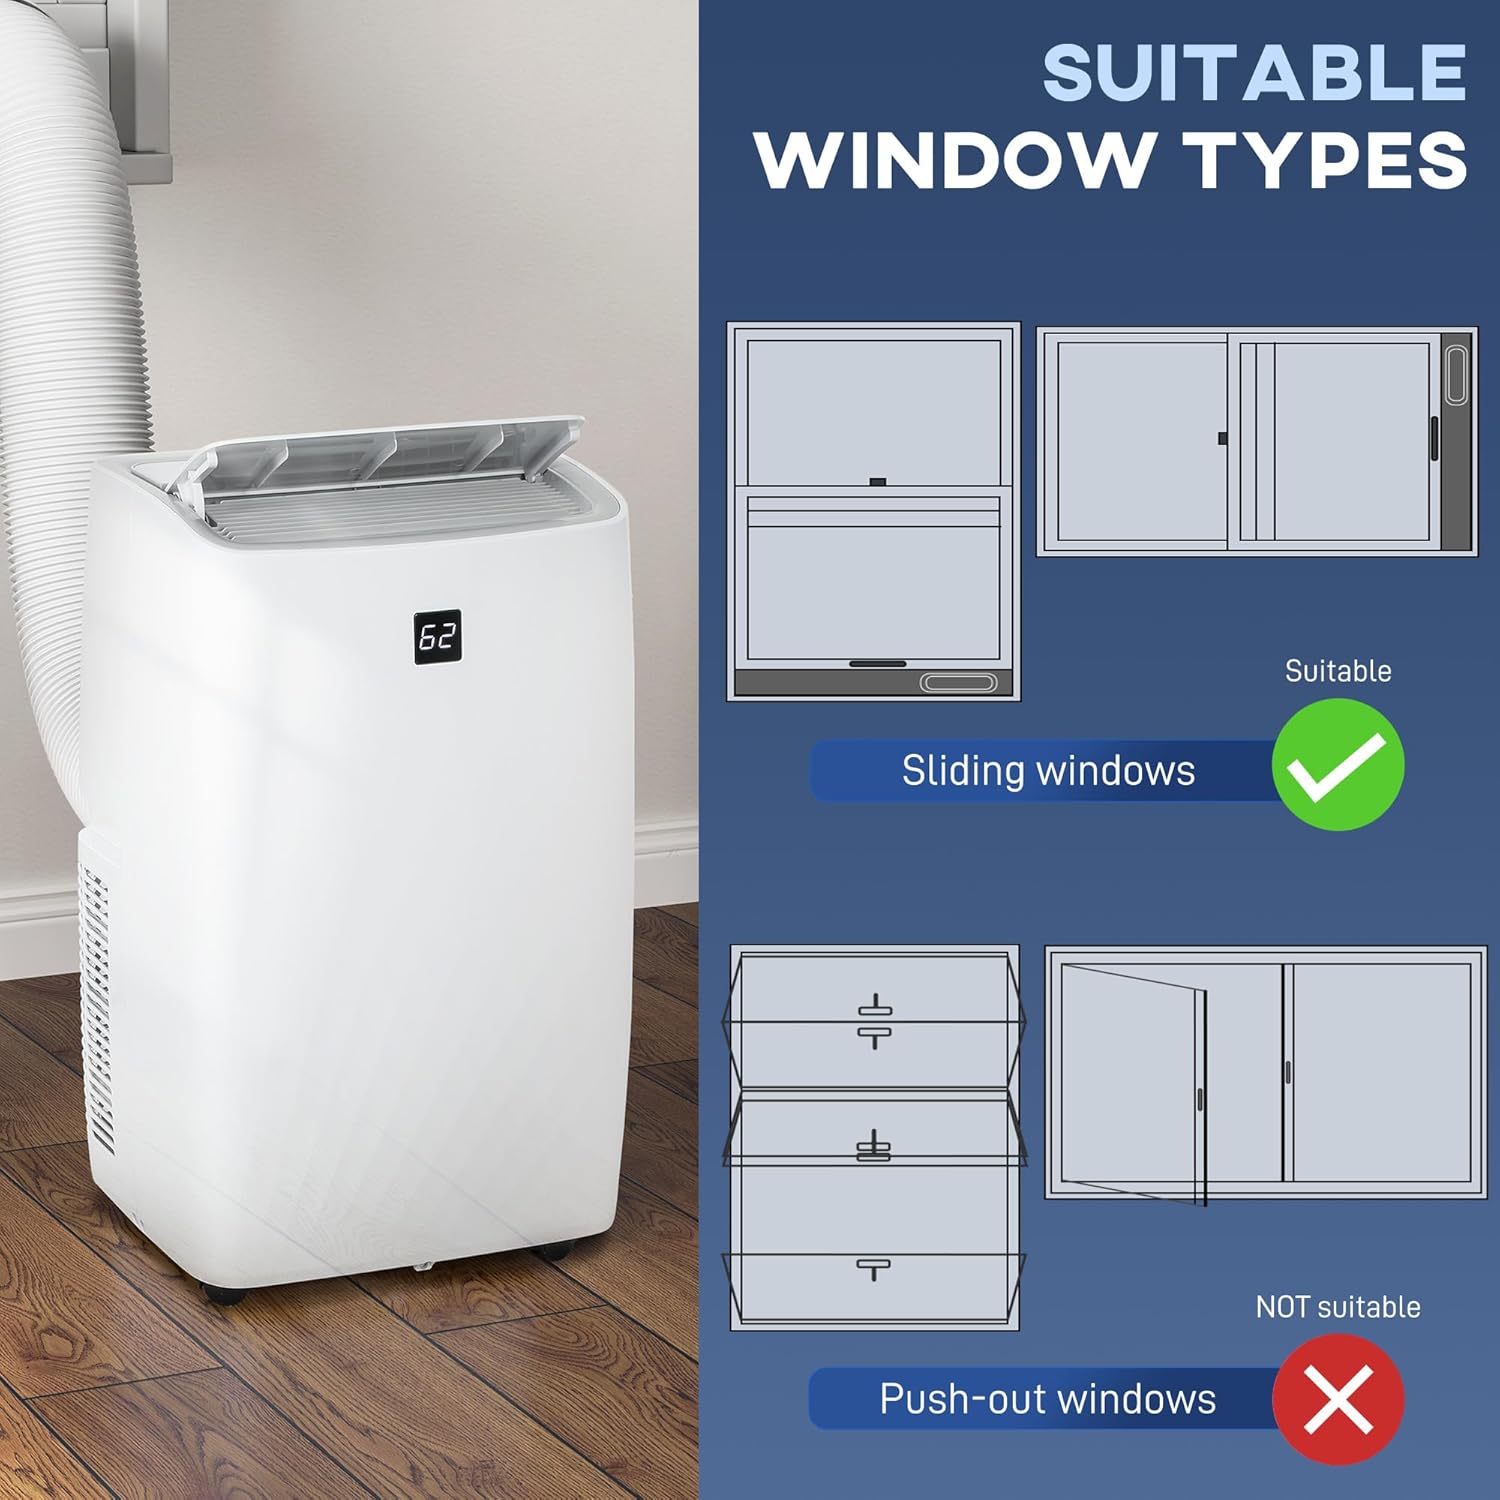
Figure 5: The window kit is suitable for sliding windows. Not suitable for push-out windows.
- Drainage Hose Connection (Dehumidifier Mode): For continuous dehumidification, connect the drainage hose to the unit's drainage port and route it to a suitable drain or container.
- Power Connection: Plug the power cord into a grounded electrical outlet.
Operating Instructions
Your HOMCOM Portable Air Conditioner can be operated via the touch control panel on the unit or the included remote control.
Control Panel and Remote

Figure 6: The unit features a clear digital display and intuitive touch controls, complemented by a remote control for convenience.
- Power Button: Turns the unit On or Off.
- Mode Button: Cycles through Cooling, Dehumidifier, Fan, and Auto modes.
- Fan Speed Button: Adjusts fan speed (Low, Medium, High) in Fan and Cooling modes.
- Temperature Adjustment Buttons (∧/∨): Increases or decreases the desired temperature.
- Timer Button: Sets the 24-hour timer for automatic operation.
- Sleep Mode Button: Activates sleep mode for quieter operation and energy efficiency during the night.
- Child Lock: Prevents accidental changes to settings.
Operating Modes
- Cooling Mode: Provides powerful cooling to lower room temperature. Set your desired temperature between 59-88 °F.
- Dehumidifier Mode: Removes excess moisture from the air, ideal for humid conditions. The unit can remove up to 75 pints per day.
- Fan Mode: Circulates air without cooling, offering a refreshing breeze. Choose from three fan speeds.
- Auto Mode: The unit automatically selects the appropriate operating mode (Cooling, Fan) based on the ambient room temperature to maintain comfort and energy efficiency.
- Sleep Mode: Optimizes cooling and fan speed for quiet operation during sleep, gradually increasing the temperature slightly over time for comfort and energy saving.

Figure 7: Sleep mode ensures quiet operation, comparable to a quiet library environment.
Maintenance
Regular maintenance ensures the efficiency and longevity of your air conditioner.
- Filter Cleaning: The air filter should be cleaned every two weeks or more frequently depending on usage.
- Unplug the unit.
- Remove the filter from the back of the unit.
- Wash the filter with warm, soapy water. Rinse thoroughly.
- Allow the filter to air dry completely before reinserting.
- Drainage: In high humidity conditions or prolonged use in cooling/dehumidifier modes, the internal water tank may fill. The unit will stop operating and display an error code when full.
- Unplug the unit.
- Place a shallow pan or tray under the drainage port at the bottom rear of the unit.
- Remove the drain plug to allow water to flow out.
- Replace the drain plug once all water has drained.
- Storage: Before storing the unit for an extended period, ensure the water tank is completely drained. Clean the air filter and allow the unit to run in fan-only mode for a few hours to dry the internal components. Store in a dry, upright position.
Troubleshooting
If you encounter issues with your air conditioner, refer to the following common problems and solutions:
| Problem | Possible Cause | Solution |
|---|---|---|
| Unit does not turn on. | No power, power cord unplugged, circuit breaker tripped. | Check power connection, reset circuit breaker. |
| Unit not cooling effectively. | Dirty air filter, blocked air vents, room too large, window kit not sealed properly, doors/windows open. | Clean filter, clear vents, ensure proper room size, seal window kit, close doors/windows. |
| Unit is noisy. | Unit not on a level surface, fan speed too high. | Place on a level surface, reduce fan speed. |
| Water leakage. | Drain plug loose, drainage hose not connected properly or blocked. | Check drain plug, ensure hose is securely connected and clear. |
| Remote control not working. | Batteries dead or incorrectly inserted, remote not pointed at receiver. | Replace batteries, ensure correct polarity, point remote directly at the unit's receiver. |
Warranty and Support
HOMCOM products are designed for quality and reliability. For warranty information, please refer to the warranty card included with your purchase or visit the official HOMCOM website. If you require technical assistance or customer support, please contact our service team:
Customer Service: support@dura-comfort-life.com
Website: www.dura-comfort-life.com
(Contact information sourced from the product's quick guide image.)