Introduction
Thank you for choosing the GOEHNER's Upgrade 2.0 Hitch Bike Rack. This heavy-duty, dual-locking bike carrier is engineered for secure and stable transport of your bicycles. Designed for vehicles with a 2-inch receiver, it accommodates up to 4 bikes with a maximum load capacity of 240 LBS. This manual provides essential information for proper assembly, safe operation, and maintenance to ensure years of reliable use.
Safety Information
Always prioritize safety when installing and using the bike rack. Failure to follow these instructions can result in property damage, injury, or death.
- Ensure the hitch receiver is clean and free of debris before installation.
- Verify all bolts, pins, and straps are securely fastened before each trip.
- Do not exceed the maximum load capacity of 240 LBS or the vehicle's hitch capacity.
- Distribute bike weight evenly on the rack. Place heavier or larger bikes closer to the vehicle.
- Check for proper clearance between the bikes, rack, and vehicle, especially during turns and over bumps.
- Be aware of the increased length and width of your vehicle when the rack is installed.
- Do not use the rack if any components are damaged or missing.
- Always remove bikes before using the tilt function to access the rear of the vehicle.
Package Contents
Please verify that all components are present before beginning assembly:
- Bike Hitch Rack (Main Assembly)
- Anti-Rattle Hitch Tightener
- Stabilizer Straps (as shown in image)
- All necessary hardware (bolts, pins, washers)

Image: Overview of the GOEHNER's Upgrade 2.0 Hitch Bike Rack and its included components, including the main rack assembly and the anti-rattle hitch tightener.
Assembly Instructions
Follow these steps to assemble your GOEHNER's bike rack:
- Insert Hitch Arm: Slide the main mast of the bike rack into your vehicle's 2-inch hitch receiver. Ensure it is fully inserted until the hitch pin holes align.
- Secure with Hitch Pin: Insert the provided hitch pin through the aligned holes in the receiver and the rack's mast. Secure it with the cotter pin or clip.
- Install Anti-Rattle Hitch Tightener: Position the anti-rattle hitch tightener around the hitch arm and receiver. Tighten the bolts firmly to eliminate any wobble between the rack and the hitch. This mechanism is crucial for minimizing movement during transit.

Image: Detailed view of the anti-rattle hitch tightener, demonstrating how it secures the rack to the vehicle's hitch to prevent wobbling.
- Attach Bike Support Arms: If not pre-assembled, attach the horizontal bike support arms to the vertical mast. Ensure they are securely fastened with the provided hardware. These arms feature enhanced rubber straps for superior bike retention.
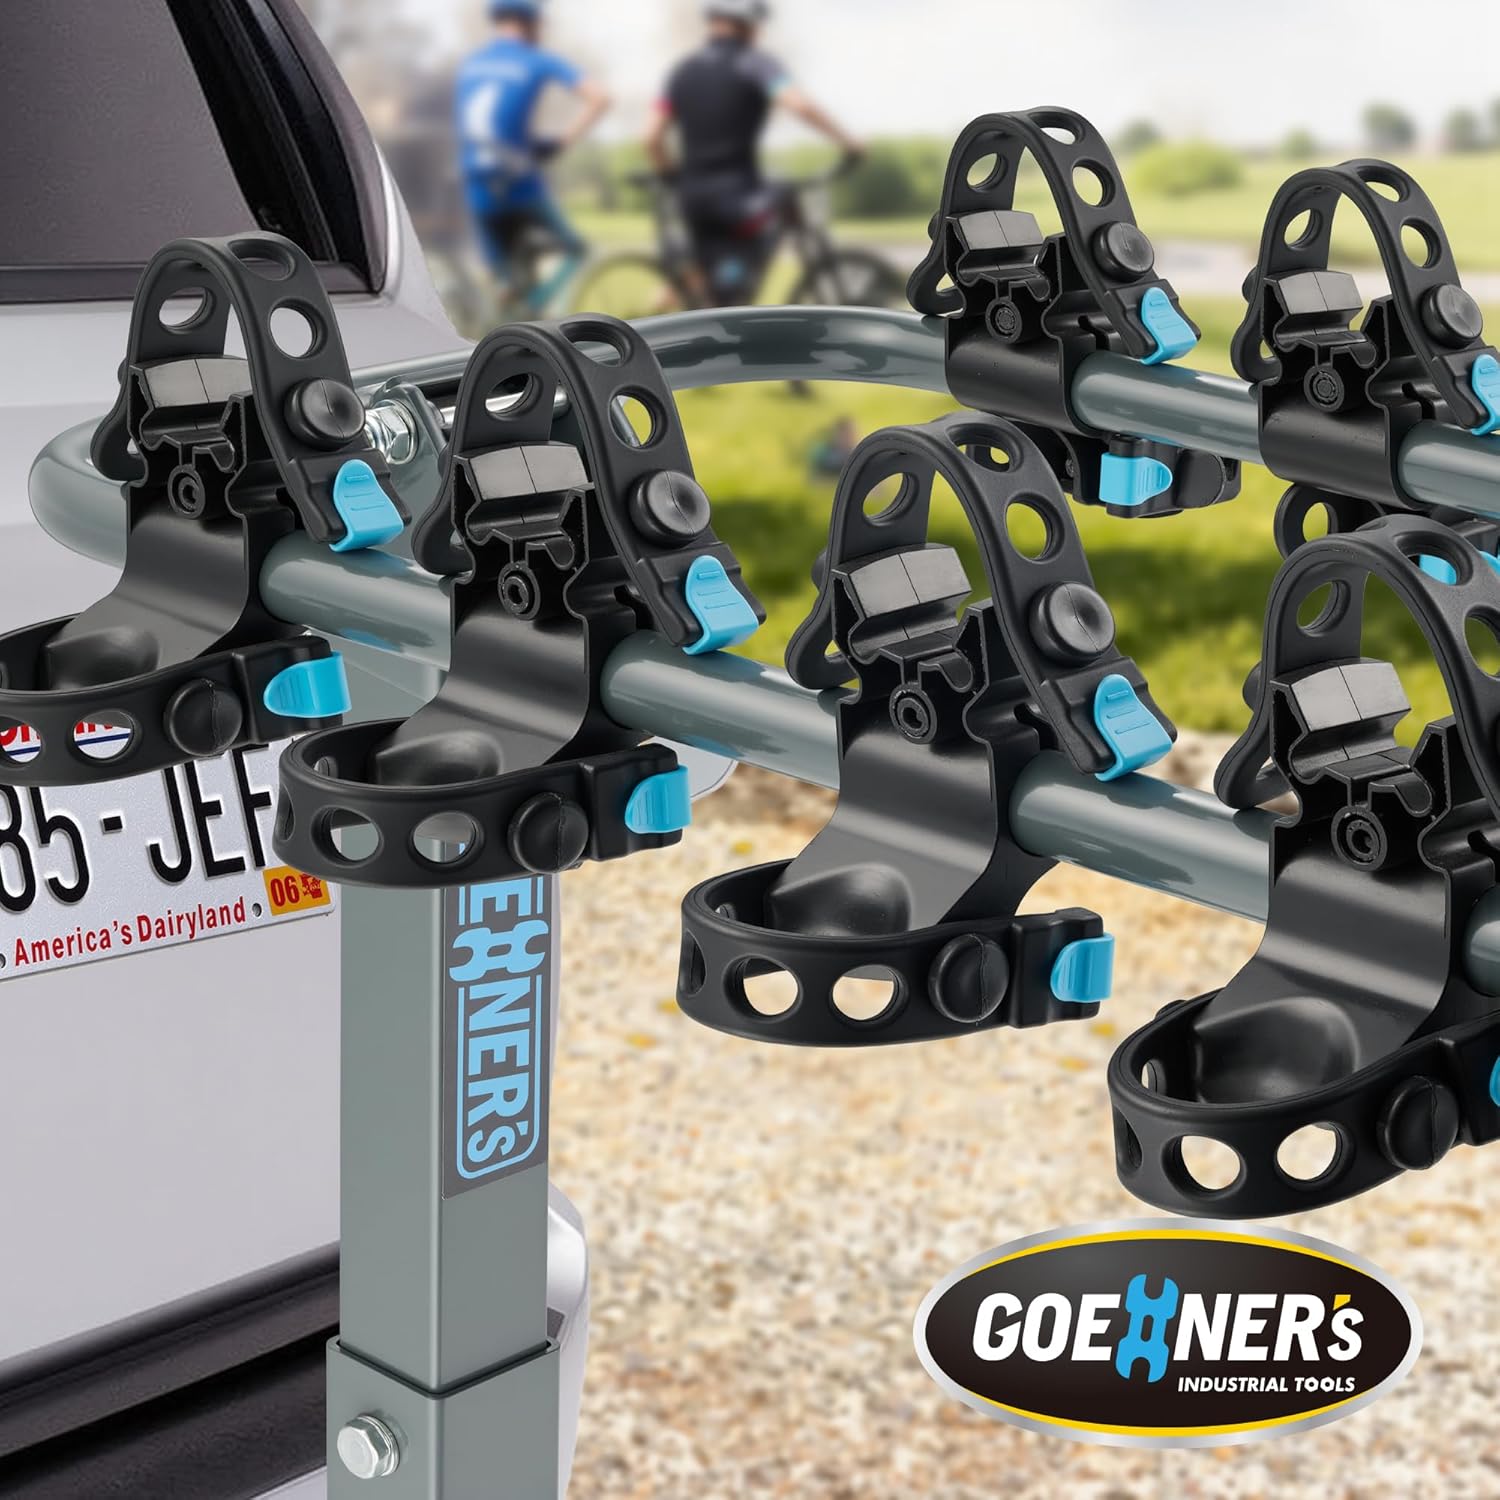
Image: A close-up showing the durable, SGS-certified rubber straps on the bike support arms, designed for secure and wear-resistant bike attachment.
- Verify Stability: Once assembled, gently shake the rack to ensure it is stable and there is minimal movement. Re-tighten any loose connections if necessary.
Operating Instructions
Proper use of your bike rack ensures safe transport of your bicycles.
Loading Bikes
- Prepare Bikes: Remove any loose items from your bikes (e.g., water bottles, pumps, bags).
- Load Order: For optimal stability, load heavier or larger bikes first, positioning them closer to the vehicle.
- Position Bikes: Place the bike frame onto the support arms, ensuring the frame rests securely in the cradles. The rack provides ample 6-inch spacing between bikes to prevent contact and damage.
- Secure Bikes: Use the enhanced rubber straps to firmly secure the bike frame to the support arms. Ensure the straps are taut and the bike is stable. Utilize the included tie-down and stabilizer straps for additional security, especially for the front wheel and handlebars, to prevent swaying.
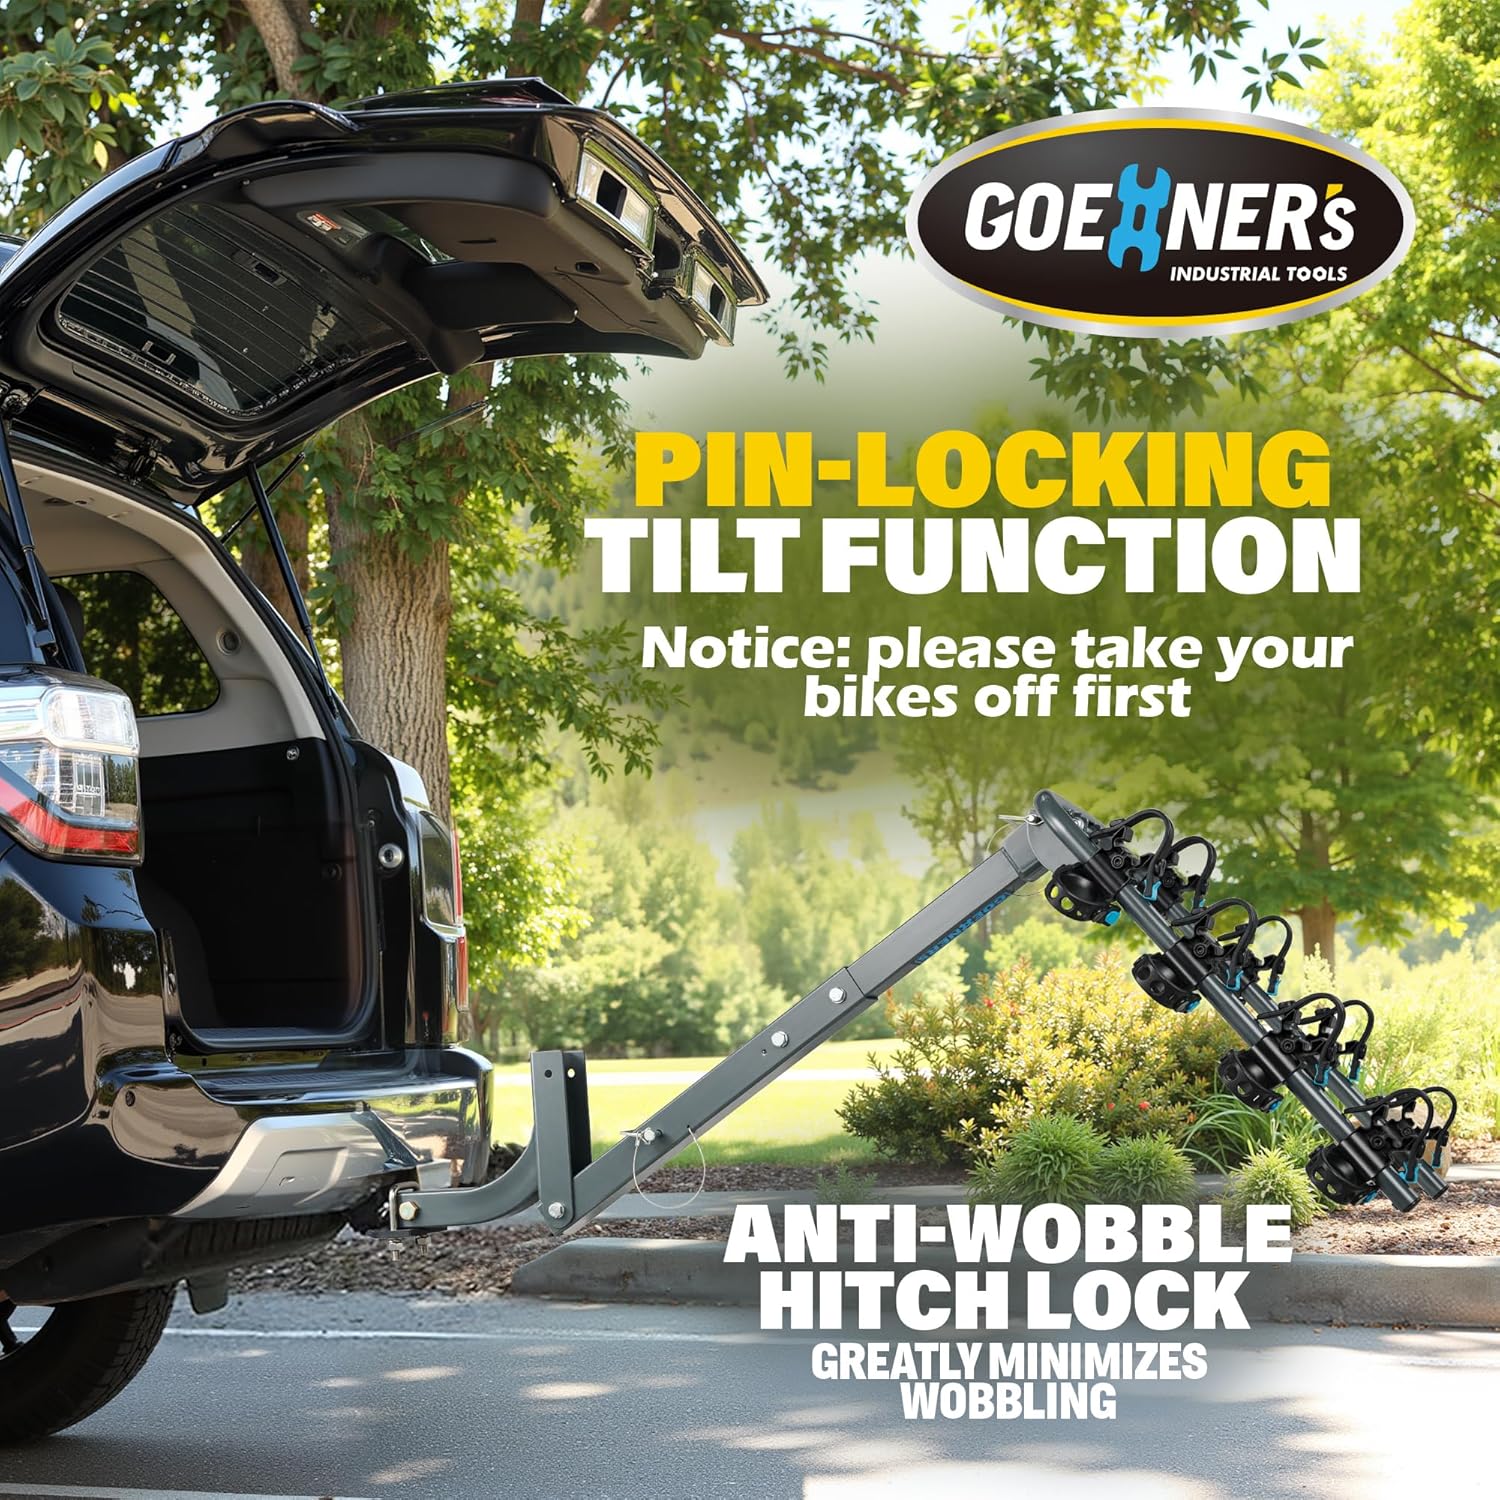
Image: A person demonstrating the process of loading a bicycle onto the GOEHNER's hitch bike rack, highlighting the ease of use and secure attachment points.
Using the Tilt Function
The rack features a convenient pin-locking tilt function for rear vehicle access.
- Important: Always remove all bikes from the rack before engaging the tilt function.
- Engage Tilt: Locate the tilt pin or lever near the base of the vertical mast. Disengage the pin to allow the rack to tilt downwards, providing access to your vehicle's trunk or tailgate.
- Return to Upright: Once access is complete, lift the rack back into its upright position until the tilt pin automatically locks into place. Verify it is securely locked before driving.

Image: The GOEHNER's bike rack shown in its tilted position, allowing convenient access to the vehicle's rear cargo area without removing the entire rack.
Folding Carry Arms
The rack's carry arms can be folded down for easy storage when not in use or when driving without bikes.
- Locate the folding mechanism on each arm.
- Release the locking pin or lever and fold the arms downwards.
- Secure the arms in the folded position if a locking mechanism is present.
Maintenance
Regular maintenance will prolong the life of your bike rack.
- Cleaning: Clean the rack regularly with mild soap and water, especially after exposure to dirt, salt, or harsh weather conditions. Rinse thoroughly and dry to prevent corrosion. The rack features an anti-rust powder coating for enhanced durability.
- Inspection: Periodically inspect all bolts, pins, straps, and welds for signs of wear, damage, or corrosion. Ensure all moving parts operate smoothly.
- Lubrication: Apply a light lubricant to moving parts, such as the tilt mechanism and folding arm pivots, as needed to ensure smooth operation.
- Storage: When not in use, store the bike rack in a dry, protected area to prevent exposure to extreme weather conditions.
Troubleshooting
Here are solutions to common issues you might encounter:
- Rack Wobbles in Hitch: Ensure the anti-rattle hitch tightener is installed correctly and tightened firmly. Check that the hitch pin is fully inserted and secured.
- Bikes Sway Excessively: Verify that all rubber straps are securely fastened and taut. Use the additional tie-down and stabilizer straps to minimize bike movement, especially for the front wheel and handlebars.
- Difficulty Loading Bikes: Ensure the bike cradles are properly aligned. For bikes with non-standard frames, consider using a bike frame adapter (sold separately) to create a horizontal top tube.
- Tilt Function Sticking: Clean the pivot points of the tilt mechanism and apply a light lubricant. Ensure no debris is obstructing the movement.
Specifications
| Feature | Detail |
|---|---|
| Brand | GOEHNER's |
| Model | Upgrade 2.0 Dual Locking Quick Release (BHR-401B) |
| Color | Grey & Black |
| Mounting Type | Hitch (2-inch receiver) |
| Load Capacity | 240 Pounds |
| Bike Capacity | Up to 4 bikes |
| Item Weight | 24.5 pounds |
| Product Dimensions (L x W x H) | 5 x 10.04 x 36.4 inches |
| Material | High strength thick steel (SPCC Forged Steel) with anti-rust powder coating |
| Strap Material | SGS-Certified Rubber (95% Rubber, 5% Toughening Agents, 5% Antioxidants) |
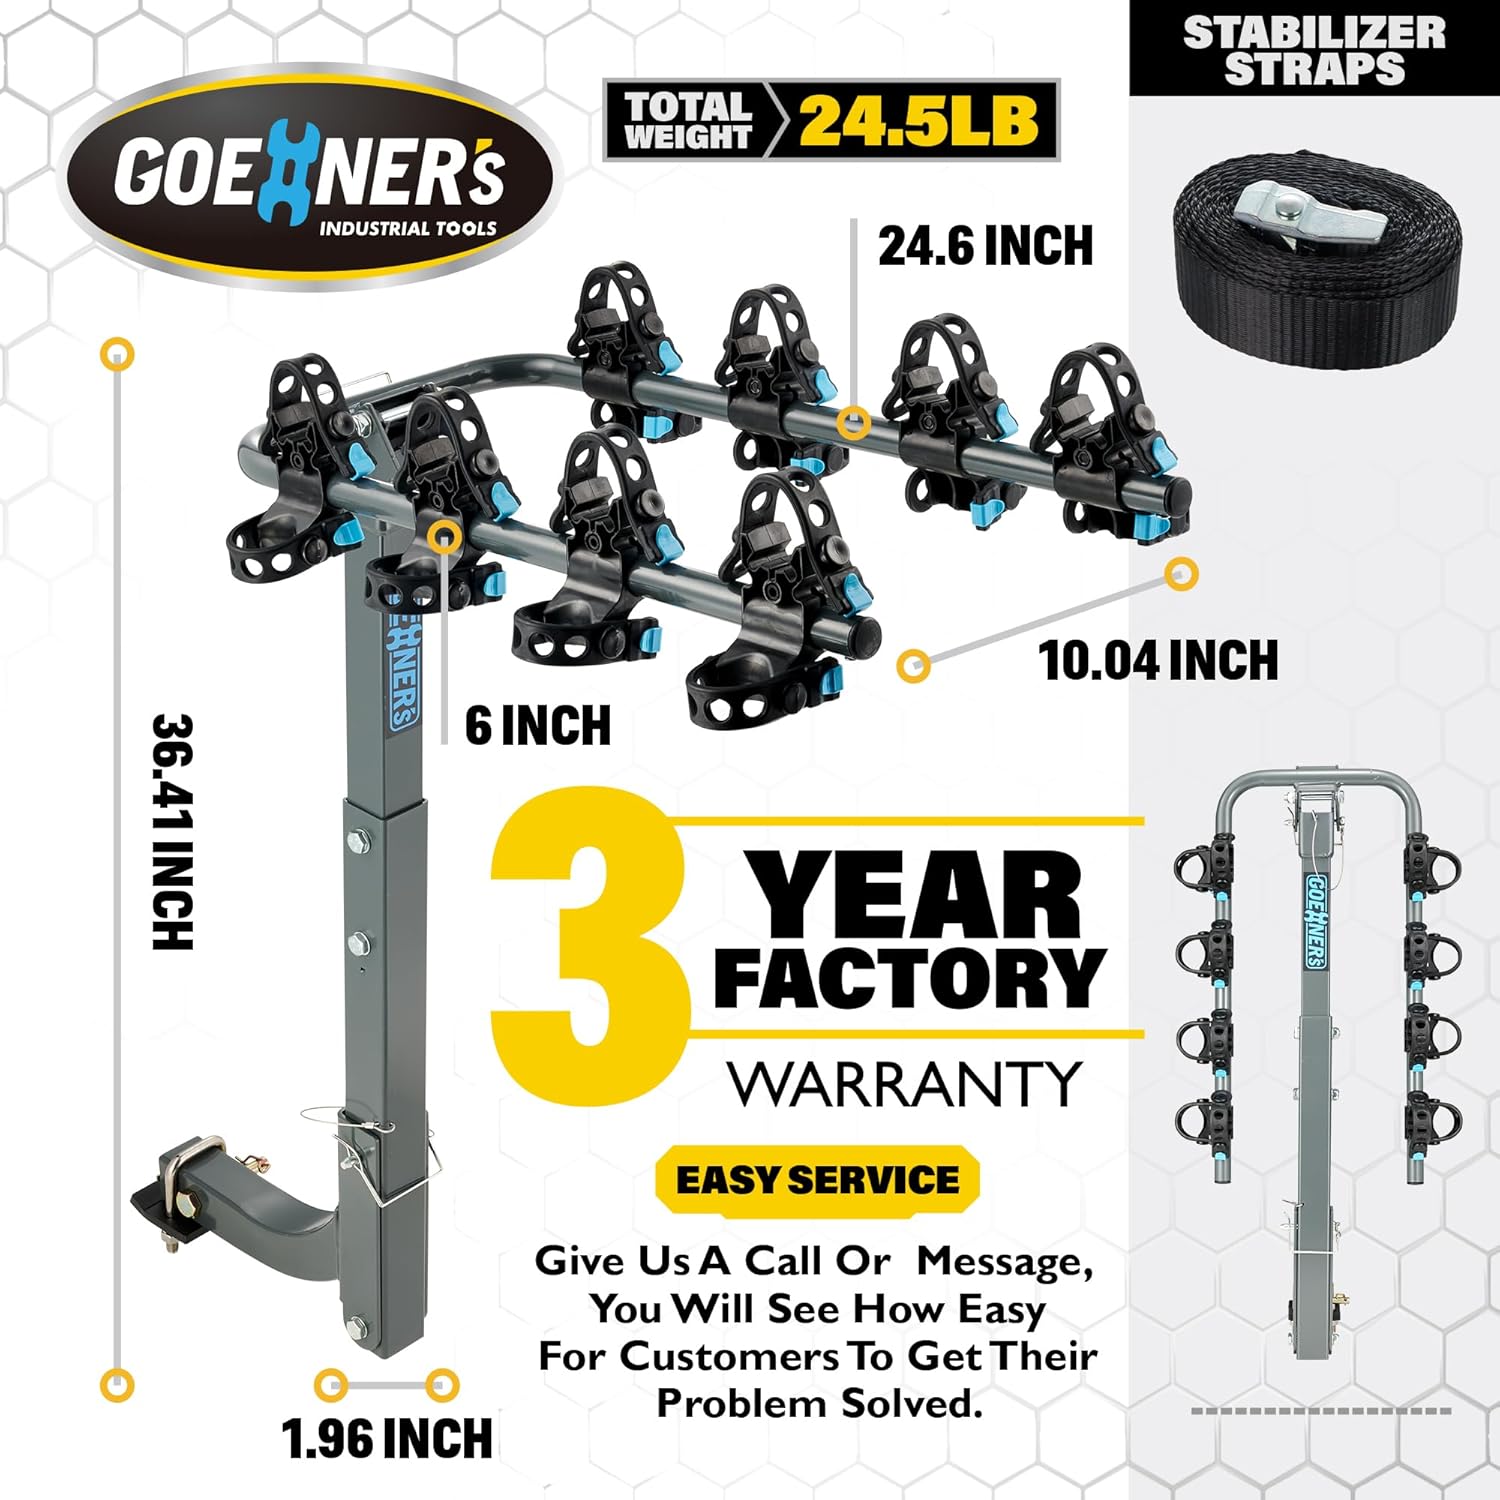
Image: A visual representation of the key dimensions of the GOEHNER's Upgrade 2.0 Hitch Bike Rack, including height, width, and hitch arm length.
Warranty and Support
Your GOEHNER's Upgrade 2.0 Hitch Bike Rack is backed by a 3-year factory warranty. This warranty covers defects in materials and workmanship under normal use.
For any questions, concerns, or warranty claims, please refer to the contact information provided with your product packaging or visit the official GOEHNER's website for customer support. Our team is ready to assist you to ensure your satisfaction and confidence in our product.