
1. Introduction
This manual provides detailed instructions for the installation, operation, and maintenance of your BATHLAVISH 6-in-1 Shower Panel Tower System. Please read this manual thoroughly before installation and use to ensure proper function and safety.

Figure 1: BATHLAVISH 6-in-1 Shower Panel Tower System in a contemporary bathroom setting.
2. Safety Information
- Ensure all water supply lines are turned off before beginning installation.
- Professional installation is recommended for optimal performance and safety.
- Verify that the wall structure can support the weight of the shower panel.
- Do not use abrasive cleaners or harsh chemicals on the panel's finish.
- Check for leaks after installation and before regular use.
3. Package Contents
Verify that all components are present and undamaged before installation.

Figure 2: Included components for the BATHLAVISH Shower Panel System.
- Shower Panel Body
- Shower Head
- 59-Inch Shower Hose
- Hand Shower
- Handheld Shower Holder
- Mounting Hardware Set
4. Specifications
| Feature | Detail |
|---|---|
| Brand | BATHLAVISH |
| Model Number | B-6YTPL09M-BNC |
| Color | Nickel and Chrome |
| Material | Brass, Stainless Steel (304 Grade) |
| Finish Type | Brushed Nickel and Chrome |
| Number of Handles | 1 |
| Mounting Type | Wall Mount |
| Water Connections | Standard NPT 1/2" Hot and Cold |
| Maximum Pressure | 1 bar (recommended operating pressure) |

Figure 3: Product dimensions. Please ensure these fit your bathroom space.
5. Setup and Installation
This shower panel system is designed for wall-mounted installation. All necessary accessories are included. Ensure you have basic plumbing tools available.
5.1 Pre-Installation Checklist
- Turn off the main water supply.
- Clear the installation area.
- Confirm all package contents are present and undamaged.
- Ensure existing hot and cold water lines are accessible and compatible with NPT 1/2" connections.
5.2 Installation Steps
- Prepare Wall: Mark the desired mounting height for the shower panel. Ensure the marks are level.
- Mount Brackets: Secure the mounting brackets to the wall using the provided hardware. Ensure they are firmly attached and level.
- Connect Water Lines: Connect the hot and cold water supply lines to the corresponding inlets on the back of the shower panel. Use plumber's tape on threaded connections to prevent leaks.
- Mount Panel: Carefully hang the shower panel onto the installed wall brackets. Ensure it is securely seated.
- Test Connections: Slowly turn on the main water supply and check all connections for leaks. Tighten any leaking connections as needed.
- Install Handheld Shower: Attach the handheld shower hose to the panel and secure the handheld shower head in its holder.
Video 1: Official installation guide for BATHLAVISH Shower Panel Systems. This video demonstrates the general steps for mounting and connecting the panel.
6. Operating Instructions
Your BATHLAVISH shower panel offers 6 distinct functions controlled by rotary switches and a main temperature/flow knob.
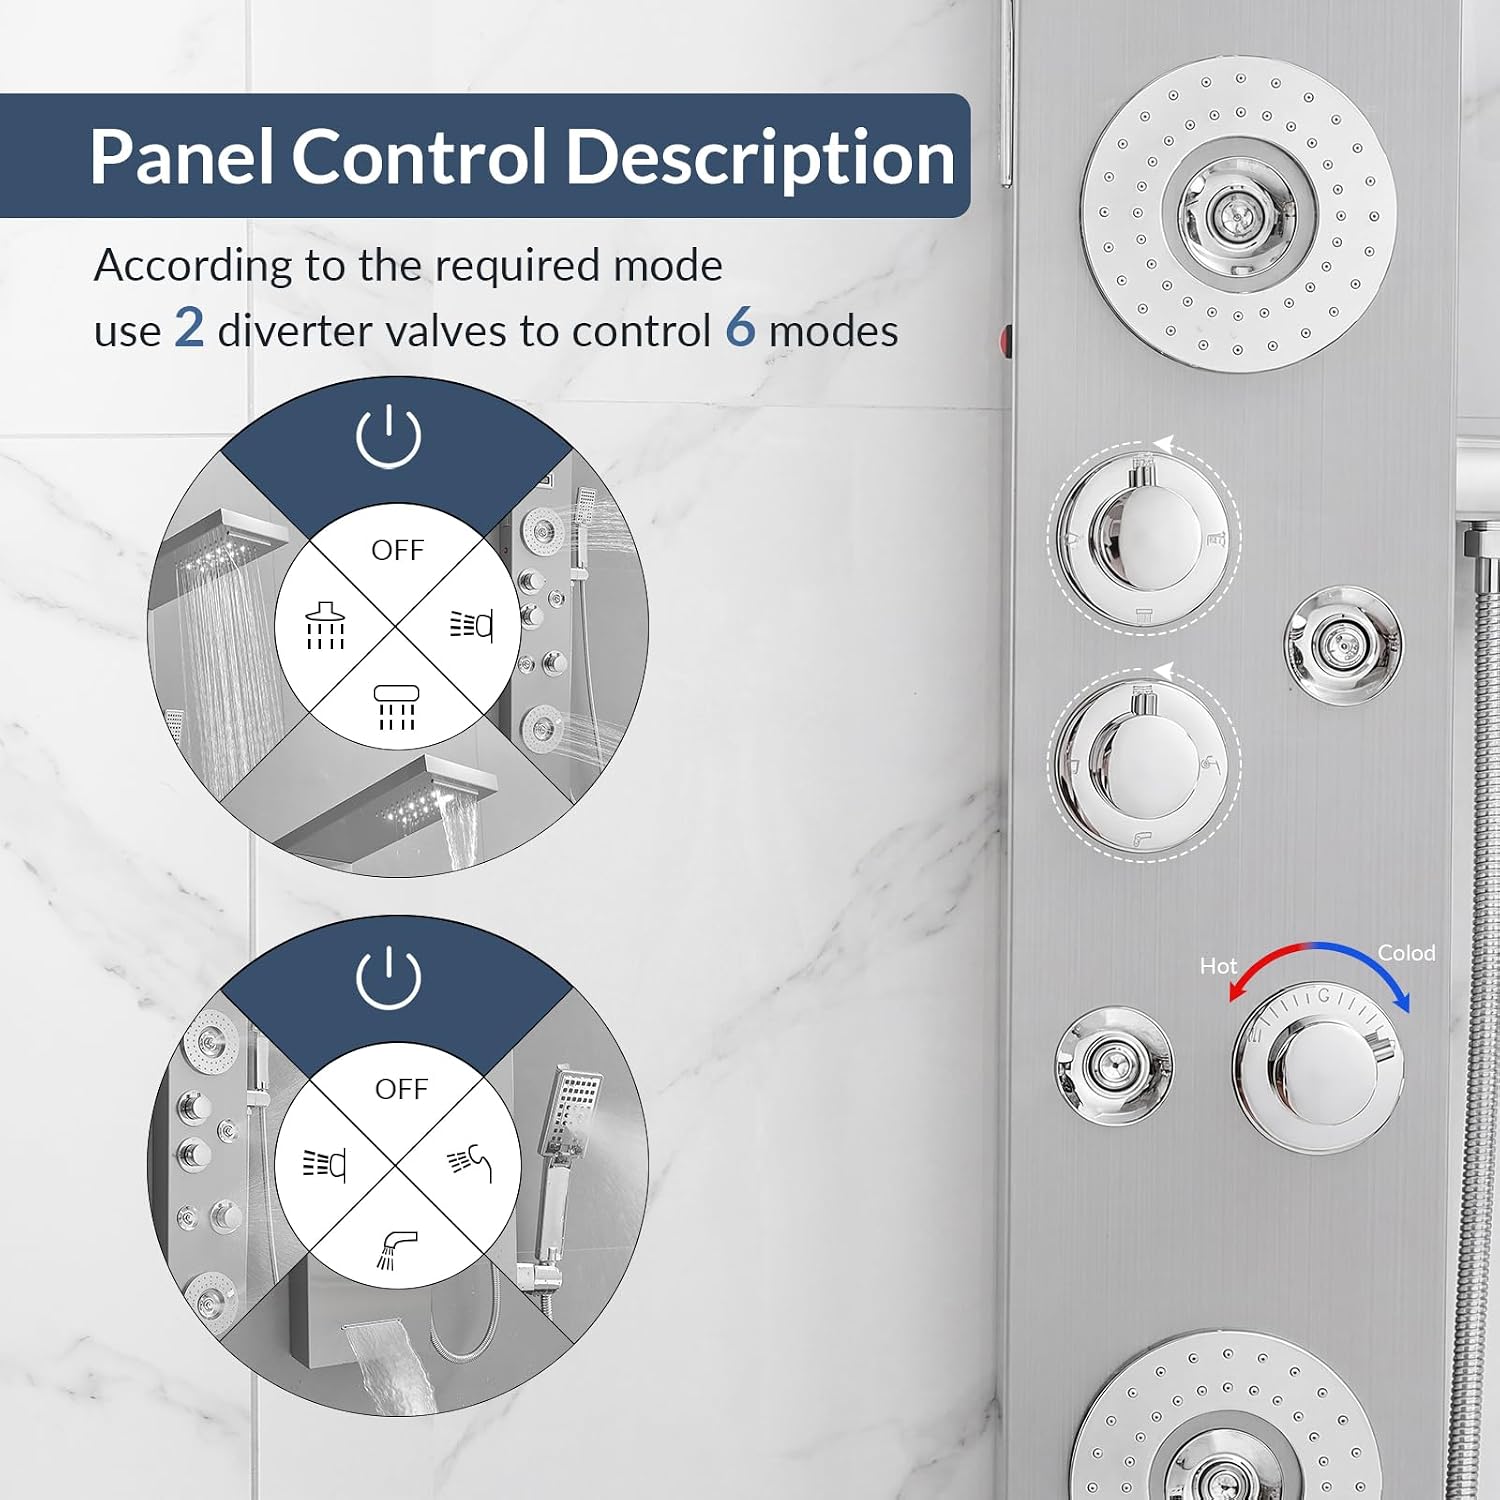
Figure 4: Panel control description. Use the diverter valves to select modes and the main knob for temperature and flow.
6.1 Temperature and Flow Control
The main rotary knob at the bottom controls both water flow (by turning) and temperature (by rotating between hot and cold indicators). Adjust to your desired comfort level.
6.2 Function Selection (6 Modes)
Two diverter valves allow you to select and combine up to 6 different shower functions:

Figure 5: Multi-outlet switches for various water effects.
- Rainfall Shower: Provides a wide, gentle overhead spray.
- Waterfall Shower: Delivers a cascading sheet of water from the overhead spout.
- Massaging Body Jets: Four adjustable jets provide a targeted massage.
- Handheld Spray: Offers flexibility for targeted rinsing with 3 spray modes (Massage, Rainfall+Massage, Rainfall).
- Waterfall Tub Faucet: A dedicated spout for filling a tub.
- Water Saving Mode: Utilizes a single stream for efficiency.

Figure 6: Dual Mode Overhead Shower (Waterfall and Rainfall).

Figure 7: Handheld Shower Head with 3 Spray Modes.
6.3 LED Display
The integrated LED display shows the current water temperature, allowing for precise control and comfort. (Note: Batteries for the LED display are sold separately and need to be installed as per instructions, typically in a small compartment on the panel).

Figure 8: LED Display showing current water temperature.
Video 2: Overview of the BATHLAVISH 6-in-1 Shower Panel Tower System, demonstrating various functions and features.
7. Maintenance
Regular cleaning and maintenance will ensure the longevity and optimal performance of your shower panel.
- Cleaning the Surface: Use a soft cloth and mild soap or a non-abrasive bathroom cleaner. Wipe the panel dry after cleaning to prevent water spots.
- Avoid Harsh Chemicals: Do not use abrasive cleaners, scouring pads, or cleaners containing ammonia, bleach, or acids, as these can damage the finish.
- Nozzle Cleaning: Periodically clean the silicone nozzles on the shower head and body jets by gently rubbing them to dislodge any mineral buildup.
- Check for Leaks: Periodically inspect all connections for any signs of leaks and tighten if necessary.
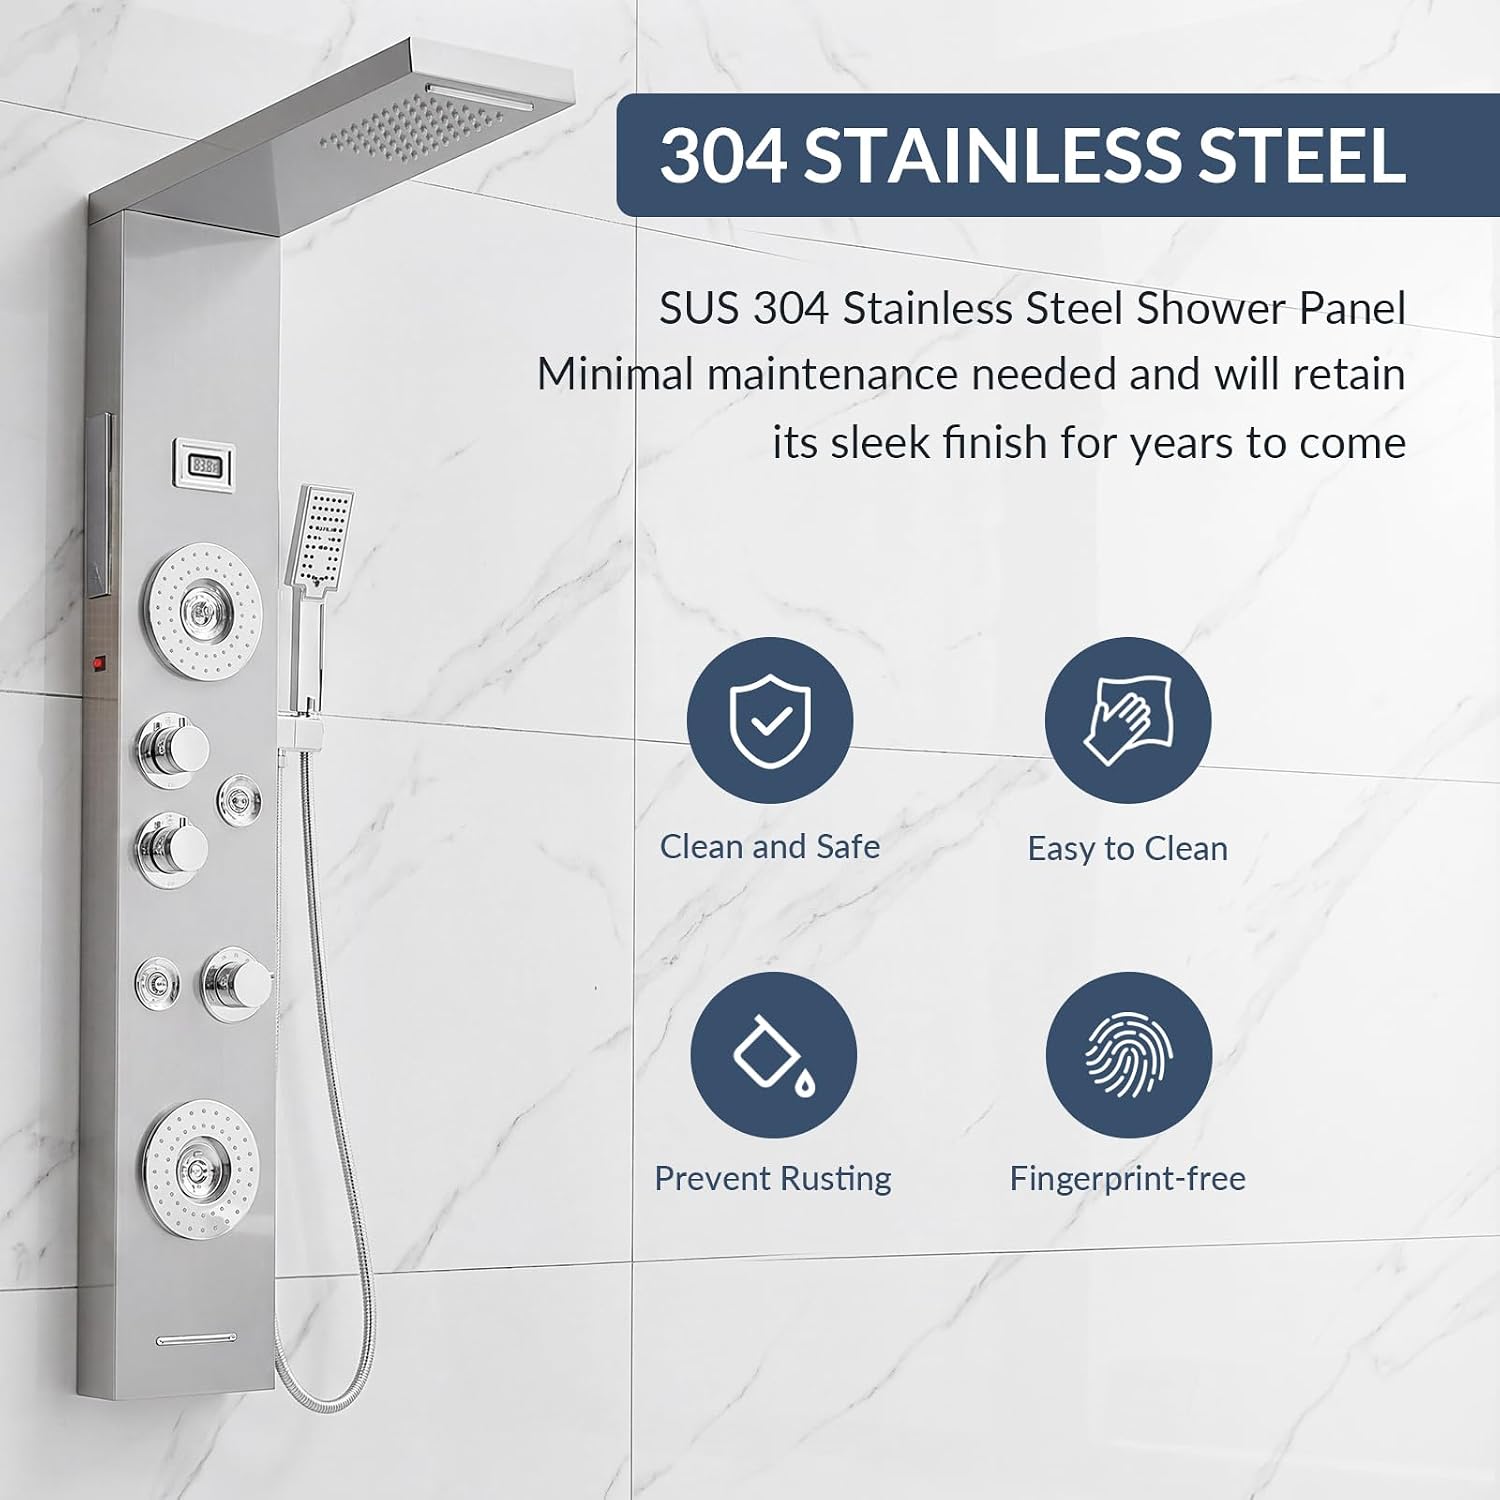
Figure 9: The 304 Stainless Steel construction ensures durability and ease of maintenance.
8. Troubleshooting
| Problem | Possible Cause | Solution |
|---|---|---|
| Low Water Pressure | Partially closed shut-off valves; mineral buildup in nozzles; clogged water lines. | Ensure shut-off valves are fully open. Clean shower head and body jet nozzles. Check water supply lines for obstructions. |
| Water Leaks from Connections | Loose connections; worn washers/gaskets; improper sealing. | Tighten connections. Replace worn washers or gaskets. Ensure plumber's tape was used correctly. |
| Inconsistent Water Temperature | Issues with hot/cold water supply; faulty mixing valve. | Check hot and cold water supply to the unit. If problem persists, professional inspection of the mixing valve may be required. |
| LED Display Not Working | No batteries; dead batteries; loose battery connection. | Install new batteries (check polarity). Ensure battery compartment is securely closed. |
9. Warranty and Support
BATHLAVISH products are manufactured to high-quality standards. For warranty information or technical support, please refer to the warranty card included with your product or visit the official BATHLAVISH website.
For further assistance, please contact BATHLAVISH customer service through their official channels.
Thank you for choosing BATHLAVISH.