MOUNTUP MU0089
MOUNTUP Ultra Slim Rotating TV Wall Mount MU0089 Instruction Manual
Model: MU0089 | Brand: MOUNTUP
Product Overview
The MOUNTUP Ultra Slim Rotating TV Wall Mount MU0089 is designed to provide a low-profile and versatile mounting solution for your television. It allows for a 90-degree rotation, enabling seamless switching between landscape and portrait viewing modes. This mount is compatible with various Samsung The Frame and Neo QLED 8K/4K TV series, supporting VESA patterns up to 400x400mm and TVs weighing up to 88 lbs.
Key Features
- Ultra-Slim Design: Mounts your TV just 1.1 inches from the wall for a sleek, art-like appearance.
- 90-Degree Rotation: Effortlessly switch between landscape and portrait orientations.
- Wide Compatibility: Supports Samsung The Frame/Neo QLED 8K/4K TVs up to 75 inches, with Max VESA 400x400mm and up to 88 lbs weight capacity. Note: Not compatible with Samsung 32" Frame TV due to VESA hole limitations.
- Easy Installation: Includes a step-by-step guide, hardware kit, mounting template, and level for straightforward setup.
- Secure Locking Mechanism: Features a secure system to prevent accidental dislodgement of the TV once mounted.
Installation Instructions
Before beginning installation, ensure you have all necessary tools and that your TV's VESA pattern and weight are within the mount's specifications. A stud finder and drill are required.
Step 1: Prepare the Wall Plate
The wall mount consists of two main pieces that must be securely bolted together before mounting to the wall. Use the provided bolts to connect these two sections. Locate wall studs using a stud finder to ensure a secure mounting surface. Mark the stud locations on the wall.

Image: The two sections of the wall plate are joined together using bolts. Ensure all bolts are tightened for stability.
Step 2: Attach Wall Plate to Wall
Position the assembled wall plate against the wall, aligning it with the marked stud locations. Use a level to ensure the mount is perfectly horizontal. Secure the wall plate to the wall studs using the provided 3/8-inch lag bolts. For concrete or brick walls, appropriate anchors (not included) must be used. Do not mount on drywall alone.

Image: The wall plate is mounted to the wall, showing the placement of lag bolts into wall studs. A level is used to ensure horizontal alignment.

Image: This diagram shows the compatibility of the mount with concrete walls (requiring anchors), wood studs (max 16"), and brick walls (requiring anchors). A warning states not to mount on drywall alone.
Step 3: Attach Brackets to TV
Attach the vertical TV brackets to the back of your television using the appropriate screws and spacers from the hardware kit. Ensure the brackets are securely fastened to the TV's VESA mounting holes. The brackets feature multiple holes for vertical adjustment, allowing you to position the TV as desired.

Image: The vertical mounting brackets are secured to the back of the television, ready for hanging.
Step 4: Hang and Secure TV to Wall Plate
Carefully lift the television and hook the top of the attached TV brackets onto the top rail of the wall plate. Once the top is securely seated, gently push the bottom of the TV towards the wall until the lower clips engage and lock into place. You will hear a click when the bottom is secured. To release the TV, pull the release strings located at the bottom of the TV brackets.

Image: The television is being carefully lifted and placed onto the wall mount, showing the engagement of the top hooks and the locking of the bottom clips.
Operating the Rotating Feature
The MOUNTUP MU0089 allows for a smooth 90-degree rotation to switch your TV between landscape and portrait modes. To rotate the TV, gently grasp both sides of the television and turn it. Ensure there is sufficient clearance around the TV to prevent it from hitting adjacent walls or furniture during rotation.
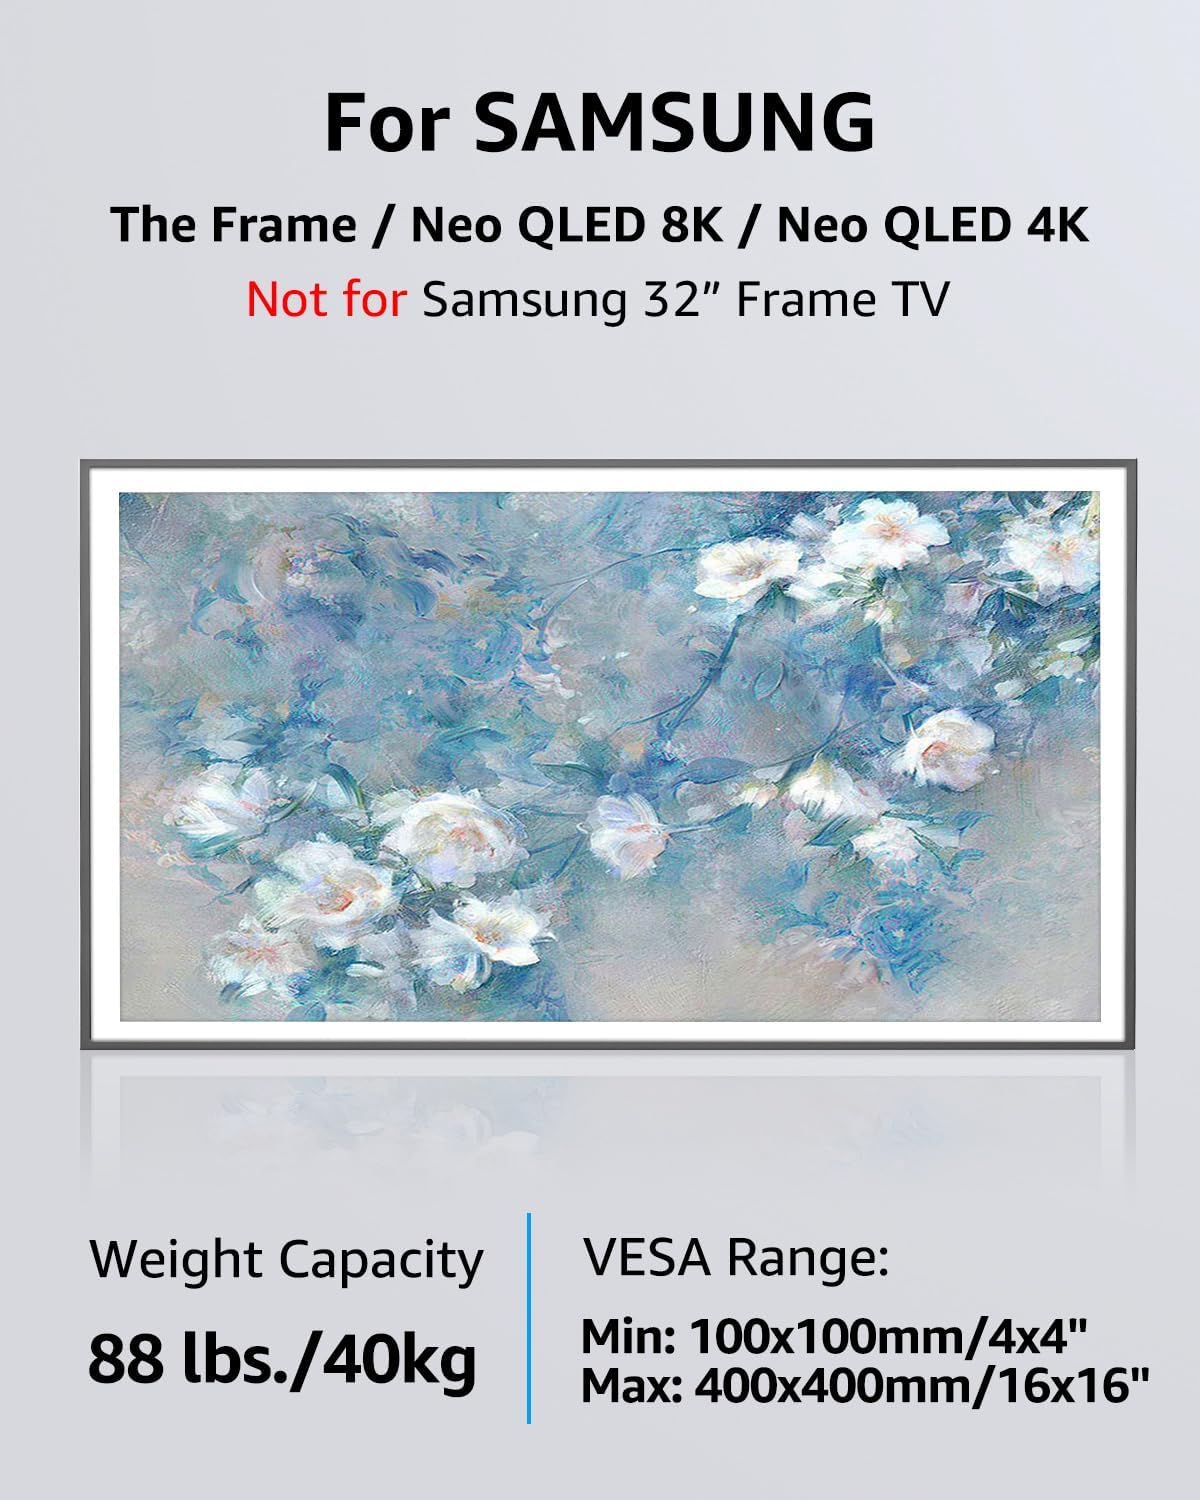
Image: A television is shown rotating from a horizontal (landscape) orientation to a vertical (portrait) orientation, highlighting the 90-degree rotation capability.
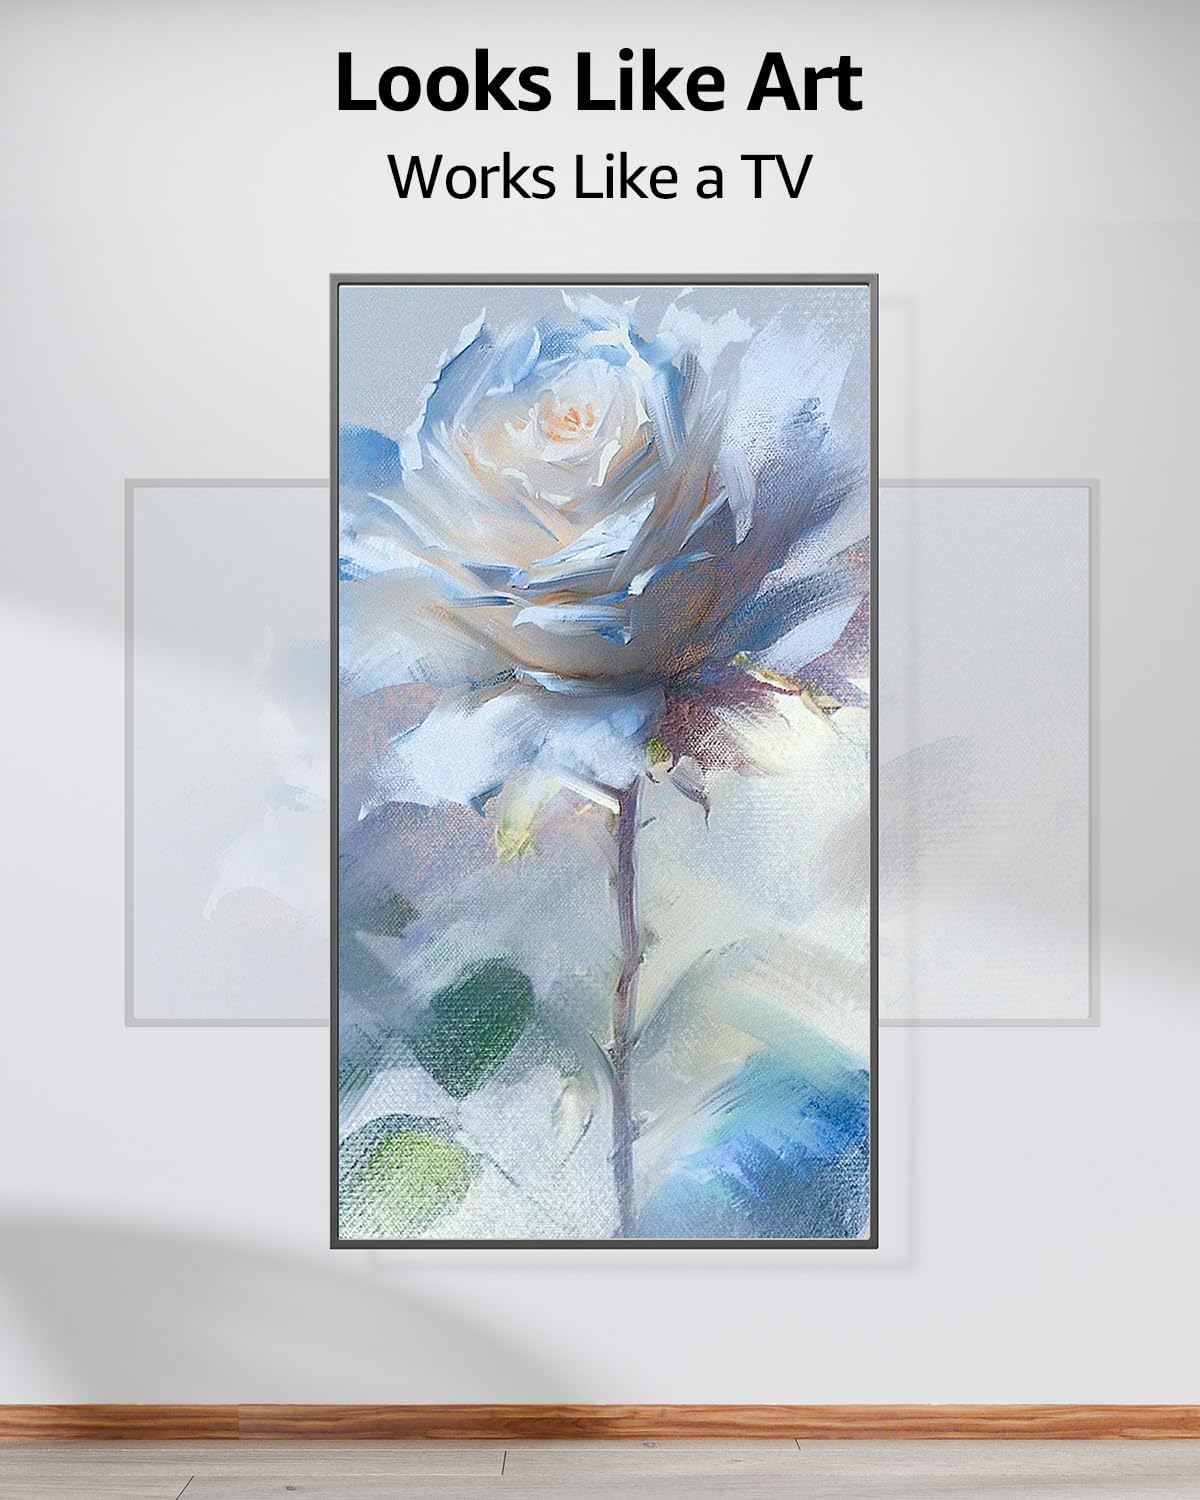
Image: This diagram indicates that the VESA center of the mount may not be the exact center of the TV screen when rotated from landscape to portrait mode. This is a normal characteristic of the rotating mechanism.
Maintenance
Regularly inspect all mounting hardware and connections to ensure they remain secure. Tighten any loose bolts as needed. Clean the mount with a soft, dry cloth. Avoid using abrasive cleaners or solvents that could damage the finish.
Troubleshooting
- TV not sitting flush or level: Ensure the wall plate is perfectly level before securing it to the wall. If the TV appears crooked after mounting, it may be due to slight variations in the wall or installation. Re-check the wall plate's level and adjust if necessary.
- TV feels insecure after mounting: Verify that both the top hooks and bottom clips of the TV brackets are fully engaged with the wall plate. The release strings should be pulled to disengage, not to secure. Ensure all bolts are tightened.
- Screws not fitting TV: The mount includes a variety of screws for different TV models. If the provided screws do not fit your TV's VESA holes, you may need to acquire specific screws from your TV manufacturer or a hardware store.
- Difficulty rotating TV: Ensure no cables are snagged or obstructing the rotation mechanism. The rotation should be smooth; if it feels stiff, check for obstructions.
Specifications
| Feature | Specification |
|---|---|
| Mounting Type | Wall Mount |
| Movement Type | Rotate (90 degrees Landscape to Portrait) |
| Brand | MOUNTUP |
| Model | MU0089 |
| Material | Alloy Steel |
| Color | Black |
| Compatible Devices | Television (Samsung The Frame/Neo QLED 8K/4K TVs) |
| Maximum Supported Screen Size | 75 Inches |
| Minimum Supported Screen Size | 43 Inches |
| Max VESA Compatibility | 400x400mm |
| Weight Capacity | 88 lbs (40 kg) |

Image: This diagram illustrates various VESA mounting patterns supported by the mount, including 200x200mm, 400x200mm, 400x300mm, and 400x400mm.

Image: This graphic confirms compatibility with Samsung The Frame and Neo QLED 8K/4K TVs (excluding 32" Frame TV), specifying a weight capacity of 88 lbs (40kg) and a VESA range of Min: 100x100mm/4x4" to Max: 400x400mm/16x16".
Warranty and Support
The MOUNTUP Ultra Slim Rotating TV Wall Mount MU0089 comes with a 3-year warranty. For any questions regarding suitability for your TV, installation assistance, or if you require additional hardware (screws, spacers, washers, etc.), please contact MOUNTUP customer service. They are available to assist with any issues.
Ask a question about this manual
Ask about setup, troubleshooting, compatibility, parts, safety, or missing instructions. Manuals+ will review the question and use this page’s manual context to help answer it.