
sixcow SP0714T
sixcow SP0714T VariFlo XL Top Mount Multiport Valve Instruction Manual
Model: SP0714T | Brand: sixcow
1. Product Overview
The sixcow SP0714T VariFlo XL Top Mount Multiport Valve is designed as a replacement part for various above-ground pool sand filter systems, including Hayward Pro or VL Series Sand Filters with 1.5-inch FIP plumbing connections. This valve provides seven distinct control functions to manage your pool's filtration and maintenance processes efficiently.

Image 1.1: The sixcow SP0714T VariFlo XL Multiport Valve, featuring its handle, pressure gauge, and plumbing ports. This valve is a key component for managing pool sand filter operations.
2. Setup and Installation
Proper installation is crucial for the optimal performance of your multiport valve. Ensure you have the correct valve model for your filter type and size before proceeding.
2.1 General Installation Steps
- Confirm Valve Compatibility: Verify that this valve is suitable for your specific filter type and model.
- Install Valve to Filter: Secure the bulkhead nuts on the valve to the fittings on the filter. Tighten the nuts by hand only.
- Connect Plumbing: Connect the pump, return, and waste lines by following the markings on the ports.
- Pressure Gauge: A pipe tap boss is provided for the optional use of a pressure gauge.
- Plumbing Connections: Piping stops are provided. IMPORTANT: Do not overtighten pipe fittings. Proper fitting make-up is hand tight plus one to 1-1/2 turns maximum. Always use Teflon pipe tape or Permatex No. 2 for connections to provide a good, "living" seal. Add extra sealant if male pipe fitting is undersized.
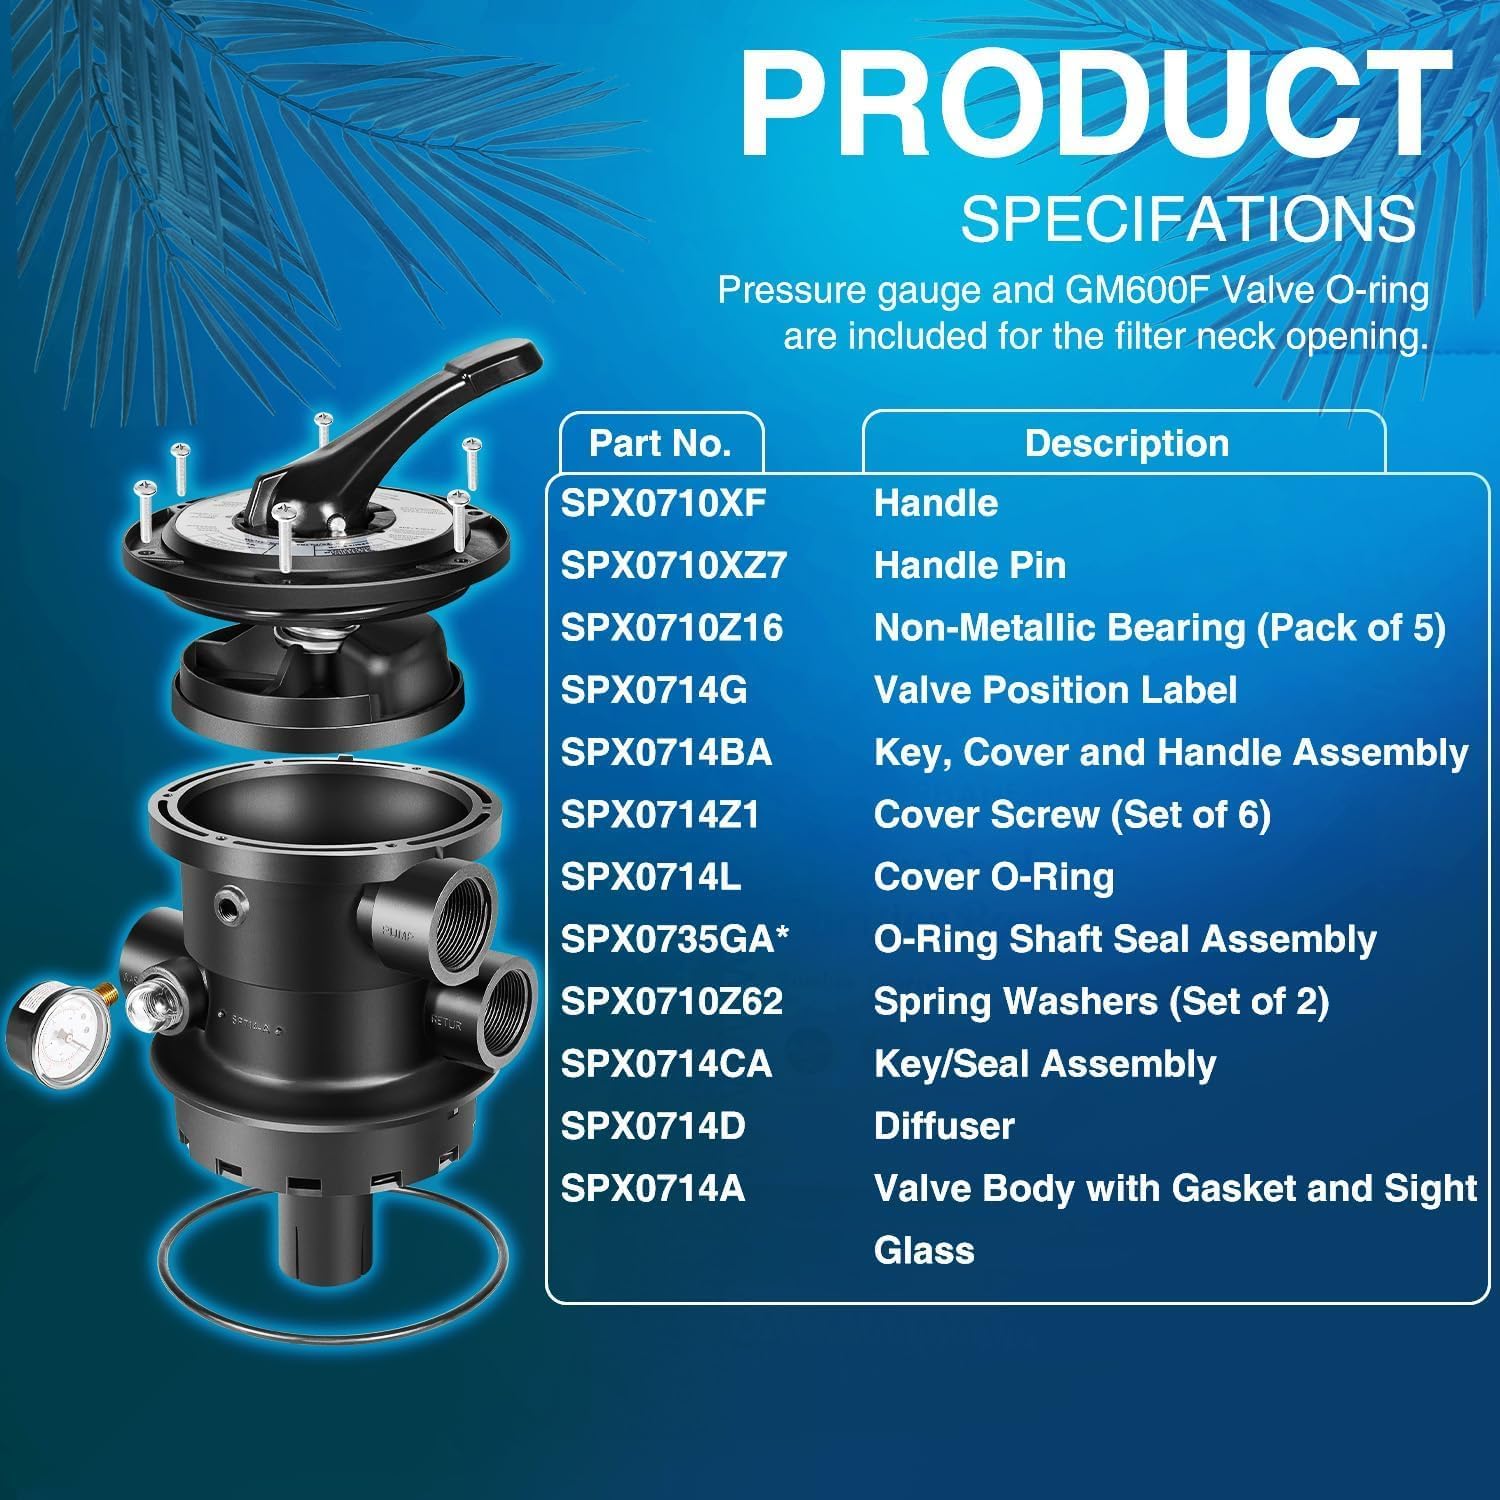
Image 2.1: Visual guide for easy installation, showing key steps and components for connecting the valve to a sand filter system.
2.2 Valve Assembly and Reassembly
- Valve Top Under Spring Load: To open the top half and service the valve, evenly and alternately loosen the cover screws.
- To Re-assemble the Top Half: Place the diverter on a smooth and firm surface. Assemble parts on the shaft. Ensure the pointer on the handle and the arrow on the diverter point in the same direction. Press down the cover by depressing the heavy-duty spring and secure the handle with a dowel pin.
- To Re-assemble the Top Half to Valve Bottom: Ensure the bottom gasket and diverter sealing surface are clean and free from nicks to ensure a positive seal. Tighten cover screws evenly and alternately. DO NOT OVERTIGHTEN THE SCREWS.

Image 2.2: Detailed general instructions for plumbing connections and initial setup of the multiport valve.

Image 2.3: Special instructions detailing the disassembly and reassembly process for the valve's key and handle assembly.
3. Operating Instructions
The valve features an easy-to-use lever-action handle that allows seamless switching between 7 settings. Always ensure the pump is turned off before changing valve positions to prevent damage.
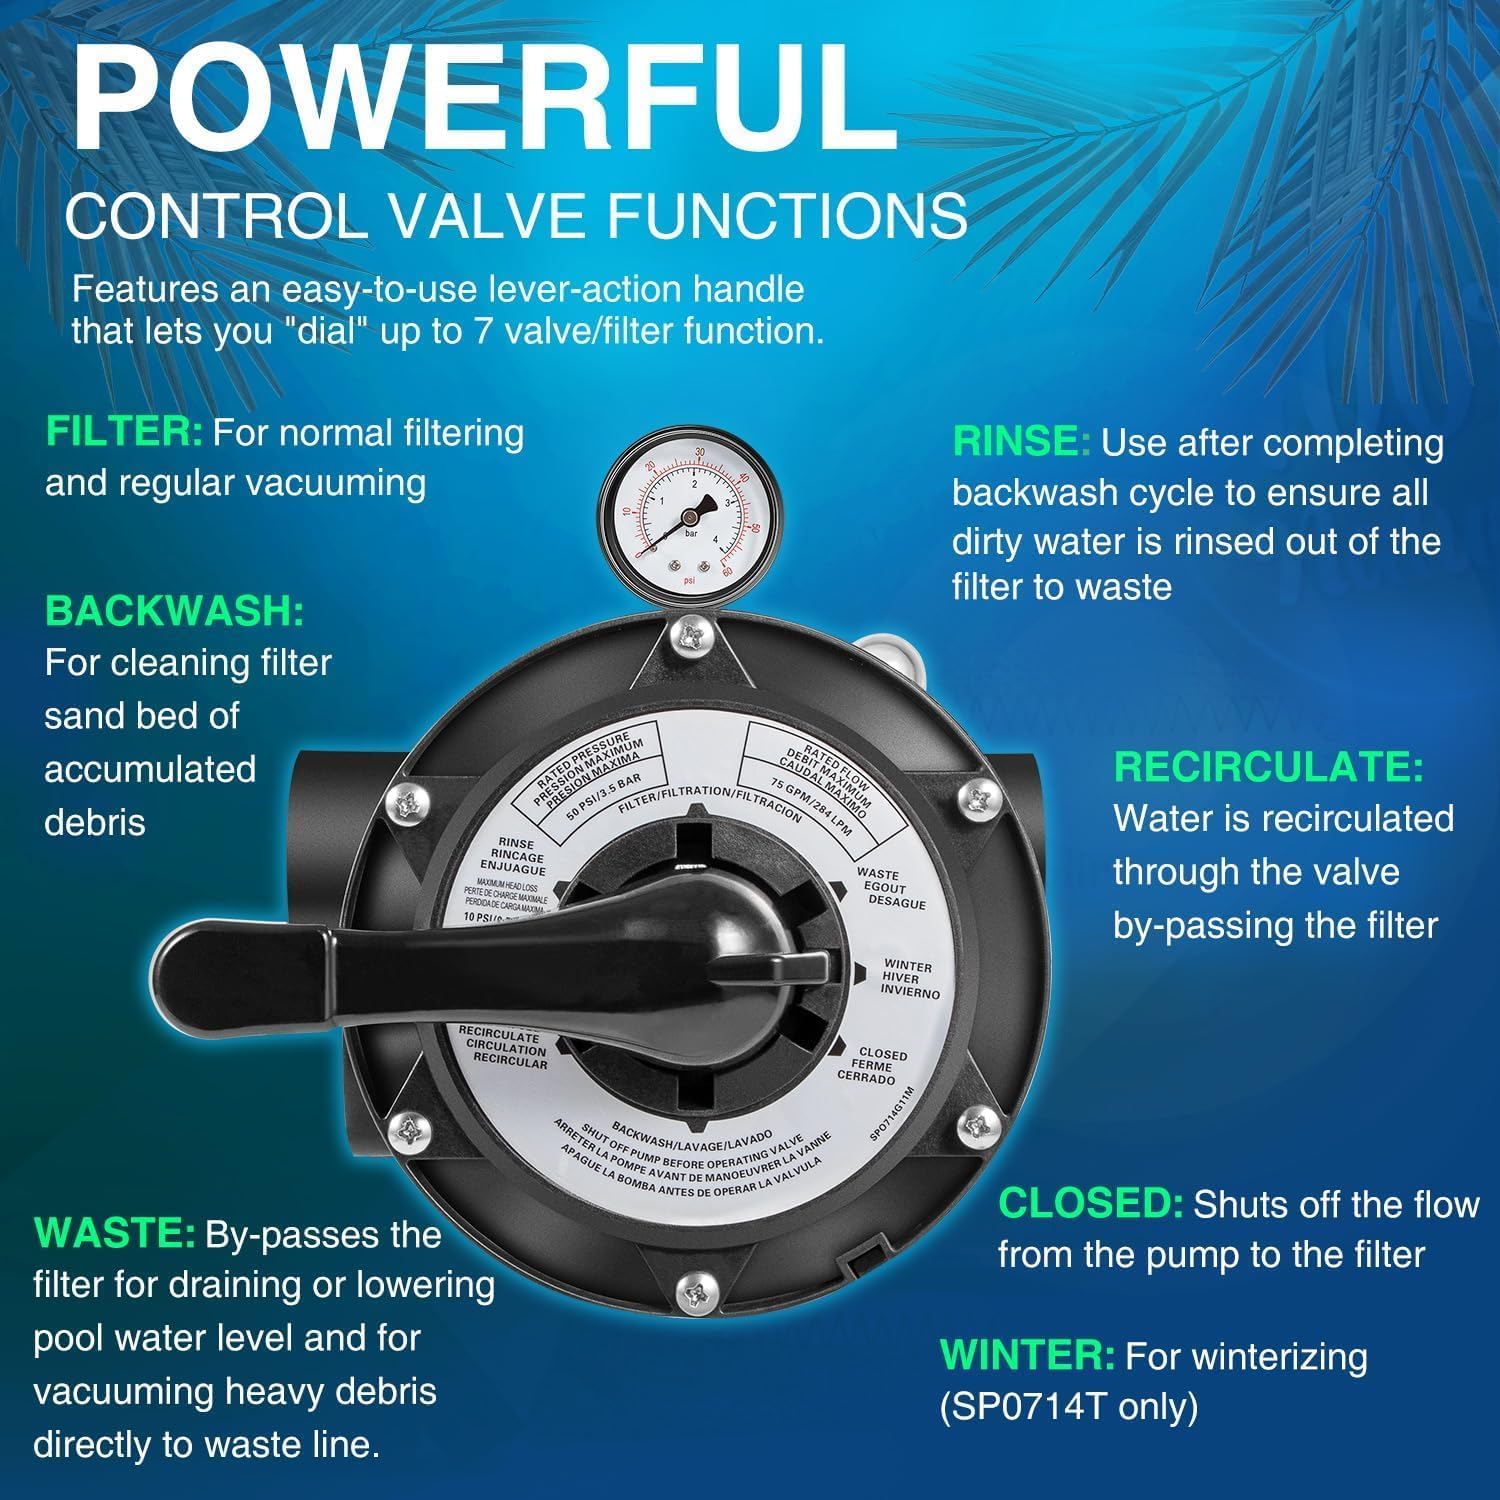
Image 3.1: Diagram illustrating the seven control functions of the multiport valve and their respective positions.
3.1 Valve Settings
- FILTER: For normal filtering and regular vacuuming of the pool.
- BACKWASH: Used for cleaning the filter sand bed of accumulated debris.
- RINSE: Use after completing a backwash cycle to ensure all dirty water is flushed out of the filter to waste.
- WASTE: Bypasses the filter for draining the pool or lowering the water level, and for vacuuming heavy debris directly to the waste line.
- RECIRCULATE: Water is recirculated through the valve, bypassing the filter. Useful for chemical distribution without filtering.
- CLOSED: Shuts off the flow from the pump to the filter. Use this setting when performing maintenance on the pump or filter.
- WINTER: For winterizing the pool system (SP0714T only).
4. Maintenance
Regular maintenance ensures the longevity and efficient operation of your multiport valve and pool filtration system.
4.1 Routine Maintenance
- Backwashing and Rinsing: Perform backwash and rinse cycles regularly as indicated by your filter's pressure gauge or flow rate. The built-in sight glass allows for convenient viewing to determine when the backwash cycle is complete (water runs clear).
- Gasket and Seal Inspection: Periodically inspect the valve's gaskets and seals for wear or damage. A molded gasket ensures a reliable seal, but replacement may be necessary over time.
- Cleaning: Keep the valve exterior clean from debris and chemical residue.
4.2 Servicing the Valve
If it becomes necessary to service or gain access to the key or valve seat gasket:
- Set the handle in the Winter position.
- Remove the cover screws.
- Lift the cover and key assembly out.
For re-assembly, wipe debris from the cover O-ring. Set the handle in the Winter position, align the notch on the cover with the tab on the body, and press down to the seat assembly. Secure the assembly to the body with cover screws, starting the thread in existing threads in the body. Tighten cover screws evenly and alternately. Do not overtighten.
4.3 Winterization
To winterize the valve, drain the pump and filter according to the manufacturer's instructions. Depress and rotate the valve handle to the "Winter" position. This helps prevent damage from freezing water.
5. Troubleshooting
This section addresses common issues you might encounter with your multiport valve.
- Valve Leakage: Ensure all plumbing connections are properly tightened and sealed with Teflon tape or sealant. Inspect the valve's internal gaskets and O-rings for damage or improper seating. If leakage persists, refer to the servicing instructions or contact support.
- Difficulty Changing Positions: Ensure the pump is turned off before attempting to change valve positions. If the handle is stiff, check for debris obstructing the internal mechanism. Lubrication of the handle shaft may be required.
- Poor Filtration/Flow: Verify that the valve is set to the "FILTER" position. Check the filter's pressure gauge; a high reading may indicate a dirty filter requiring backwash. Ensure the pump is operating correctly.
If you experience issues not covered here or if problems persist, please contact sixcow customer support for assistance.
6. Specifications
Detailed technical specifications for the sixcow SP0714T VariFlo XL Multiport Valve.
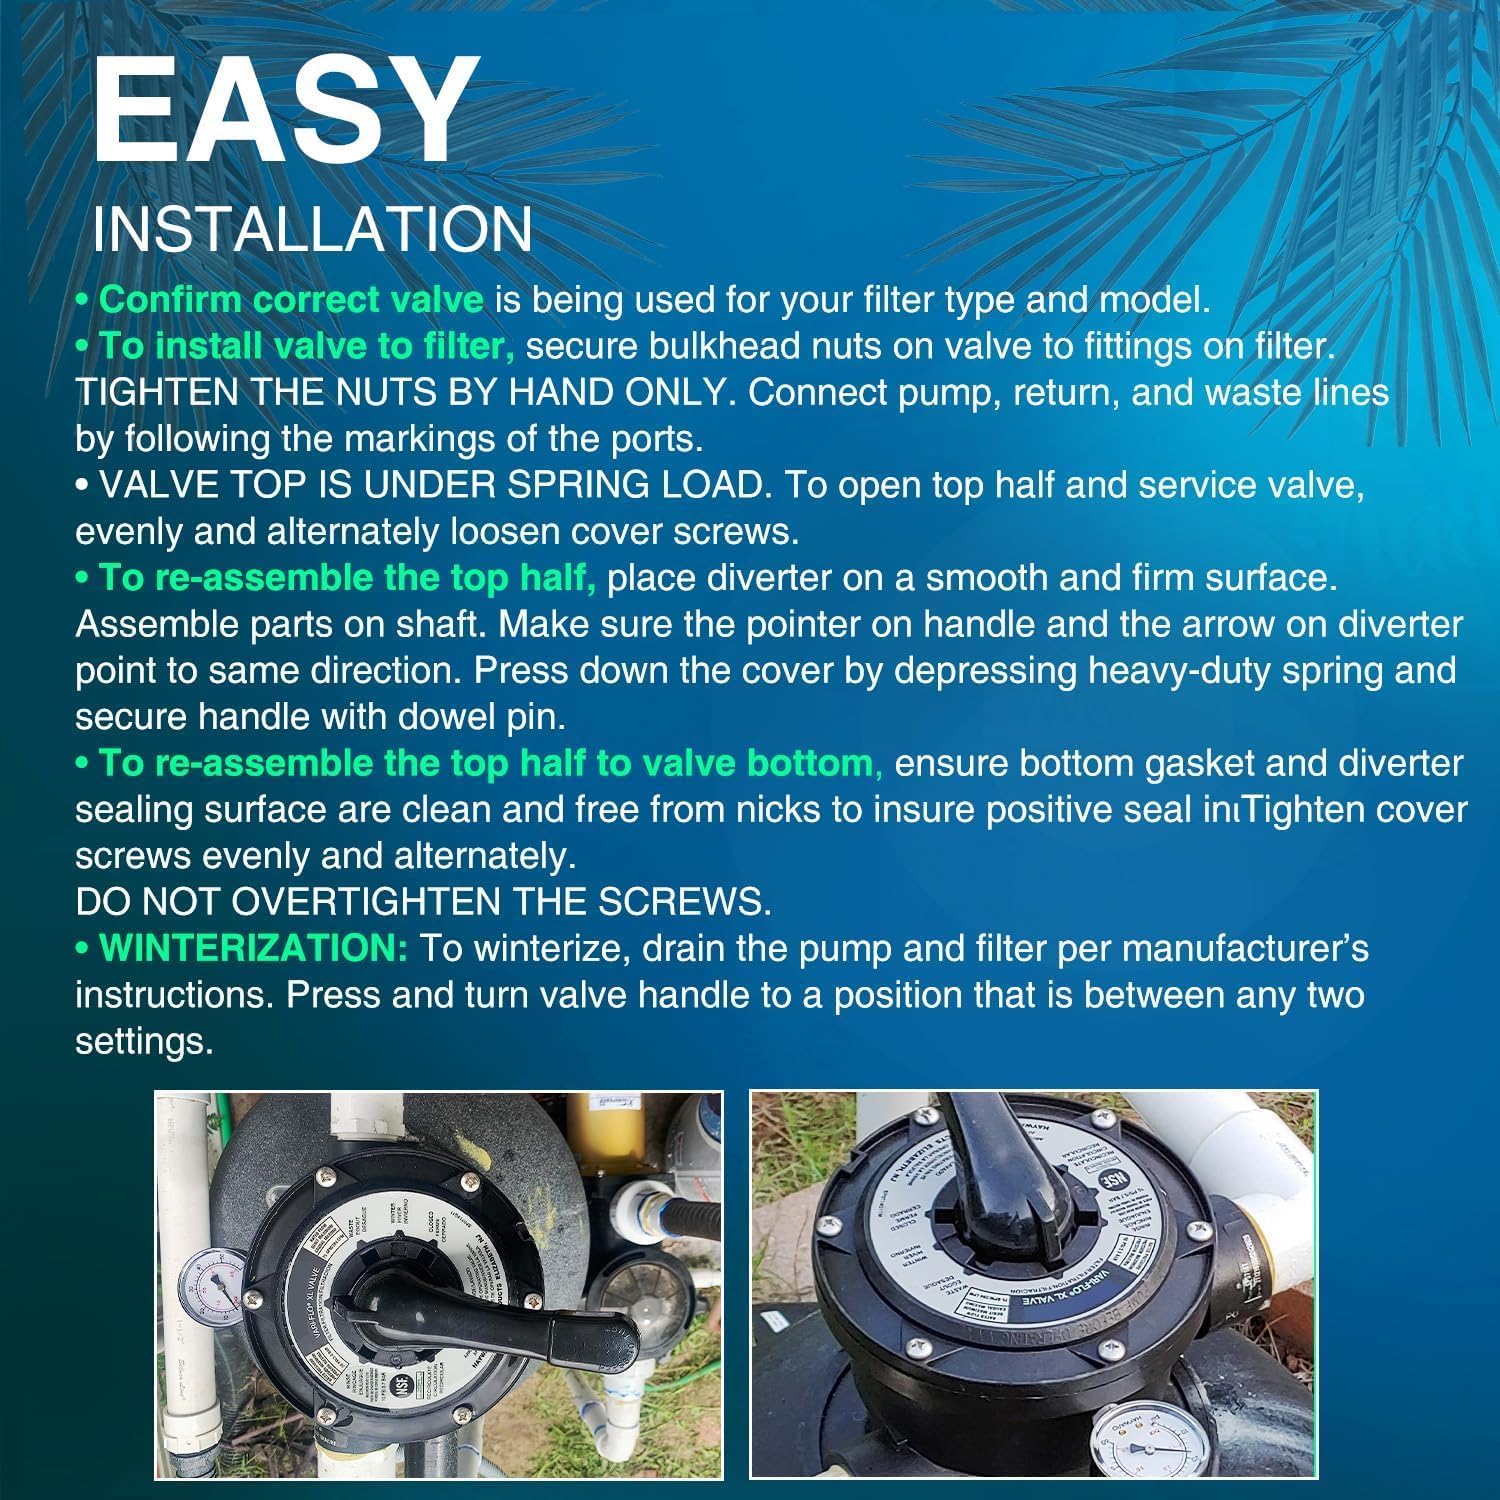
Image 6.1: Diagram showing the product dimensions and key specifications of the multiport valve.
| Feature | Specification |
|---|---|
| Product Dimensions | 9 x 7 x 2 inches |
| Item Weight | 5.59 pounds |
| Plumbing Ports | 1.5" FIP threaded |
| Maximum Operating Pressure | 50 PSI |
| Maximum Flow Rate | 75 GPM |
| Number of Ports | 7 |
| Material | Rugged, colorfast ABS material with stainless steel spring and rubber valve seat |
6.1 Compatible Models and Part Numbers
This valve is designed for broad compatibility with various sand filter systems. It is interchangeable with numerous part numbers and fits a wide array of models.
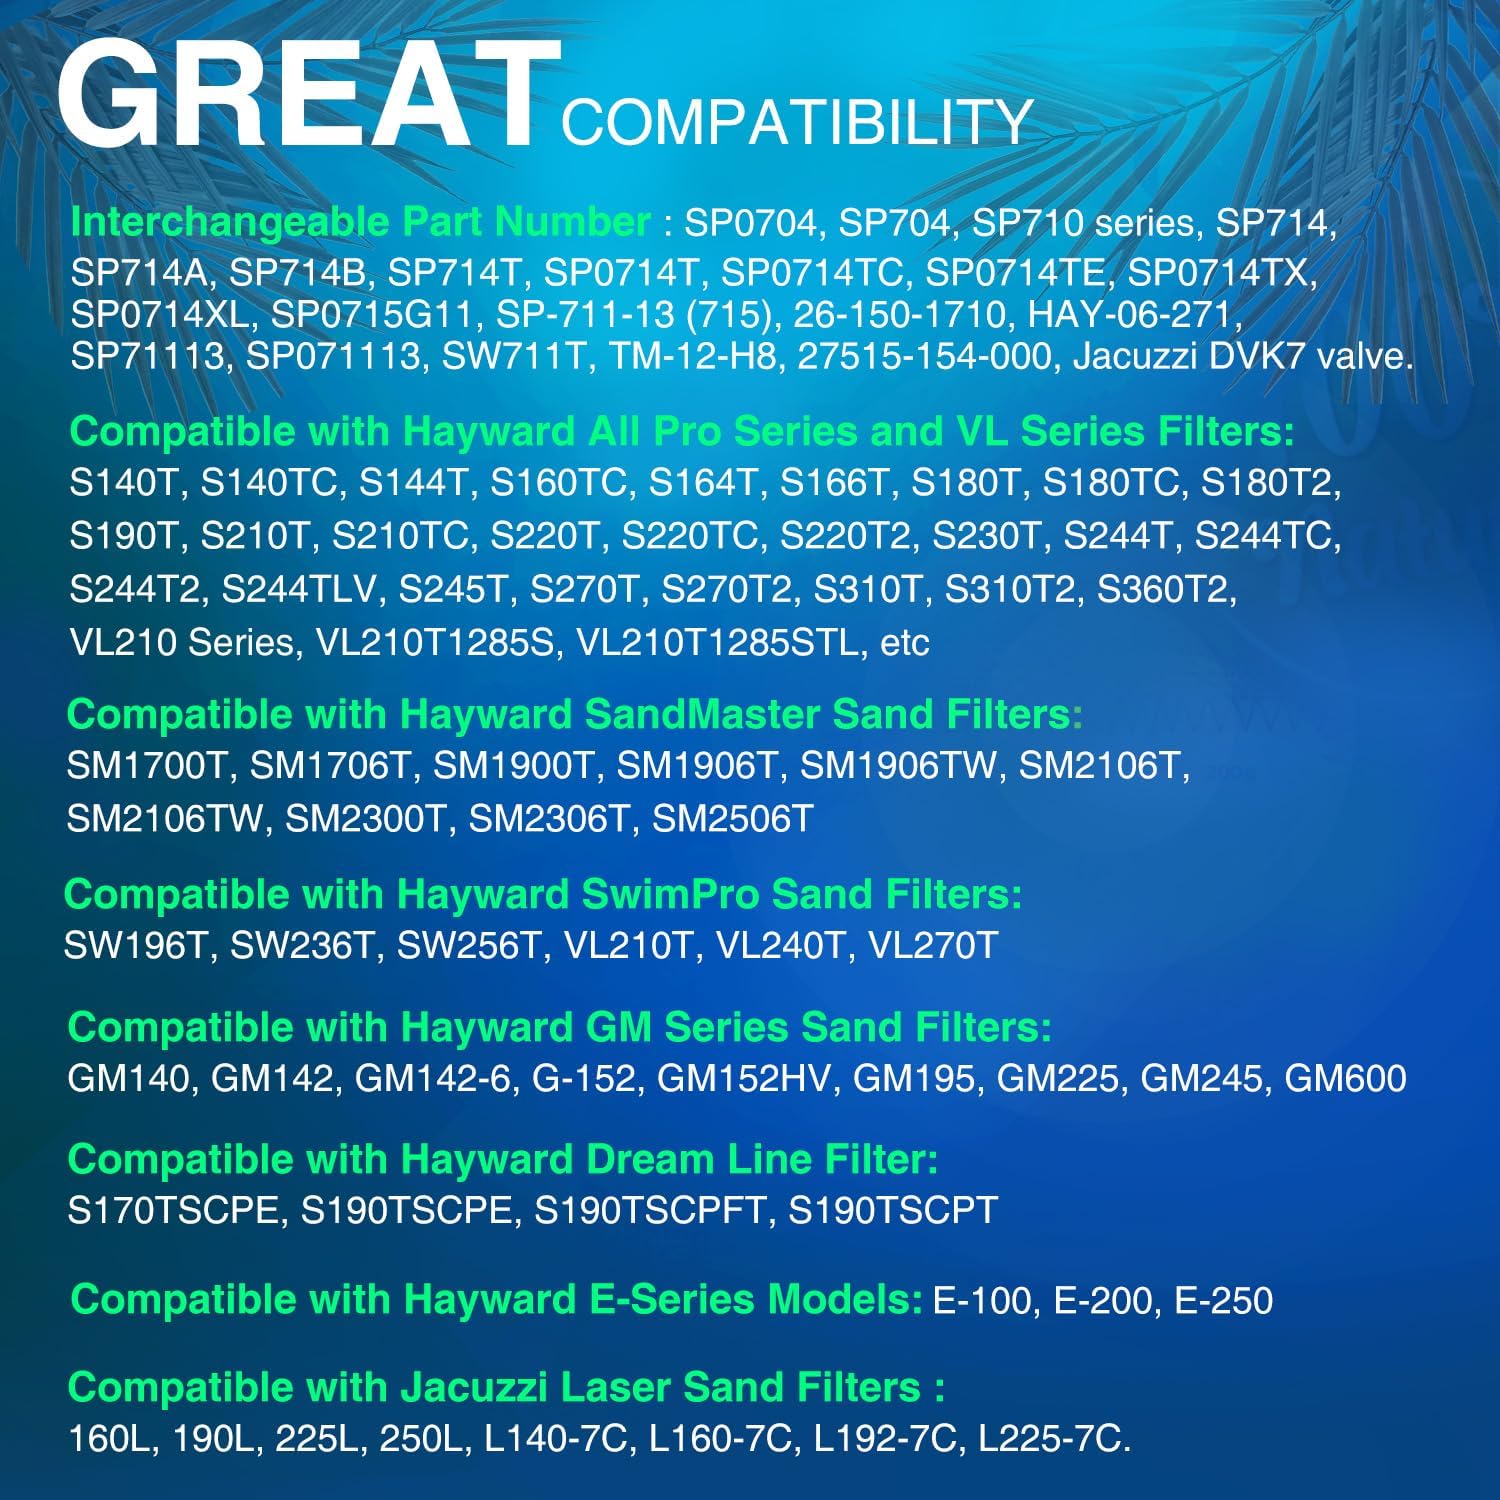
Image 6.2: A comprehensive list of compatible Hayward filter series and interchangeable part numbers for the multiport valve.
- Interchangeable Part Numbers: SP0704, SP704, SP710 series, SP714, SP714A, SP714B, SP0714T, SP0714TC, SP0714TE, SP0714TX, SP0714XL, SP0715G11, SP-711-13 (715), 26-150-1710, HAY-06-271, SP714T, SP71113, SP711-13, SP071113, SW711T, TM-12-H8, 27515-154-000, and Jacuzzi DVK7 valve.
- Compatible with Hayward Pro Series and VL Series Filters: S140T, S140TC, S144T, S160TC, S164T, S166T, S180T, S180TC, S180T2, S190T, S210T, S210TC, S220T, S220TC, S220T2, S230T, S244T, S244TC, S244T2, S244TLV, S245T, S270T, S270T2, S310T, S310T2, S360T2, VL210 Series, VL210T1285S, VL210T1285STL, etc.
- Compatible with Hayward SandMaster Sand Filters: SM1700T, SM1706T, SM1900T, SM1906T, SM1906TW, SM2106T, SM2106TW, SM2300T, SM2306T, SM2506T.
- Compatible with Hayward SwimPro Sand Filters: SW196T, SW236T, SW256T, VL210T, VL240T, VL270T.
- Compatible with Hayward GM Series Sand Filters: GM140, GM142, GM142-6, G-152, GM152HV, GM195, GM225, GM245, GM600.
- Compatible with Hayward Dream Line Filters: S170TSCPE, S190TSCPE, S190TSCPFT, S190TSCPT.
- Compatible with Hayward E-Series Models: E-100, E-200, E-250.
- Compatible with Jacuzzi Laser Sand Filters: 160L, 190L, 225L, 250L, L140-7C, L160-7C, L192-7C, L225-7C.
7. Warranty and Support
sixcow is committed to customer satisfaction and product quality.
- Satisfaction Guarantee: All sixcow products include a 30-Day money-back guarantee.
- Warranty: A 12-Month warranty is provided for quality-related issues.
- Customer Support: For any questions, concerns, or warranty claims, please contact sixcow customer service. Refer to your purchase documentation for specific contact information.
Ask a question about this manual
Ask about setup, troubleshooting, compatibility, parts, safety, or missing instructions. Manuals+ will review the question and use this page’s manual context to help answer it.