1. Product Overview
This document provides instructions for the YSVQHHDV 5000mAh lithium-ion replacement battery, designed for various Xiaomi, Mijia, and Dreame vacuum cleaner models. This battery is specifically compatible with the G9, G10, and 1S series, and also supports T20, V8, V9, V10, K10, and 1C models.
1.1 Key Features and Benefits
- Improved Battery Life: Provides extended operating time for your vacuum cleaner, allowing for larger cleaning areas without frequent recharging.
- Extended Service Life: Helps prolong the overall lifespan of your vacuum cleaner by replacing an aging battery, reducing equipment failures.
- Enhanced Cleaning Performance: Restores the vacuum cleaner's original suction power, ensuring effective cleaning results that may diminish with an aging battery.
- Reduced Downtime: Minimizes interruptions during cleaning caused by insufficient power, improving work efficiency.
1.2 Battery Specifications
- Nominal Capacity: 5000mAh
- Nominal Voltage: 25.2V
- Energy: 70.56Wh
- Weight: Approximately 500g
- Battery Type: Li-Ion (Lithium-Ion)
- Application: Vacuum Cleaner Batteries
- Compatible Models: Xiaomi, Mijia, Dreame Series G9, G10, 1S, T20, V8, V9, V10, K10, 1C
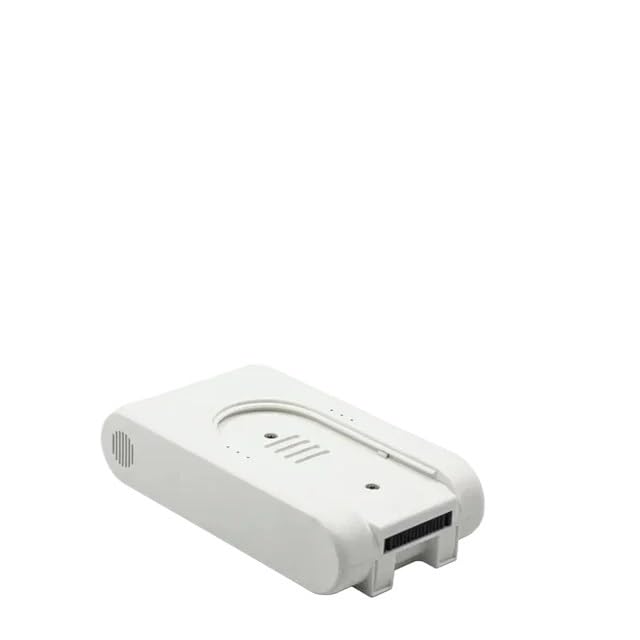
Image 1.1: The YSVQHHDV 5000mAh replacement battery, specifically designed for G9, G10, and 1S vacuum cleaner models.

Image 1.2: A visual comparison of different YSVQHHDV replacement battery models, highlighting compatibility with G9/G10/1S/T20, V8/V9/V10, 1C, and K10 series vacuum cleaners.

Image 1.3: An exploded view showing the internal components of the YSVQHHDV replacement battery, including the circuit board and individual battery cells.
2. Safety Information
Please read and understand all safety instructions before installing or using the battery. Failure to follow these instructions may result in electric shock, fire, or serious injury.
- Do Not Disassemble: Never attempt to open, disassemble, or modify the battery pack. This can cause short circuits, overheating, or fire.
- Avoid Extreme Temperatures: Do not expose the battery to extreme heat (above 60°C / 140°F) or cold (below 0°C / 32°F). Avoid direct sunlight and keep away from heat sources.
- Keep Dry: Do not immerse the battery in water or expose it to moisture.
- Handle with Care: Avoid dropping, puncturing, or crushing the battery. If the battery appears damaged, discontinue use immediately.
- Proper Disposal: Dispose of used batteries according to local regulations. Do not dispose of batteries in household waste or by incineration.
- Use Correct Charger: Only use the original vacuum cleaner charger or a compatible charger specifically designed for lithium-ion batteries.
- Keep Away from Children: Store the battery out of reach of children and pets.
3. Setup and Installation
Before installing the new battery, ensure your vacuum cleaner is turned off and unplugged from any power source. Refer to your vacuum cleaner's original instruction manual for specific battery removal and installation procedures, as steps may vary by model.
3.1 General Installation Steps
- Power Off and Unplug: Ensure the vacuum cleaner is completely powered off and disconnected from the charging cable.
- Locate Battery Compartment: Identify the battery compartment on your vacuum cleaner. This is typically located on the main body or handle.
- Remove Old Battery: Depending on your model, you may need to press a release button, slide a latch, or unscrew a cover to remove the old battery. Carefully pull the old battery out.
- Insert New Battery: Align the new YSVQHHDV replacement battery with the compartment. Ensure the connectors are properly aligned and gently push the battery into place until it clicks or locks securely.
- Secure Compartment: Close any covers or fasten any screws that were removed during the process.
- Initial Charge: It is recommended to fully charge the new battery before its first use.

Image 3.1: An example of a YSVQHHDV replacement battery for V8/V9/V10 series, showing the connection interface for installation.
4. Operating Instructions
Once the battery is installed, your vacuum cleaner is ready for use. For optimal performance and battery longevity, follow these guidelines:
- First Use: Fully charge the battery before the first operation. This helps calibrate the battery's charge indicator.
- Charging: Connect your vacuum cleaner to its original charging dock or adapter. The charging indicator on your vacuum cleaner will typically show the charging status.
- Discharging: For best battery health, avoid completely draining the battery to 0% frequently. Recharge when the power level is low.
- Normal Operation: Use your vacuum cleaner as per its original manufacturer's instructions. The replacement battery will provide comparable or improved run time.
5. Maintenance
Proper maintenance can extend the life and performance of your YSVQHHDV replacement battery.
- Regular Charging: If the vacuum cleaner is not used for an extended period, charge the battery at least once every 3-6 months to prevent deep discharge, which can damage the battery.
- Clean Contacts: Periodically inspect and gently clean the battery contacts on both the battery and the vacuum cleaner with a dry cloth to ensure good electrical connection.
- Storage: Store the battery in a cool, dry place, away from direct sunlight and extreme temperatures. Ideally, store it at around 50% charge if not used for a long time.
- Avoid Overcharging/Over-discharging: Modern lithium-ion batteries have protection circuits, but it's good practice to disconnect the charger once fully charged and avoid letting the battery sit at 0% for extended periods.
6. Troubleshooting
If you encounter issues with your YSVQHHDV replacement battery, consider the following troubleshooting steps:
6.1 Battery Not Charging
- Check Connections: Ensure the battery is securely installed in the vacuum cleaner and the charging cable/dock is properly connected to both the vacuum and a working power outlet.
- Inspect Charger: Verify that the original vacuum cleaner charger is functioning correctly. Try charging another device if possible, or check for visible damage to the charger.
- Clean Contacts: Ensure the charging contacts on both the battery and the vacuum cleaner are clean and free of debris.
- Temperature: Ensure the battery and vacuum cleaner are within the recommended operating temperature range (typically 0-40°C / 32-104°F) for charging.
6.2 Short Run Time
- Full Charge: Confirm the battery is fully charged before use.
- Vacuum Cleaner Mode: High-power or 'Max' modes consume more battery power, resulting in shorter run times. Try using a lower power setting.
- Vacuum Cleaner Condition: A clogged filter, brush roll, or hose can make the motor work harder, increasing power consumption. Clean all components of your vacuum cleaner.
- Battery Age: While this is a new battery, all lithium-ion batteries degrade over time and with charge cycles.
6.3 Vacuum Cleaner Not Turning On
- Battery Charge: Ensure the battery has sufficient charge.
- Battery Installation: Re-check that the battery is correctly and securely installed.
- Vacuum Cleaner Fault: If the battery appears functional (e.g., charges correctly), the issue might be with the vacuum cleaner itself. Refer to your vacuum cleaner's manual or contact its manufacturer for support.
7. Warranty and Support
For any questions, concerns, or warranty claims regarding your YSVQHHDV replacement battery, please contact the seller directly through the platform where you made your purchase. The seller, congyili, is committed to providing support for their products.
Please retain your proof of purchase for warranty purposes.