1. Introduction
The BDFFLY PW-S7235H is a 2-port HDMI KVM Switch designed to allow two computers to share one monitor, one set of USB 3.0 keyboard and mouse, and other USB 3.0 peripherals. This device eliminates the need to constantly plug and unplug cables, streamlining your workspace and enhancing productivity. It supports high-resolution video up to 4K@60Hz and offers flexible switching methods.
2. Package Contents
Please check the package carefully to ensure all items are present and in good condition:
- 1 x BDFFLY PW-S7235H HDMI KVM Switch Host
- 1 x Wired Desktop Controller
- 2 x USB-A to USB-A USB 3.0 Cables (1.2m / 4ft)
- 1 x 3.5mm Audio Cable (1m / 3.3ft)
- 1 x User Manual
- 1 x Warranty Card

Figure 2.1: Contents of the package, including the KVM switch, wired remote, USB 3.0 cables, 3.5mm audio cable, user manual, and warranty card.
3. Product Overview
The BDFFLY PW-S7235H KVM Switch features a compact design with clearly labeled ports for easy connection. Familiarize yourself with the device's front and rear panels.

Figure 3.1: Front and rear panel layout of the KVM switch, showing HDMI input/output, USB 3.0 ports, and control port.
Front Panel:
- CTRL Port: Connects to the wired desktop controller.
- USB 3.0 Ports (x3): For connecting USB peripherals such as keyboard, mouse, printer, USB drive, etc.
- HD OUT: HDMI output port for connecting to your monitor.
- PC 1 / PC 2 Buttons: Manual switching buttons between connected computers.
Rear Panel:
- USB 3.0 (PC 1 / PC 2): USB input ports for connecting to Computer 1 and Computer 2.
- HD IN 1 / HD IN 2: HDMI input ports for connecting to Computer 1 and Computer 2.
4. Setup Instructions
Follow these steps to connect your BDFFLY PW-S7235H KVM Switch:
- Connect Monitor: Connect your monitor to the HD OUT port on the front panel of the KVM switch using an HDMI cable.
- Connect Computers:
- Connect Computer 1's HDMI output to the HD IN 1 port on the rear panel of the KVM switch.
- Connect Computer 1's USB port to the USB 3.0 (PC 1) port on the rear panel of the KVM switch using one of the provided USB-A to USB-A cables.
- Repeat the above steps for Computer 2, connecting its HDMI output to HD IN 2 and its USB port to USB 3.0 (PC 2).
- Connect Peripherals: Connect your USB keyboard, mouse, printer, or other USB 3.0 devices to the three USB 3.0 ports on the front panel of the KVM switch.
- Connect Wired Remote (Optional): Plug the wired desktop controller into the CTRL port on the front panel for convenient remote switching.
- Power On: Ensure all connections are secure. The KVM switch is typically powered via the USB connections from the computers and does not require an external power adapter.

Figure 4.1: Detailed connection diagram showing how to connect two PCs, a monitor, and USB peripherals to the KVM switch.
Note: For optimal performance, ensure all HDMI cables and input/output devices support 4K@60Hz if you intend to use this resolution.
5. Operating Instructions
The BDFFLY PW-S7235H KVM Switch offers two methods for switching between connected computers:
5.1. Button Control
Press the PC 1 or PC 2 button on the front panel of the KVM switch to switch to the corresponding computer. The LED indicator next to the button will illuminate to show which computer is currently active.
5.2. Wired Remote Control
If you have connected the wired desktop controller, simply press the button on the remote to switch between Computer 1 and Computer 2. This provides a convenient way to switch without reaching for the KVM unit itself.

Figure 5.1: Demonstrates the two switching methods: direct button press on the unit and using the wired desktop controller.
Note: This KVM Switch does not support hotkey switching or ultra-wide screen resolutions.
6. Key Features
6.1. Ultra HD 4K@60Hz Resolution
The KVM switch supports resolutions up to 4K (3840x2160) at 60Hz, ensuring a clear and smooth visual experience. It is backward compatible with lower resolutions such as 3840x2160@30Hz and 1920x1080P@60Hz. The device is compatible with HDMI 2.0 and HDCP 2.2 standards.

Figure 6.1: Visual representation of the KVM switch's support for 4K@60Hz resolution.
6.2. USB 3.0 Hubs for Device Sharing
Equipped with three USB 3.0 ports, this KVM switch allows you to share various USB devices, including keyboards, mice, scanners, printers, and USB drives, between the two connected computers. USB 3.0 offers significantly faster data transfer speeds compared to USB 2.0.
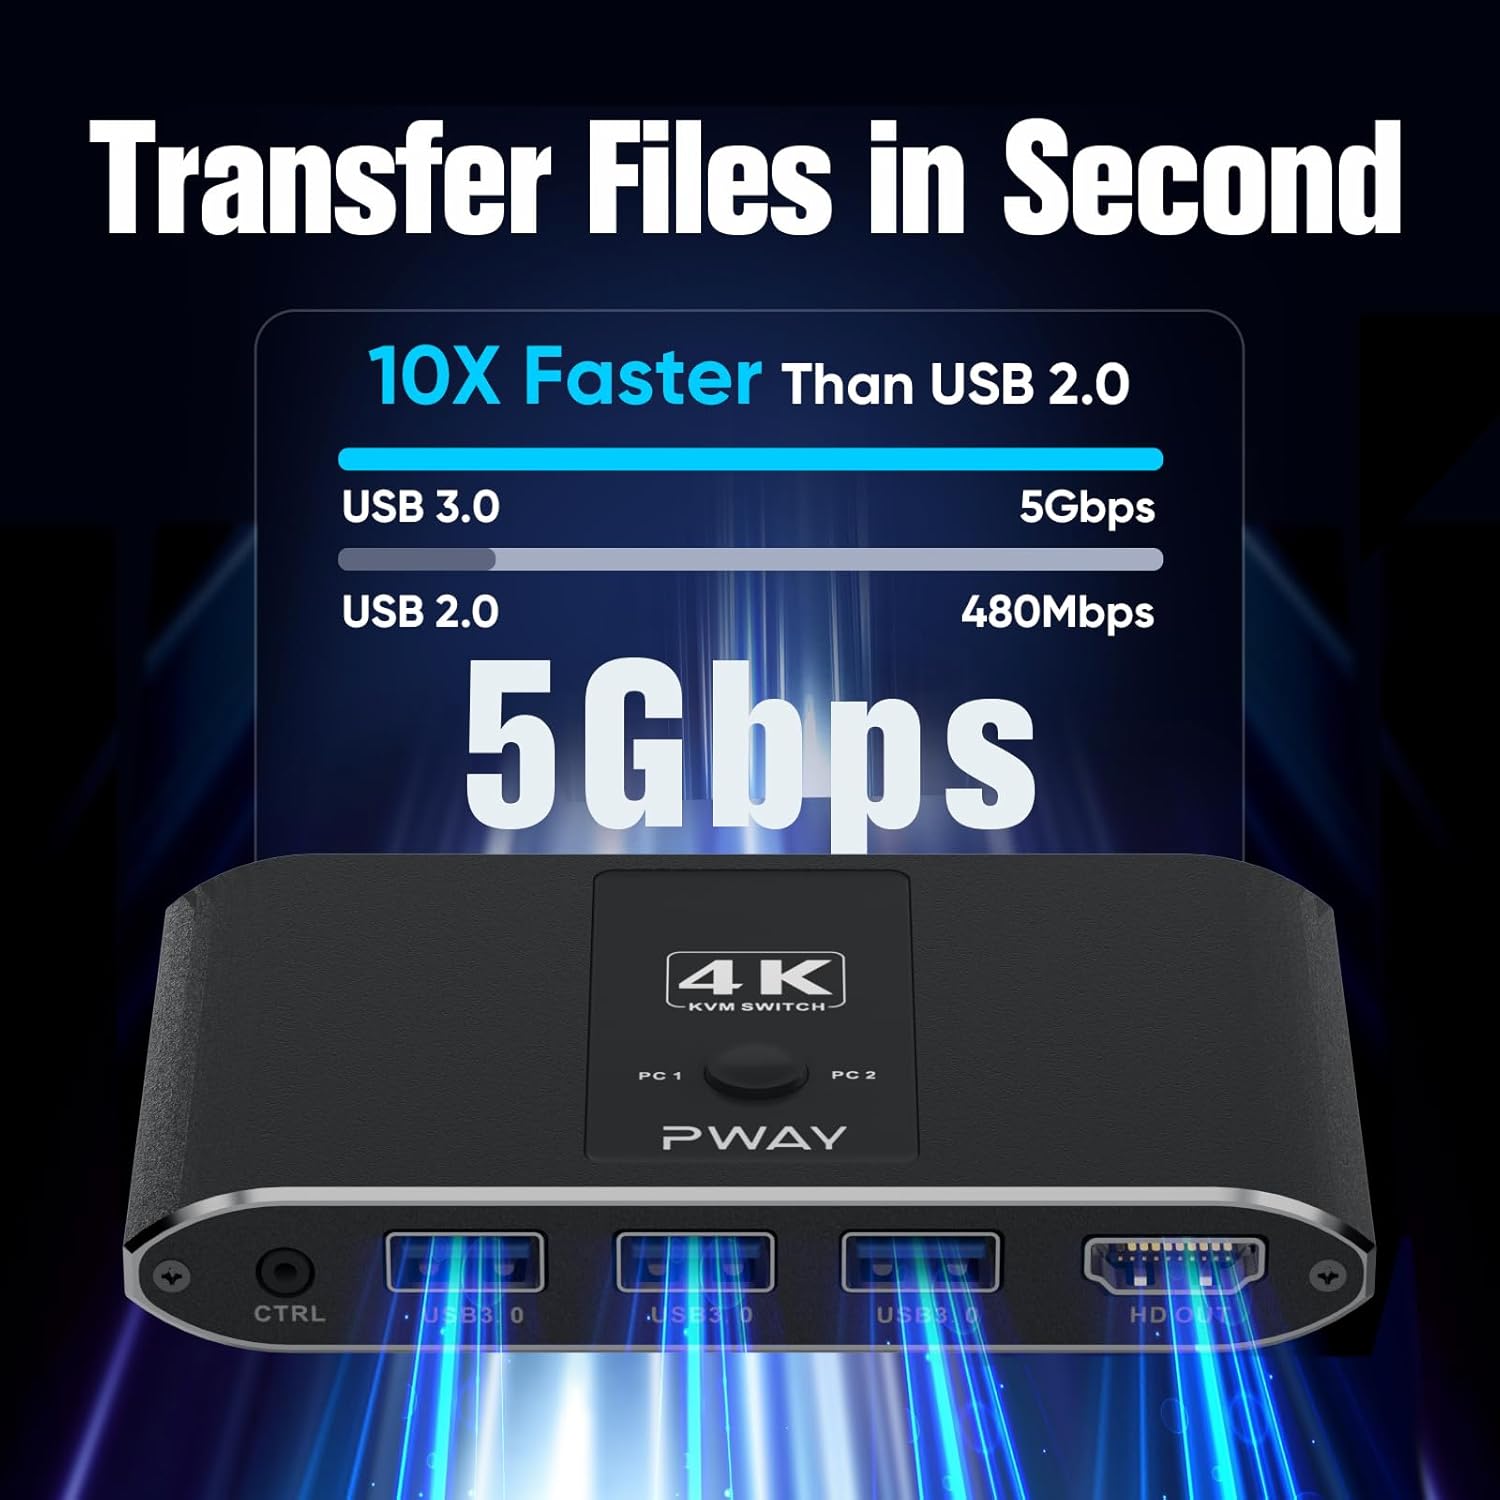
Figure 6.2: Comparison of USB 3.0 (5Gbps) and USB 2.0 (480Mbps) transfer speeds, highlighting the KVM's USB 3.0 capability.
6.3. Adaptive EDID
The KVM switch features adaptive EDID (Extended Display Identification Data) functionality. This allows the switch to automatically identify and match various display devices, enhancing the stability and smoothness of image transmission and reducing compatibility issues.
7. Compatibility
The BDFFLY PW-S7235H KVM Switch is widely compatible with various input devices and operating systems:
- Input Devices: PCs, Laptops, PS4, and other HDMI-enabled devices.
- Operating Systems: Windows, Linux, Mac, Unix, DOS.

Figure 7.1: Depiction of the KVM switch in a multi-computer setup, highlighting its wide compatibility with different operating systems.
8. Specifications
| Feature | Detail |
|---|---|
| Model | PW-S7235H (BD-S7235H-EU) |
| HDMI Version | HDMI 2.0 |
| HDCP Version | HDCP 2.2 |
| Max Resolution | 4K@60Hz (3840x2160@60Hz) |
| Backward Compatibility | 3840x2160@30Hz, 1920x1080P@60Hz, etc. |
| USB Ports | 3 x USB 3.0 (for peripherals), 2 x USB 3.0 (for PC connection) |
| Switching Methods | Button Control, Wired Remote Control |
| EDID Support | Adaptive EDID |
| Operating System Support | Windows, Linux, Mac, Unix, DOS |
| Product Dimensions | 1 x 1 x 1 cm (approx. 6.5 x 6 inch based on image); 259 g |
| Color | Black |
| Material | Stainless Steel (housing) |
| Power Supply | USB Powered (no external adapter required) |
9. Troubleshooting
If you encounter issues with your KVM switch, please refer to the following common problems and solutions:
- No Display on Monitor:
- Ensure all HDMI cables are securely connected between the computers, KVM switch, and monitor.
- Verify that the correct input source is selected on your monitor.
- Try restarting the connected computers.
- Check if your HDMI cables support the desired resolution (e.g., 4K@60Hz).
- Keyboard/Mouse Not Responding:
- Ensure the USB-A to USB-A cables are securely connected from both computers to the KVM switch.
- Verify that the keyboard and mouse are plugged into the correct USB 3.0 ports on the front of the KVM switch.
- Try connecting the keyboard/mouse directly to the computer to confirm they are functional.
- Some specialized gaming keyboards/mice may require direct connection or specific drivers; try a standard keyboard/mouse first.
- Switching Issues:
- Ensure the KVM switch is receiving power (indicated by LED lights).
- If using the wired remote, ensure it is properly connected to the CTRL port.
- Wait a few seconds after switching for the display and peripherals to synchronize.
- Resolution/Refresh Rate Problems:
- Confirm that your computers' graphics cards, monitor, and HDMI cables all support the desired resolution and refresh rate (e.g., 4K@60Hz).
- Adjust the display settings on your computer to a lower resolution or refresh rate to test compatibility.
10. Maintenance
To ensure the longevity and optimal performance of your BDFFLY PW-S7235H KVM Switch, follow these maintenance guidelines:
- Keep the device in a cool, dry place, away from direct sunlight, high temperatures, and humidity.
- Avoid exposing the device to water or other liquids.
- Clean the device with a soft, dry cloth. Do not use abrasive cleaners or solvents.
- Do not attempt to open or repair the device yourself. Refer to qualified personnel for service.
11. Warranty and Support
Your BDFFLY PW-S7235H KVM Switch comes with a warranty. Please refer to the included Warranty Card for specific terms and conditions.
For any questions, concerns, or technical support, please contact BDFFLY customer service directly with your order number. We are committed to providing timely and satisfactory solutions.
Contact information can typically be found on the Warranty Card or the seller's platform where the product was purchased.