
Blomiky C150
Blomiky C150 Smart Battery Balance Charger User Manual
Model: C150
Product Overview
The Blomiky C150 is a versatile AC/DC smart battery balance charger and discharger designed for various battery types commonly used in RC cars, drones, and boats. It supports 1S-6S LiPo/LiFe/LiHv batteries, 1S-15S NiCd/NiMH batteries, and 2V-20V Pb batteries. This charger offers multiple functions including charge, discharge, balance charge, fast charge, and storage charge modes, along with memory function for NiCd/NiMH battery cycles.
Its compact design and comprehensive features make it an essential tool for hobbyists requiring precise battery management.
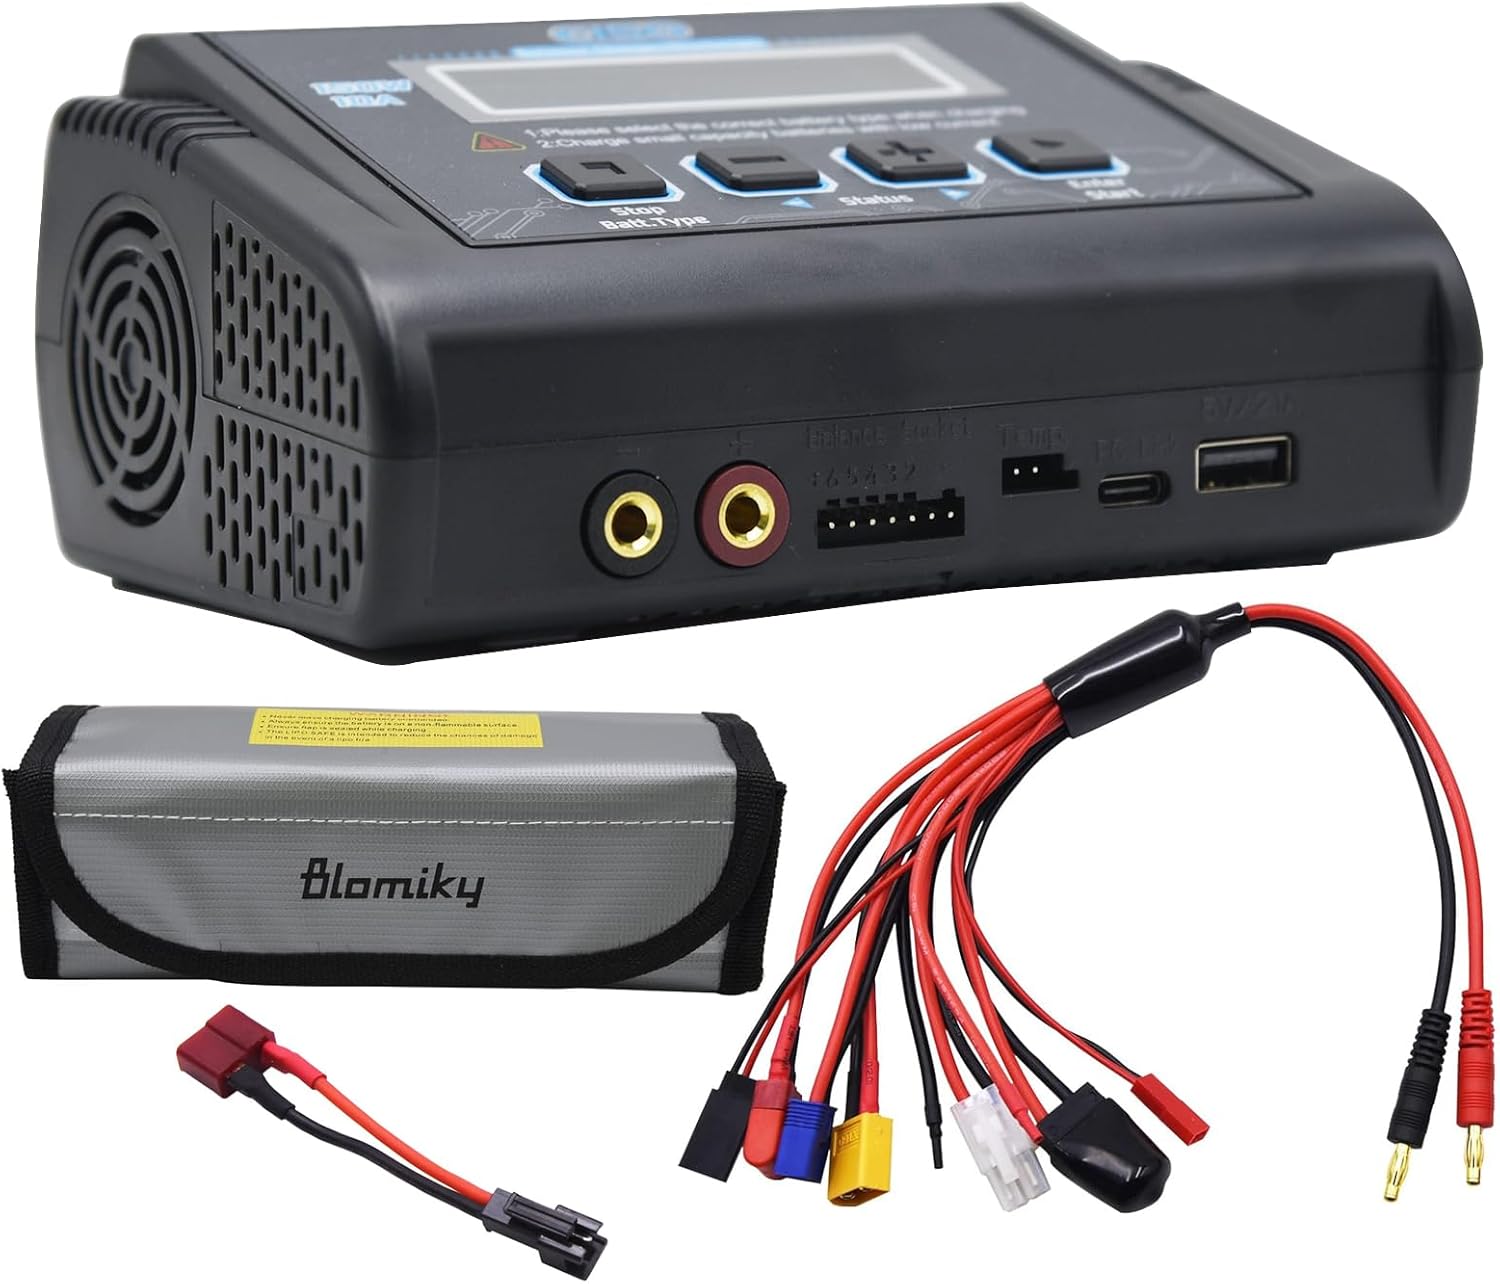
Figure 1: Blomiky C150 Smart Battery Balance Charger and accessories.
Package Contents
Upon opening the package, please verify that all the following items are included:
- 1 x Blomiky C150 Main Charger Device
- 1 x AC Power Cord
- 1 x XT60 DC Cable
- 1 x Lipo Safe Case
- 1 x 1-to-8 Octopus Multi-Charging Cable (with TRX, T-Plug, Futaba, EC3, XT60, JST, Tamiya, and DIY bare wire connectors)
- 1 x 2S-6S XH Balance Charge Board and Cable
- Various adapter cables: 4.0mm to T, T to XT60, T to SM-2P, T to Alligator Clip, Tamiya, XH-7P to XH-7P, XH-7P to XH-3P, 4P, 5P, 6P board.

Figure 2: All components included in the Blomiky C150 package.
Safety Instructions
Please read and understand all safety warnings and instructions before using the Blomiky C150 charger. Improper use can lead to fire, injury, or property damage.
- Always operate the charger in a well-ventilated area, away from flammable materials.
- Never leave the charger unattended while in use.
- Ensure the correct battery type and cell count are selected before charging. Incorrect settings can cause severe damage to the battery and charger.
- Do not charge damaged, swollen, or leaking batteries.
- Keep the charger away from water, moisture, and extreme temperatures.
- Use only the original or approved charging cables and adapters.
- Disconnect the charger from the power source when not in use.
- Keep out of reach of children.
Setup
Follow these steps to set up your Blomiky C150 charger:
- Place the charger on a stable, non-flammable surface.
- Power Connection:
- For AC power (100-240V): Connect the provided AC power cord to the charger's AC input port on the back and then to a wall outlet. Ensure the power switch is in the OFF position before connecting.
- For DC power (11V-18V): Connect the XT60 DC cable to the DC input port on the side of the charger and to a suitable DC power source (e.g., a car battery or power supply).
- Once connected, switch the power button to the ON position. The LCD screen will illuminate.
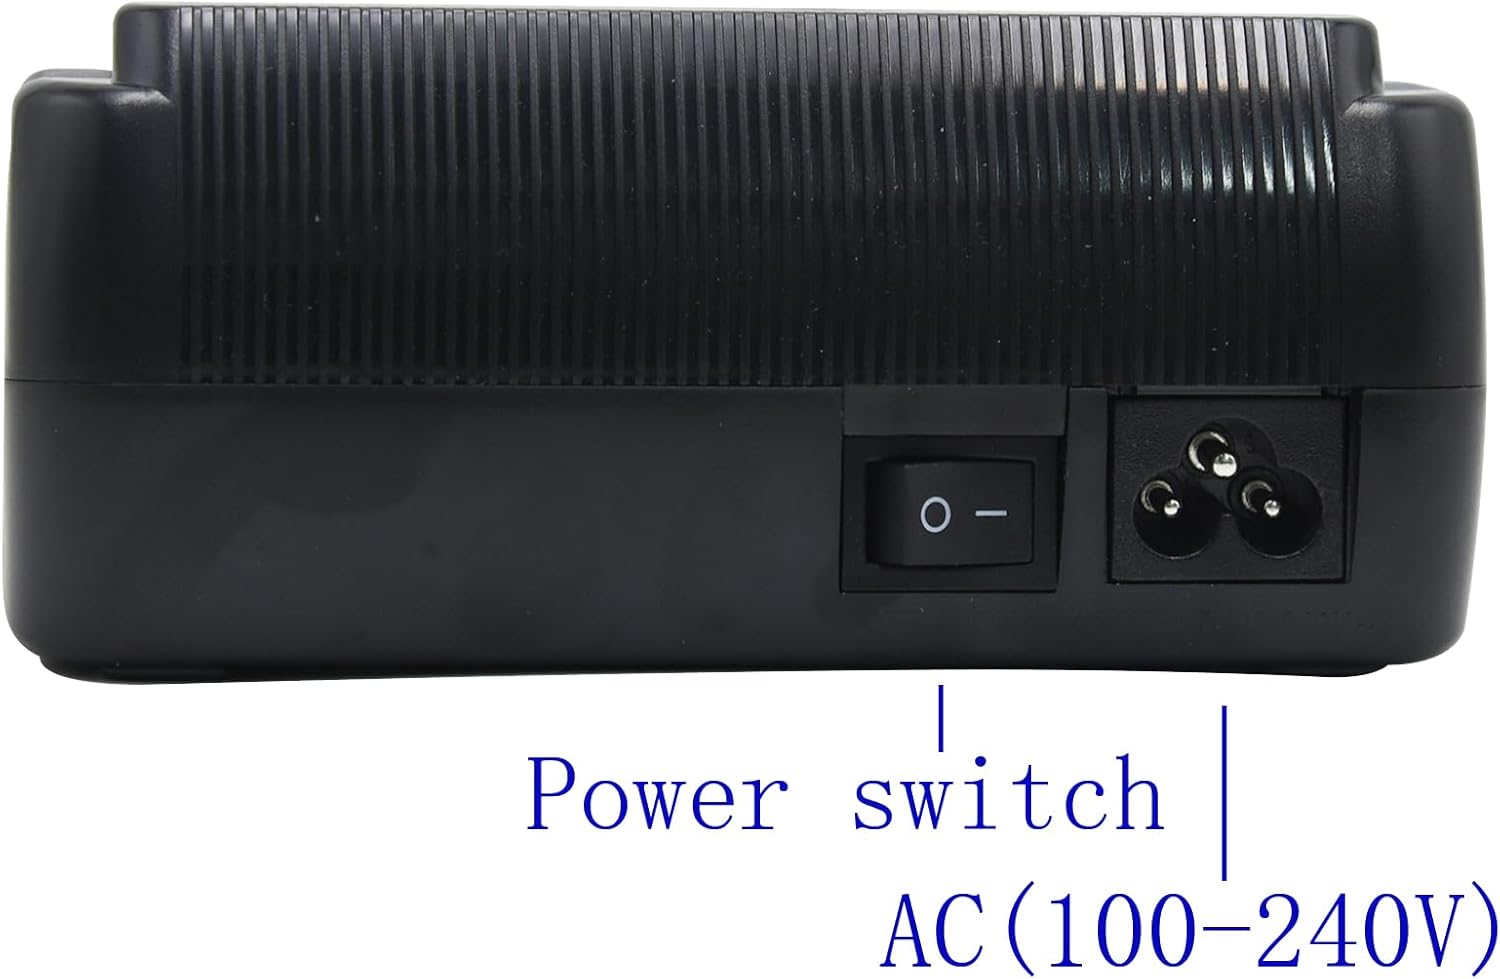
Figure 3: Rear view of the charger with AC input and power switch.

Figure 4: Side view of the charger with DC input port.
Operating Instructions
The Blomiky C150 features a 1602 LCD screen and four control buttons: Stop/Batt.Type, Status (left/right arrows), and Enter/Start.
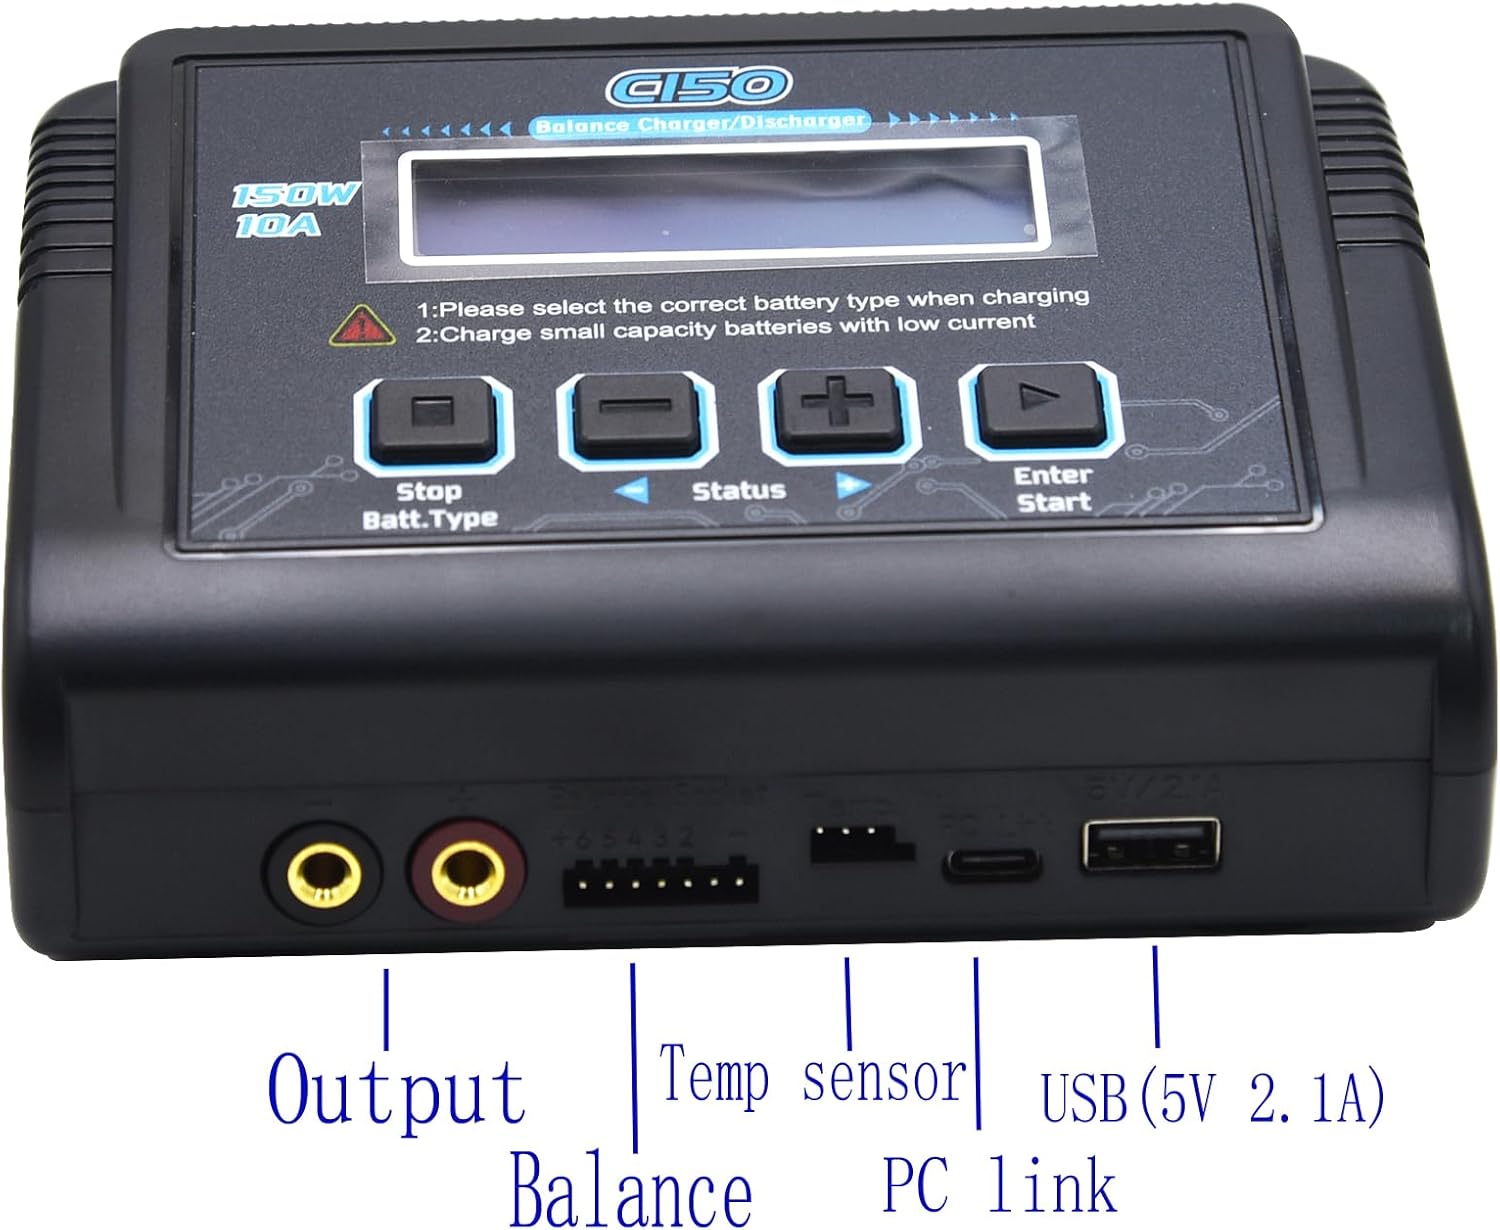
Figure 5: Front panel of the charger with controls and ports.
Charging Lithium Batteries (LiPo/LiFe/LiHv)
For Lithium batteries, it is recommended to use the balance charge mode for optimal battery health and safety.
- Connect the main discharge plug of your Lithium battery to the charger's output port.
- Connect the balance plug of your Lithium battery to the charger's balance port. Both connections are required for balance charging.
- Press the "Stop/Batt.Type" button repeatedly until "PROGRAM SELECT Lithium BATT" appears on the LCD screen.
- Press the "Enter/Start" button.
- Use the "Status" (left or right arrow) buttons to navigate and choose either "Lipo Balance CHG" (for balance charging) or "Lipo Charge" (for standard charging). Balance charging is highly recommended.
- Long press the "Enter/Start" button for 3 seconds. The screen will display "Battery Check, Wait.....".
- Wait for 5-10 seconds for the charger to analyze the battery.
- Once the battery check is complete, press the "Enter/Start" button again to begin the charging process.

Figure 6: Lithium battery connected for charging (battery not included).
Charging NiMH/NiCd Batteries
Follow these steps to charge NiMH or NiCd batteries:
- Connect the NiMH/NiCd battery to the charger's output port.
- Press the "Stop/Batt.Type" button repeatedly until "PROGRAM SELECT NiMH BATT" or "NiCd BATT" appears on the LCD screen.
- Press the "Enter/Start" button.
- Use the "Status" (left or right arrow) buttons to adjust the charging current if necessary.
- Long press the "Enter/Start" button for 3 seconds to confirm and begin charging.
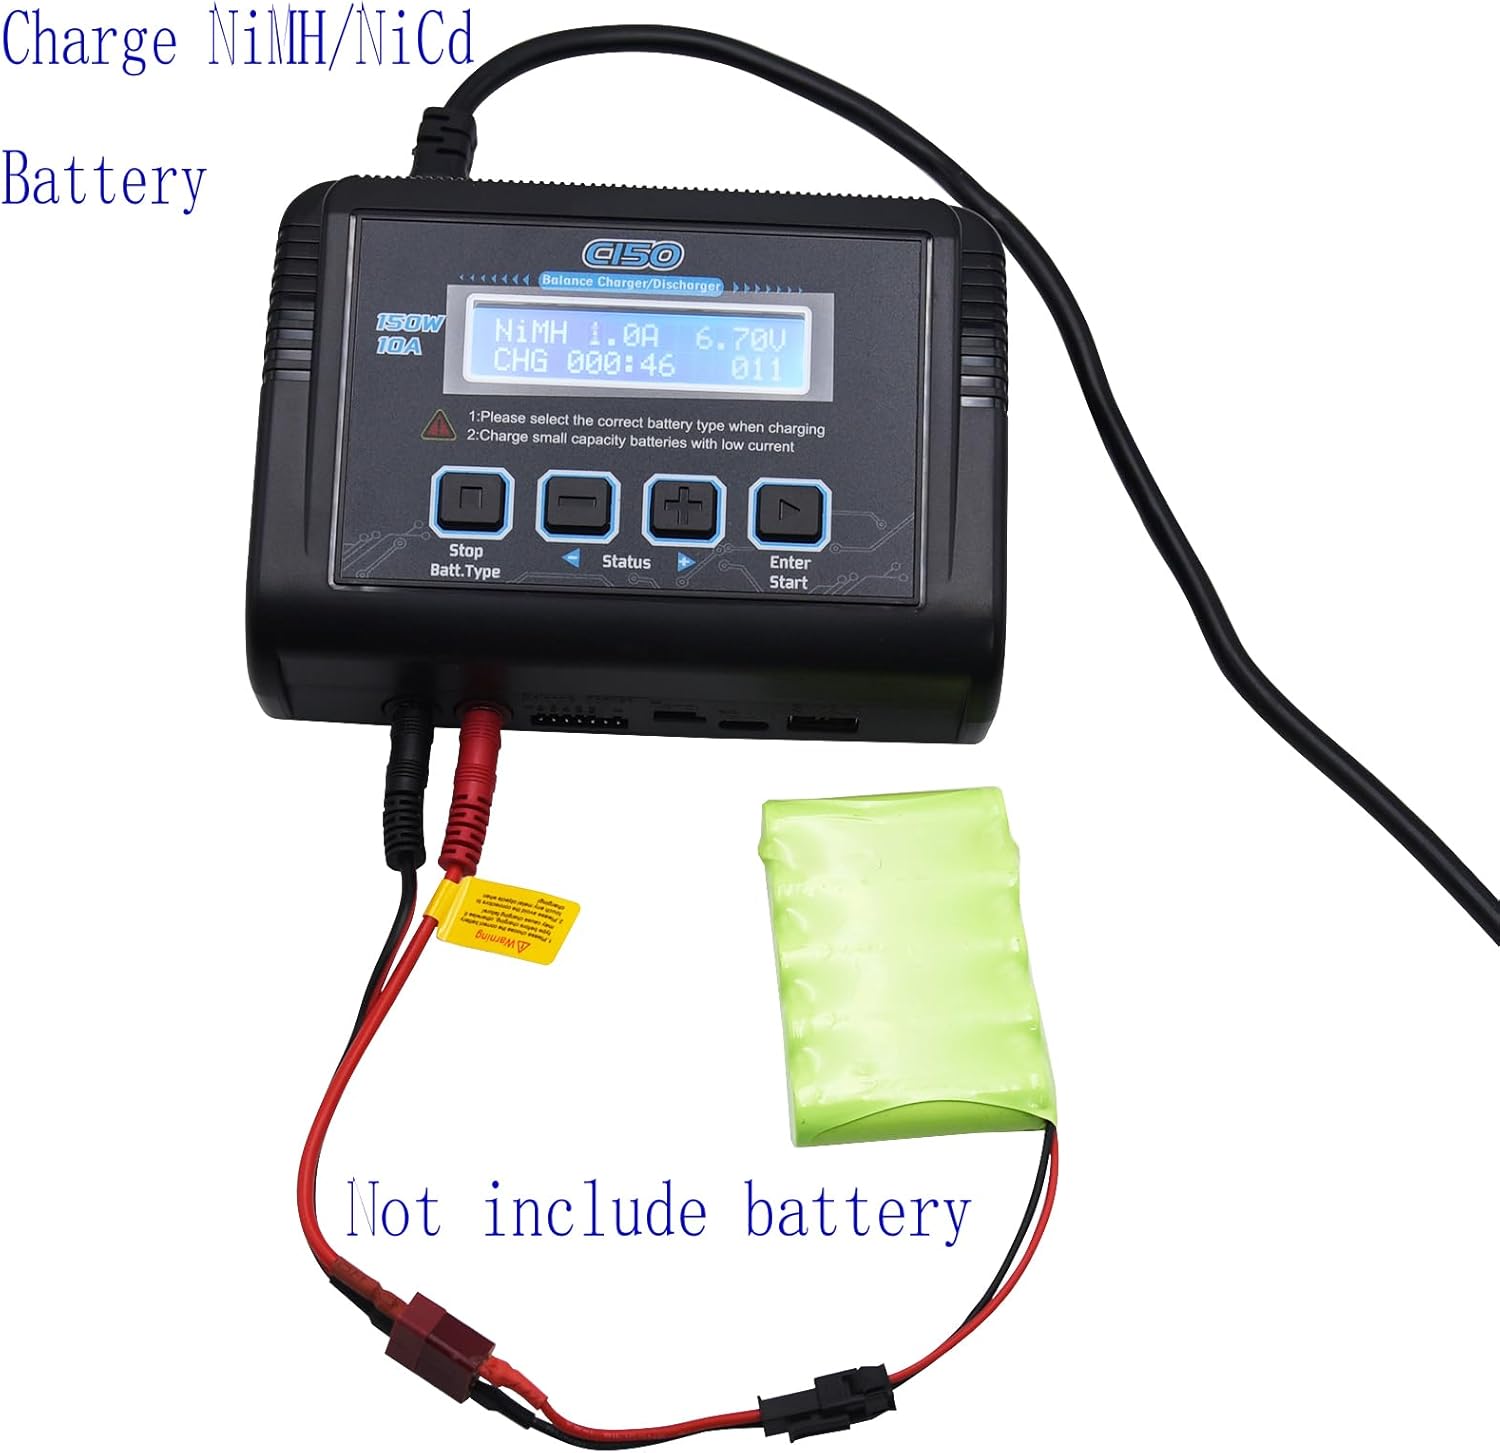
Figure 7: NiMH/NiCd battery connected for charging (battery not included).
Advanced Voltage Control (For Experts Only)
The charger allows users to set the end voltage for Lithium batteries. The maximum per cell is 4.2V, and users can set a range from 3.8V to 4.2V. This feature is intended for expert users only and should be used with caution.
Maintenance
Proper maintenance ensures the longevity and safe operation of your Blomiky C150 charger:
- Cleaning: Regularly wipe the charger's exterior with a soft, dry cloth. Do not use harsh chemicals or abrasive cleaners. Ensure no dust or debris accumulates in the ventilation openings.
- Storage: Store the charger in a cool, dry place away from direct sunlight and extreme temperatures. When not in use for extended periods, disconnect it from the power source.
- Cable Inspection: Periodically inspect all cables and connectors for any signs of wear, damage, or corrosion. Replace damaged cables immediately.
Troubleshooting
If you encounter issues with your Blomiky C150 charger, consider the following common troubleshooting steps:
- Charger Not Powering On:
- Ensure the AC power cord or DC input cable is securely connected.
- Verify that the power outlet or DC power source is functional.
- Check the power switch on the back of the charger is in the ON position.
- Battery Not Charging:
- Confirm that the battery's main discharge plug and balance plug (for Lithium batteries) are correctly and securely connected to the charger.
- Verify that the correct battery type and charging mode are selected on the charger's LCD screen.
- Check if the battery itself is damaged or over-discharged.
- Error Messages on LCD:
- Refer to the charger's display for specific error codes or messages. These usually indicate an issue with the battery connection, battery type selection, or an internal fault.
- Disconnect and reconnect the battery and restart the charging process.
If problems persist after attempting these steps, please contact customer support.
Specifications
| Feature | Specification |
|---|---|
| Model | C150 |
| AC Input Voltage Range | 100-240V |
| DC Input Voltage Range | 11V-18V |
| Charge Power Limit | AC Max 150W, DC Max 150W |
| Discharge Power Limit | Max 10W |
| Charge Current Range | 0.1-10A |
| Discharge Current Range | 0.1-2A |
| Supported Battery Types | LiPo, Li-Ion, LiFe, LiHv (1S-6S); NiMH/Ni-Cd (1S-15S); Pb (2V-20V) |
| Display | 1602 LCD Screen |
| Controls | 4 Buttons |
| Main Device Dimensions (L x W x H) | 145 x 105 x 64 mm (approx. 5.7 x 4.1 x 2.5 inches) |
| Item Weight | 460 grams (approx. 1.01 pounds) |
Warranty and Support
For warranty information and technical support, please refer to the official Blomiky website or contact the seller directly. Keep your purchase receipt as proof of purchase.
You can visit the Blomiky Store for more information: Blomiky Store on Amazon
Ask a question about this manual
Ask about setup, troubleshooting, compatibility, parts, safety, or missing instructions. Manuals+ will review the question and use this page’s manual context to help answer it.