
1. Introduction
Thank you for choosing the HOGYME Outdoor Lean-to Pergola Gazebo. This manual provides essential information for the safe assembly, operation, and maintenance of your new gazebo. Please read these instructions thoroughly before beginning assembly and retain them for future reference.
2. Safety Information
WARNING: Failure to follow these safety instructions may result in injury or damage to the product.
- Always secure the gazebo to a stable foundation using the provided ground screws to prevent it from tipping over in strong winds.
- Be cautious during assembly and disassembly, as components may be heavy or sharp. Wear appropriate protective gear, such as gloves.
- Do not use the gazebo in extreme weather conditions, including severe winds, heavy snow loads exceeding its capacity, or intense thunderstorms, to avoid potential hazards.
- Ensure all connections are tightened securely before use. Periodically check and re-tighten fasteners.
- Keep children and pets away from the assembly area to prevent accidents.
3. Package Contents
Verify that all components listed below are present and undamaged before beginning assembly. The product is shipped in two parcels; please ensure both have arrived.
- 1 x Outdoor Pergola Frame and Roof Components
- 1 x User Manual (this document)
- 2 x Pair of Gloves
- All necessary hardware (screws, bolts, nuts, ground anchors)
4. Setup and Assembly Instructions
Assembly requires a minimum of two adults. Do not attempt to assemble alone. It is recommended to lay out all parts and identify them according to the parts list (not included in this manual, refer to the physical manual provided in the package) before starting.
4.1 Preparation
- Choose a level and stable surface for installation.
- Unpack all components carefully and check against the parts list. If any parts are missing or damaged, contact customer support immediately.
- Gather necessary tools (e.g., wrench, screwdriver, ladder).
4.2 Frame Assembly
Begin by assembling the main support frame. Do not fully tighten all bolts until the entire frame is assembled to allow for minor adjustments.
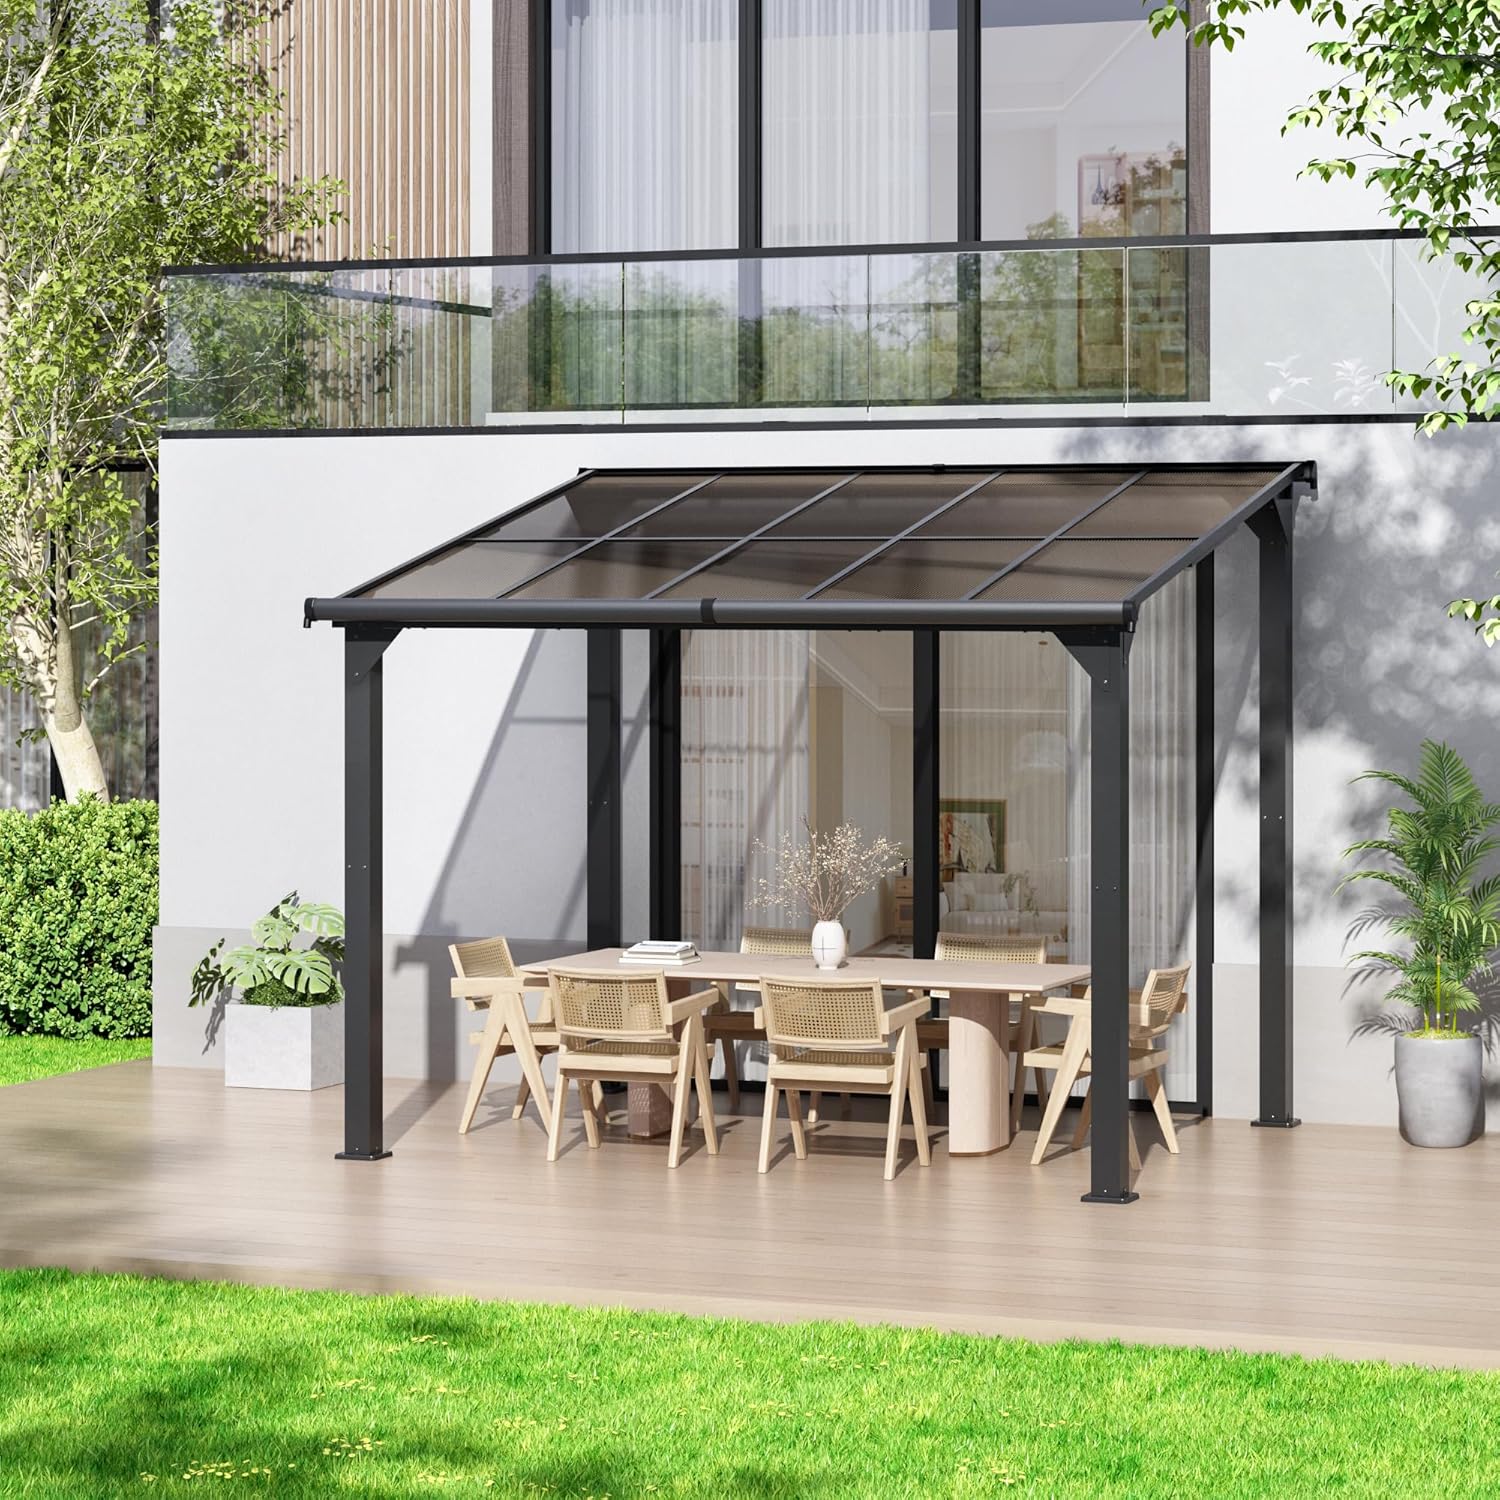
Image 1: The HOGYME Outdoor Lean-to Pergola Gazebo installed on a patio, providing shaded outdoor living space.
4.3 Roof Panel Installation
The gazebo features sunlight panels designed for light transmission and UV protection. Install these panels according to the detailed diagrams in your physical manual. Ensure panels are correctly oriented and seated in their channels to prevent water leakage.

Image 2: A close-up view of the gazebo's roof structure, highlighting its multi-functional design for anti-UV protection, smooth water drainage, fire resistance, waterproofing, and wind resistance up to 40-70 mph.
4.4 Securing the Gazebo
Once the frame and roof are assembled, securely anchor the gazebo to the ground using the provided pre-drilled bases and ground screws. This step is critical for stability, especially in windy conditions.

Image 3: A visual comparison demonstrating the gazebo's performance in different seasons. The left side shows the roof holding up to 7 inches of snow in winter, while the right side illustrates the heavily tinted roof blocking UPF 50+ and 99% UV rays in summer.
5. Operating Instructions
Your HOGYME Lean-to Pergola Gazebo is designed to provide a comfortable outdoor space. The sloped sunlight roof allows for natural light while offering protection from UV rays and light rain. The built-in gutters facilitate water drainage, preventing accumulation on the roof.

Image 4: The gazebo's design includes a pre-configured structure, indicating its potential for expanding coverage with additional accessories, allowing for a customizable outdoor space.
6. Maintenance
- Cleaning: Clean the frame and roof panels regularly with mild soap and water. Avoid abrasive cleaners or harsh chemicals that could damage the finish or materials.
- Fastener Checks: Periodically inspect all bolts, screws, and connections. Re-tighten any loose fasteners to maintain structural integrity.
- Gutter Maintenance: Ensure the built-in gutters are clear of debris (leaves, twigs) to allow for proper water drainage.
- Seasonal Care: While designed for all-weather use, consider removing heavy snow accumulation from the roof to prevent excessive stress. In areas with extreme weather, additional winterization or temporary disassembly may be advisable.
7. Troubleshooting
7.1 Difficulty During Assembly / Misaligned Holes
- Solution: Do not fully tighten any bolts until all components for a section are loosely assembled. This allows for minor adjustments to align holes. If holes are significantly misaligned, double-check part orientation against the manual's diagrams. If the issue persists, contact customer support for assistance.
7.2 Water Leakage from Roof
- Solution: Ensure all roof panels are correctly installed and seated in their channels. Check that all sealing strips (if applicable) are properly in place. Verify that the built-in gutters are clear of debris and functioning correctly.
7.3 Gazebo Instability in Wind
- Solution: Confirm that the gazebo is securely anchored to a stable foundation using all provided ground screws. Ensure the ground screws are fully engaged. In very high winds, it is recommended to take additional precautions or temporarily remove the roof panels if possible.
7.4 Missing or Damaged Parts
- Solution: Immediately contact HOGYME customer support with your purchase details and a description of the missing or damaged parts. Do not attempt to force incompatible parts or use the gazebo with compromised components.
8. Specifications
| Feature | Detail |
|---|---|
| Brand | HOGYME |
| Model Number | HGP078 |
| Product Dimensions (L x W x H) | 119.7" x 163.3" x 97.24" (8x10 FT variant) |
| Item Weight | 148.5 Pounds |
| Frame Material | Iron Pipe, Aluminum Alloy |
| Roof Material | Hollow Sheet (Sunlight Panels) |
| Color | Frosted Gray |
| Water Resistance Level | Waterproof |
| Ultraviolet Light Protection | Yes (UPF 50+, 99% UV block) |
| Wind Resistance | 40-70 mph |
| Assembly Required | Yes |
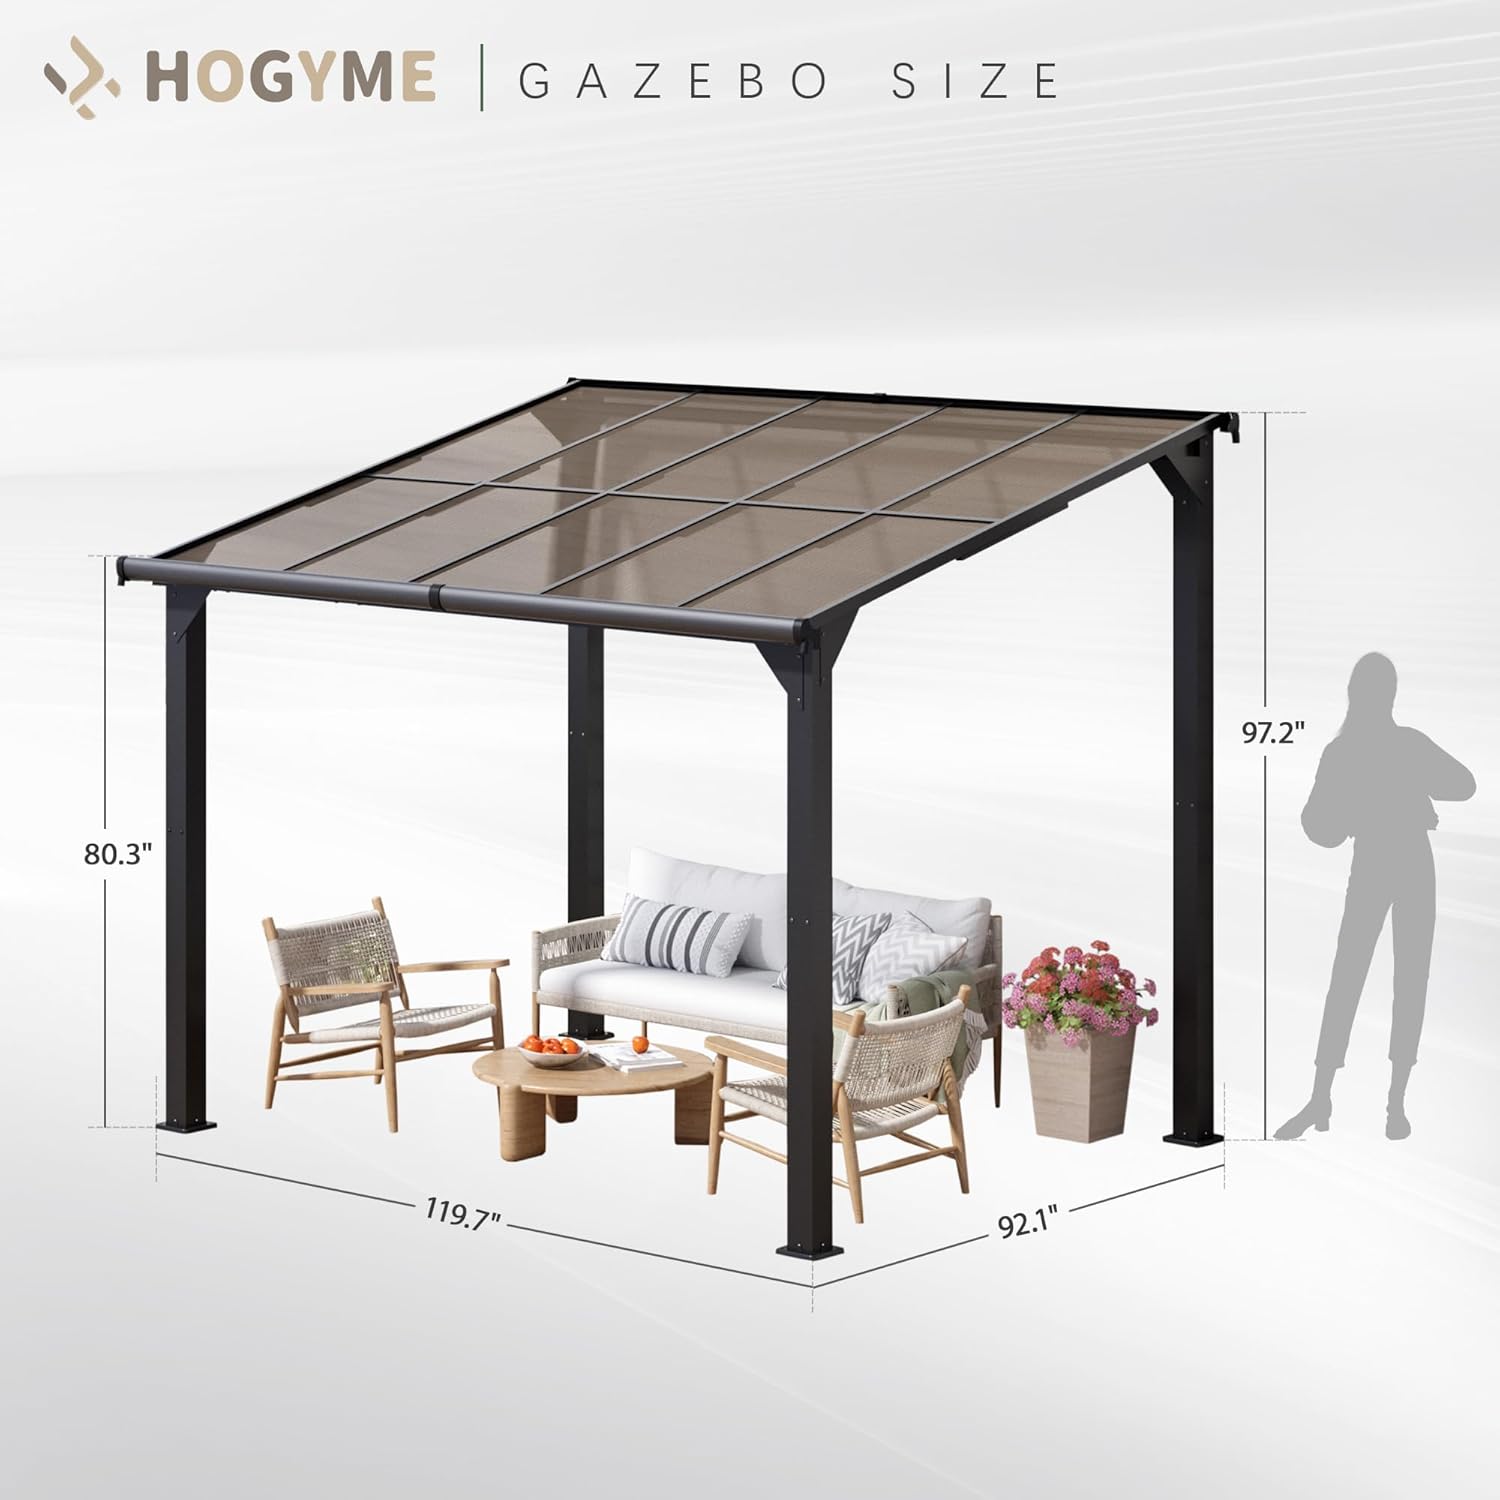
Image 5: A detailed diagram illustrating the key dimensions of the HOGYME gazebo, including height, length, and width, for planning and installation purposes.
9. Warranty and Support
For warranty information, please refer to the documentation provided with your purchase or contact HOGYME customer support directly. If you have any questions, require assistance with assembly, or need to report missing/damaged parts, please reach out to our customer service team.
Contact information for support can typically be found on the product packaging or the retailer's website where the product was purchased.