1. Important Safety Information
Please read and understand all instructions and warnings before assembling and using this greenhouse. Failure to follow these instructions may result in injury or product damage.
- Always follow assembly instructions carefully to avoid injury from sharp edges or heavy components.
- Ensure the greenhouse is properly anchored to prevent damage or injury from high winds.
- Be aware of potential UV exposure and chemical treatments on the greenhouse material.
- Always maintain proper ventilation to prevent overheating and potential fire hazards.
- Keep children and pets away from the assembly area.
- Wear appropriate safety gear, such as gloves and eye protection, during assembly.
2. Product Overview & Features
The Yardenaler 8x16 FT Polycarbonate Aluminum Greenhouse Kit is designed to provide an optimal environment for plant growth and versatile gardening space. Its robust construction ensures durability and functionality.
Key Features:
- Heavy Duty Construction: The frame is made of high-quality, corrosion and weather-resistant gray powder-coated thickened aluminum, ensuring rust resistance and stability in all climates. Thick polycarbonate panels with a diffusion pattern provide extra warmth and prevent frost.
- Two Adjustable Roof Vents: Equipped with two adjustable roof vents for ventilation, featuring a pole-less mode with pulleys. These can be adjusted to a suitable angle to regulate airflow and create an ideal growth environment. They can be mounted in any panel for customization.
- Innovative Structure: Features an upgraded swing-out lockable door for easier access and enhanced security. The overall structure has been optimized to shorten the installation process.
- Versatile Gardening Space: Ideal for growing flowers, vegetables, and other plants. It also offers spacious storage for garden tools and equipment, and can serve as a relaxing area for your family.
3. Specifications
| Specification | Detail |
|---|---|
| Brand | Yardenaler |
| Model Number | PG0101-15GY |
| Size | 8x16 FT |
| Product Dimensions (L x W x H) | 189.56" x 97.3" x 90.5" |
| Frame Material | Aluminum |
| Cover Material | Polycarbonate (PC) |
| Color | Gray |
| Number of Vents | 2 |
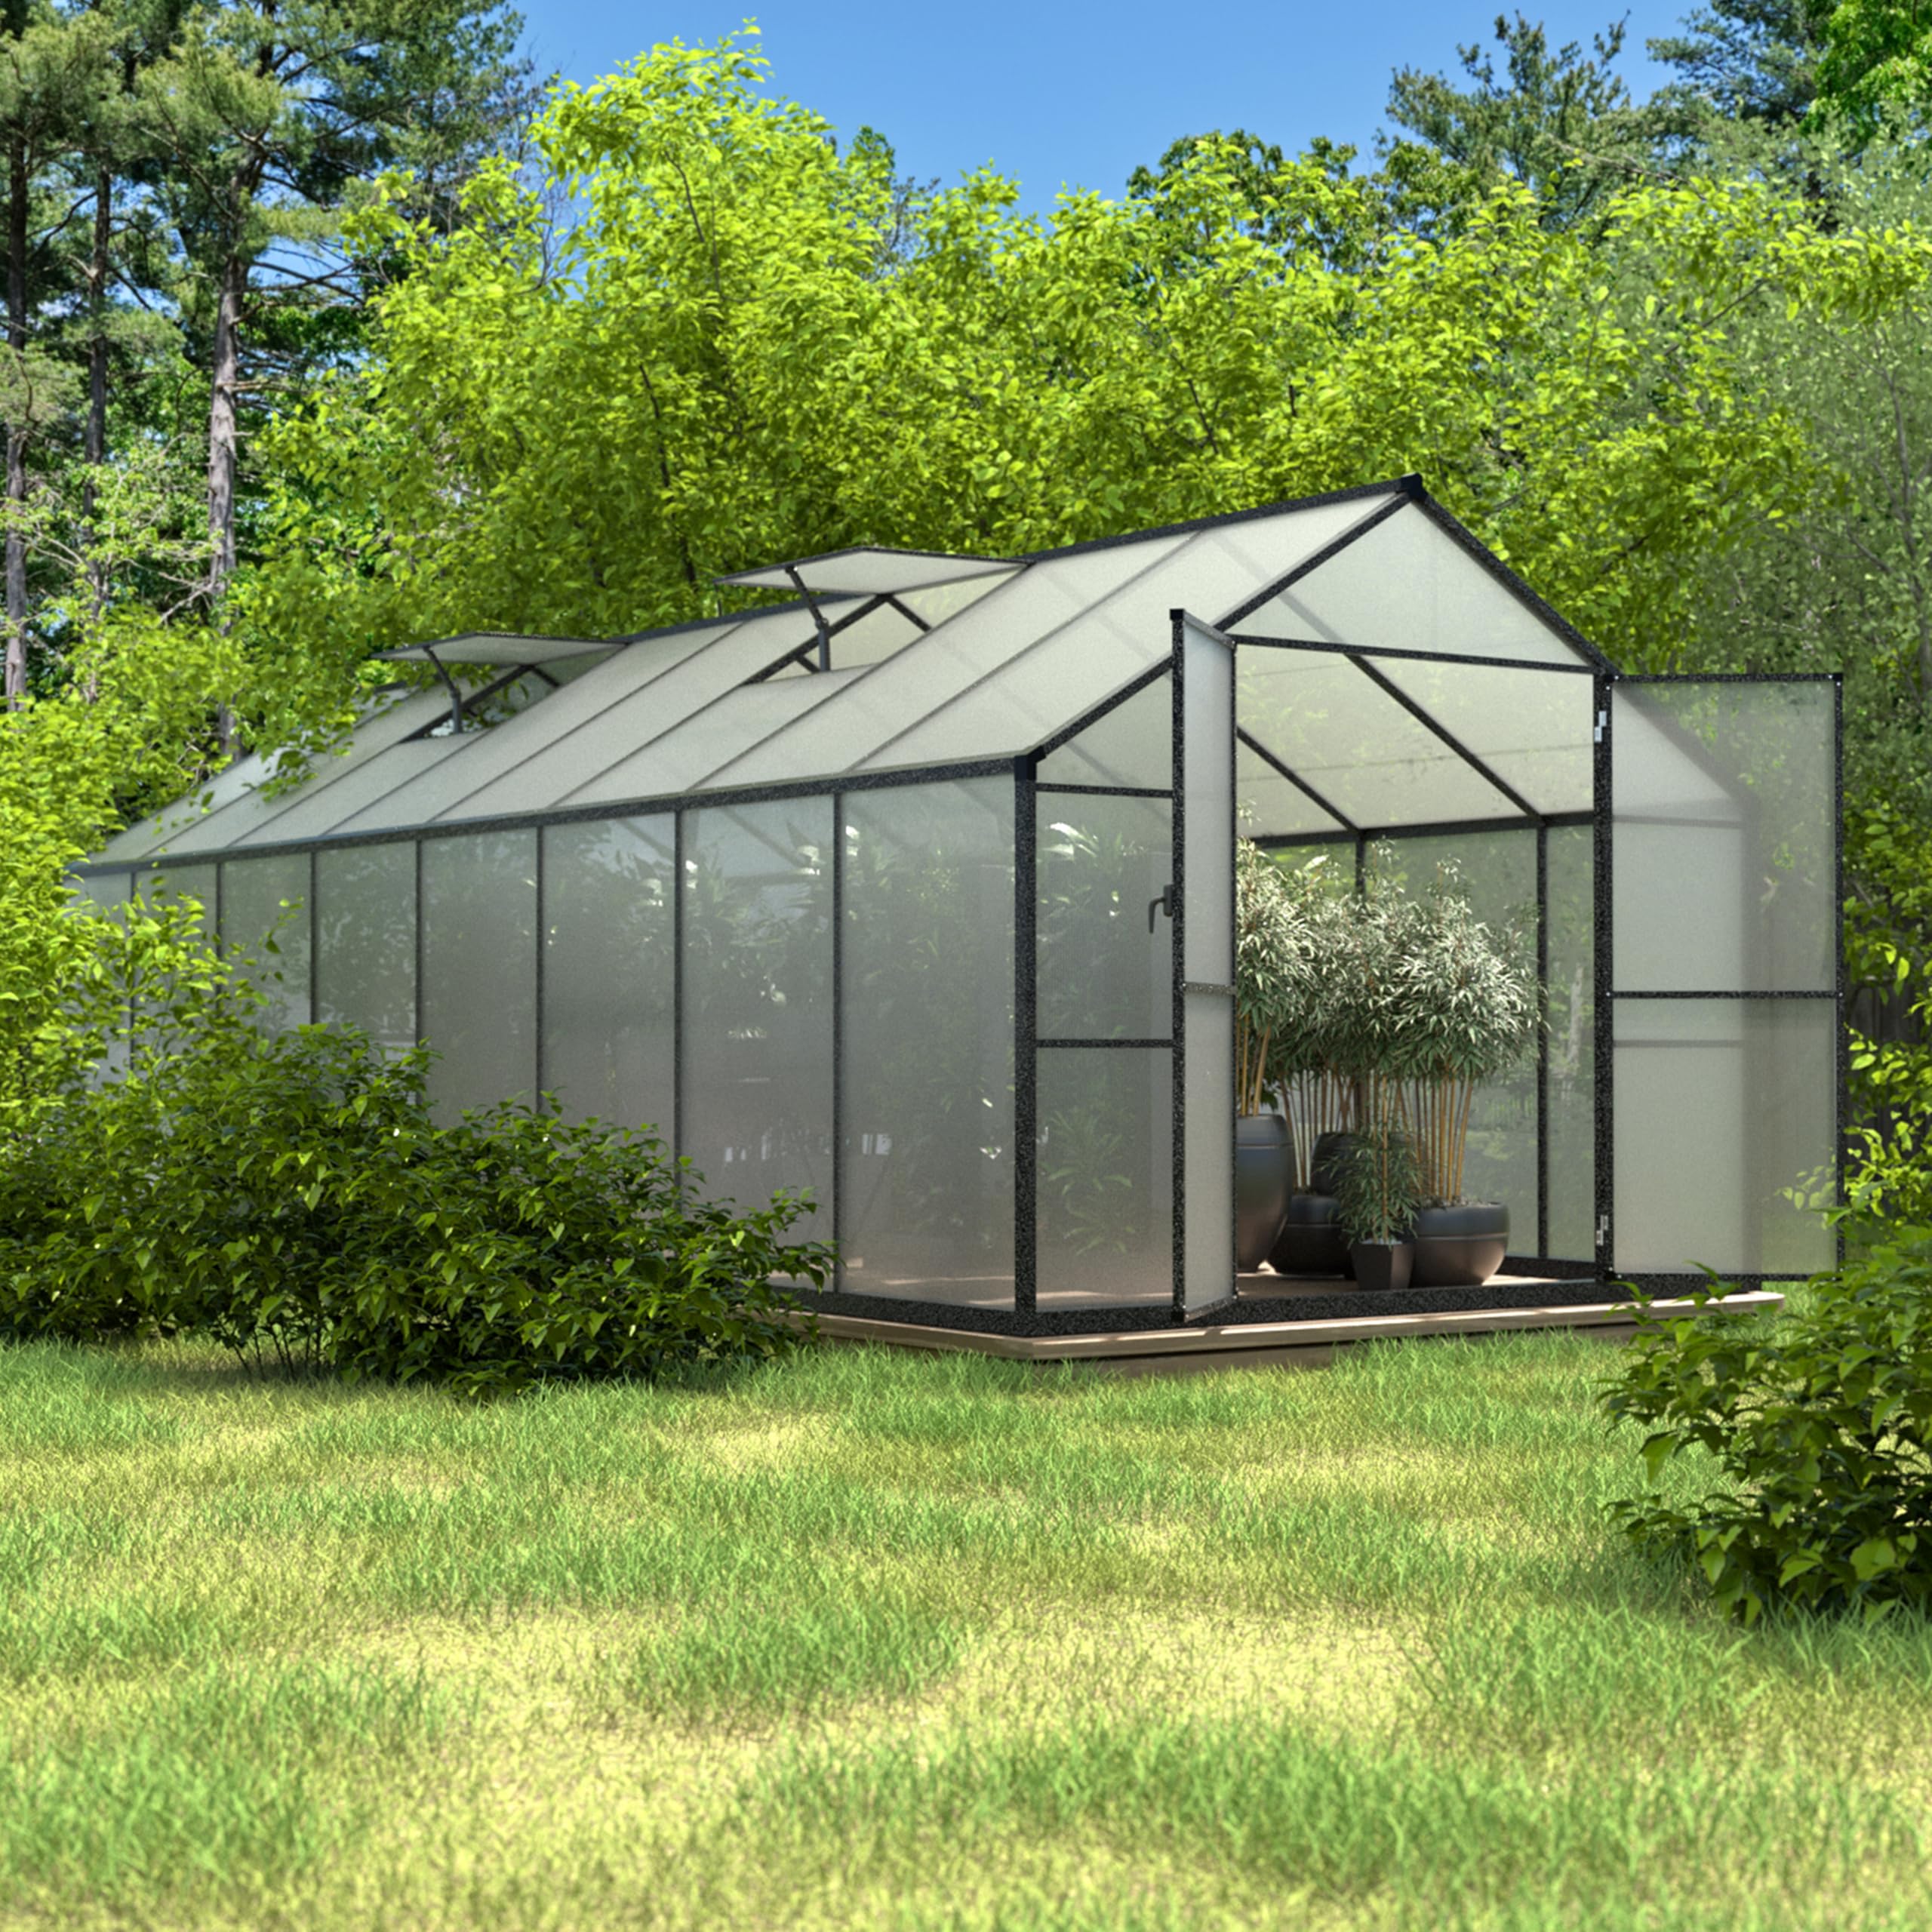
Image: Detailed dimensions of the Yardenaler 8x16 FT Polycarbonate Aluminum Greenhouse Kit.
4. Setup & Assembly
Careful assembly is crucial for the stability and longevity of your greenhouse. Follow the steps below, referring to the provided images and videos for visual guidance.
General Assembly Tips:
- Ensure you have all parts listed in the packing list before starting.
- Work on a flat, level surface.
- Do not overtighten screws until instructed to do so.
- It is recommended to have at least two people for assembly.
Assembly Process:
The assembly process involves connecting various aluminum frame pieces and inserting polycarbonate panels. Pay close attention to part numbers and orientation as indicated in the manual and videos.
Video: Detailed product installation process for the greenhouse. This video provides a step-by-step visual guide to assembling the frame and panels.
Video: Additional installation video for the greenhouse, demonstrating key assembly steps and tips.
Key Assembly Components:
- Aluminum Frame: The main structural components are labeled for easy identification. Connect them using the provided fasteners.
- Polycarbonate Panels: These panels slide into designated grooves in the aluminum frame. Ensure the correct side of the panel (UV protected) faces outwards.
- Roof Vents: Assemble and attach the two adjustable roof vents as per instructions for proper ventilation.
- Lockable Door: Assemble the swing-out door and attach it to the frame. Ensure the locking mechanism functions correctly.
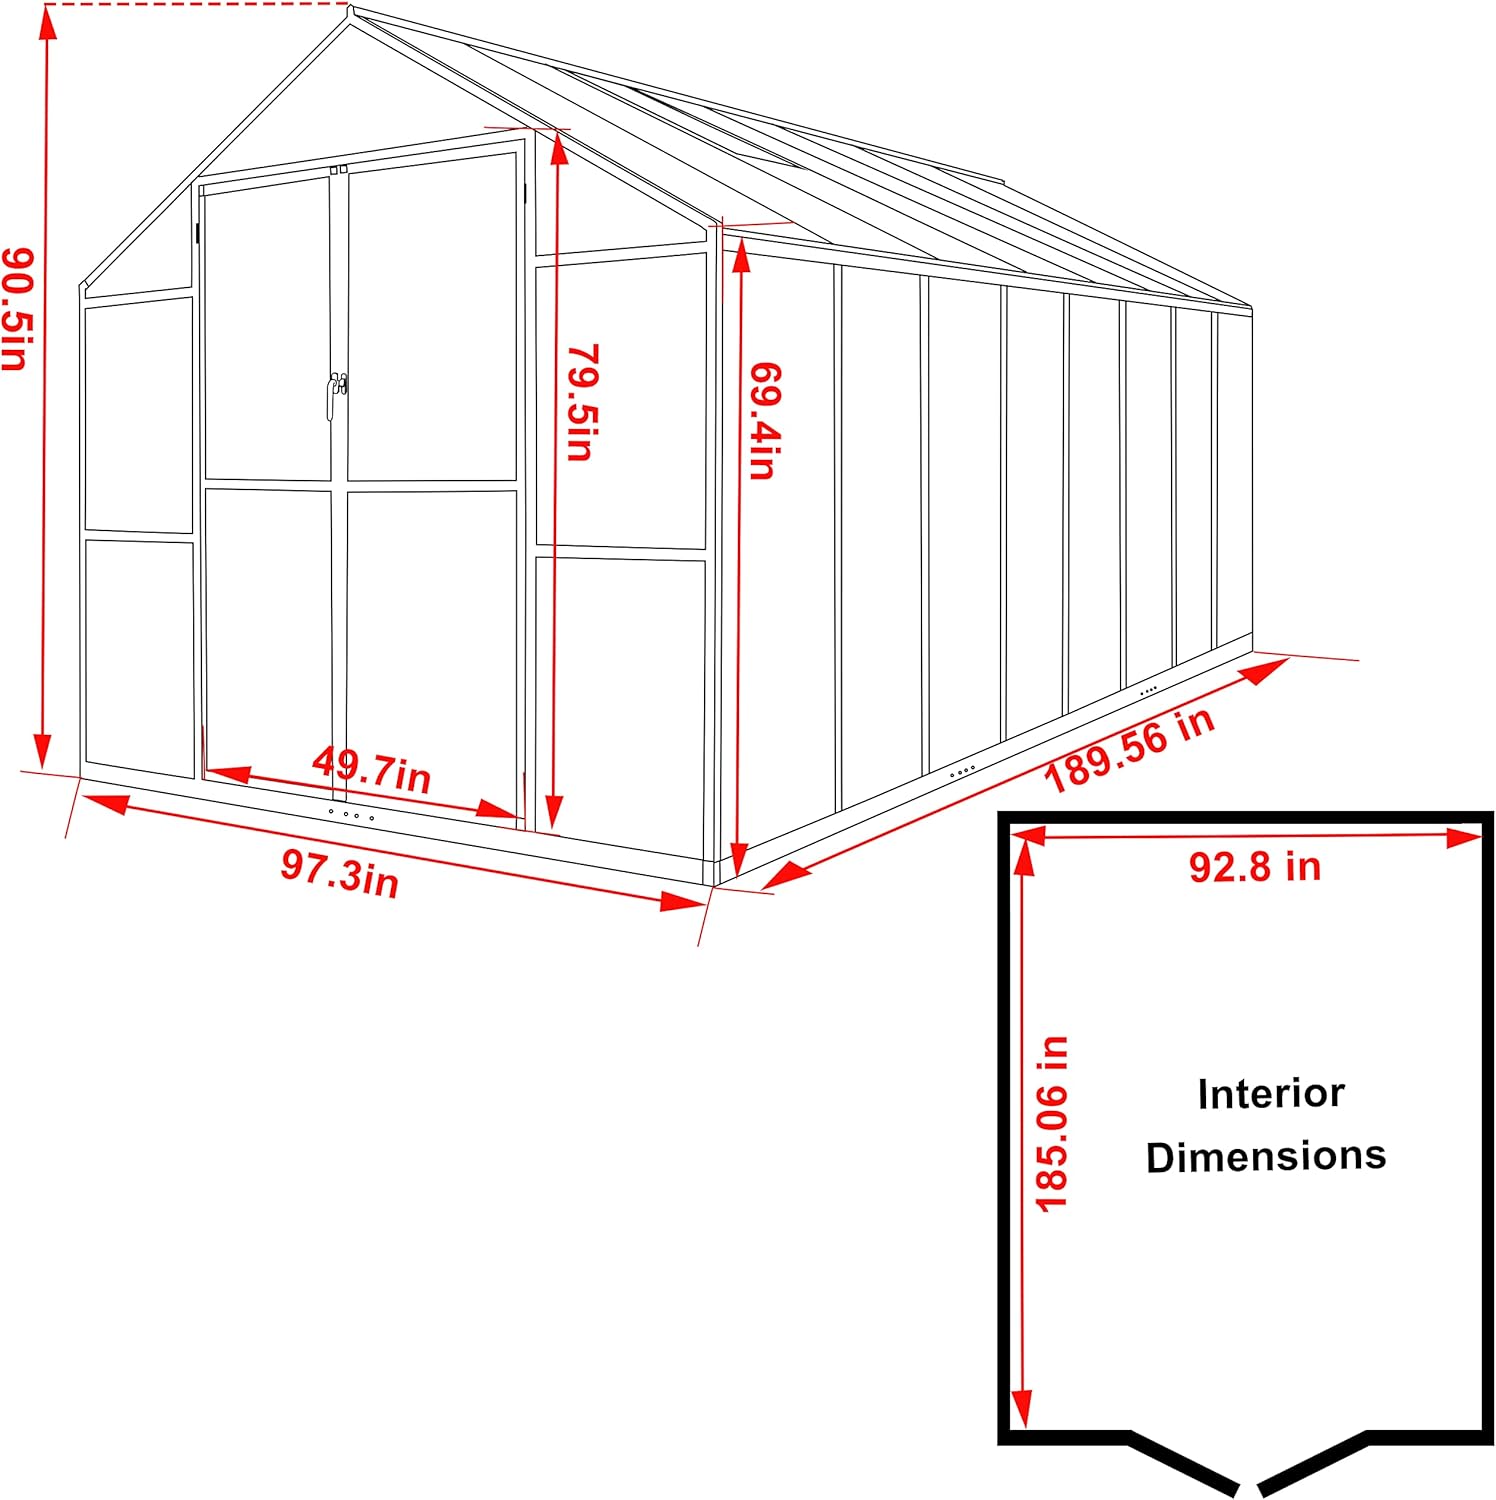
Image: The Yardenaler greenhouse frame with its double doors fully open and roof vents raised, showcasing the spacious interior.

Image: A closer view inside the greenhouse, highlighting the open double doors and the clear polycarbonate panels that allow ample light.

Image: A collage showing key features: an easier sliding panel assembly system, the lockable door, dual double doors design, and sturdy construction details.

Image: Recommendations for increasing the greenhouse's wind rating, showing how to bolt the greenhouse to the ground and use silicone sealant to seal panels.

Image: Close-up details of the thickened polycarbonate panels with diffused pattern for warmth and light penetration, and the powder-coated aluminum frame in grey finish for rust-resistance and durability.

Image: A detailed view of the double adjustable roof vents, illustrating how they can be adjusted by rotating and fixing buttons to customize airflow.
5. Operating Instructions
Roof Vents:
Your greenhouse is equipped with two adjustable roof vents to control internal temperature and humidity. To open or close a vent, simply rotate and fix the buttons tightly to the desired angle. This allows for optimal air circulation, preventing overheating and promoting healthy plant growth.
Lockable Door:
The greenhouse features a swing-out lockable door for easy access and security. To open, unlock the door and swing it outwards. To secure, close the door and engage the locking mechanism. This design ensures your plants and tools are safe while providing convenient entry and exit.
6. Maintenance
Regular maintenance will extend the life of your Yardenaler greenhouse and ensure optimal performance.
- Cleaning: Periodically clean the polycarbonate panels with mild soap and water to remove dirt and algae, ensuring maximum light transmission. Avoid abrasive cleaners that could scratch the panels.
- Frame Inspection: Annually inspect the aluminum frame for any signs of corrosion, loose bolts, or damage. Tighten any loose fasteners and replace damaged parts as needed.
- Ventilation System: Ensure roof vents operate smoothly. Lubricate moving parts if necessary.
- Anchoring: Regularly check that the greenhouse remains securely anchored, especially after strong winds or heavy rainfall.
7. Troubleshooting
Here are some common issues and their potential solutions:
| Problem | Possible Cause | Solution |
|---|---|---|
| Excessive Heat Inside | Insufficient ventilation | Open roof vents wider or for longer periods. Consider additional shading during peak sun hours. |
| Condensation on Panels | High humidity, poor airflow | Increase ventilation by opening vents. Ensure proper spacing between plants. |
| Water Leaks | Loose panels, unsealed joints | Check all panel connections and tighten if loose. Apply silicone sealant to any gaps or joints. |
| Greenhouse Instability | Improper anchoring, loose frame connections | Verify all anchor points are secure. Tighten all frame bolts and screws. Consider additional tie-down kits in windy areas. |
8. Warranty & Support
Yardenaler stands behind the quality of its products. For warranty information, missing parts, or technical support, please refer to the contact information provided at the point of purchase or visit the official Yardenaler website.
Please retain your proof of purchase for any warranty claims.


