Urageuxy FT0818
Urageuxy Weather Station User Manual
Model: FT0818
Product Overview
The Urageuxy Weather Station (Model FT0818) is a comprehensive device designed to provide accurate indoor and outdoor environmental data. It features a large 8.3-inch HD color display for clear readability of temperature, humidity, atmospheric pressure, and weather forecasts. The station includes an atomic clock for automatic time synchronization and supports up to 8 external sensors for multi-channel monitoring.
Key Features:
- 8.3-inch HD Color Display with 4-level adjustable backlight.
- Accurate Indoor/Outdoor Temperature and Humidity readings.
- DCF Atomic Clock for automatic time and date synchronization.
- 12-24 hour Weather Forecast based on atmospheric pressure analysis.
- Atmospheric Pressure display and Moon Phase.
- Supports up to 8 external sensors (one included) with 100m transmission range.
- Historical data graphs for temperature, humidity, and pressure (24/72 hours).
- Customizable alarms for time, temperature, humidity, and pressure.
- Flexible mounting options: wall-mount or tabletop.
- Dual power modes: AC adapter or battery (backlight permanent only with AC adapter).
Package Contents
Please check the package for the following items:
- Urageuxy Weather Station (Main Unit)
- Outdoor Sensor (1 unit)
- AC Power Adapter
- User Manual
Note: 2x AAA batteries for the outdoor sensor and 3x AAA batteries for the main unit are not included and must be purchased separately.
Setup
1. Powering the Devices
Main Unit:
- Insert 3x AAA batteries (not included) into the battery compartment on the back of the main unit. Ensure correct polarity.
- Connect the AC power adapter to the main unit's power port and plug it into a wall outlet. The display will light up.
- Note: For continuous backlight, the AC adapter must be connected. Batteries serve as backup power.
Outdoor Sensor:
- Insert 2x AAA batteries (not included) into the battery compartment of the outdoor sensor. Ensure correct polarity.
- Select a channel (1-8) on the outdoor sensor using the small switch inside the battery compartment. It is recommended to start with Channel 1.
2. Pairing the Sensor
Once both units are powered, the main unit will automatically search for the outdoor sensor. This may take a few minutes. The outdoor temperature and humidity readings should appear on the main unit's display. If pairing fails:
- Ensure the sensor is within range (up to 100m in open air, less with obstructions).
- Press and hold the "CHANNEL" button on the main unit to initiate a manual search for the sensor.
- Ensure the outdoor sensor is on the same channel as selected on the main unit (if multiple sensors are used).
3. DCF Atomic Clock Synchronization
The weather station will automatically attempt to synchronize with the DCF radio signal to set the correct time and date. This process can take up to 48 hours, especially in areas with weak signals. Ensure the main unit is placed away from electronic interference.
If the DCF signal is weak, you can manually set the time and date (refer to the "Operating" section).
4. Placement Recommendations
- Main Unit: Place indoors on a flat surface or mount on a wall. Avoid direct sunlight or heat sources.
- Outdoor Sensor: Place in a shaded, dry location outdoors, protected from direct rain and sunlight, to ensure accurate readings. Ensure it is within the 100m transmission range of the main unit.
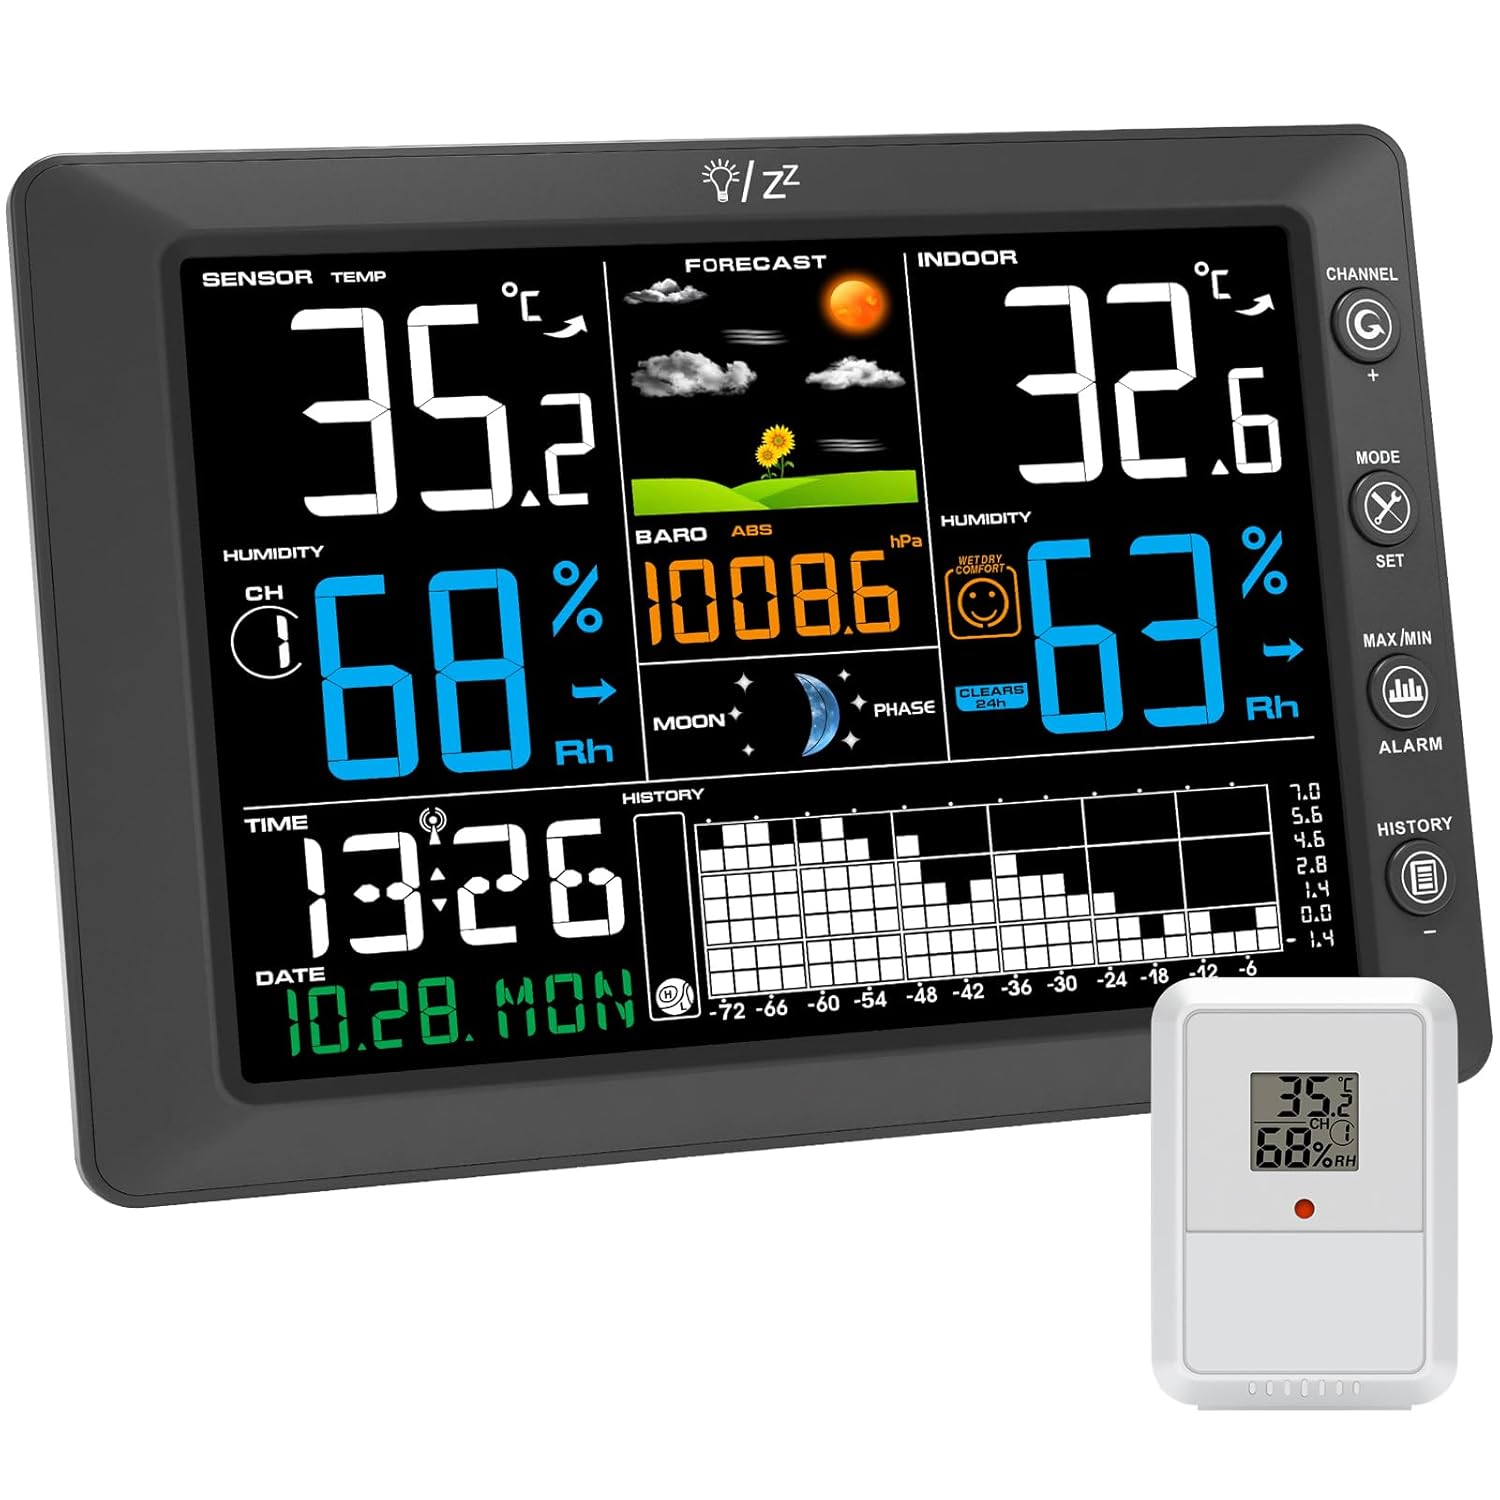
Image: The Urageuxy Weather Station main unit with its large color display and the compact outdoor sensor.

Image: Example placement of the Urageuxy Weather Station on a wall in a home environment, showing its integration into a living space.
Operating Instructions
1. Display Overview
The 8.3-inch HD color display shows various data points:
- Indoor Temperature & Humidity: Current readings inside.
- Outdoor Temperature & Humidity: Current readings from the external sensor.
- Weather Forecast: Icons indicating predicted weather (sunny, cloudy, rainy, etc.).
- Atmospheric Pressure: Current barometric pressure.
- Time & Date: Synchronized by DCF atomic clock.
- Moon Phase: Current moon phase.
- History Graph: Displays historical data for temperature, humidity, and pressure over 24 or 72 hours.
- Comfort Indicator: An icon indicating indoor comfort level based on humidity.
2. Button Functions
The main unit has several buttons on the side:
- CHANNEL (C/+): Press to cycle through outdoor sensor channels (if multiple are connected). Hold to search for outdoor sensors.
- MODE: Press to switch between display modes (e.g., time, alarm). Hold to enter time/date setting mode.
- SET (X): Used to confirm settings in setup mode.
- MAX/MIN: Press to view maximum/minimum recorded values for temperature and humidity. Press again to clear.
- ALARM: Press to view or set alarms.
- HISTORY: Press to view historical data graphs (24h/72h).
3. Setting Time and Date Manually
If DCF synchronization is not desired or signal is weak:
- Hold the "MODE" button until the time display flashes.
- Use the "C/+" button to adjust the value and "SET" to confirm and move to the next setting (e.g., 12/24 hour format, hour, minute, year, month, day, time zone).
- Press "MODE" to exit setting mode.
4. Setting Alarms
The station supports time alarms and customizable alerts for temperature, humidity, and pressure.
- Press the "ALARM" button to cycle through alarm settings.
- Hold "ALARM" to enter alarm setting mode.
- Use "C/+" to adjust values and "SET" to confirm.
- Set desired high/low thresholds for temperature, humidity, or pressure alerts.
5. Backlight Adjustment
The display backlight has 4 adjustable levels. When powered by the AC adapter, the backlight can be continuously on. When powered by batteries, the backlight will turn off after a short period to conserve power.
To adjust backlight brightness, press the light icon button (usually located on the top or side of the unit, not explicitly named in feature bullets but implied by "4-level adjustable backlight").
Maintenance
- Cleaning: Wipe the main unit and sensor with a soft, damp cloth. Do not use abrasive cleaners or solvents.
- Battery Replacement: Replace batteries in both the main unit and outdoor sensor when the low battery indicator appears on the display. Ensure to use fresh batteries of the correct type (AAA).
- Sensor Placement: Periodically check the outdoor sensor's placement to ensure it remains protected from direct weather elements and is within effective transmission range.
- Firmware Updates: There are no user-serviceable firmware updates for this device.
Troubleshooting
| Problem | Possible Cause | Solution |
|---|---|---|
| No display on main unit. | No power, dead batteries, or faulty adapter. | Check AC adapter connection. Replace batteries in main unit. |
| Outdoor readings not displayed or inaccurate. | Sensor out of range, dead sensor batteries, incorrect channel, interference. | Move sensor closer to main unit. Replace sensor batteries. Ensure sensor and main unit are on the same channel. Avoid placing near large metal objects or strong electronic devices. Hold "CHANNEL" button to re-search. |
| DCF time synchronization fails. | Weak signal, interference, incorrect time zone. | Relocate unit away from electronics. Allow up to 48 hours for synchronization. Manually set time if necessary. |
| Backlight not staying on. | Unit running on battery power. | Connect the AC power adapter for continuous backlight. |
| Display difficult to read from an angle. | Viewing angle limitation of the display technology. | Adjust viewing angle or reposition the unit for optimal visibility. |
Specifications
| Feature | Detail |
|---|---|
| Model Number | FT0818 |
| Display Size | 8.3 inches (20.5 cm) HD Color Display |
| Indoor Temperature Range | 0°C to 60°C (32°F to 140°F) |
| Outdoor Temperature Range | -40°C to 60°C (-40°F to 140°F) |
| Temperature Accuracy | +/- 1°C |
| Humidity Range | 10% to 99% RH |
| Humidity Accuracy | +/- 5% RH |
| Air Pressure Range | 300-1100 hPa |
| Air Pressure Accuracy | +/- 3 hPa |
| Wireless Transmission Range | Up to 100 meters (328 feet) in open area |
| Wireless Frequency | 433 MHz |
| Power Supply (Main Unit) | AC Power Adapter (included), 3x AAA Batteries (not included) |
| Power Supply (Outdoor Sensor) | 2x AAA Batteries (not included) |
| Dimensions (Main Unit) | Approx. 30.8 x 20.9 x 5.1 cm (from package dimensions) |
| Weight | Approx. 800 grams (from package dimensions) |
Warranty and Support
Urageuxy products are designed for reliability and performance. For warranty information, please refer to the terms provided at the point of purchase or contact your retailer. Typically, a standard manufacturer's warranty covers defects in materials and workmanship.
Customer Support:
If you encounter any issues or have questions regarding your Urageuxy Weather Station, please contact the seller or manufacturer's customer support. Keep your purchase receipt as proof of purchase.
For more information about Urageuxy and their products, you may visit their brand store:

Image: The official Urageuxy brand logo.
Ask a question about this manual
Ask about setup, troubleshooting, compatibility, parts, safety, or missing instructions. Manuals+ will review the question and use this page’s manual context to help answer it.