Introduction
This manual provides essential information for the proper installation, operation, and maintenance of your KICKER CXA800.1 Class D Mono Car Audio Amplifier. Please read these instructions thoroughly before attempting to install or operate the amplifier to ensure optimal performance and safety. The KICKER CXA800.1 is designed to deliver powerful, efficient bass amplification for your vehicle's audio system.
Setup and Installation
Proper installation is crucial for the performance and longevity of your amplifier. It is recommended that installation be performed by a professional car audio installer.
Amplifier Placement
Choose a mounting location that provides adequate ventilation for the amplifier. Avoid mounting in enclosed spaces or directly on carpet where airflow is restricted. The CXA800.1 includes vertical mounting hardware for flexible installation options.
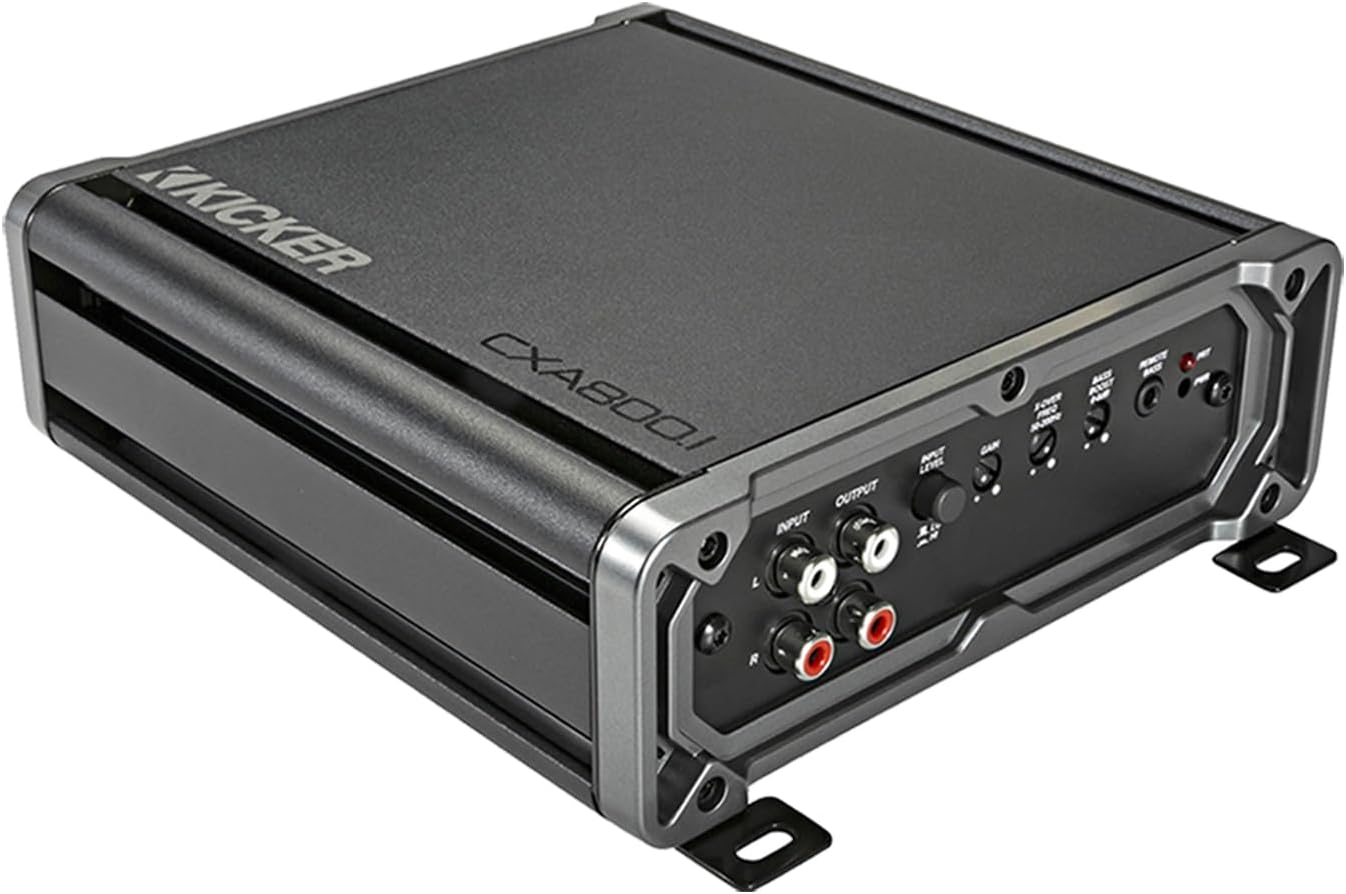
Image: KICKER CXA800.1 Mono Car Audio Amplifier. This image shows the top and front view of the amplifier, highlighting its compact design and input/output terminals.
Wiring Connections
The amplifier is compatible with various head units thanks to KICKER's FIT+ (Fail-safe Integration Technology-PLUS), accepting up to 40 volts (400 watts) of speaker-level input signal. This eliminates the need for line-out converters in many installations.
A complete amplifier installation kit is typically included, containing the following components:
- 17 ft 4 AWG Blue Power Wire
- 4 ft 4 AWG Gray Ground Wire
- FHS Fuse Holder with 100 Amp Fuse
- 17 ft 16 Gauge Remote Turn-On Wire
- 16.4 ft KI RCA Interconnects
- 12 ft Q Series 12 AWG Speaker Wire
- Assorted Fork Terminals, Butt Connector, Zip Ties, and Firewall Grommet

Image: KICKER Amplifier Wiring Install Kit. This image displays the various cables and accessories included in a typical amplifier wiring kit, such as power, ground, remote, RCA, and speaker wires, along with a fuse holder and terminals.
Power Connection:
Connect the 4 AWG power wire directly to the positive terminal of your vehicle's battery. Install the fuse holder within 18 inches (45 cm) of the battery. Ensure all connections are secure and properly insulated.
Ground Connection:
Connect the 4 AWG ground wire to a clean, solid metal point on the vehicle's chassis. The ground point should be free of paint, rust, or dirt to ensure a good electrical connection. The ground wire should be as short as possible, ideally less than 3 feet (1 meter).
Remote Turn-On Connection:
Connect the 16 gauge remote wire to the remote turn-on output of your head unit. This signal turns the amplifier on and off with your vehicle's audio system.
Signal Input:
Connect the RCA interconnects from your head unit's RCA outputs to the amplifier's input terminals. If using speaker-level inputs, connect your head unit's speaker outputs directly to the amplifier's speaker-level input terminals.
Speaker Output:
Connect your subwoofer(s) to the amplifier's speaker output terminals using the 12 AWG speaker wire. Ensure correct polarity (+ to + and - to -) for all speaker connections.
Operating Instructions
Once installed, the CXA800.1 amplifier offers several adjustable controls to fine-tune your audio experience.
Gain Control
The gain control matches the amplifier's input sensitivity to the output level of your head unit. Start with the gain set to minimum, then slowly increase it until you hear distortion, then back off slightly. This is not a volume control.
Variable Lo-Pass Crossover
The variable low-pass crossover allows you to set the upper frequency limit for the amplifier's output, typically between 50Hz and 200Hz at 12dB/octave. This ensures that only low frequencies are sent to your subwoofer(s).
Subsonic Filter
The subsonic filter is fixed at 25Hz with a 24dB/octave slope. This filter removes extremely low, inaudible frequencies that can waste amplifier power and potentially damage subwoofers without producing useful sound.
KickEQ Boost
The KickEQ boost provides a variable bass enhancement from 0-6dB at 40Hz. Use this control to add a desired amount of bass emphasis to your audio.
Remote Bass Control (CXARC)
The KICKER CXARC Wired Remote Bass Controller (sold separately) allows you to adjust the bass level directly from your vehicle's dashboard. Connect the remote to the dedicated REMOTE BASS jack on the amplifier.
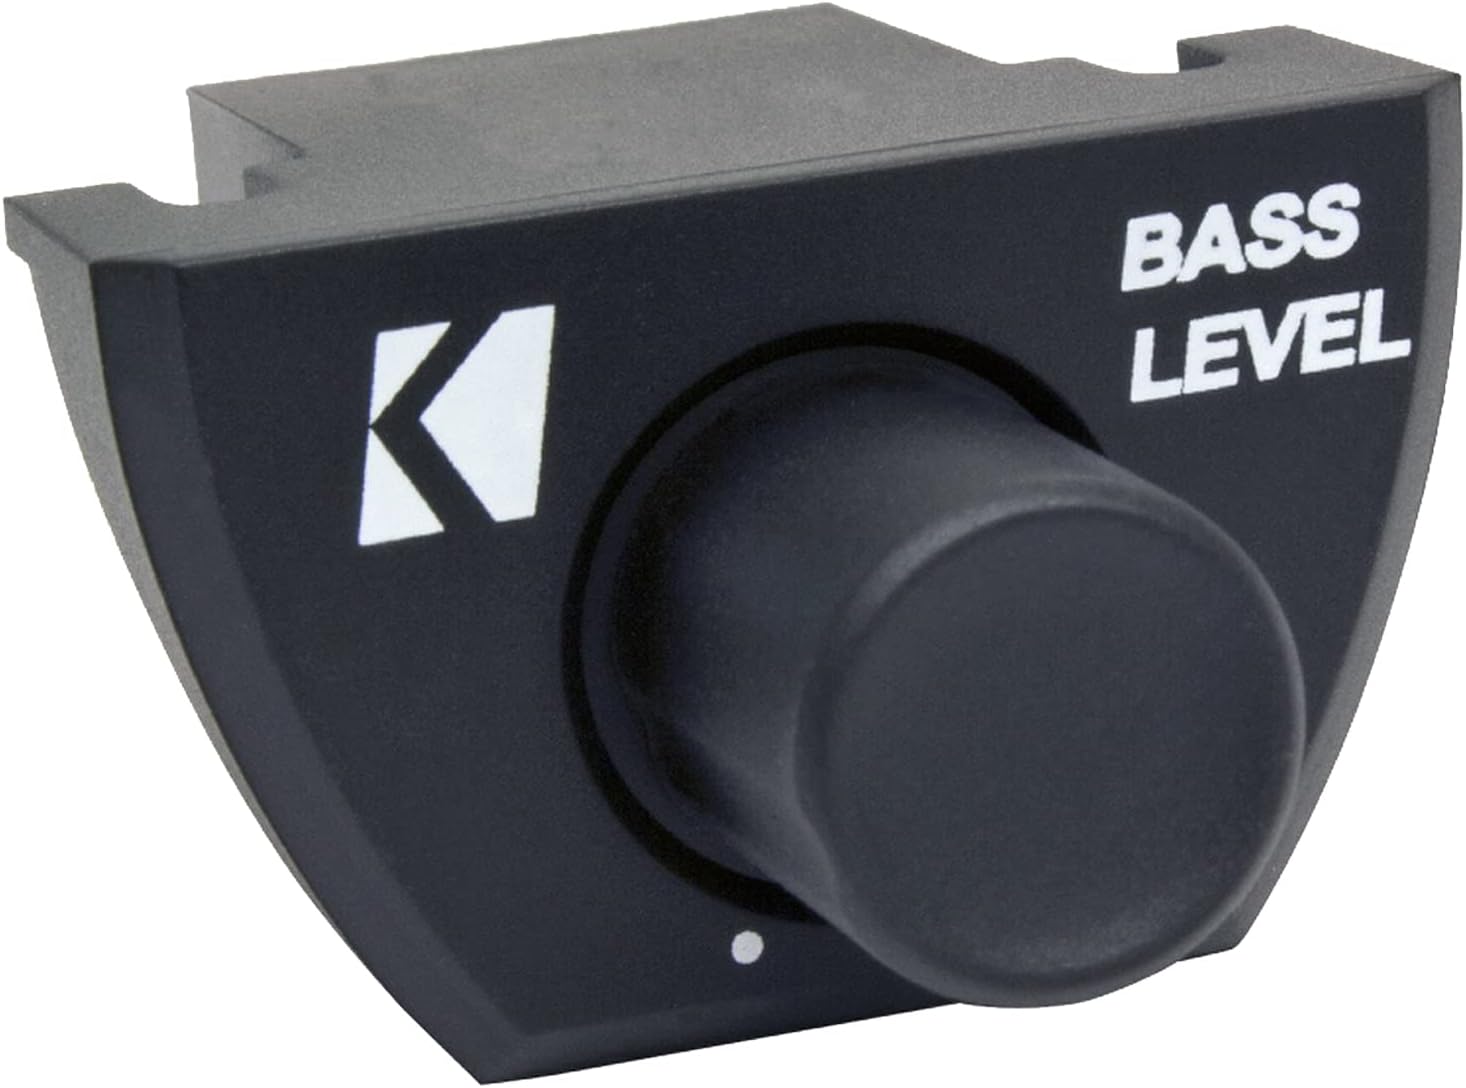
Image: KICKER CXARC Remote Bass Controller. This image shows the wired remote bass control unit with a rotary knob for adjusting bass levels.
Maintenance
The KICKER CXA800.1 amplifier requires minimal maintenance. Follow these guidelines to ensure continued optimal performance:
- Keep Clean: Periodically wipe the amplifier's exterior with a soft, dry cloth to remove dust and debris. Avoid using harsh chemicals or abrasive cleaners.
- Check Connections: Regularly inspect all power, ground, remote, and speaker connections to ensure they are secure and free from corrosion. Loose connections can lead to poor performance or damage.
- Ensure Ventilation: Confirm that the amplifier's cooling fins are not obstructed. Proper airflow is essential to prevent overheating.
- Fuse Replacement: If the amplifier's fuse blows, replace it only with a fuse of the exact same type and rating (100 Amp AFS). Using an incorrect fuse can cause damage or fire.
Troubleshooting
If you experience issues with your KICKER CXA800.1 amplifier, refer to the following common troubleshooting steps:
- No Power/No Indicator Light:
- Check the in-line fuse near the battery. Replace if blown.
- Verify power and ground connections are secure and free of corrosion.
- Ensure the remote turn-on wire is connected and receiving 12V from the head unit.
- No Sound Output:
- Check all RCA or speaker-level input connections from the head unit to the amplifier.
- Verify speaker wire connections to the amplifier and subwoofer(s) are secure and correct polarity.
- Ensure the head unit is powered on and outputting audio.
- Adjust the amplifier's gain control.
- Distorted Sound:
- Reduce the amplifier's gain control.
- Check for proper impedance matching between the amplifier and subwoofer(s).
- Ensure the subwoofer(s) are not over-driven.
- Adjust crossover and KickEQ settings.
- Amplifier Overheating (Protection Mode):
- Ensure adequate ventilation around the amplifier.
- Check speaker impedance; ensure it is within the amplifier's specified range (1 Ohm minimum).
- Reduce the gain setting.
If problems persist after following these steps, consult a professional car audio technician or contact KICKER customer support.
Specifications
Below are the key technical specifications for the KICKER CXA800.1 Mono Car Audio Amplifier:
| Feature | Specification |
|---|---|
| Amplifier Class | Class D |
| Power Output (RMS, 4 Ohm) | 300 watts x 1 channel |
| Power Output (RMS, 2 Ohm) | 600 watts x 1 channel |
| Power Output (RMS, 1 Ohm) | 800 watts x 1 channel |
| Frequency Response | 25Hz – 200Hz, +0/-1dB |
| Signal-to-Noise Ratio | >95dB (a-weighted, re: rated power) |
| Active Crossover | Variable Lo-pass 50Hz – 200Hz, 12dB/octave |
| Subsonic Filter | 25Hz @ 24dB/octave |
| KickEQ Boost | Variable 0-6dB @ 40Hz |
| Remote Bass Control | Compatible with CXARC (sold separately) |
| Input Sensitivity | Up to 40 volts (400 watts) speaker-level input |
| Item Weight | 6.85 pounds |
| Package Dimensions | 16 x 12 x 8 inches |
Warranty and Support
For detailed warranty information, please refer to the warranty card included with your product or visit the official KICKER website. KICKER provides customer support for technical assistance and service inquiries.
It is recommended to register your product upon purchase to facilitate any future warranty claims or support needs.