Introduction
This manual provides essential instructions for the safe operation, setup, maintenance, and troubleshooting of your Generic K6MAX P15 Pro 4K HD Drone. This quadcopter features a dual 4K HD camera system, advanced obstacle avoidance technology, and a foldable design for portability. Please read this manual thoroughly before operating the drone to ensure proper function and safety.
Safety Notice: This product is intended for users aged 14 and over. Always operate the drone in open areas, away from people, animals, and obstacles. Adhere to all local drone regulations and guidelines.
Box Contents
Verify that all items listed below are present in the packaging:
- 1 x K6MAX P15 Pro Drone
- 1 x Remote Controller
- 3 x Drone Batteries (Lithium Polymer, 1800 mAh)
- 1 x Obstacle Sensor
- Spare Propellers
- Screws
- Battery Charging Cable
Setup
1. Unfolding the Drone
Gently unfold the drone arms until they lock into position. Ensure all arms are fully extended before flight.
2. Battery Charging and Installation
Use the provided charging cable to charge all three drone batteries. Connect the cable to a suitable USB power source. The charging indicator will show the charging status. Once fully charged, insert a battery into the drone's battery compartment, ensuring it clicks securely into place.
3. Propeller Installation (if required)
If propellers are not pre-installed, attach them according to the markings (A and B) on the propellers and motor shafts. Ensure they are securely fastened. Refer to the spare propellers for correct orientation if needed.
4. Remote Controller Preparation
Install the required batteries (not specified, typically AA or AAA) into the remote controller. Ensure correct polarity. Power on the remote controller.
5. Obstacle Sensor Attachment
Attach the obstacle sensor to the designated port on the drone, ensuring a firm connection. This sensor enhances flight safety by detecting nearby obstacles.

Image: The K6MAX P15 Pro drone with its arms unfolded, ready for flight. This view highlights the compact design and overall structure of the aircraft.
Operating Instructions
1. Pre-Flight Checklist
- Ensure drone and remote control batteries are fully charged.
- Check that propellers are securely attached and undamaged.
- Verify the obstacle sensor is correctly installed.
- Choose an open, clear area for flight, away from people, animals, and obstacles.
- Check local weather conditions; avoid flying in strong winds or rain.
2. Power On and Pairing
Place the drone on a flat, level surface. Power on the drone, then power on the remote controller. The drone and remote will automatically attempt to pair. Indicators on both devices will confirm successful pairing.
3. Take-off and Landing
After pairing, press the one-key take-off button on the remote, or slowly push the left joystick up to initiate take-off. To land, press the one-key landing button, or slowly pull the left joystick down.
4. Flight Controls
Use the joysticks on the remote control to maneuver the drone. The left joystick typically controls altitude (up/down) and rotation (yaw). The right joystick controls forward/backward and left/right movement (pitch/roll).
5. Dual Camera Operation
The drone is equipped with a dual camera system, featuring a front 4K HD camera and a bottom camera. Use the dedicated buttons on the remote control or the associated mobile application (if applicable) to switch between cameras, capture 4K video, and take 1080MP still images. The dual cameras provide multiple viewing angles for comprehensive aerial photography.

Image: Close-up view of the drone's dual camera system, showing both the front-facing and bottom-facing lenses for versatile capture options.
6. Obstacle Avoidance System
The drone features advanced 540° induction obstacle avoidance sensors. These sensors detect obstacles in the drone's path and automatically adjust its flight trajectory to prevent collisions. While this system enhances safety, it is not foolproof; always maintain visual line of sight and exercise caution.

Image: The drone in flight, illustrating its 540-degree induction obstacle avoidance system actively detecting and reacting to its surroundings.
7. Optical Flow Positioning
The optical flow intelligent height setting allows the drone to maintain a stable hover at a set altitude, even indoors or in areas with minimal GPS signal. This feature contributes to smoother flight and more stable aerial photography.
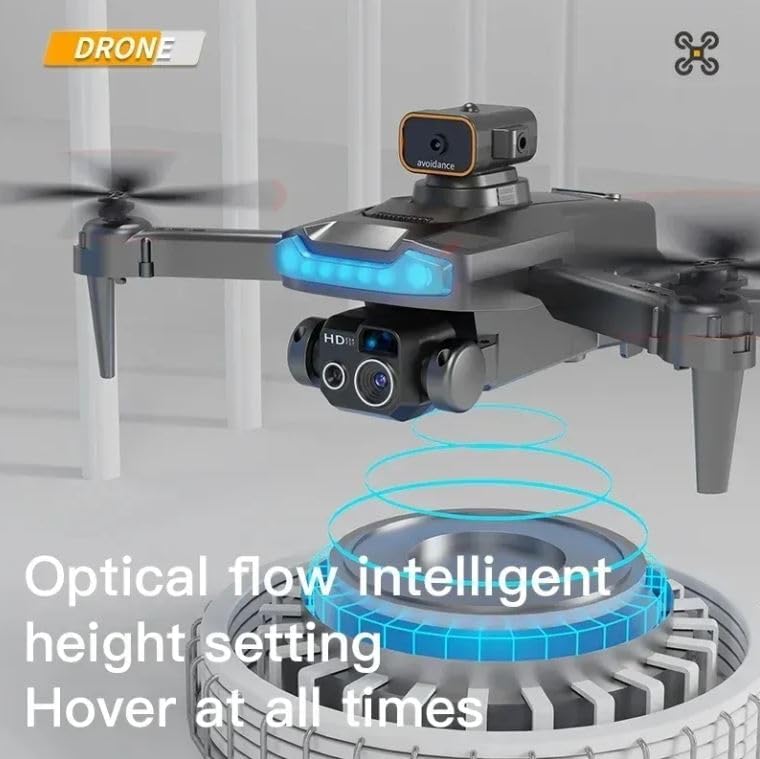
Image: The drone showcasing its optical flow intelligent height setting, which enables stable hovering and precise positioning.
8. Intelligent Following Mode
When enabled, the intelligent following mode allows the drone to automatically track and follow the remote control or a designated subject. This feature is useful for capturing dynamic video footage without manual control.

Image: A drone actively following a person on a skateboard, demonstrating its intelligent following capability for dynamic video capture.
9. LED Lighting
The drone is equipped with bright LED indicators for enhanced visibility during flight, especially in low-light conditions. These lights also assist with orientation.
Maintenance
1. Cleaning
Regularly clean the drone body, propellers, and camera lenses with a soft, dry cloth. Avoid using liquids or solvents that could damage components.
2. Propeller Inspection and Replacement
Before each flight, inspect propellers for cracks, bends, or damage. Replace any damaged propellers immediately using the provided spare parts and screws. Incorrect or damaged propellers can affect flight stability and safety.
3. Battery Care and Storage
Store batteries in a cool, dry place, away from direct sunlight and extreme temperatures. Do not overcharge or fully discharge batteries. If storing for extended periods, charge batteries to approximately 50% capacity.
4. General Inspection
Periodically check all connections, screws, and moving parts for looseness or wear. Ensure the obstacle sensor is clean and unobstructed.
Troubleshooting
- Drone does not power on: Ensure the battery is fully charged and correctly installed. Check for any visible damage to the battery or drone power port.
- Cannot connect to remote control: Ensure both the drone and remote are powered on and within range. Try restarting both devices and re-pairing them according to the operating instructions.
- Unstable flight: Check that all propellers are correctly installed, undamaged, and spinning freely. Ensure the drone is placed on a flat surface before take-off for proper calibration. Avoid flying in strong winds.
- Camera issues (no image, poor quality): Verify the camera lens is clean and unobstructed. Ensure the drone is properly connected to the mobile application (if used for live view). Check storage capacity for recording.
- Obstacle avoidance not working: Ensure the obstacle sensor is clean and free from debris. Verify it is securely attached. Test in a controlled environment with clear obstacles.
Specifications
| Feature | Detail |
|---|---|
| Brand | Generic |
| Model Name | Drone 4k P15 Pro RAYNISHOPSSTORE |
| Model Number | P15pro |
| Special Features | Dual Camera, Foldable Design, LED Lights, Obstacle Avoidance, Remote Control |
| Age Range (Description) | Kid, Youth (Intermediate for ages 14 and over) |
| Color | Dark Gray |
| Video Capture Resolution | 4K, HD |
| Effective Still Resolution | 1080 MP |
| Connectivity Technology | Bluetooth, Wi-Fi |
| Included Components | 1 Drone, 1 Remote Controller, 3 Batteries, Dual Cameras, Propellers spare parts |
| Skill Level | Intermediate for ages 14 and over, not for children |
| Item Weight | 150 Grams (5.3 ounces) |
| Battery Capacity | 1800 Milliamp Hours |
| Video Capture Format | MP4 |
| Remote Control Technology | Radio Control |
| Control Type | Remote Control |
| Material | Metal, Plastic |
| Wireless Communication Technology | Radio Frequency |
| Battery Cell Composition | Lithium Polymer |
| Product Dimensions | 12"L x 10"W x 3"H |
| Manufacturer | Raynishopsstore |
Warranty and Support
Specific warranty details for the Generic K6MAX P15 Pro Drone are not provided in the product information. For any warranty claims, technical support, or service inquiries, please contact the manufacturer, Raynishopsstore, or your point of purchase. Keep your purchase receipt as proof of purchase.