1. Introduction
This manual provides comprehensive instructions for the safe and efficient operation, setup, and maintenance of your AchiPrin A1 6090 UV Flatbed Printer. Please read this manual thoroughly before operating the device to ensure optimal performance and longevity.

Figure 1.1: The AchiPrin A1 6090 UV Flatbed Printer, shown with accompanying UV ink bottles and examples of printed items like phone cases and art.
The AchiPrin A1 6090 is a high-performance UV flatbed printer designed for versatile printing on various materials. It features an XP600 print head, automatic white ink circulation, and an automatic wiping and moisturizing system for enhanced efficiency and print quality.
2. Safety Information
Always adhere to the following safety guidelines to prevent injury and damage to the printer:
- Ensure the printer is placed on a stable, level surface.
- Connect the printer to a grounded power outlet.
- Do not expose the printer to direct sunlight or extreme temperatures.
- Keep hands and loose clothing away from moving parts during operation.
- Wear appropriate personal protective equipment (PPE), such as gloves and eye protection, when handling UV inks.
- Do not look directly at the UV lamp during operation.
- In case of ink spills, clean immediately with appropriate cleaning solutions and ventilation.
- Refer to the material safety data sheets (MSDS) for all inks and cleaning agents.
3. Product Overview and Main Components
Familiarize yourself with the key components of your AchiPrin A1 6090 UV Printer.

Figure 3.1: Labeled diagram of the AchiPrin A1 6090 UV Printer, highlighting components such as the printhead, UV lamp, ink bottles, LED screen, and key function panel.
- Printhead: The core component responsible for ink deposition. This model uses an XP600 print head.
- UV Lamp: Cures the UV ink instantly after printing.
- Ink Bottles: Reservoirs for the various UV inks (CMYK, White, Varnish).
- Ink Pad: Area for printhead parking and maintenance.
- LED Screen & Key Function Panel: User interface for controlling printer functions.
- Vacuum Adsorption Platform: Secures materials during printing to prevent movement.
- Continuous Ink Supply System: Ensures a steady flow of ink to the printhead.

Figure 3.2: Illustration of the Wellprint Control Board, which manages printer operations for faster startup and efficient processing.
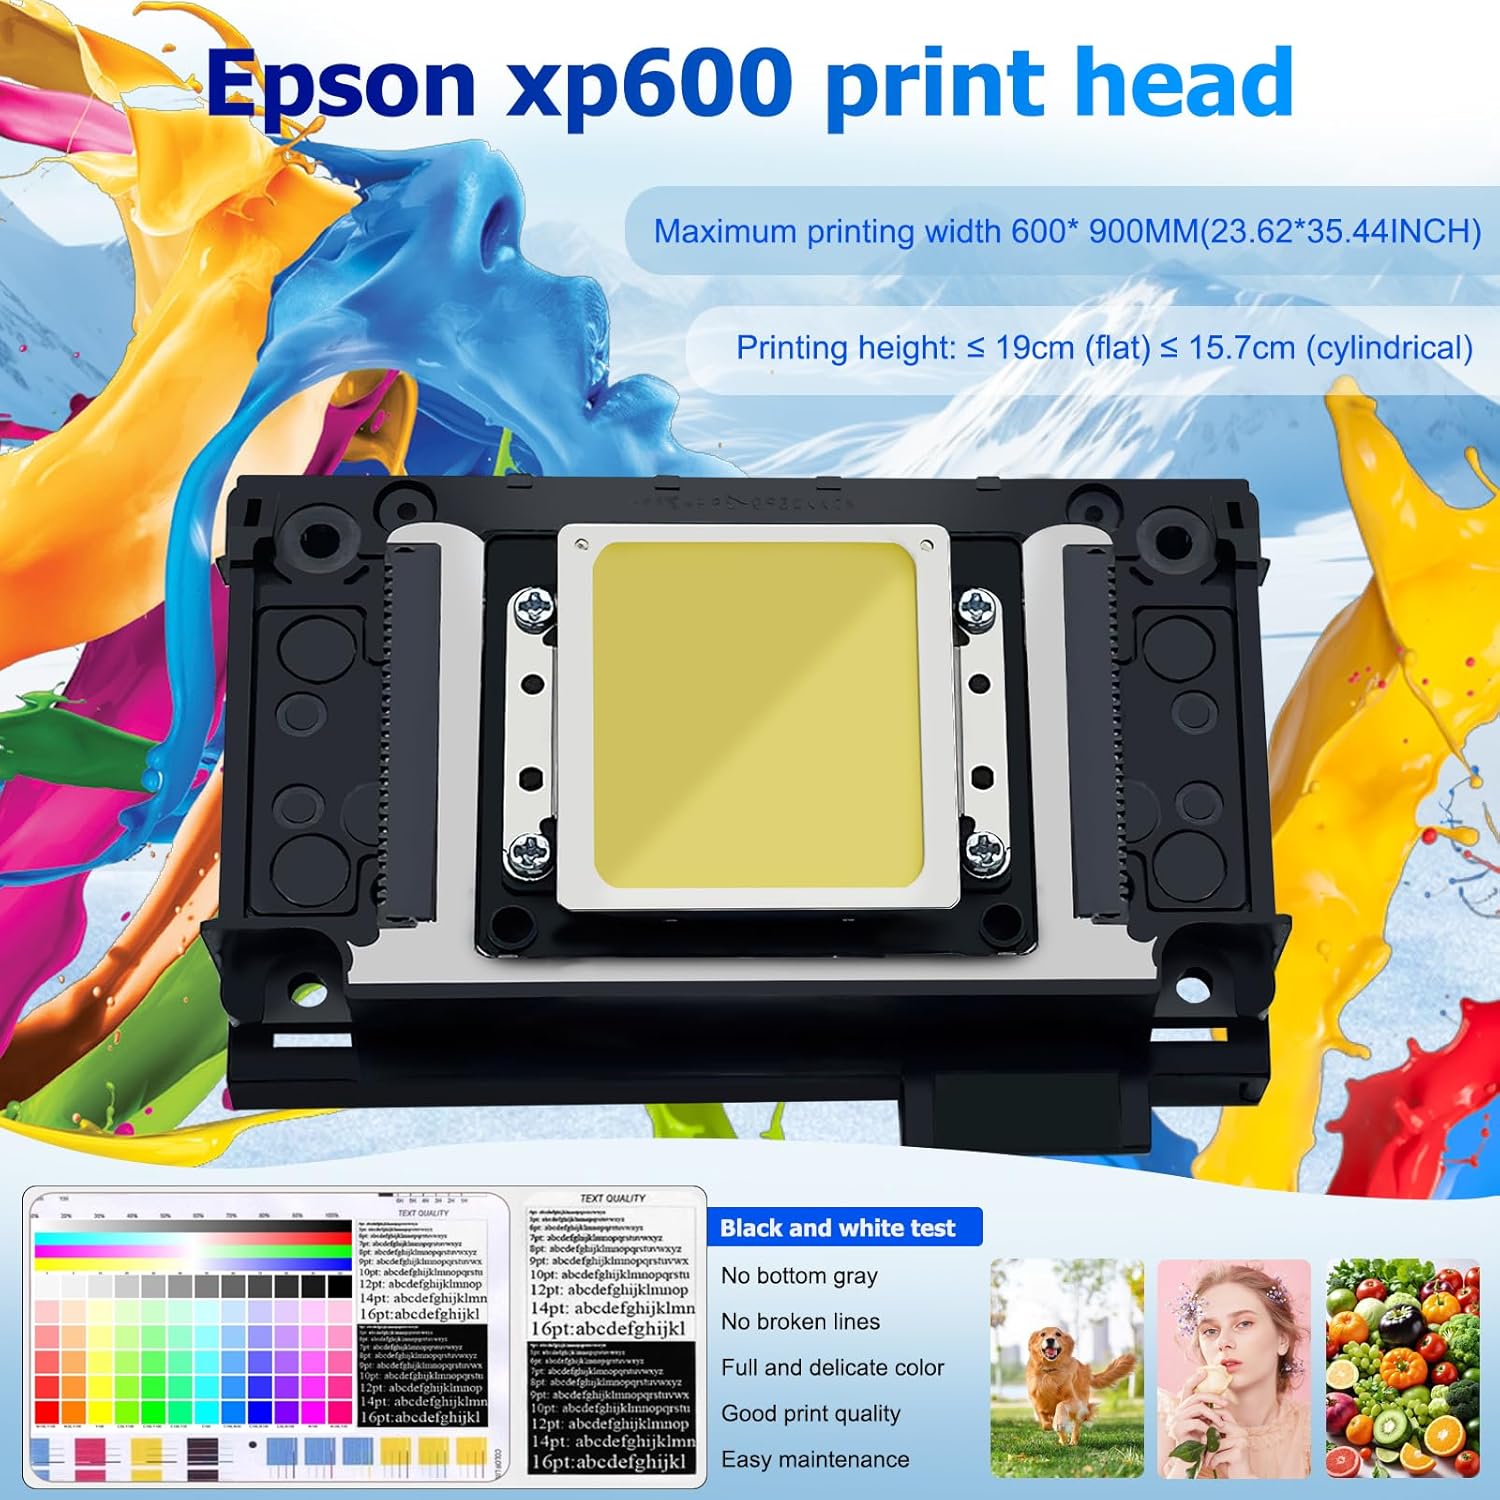
Figure 3.3: Detailed view of the Epson XP600 print head, capable of high-resolution printing with variable drip ink technology.
4. Setup Instructions
4.1 Unpacking and Placement
Your printer may arrive in multiple packages. Ensure all components listed in the packing list are received before proceeding.

Figure 4.1: The packing list details all items included with the AchiPrin 6090 UV Printer, such as the printer unit, ink, replacement dampers, rotary axis, and software.
Carefully unpack all items. Place the printer on a sturdy, level surface with adequate space for operation and maintenance. Ensure proper ventilation in the work area.
4.2 Power and USB Connection
- Connect the power cable to the printer and a grounded electrical outlet.
- Connect the USB cable from the printer to your computer.
4.3 Ink Installation
The printer utilizes a continuous ink supply system. Follow these steps for ink installation:
- Identify the correct ink color for each reservoir.
- Carefully pour the UV ink into the corresponding ink bottles.
- Ensure the ink lines are properly connected and free of air bubbles.
- The white ink system features automatic circulation to prevent pigment precipitation.

Figure 4.2: Close-up of the continuous ink supply system, designed for easy refilling and consistent ink flow, alongside the independent air-cooled UV lamp.
4.4 Software Installation
Install the provided printing software and drivers from the included USB drive or software dongle. Follow the on-screen instructions for a complete installation.
5. Operating Instructions
5.1 Printing Process Overview
The general printing workflow involves preparing your design, placing the material, and initiating the print job.

Figure 5.1: Visual guide to the printing process, from preparing the design in Photoshop to placing the material, opening printing software, and completing the print.
- Design Preparation: Create or open your design file. For spot colors, use software like Photoshop and save the file in TIFF format.
- Material Placement: Place the material onto the printer's flatbed. Adjust the height of the printhead to match the material thickness.
- Software Operation: Open the printing software, load your prepared file, and configure print settings.
- Print Initiation: Start the printing process. The printer will automatically apply and cure the UV ink.
5.2 Using the Vacuum Adsorption Platform
The vacuum adsorption platform is crucial for stable printing, especially on lightweight or flexible materials.

Figure 5.2: The vacuum adsorption platform holds materials firmly in place during printing, preventing movement and ensuring precise output.
- Place your material flat on the platform.
- Activate the vacuum function (refer to the control panel or software interface).
- Ensure the material is securely held before starting the print job.
6. Maintenance
Regular maintenance ensures the longevity and optimal performance of your AchiPrin A1 6090 UV Printer.
6.1 Automatic Wiping and Moisturizing System
This system helps prevent printhead clogging:
- The printhead is automatically wiped when the machine is turned on.
- It maintains printhead moisture when the machine is turned off or not in use.
- Ensure the ink pad is clean and functional for effective moisturizing.
6.2 White Ink Automatic Circulation
The white ink system automatically circulates every 30 seconds to prevent pigment settling and clogging. Ensure this function is active, especially when using white ink.
6.3 General Cleaning
- Regularly clean the printer's exterior with a soft, damp cloth.
- Inspect and clean the printhead area as per the software's maintenance prompts or as needed.
- Use only recommended cleaning solutions for UV printers.
7. Troubleshooting
This section addresses common issues you might encounter. For more complex problems, refer to the operation video or contact support.
| Problem | Possible Cause | Solution |
|---|---|---|
| Poor print quality (streaks, missing lines) | Clogged printhead nozzles, low ink levels, incorrect print settings. | Perform a printhead cleaning cycle. Check ink levels. Verify print settings in software. |
| Printer not responding | Loose power/USB cable, software error, printer offline. | Check all cable connections. Restart printer and computer. Ensure printer is selected in software. |
| White ink settling | Automatic circulation not active or insufficient. | Ensure the white ink automatic circulation feature is enabled and functioning. |
| Material not adhering to platform | Vacuum adsorption not active, platform dirty, material too heavy/uneven. | Activate vacuum. Clean platform. Ensure material is flat and within weight limits. |
For further assistance, refer to the provided operation video or contact AchiPrin customer support for remote assistance.
8. Specifications
- Model: UV6090
- Print Head: XP600 (supports up to 3 print heads)
- Maximum Printing Speed: 16m² per hour (with multiple print heads)
- Product Dimensions: 51.18"D x 47.24"W x 31.49"H
- Compatible Devices: Laptop, Personal Computer, Smartphone
- Ink Type: UV Ink (CMYK, White, Varnish)
- Features: Automatic White Ink Circulation, Automatic Wiping and Moisturizing System, High Quality Screw Slide Track, Vacuum Adsorption Platform.
9. Warranty and Support
AchiPrin provides comprehensive support for your UV printer:
- Machine Warranty: 2 years. Please note that damaged ink contact parts, including the printhead, are not covered under warranty.
- Support: Comprehensive installation videos, detailed user manuals, and lifetime remote assistance are available.
- Contact: If you encounter any problems, professional engineers are available to provide support within 24 hours.