1. Introduction
This manual provides essential information for setting up, operating, and maintaining your WEELIAO NUC 15 Pro Mini PC. This compact and powerful system features an Intel Core Ultra 5 225H processor, Intel Arc Graphics, and supports up to 96GB DDR5-6400 RAM, designed for efficient multitasking and demanding workloads.
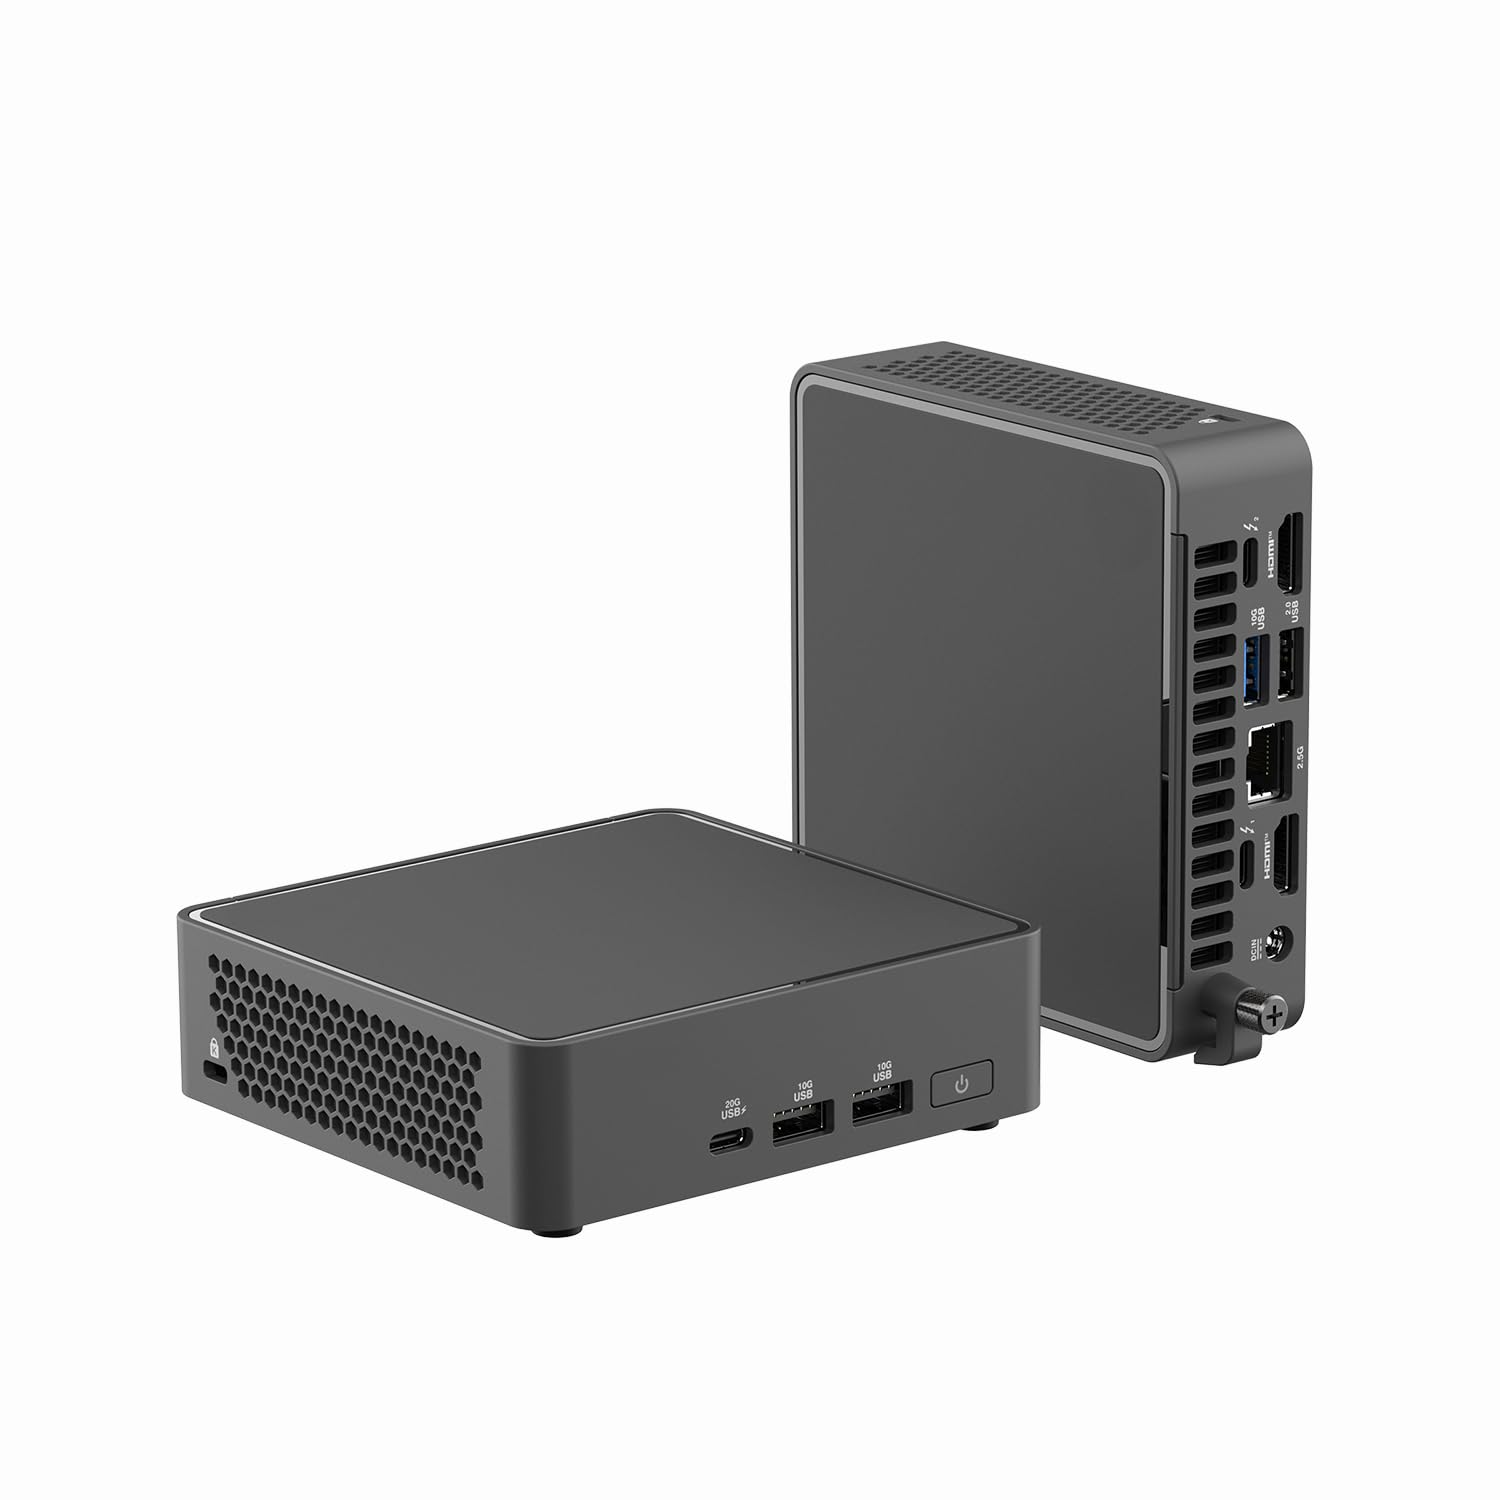
Image: Front view of the WEELIAO NUC 15 Pro Mini PC, showcasing its compact design.
2. Package Contents
Verify that all items are present in the package:
- Mini PC
- Power Adapter
3. Product Overview
3.1. Front and Rear Panels

Image: Diagram illustrating the front and rear ports and features of the NUC 15 Pro Mini PC.
- Front Panel: Power Button, 2x USB 3.2 Gen2 Type-A ports, 1x USB 3.2 Gen2 Type-C port.
- Rear Panel: DCIN, 2x HDMI 2.1 ports, Intel 2.5 Gb Ethernet port, 1x USB 3.2 Gen2 Type-A port, 1x USB 2.0 Type-A port, 2x Thunderbolt 4 ports (with DisplayPort 2.1), Kensington Lock slot.
3.2. Compact Design and Mounting
The NUC 15 Pro Mini PC features a compact 0.48L design, allowing for versatile placement options, including mounting behind a monitor to save desk space.

Image: The Mini PC discreetly mounted on the back of a computer monitor, demonstrating its space-saving capability.
4. Setup
- Connect Peripherals: Connect your keyboard, mouse, and other USB devices to the available USB ports.
- Connect Display: Connect your monitor(s) to the HDMI 2.1 ports or Thunderbolt 4 ports using appropriate cables. The system supports up to four 4K displays.
- Connect Network: For a wired connection, connect an Ethernet cable to the 2.5 Gb Ethernet port. For wireless, ensure your Wi-Fi network is available.
- Connect Power: Plug the power adapter into the DCIN port on the rear panel, then plug the adapter into a power outlet.
- Power On: Press the power button on the front panel to turn on the Mini PC.
- Initial Setup: Follow the on-screen instructions to complete the Windows 11 Pro operating system setup.

Image: The Mini PC set up on a desk, connected to a monitor and peripherals.
5. Operating Instructions
5.1. Basic Operation
- Power On/Off: Press the power button to turn on. To shut down, use the operating system's power options.
- Restart: Use the operating system's restart option.
- Sleep Mode: Use the operating system's sleep option or briefly press the power button.
5.2. Display Configuration
The NUC 15 Pro supports up to four 4K displays simultaneously. Connect your displays to the HDMI 2.1 ports and/or Thunderbolt 4 ports. Configure display settings within your operating system (e.g., Windows Display Settings) to extend or duplicate your desktop.
5.3. Wireless Connectivity
The Mini PC features Wi-Fi 7 (802.11.be) and Bluetooth 5.4 for wireless connections. Access network settings in your operating system to connect to Wi-Fi networks or pair Bluetooth devices.
6. Maintenance and Upgrades
The NUC 15 Pro features a 0.48L tool-less chassis design, allowing for easy access to internal components for upgrades or maintenance.

Image: The Mini PC with its top cover removed, showing internal components for upgrades.
6.1. RAM Upgrade
The system supports up to 96GB dual-channel DDR5-6400 RAM. To upgrade, carefully open the chassis, locate the SO-DIMM slots, and install compatible DDR5 memory modules. Ensure the system is powered off and unplugged before performing any internal work.
6.2. Storage Upgrade
The Mini PC supports PCIe Gen5 NVMe SSDs. To upgrade or add storage, open the chassis and install compatible M.2 SSDs into the available slots. Always back up your data before making changes to storage.
6.3. Cleaning
Regularly clean the exterior of the Mini PC with a soft, dry cloth. Use compressed air to clear dust from ventilation grilles to maintain optimal airflow and cooling. Do not use liquid cleaners directly on the device.
6.4. Tool-less Integration Video
Watch this short video demonstrating the easy, tool-less access for upgrades and maintenance.
Video: A brief demonstration of the NUC 15 Pro Mini PC's tool-less chassis design, showing how to open it for component access.
7. Troubleshooting
| Problem | Possible Cause | Solution |
|---|---|---|
| No power | Power adapter not connected; power outlet issue. | Ensure power adapter is securely connected to the PC and a working power outlet. Test the outlet with another device. |
| No display output | Display cable loose; incorrect input selected on monitor; monitor off. | Check display cable connections. Ensure monitor is on and set to the correct input source (HDMI, DisplayPort). |
| No internet connection (wired) | Ethernet cable loose; router/modem issue; network driver issue. | Verify Ethernet cable is securely connected. Restart your router/modem. Check network adapter status in Windows Device Manager. |
| No internet connection (Wi-Fi) | Wi-Fi disabled; incorrect password; router/modem issue. | Ensure Wi-Fi is enabled in Windows settings. Re-enter Wi-Fi password. Restart your router/modem. |
| System slow or unresponsive | Too many applications running; insufficient RAM; overheating. | Close unnecessary applications. Consider upgrading RAM if frequently experiencing slowdowns. Ensure proper ventilation. |
8. Specifications
| Feature | Detail |
|---|---|
| Processor | Intel Core Ultra 5 225H (18M Cache, up to 4.90 GHz, 14 Cores) |
| Graphics | Intel Arc Graphics with AI Acceleration |
| RAM (Installed) | 8GB DDR5-5600 (Supports up to 96GB DDR5-6400) |
| Storage (Installed) | 256GB PCIe Gen5 NVMe SSD |
| Operating System | Windows 11 Pro |
| Wireless Connectivity | Wi-Fi 7 (802.11.be), Bluetooth 5.4 |
| Ethernet | Intel 2.5 Gb Ethernet |
| Video Output | 2x HDMI 2.1, 2x Thunderbolt 4 (DisplayPort 2.1 support) - Supports up to four 4K displays |
| USB Ports | 3x USB 3.2 Gen2 Type-A, 1x USB 3.2 Gen2 Type-C, 1x USB 2.0 Type-A |
| Security Features | Intel vPro Technology, Intel Platform Trust Technology, Kensington Lock |
| Chassis Design | 0.48L Compact, Tool-less access |
| Dimensions | 9.45 x 9.45 x 5.12 inches (Package) |
| Weight | 2 pounds (Item) |
9. Warranty and Support
For warranty information and technical support, please contact the seller, WEELIAO-ASUS Intel Authorized Distributor, or refer to the documentation provided with your purchase. Keep your proof of purchase for warranty claims.
You can visit the WEELIAO Store on Amazon for additional product information and resources.