1. Introduction
Thank you for choosing the QUINEAR Foot Massager with TENS & EMS. This device is designed to provide foot stimulation using low-frequency pulse technology, combining EMS (Electrical Muscle Stimulation) and TENS (Transcutaneous Electrical Nerve Stimulation) to support nerve and muscle function, promote circulation, and alleviate discomfort in the feet and other body areas.
Please read this manual thoroughly before use to ensure safe and effective operation. Keep this manual for future reference.
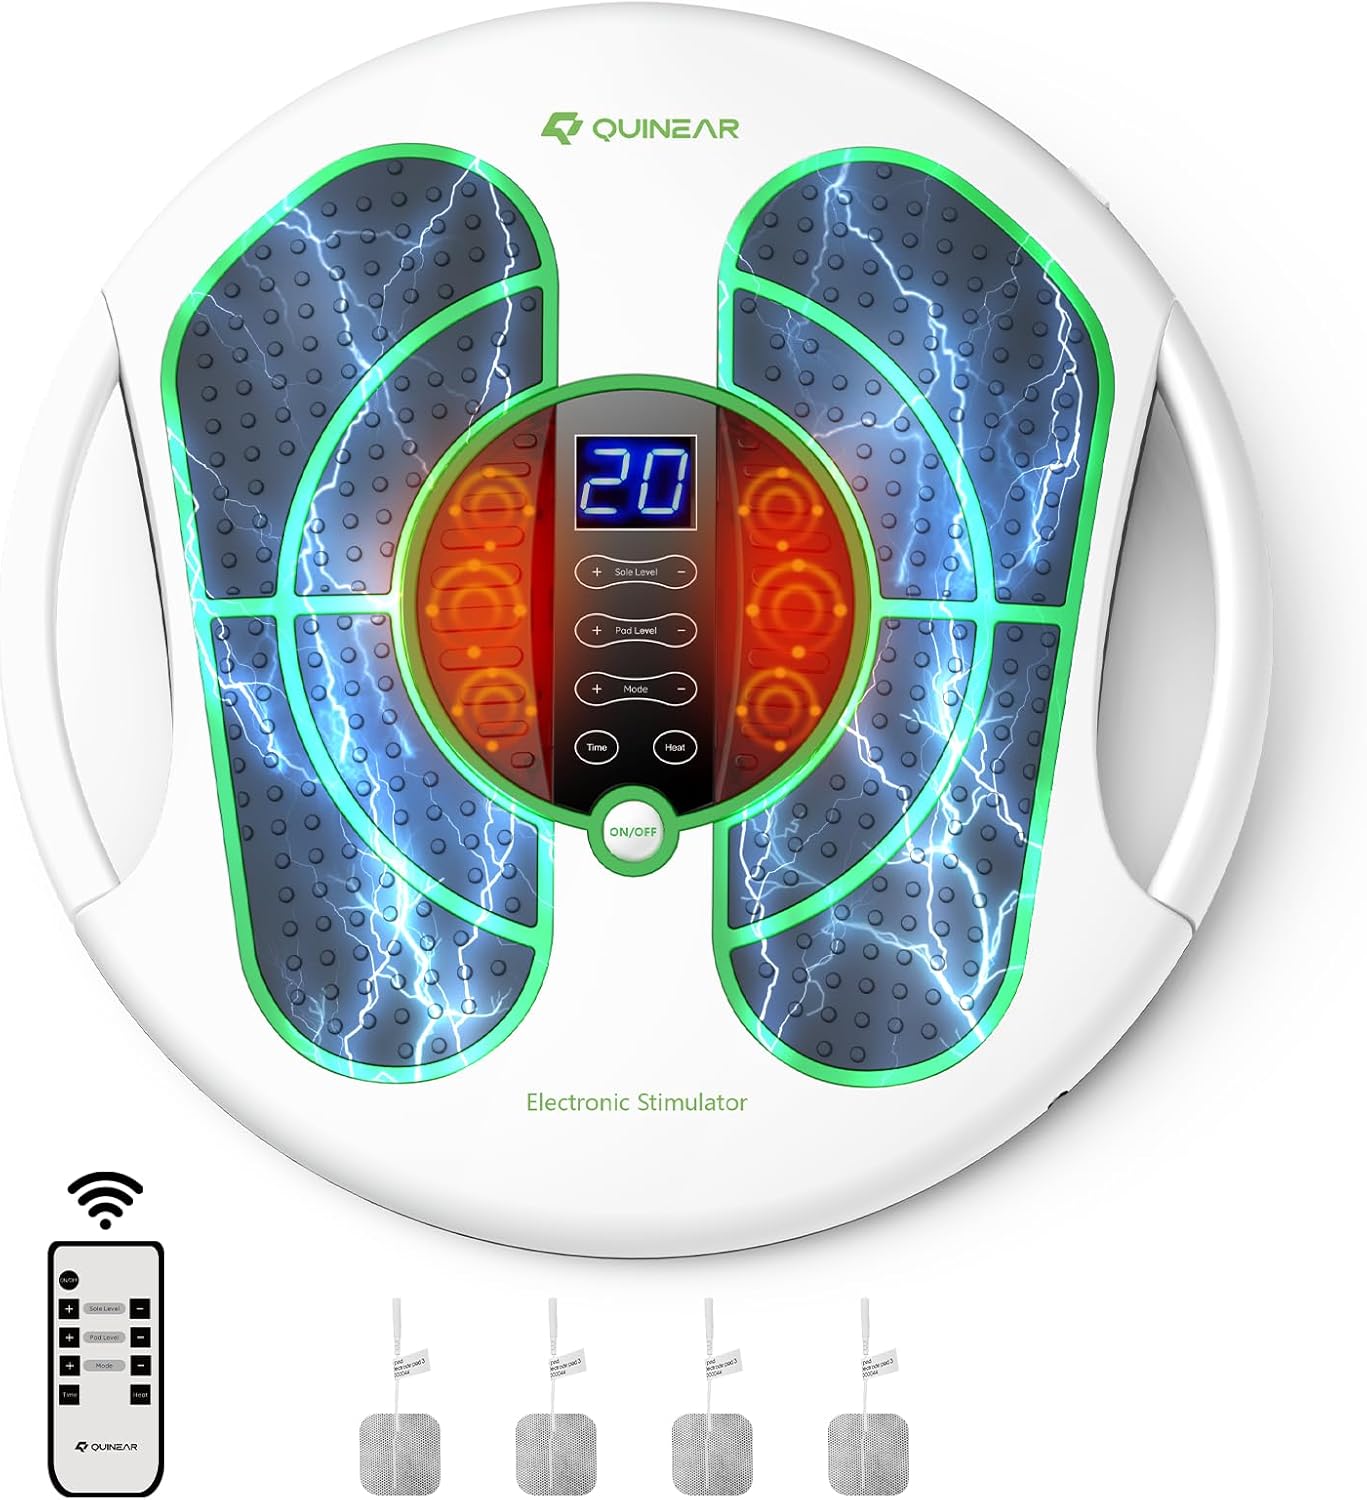
Figure 1.1: The QUINEAR Foot Massager in use, highlighting its key benefits.
2. Important Safety Information
WARNING: To reduce the risk of electric shock, burns, fire, or injury, read all instructions before using this appliance.
- Consult a physician before use if you have a pacemaker, heart condition, epilepsy, diabetes, or are pregnant.
- Do not use on open wounds, swollen areas, or inflamed skin.
- Do not use while sleeping or driving.
- Keep out of reach of children.
- Do not immerse the device in water or other liquids.
- Use only the provided power adapter.
- If you experience any discomfort, stop using the device immediately.
- Statements regarding dietary supplements have not been evaluated by the FDA and are not intended to diagnose, treat, cure, or prevent any disease or health condition. This device is not intended to replace professional medical advice or treatment.
3. Package Contents
Verify that all items are present in your package:

Figure 3.1: All components included in the QUINEAR Foot Massager package.
- QUINEAR Foot Stimulator Unit
- User Manual
- Remote Control
- Electrode Pads (4 pieces)
- Power Adapter
- Electrode Wires
4. Product Features
- EMS & TENS Technology: Utilizes low-frequency pulse technology to stimulate foot reflex areas, improving neuropathy, muscle spasms, blood circulation, and muscle function.
- Adjustable Intensity & Modes: Features 20 intensity levels for foot sole stimulation and 30 intensity levels for TENS pads, with 10 massage modes for personalized comfort.
- Additional TENS Pads: Includes 4 TENS pads for targeted relief on other body areas such as ankles, legs, waist, and shoulders.
- Remote Control & LED Display: Easy operation without bending, featuring a clear LED display.
- Adjustable Timer: Customizable massage sessions from 10 to 30 minutes.
- Heating Function: Integrated heating for enhanced circulation.
- Portable Design: Equipped with two handles for easy carrying.

Figure 4.1: Explanation of EMS and TENS technologies.
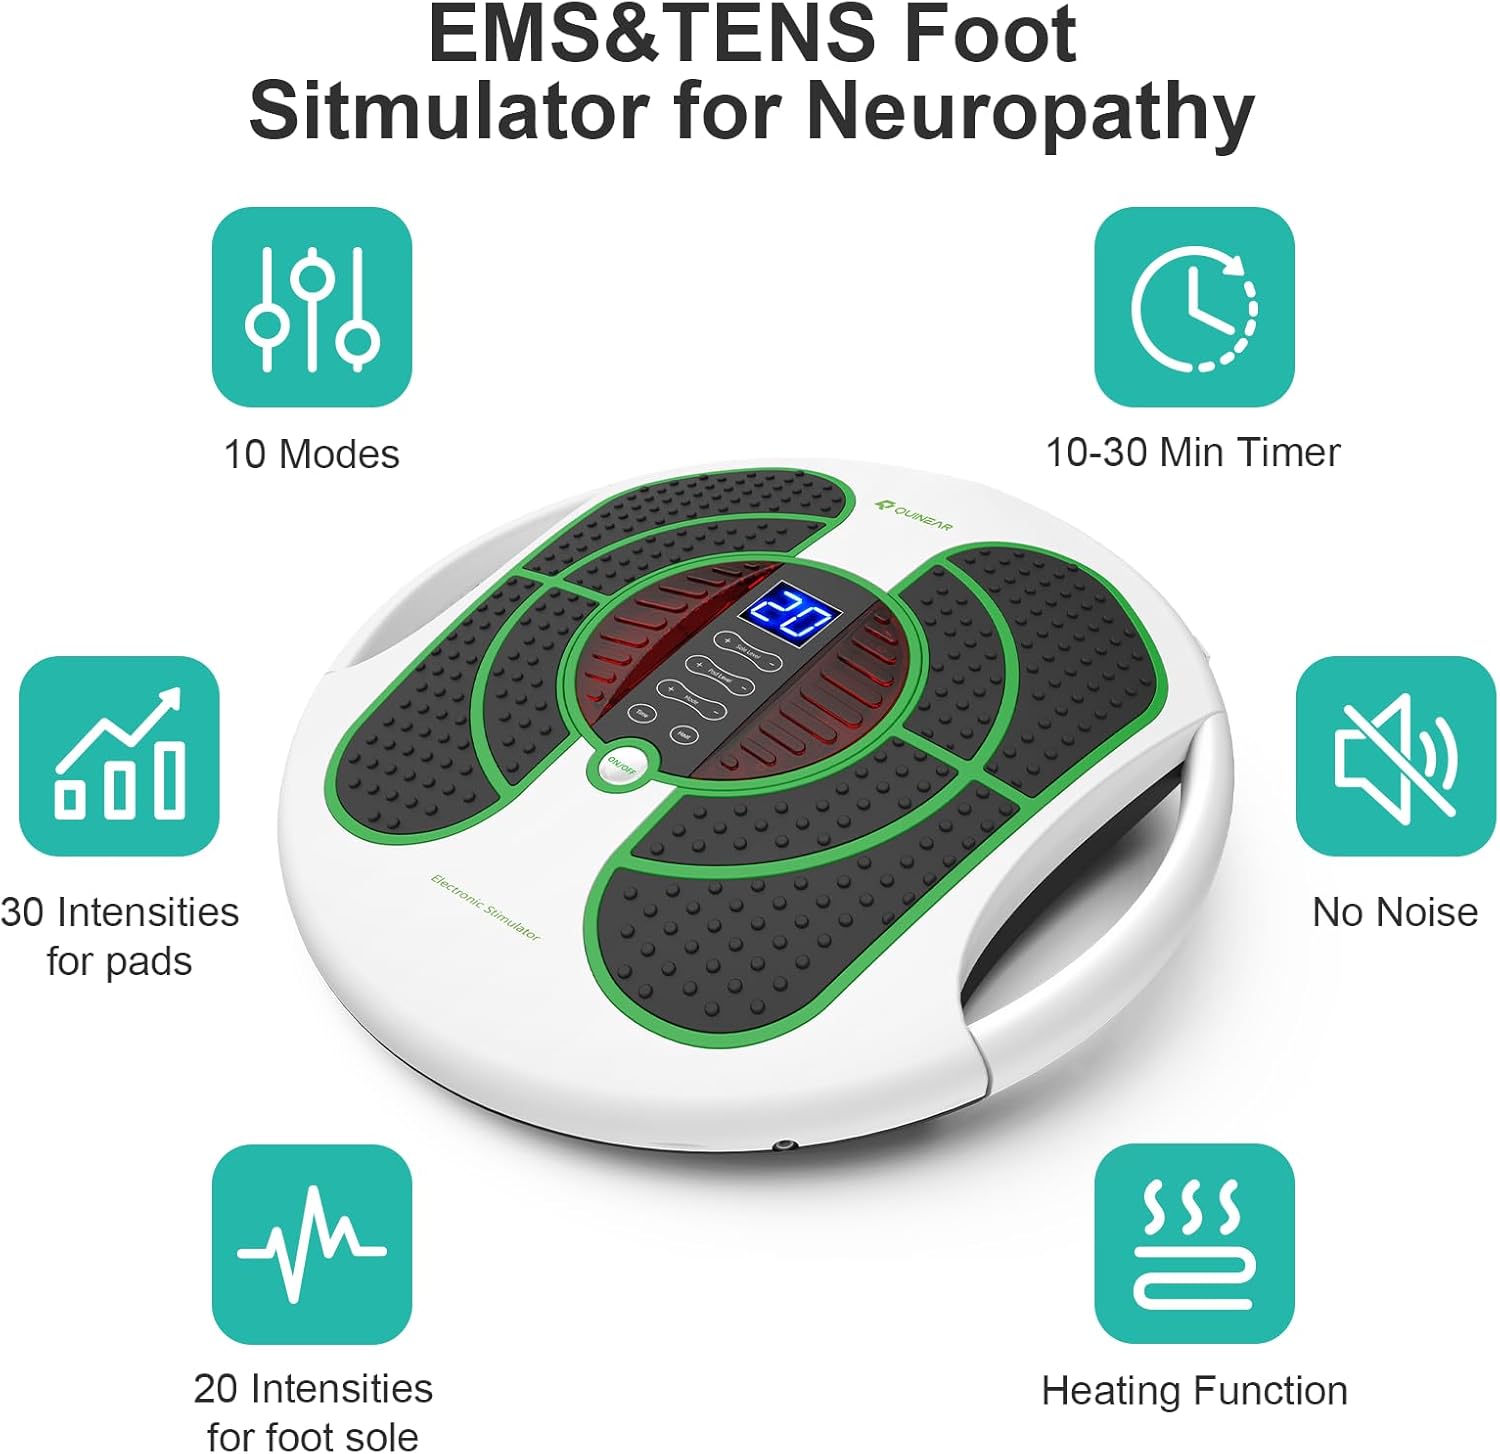
Figure 4.2: Summary of device features.
5. Setup
- Unpack: Carefully remove all components from the packaging.
- Placement: Place the QUINEAR Foot Stimulator on a flat, stable surface where you can comfortably sit.
- Power Connection: Connect the power adapter to the device's power input port, then plug the adapter into a standard electrical outlet.
- Remote Control: Ensure the remote control has batteries installed and is ready for use.
6. Operating Instructions
6.1 Using the Foot Stimulator
- Positioning: Sit comfortably and place your bare feet on the foot pads of the device.
- Power On: Press the "ON/OFF" button on the device or the remote control to turn it on. The LED display will illuminate.
- Select Mode: Use the "Mode" button on the device or remote to cycle through the 10 available massage modes.
- Adjust Intensity: Use the "+" and "-" buttons to adjust the intensity level (1-20) for the foot pads. It is recommended to start with the lowest strength and gradually increase.
- Set Timer: Use the "Time" button to select a massage duration (10-30 minutes). The device will automatically shut off after the set time.
- Heating Function: Press the "Heat" button to activate the heating function for enhanced circulation.
- Power Off: Press the "ON/OFF" button again to turn off the device when finished.
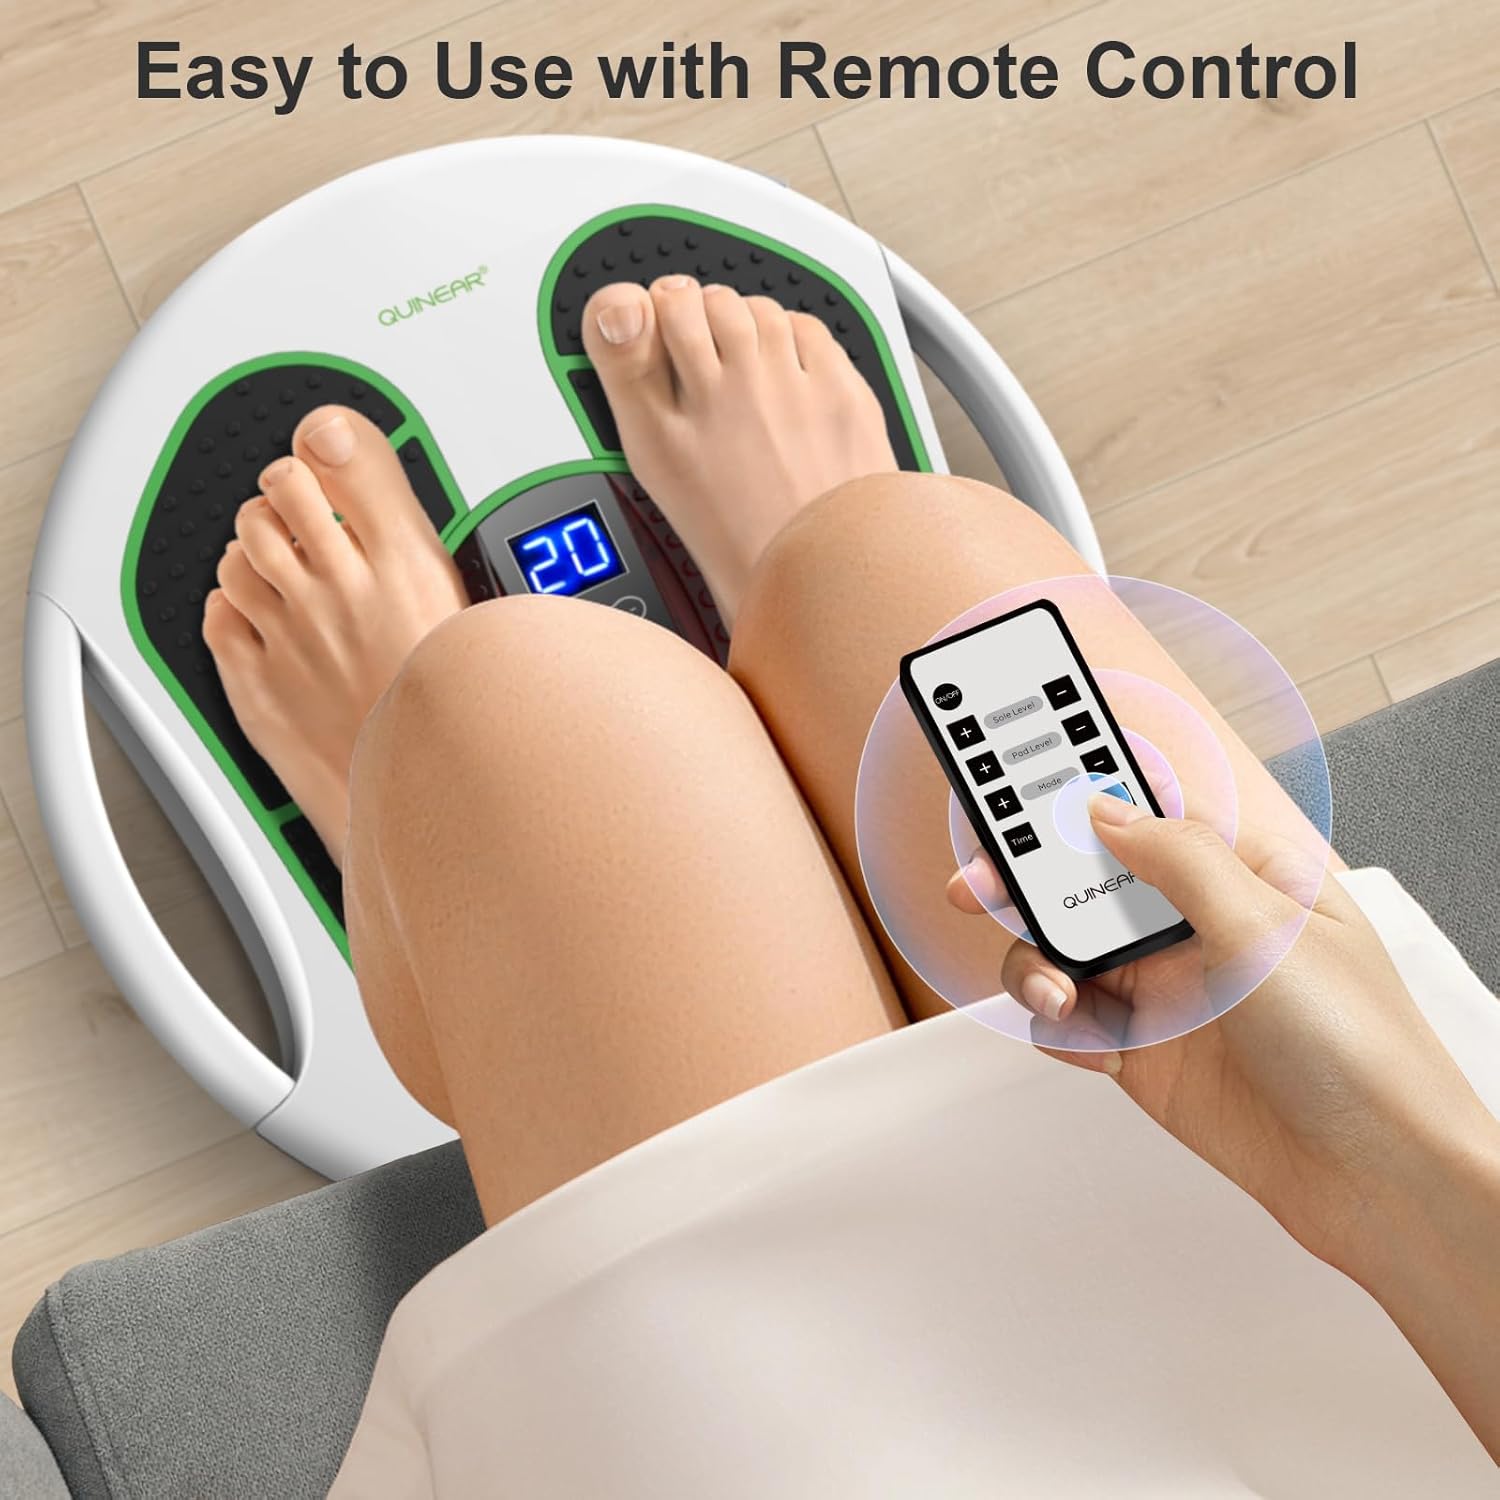
Figure 6.1: Operating the device with the remote control.

Figure 6.2: Overview of intensity levels and massage modes.

Figure 6.3: Visual representation of improved foot circulation with heating function.
6.2 Using the TENS Pads
The included TENS pads allow for targeted stimulation on other parts of the body.
- Connect Pads: Plug the electrode wires into the designated ports on the side of the main unit. Attach the electrode pads to the other end of the wires.
- Apply Pads: Ensure your skin is clean and dry. Apply the adhesive side of the TENS pads directly to the desired area of the body (e.g., ankles, legs, waist, shoulders).
- Power On & Adjust: Turn on the device. Use the "Pad Level +" and "Pad Level -" buttons on the remote or device to adjust the intensity for the TENS pads.
- Combined Use: The foot stimulation and TENS pad functions can be used simultaneously or independently.
- Removal: After use, gently peel the pads off your skin. Store them on their protective film to maintain adhesiveness.
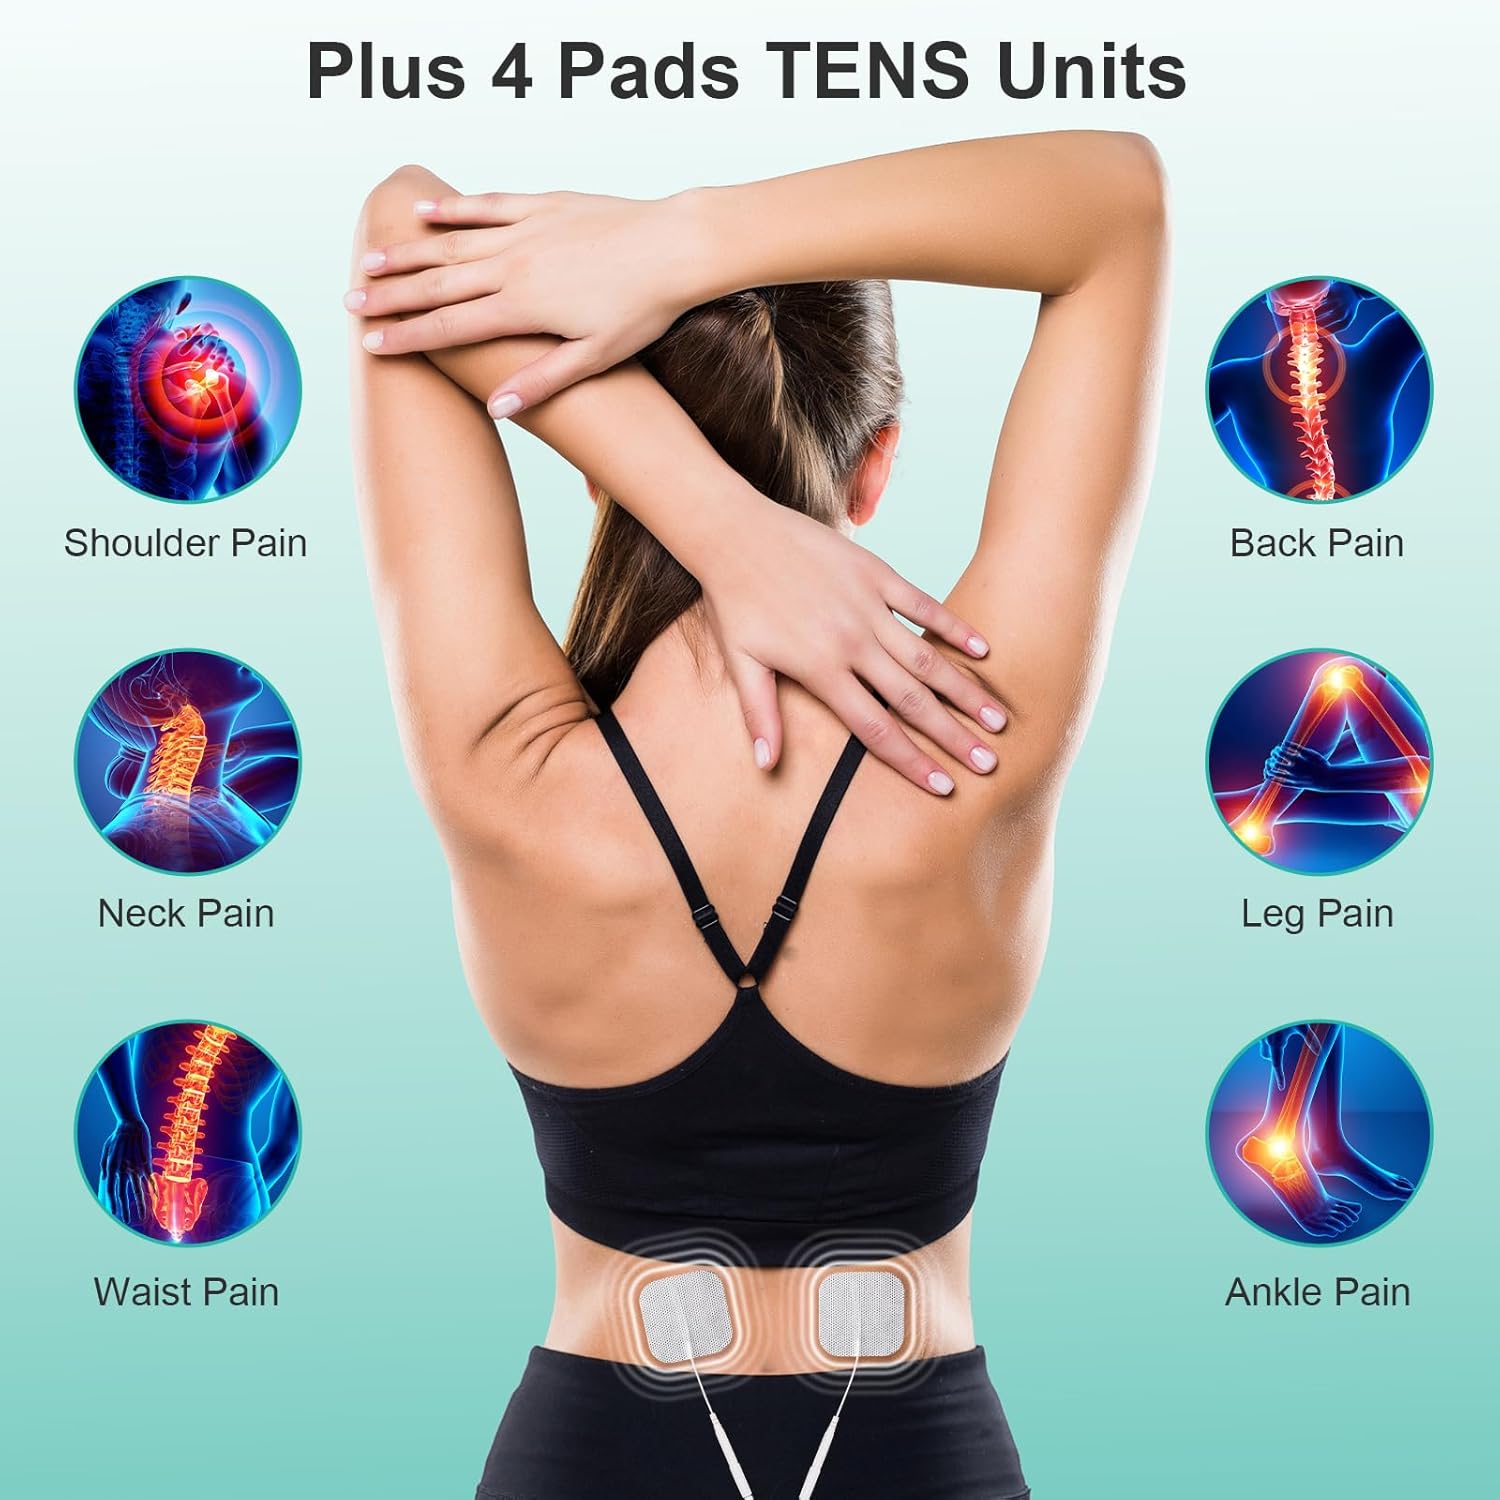
Figure 6.4: Application areas for the TENS pads.
7. Maintenance
- Cleaning: Wipe the main unit with a soft, damp cloth. Do not use abrasive cleaners or immerse in water.
- Electrode Pads: Clean the adhesive side of the pads with a damp cloth if they lose stickiness. Replace pads when they no longer adhere properly.
- Storage: Store the device in a cool, dry place, away from direct sunlight and extreme temperatures. Keep it out of reach of children.
8. Troubleshooting
| Problem | Possible Cause | Solution |
|---|---|---|
| Device does not turn on. | Not plugged in; power outlet issue; power adapter fault. | Ensure power adapter is securely plugged into both the device and a working outlet. Try a different outlet. |
| No sensation from foot pads. | Intensity too low; feet not making full contact; dry skin. | Increase intensity. Ensure bare feet are fully on the pads. Moisten feet slightly if skin is very dry. |
| No sensation from TENS pads. | Pads not connected; pads not adhering; intensity too low. | Ensure wires are connected and pads are firmly applied. Increase TENS pad intensity. Replace old pads. |
| Remote control not working. | Dead batteries; obstruction. | Replace batteries. Ensure no obstructions between remote and device. |
9. Specifications
- Model: B0DZCPJK5N
- Brand: QUINEAR
- Product Dimensions: 5 x 17 x 17 inches
- Weight: 6.05 Pounds
- Power Source: Corded Electric
- Material: Plastic
- Color: White
- Intensity Levels: 20 (for foot sole), 30 (for pads)
- Massage Modes: 10
- Timer Settings: 10-30 minutes
10. Warranty & Support
QUINEAR provides a two-year after-sales service for this product. For warranty claims, technical support, or any questions regarding your device, please contact QUINEAR customer service through the retailer where you purchased the product or visit the official QUINEAR website.
Please retain your proof of purchase for warranty purposes.
11. General Information
QUINEAR is dedicated to proactive self-care, blending clinical research with engineering precision. Their advanced compression therapy, smart sensors, and ergonomic design ensure targeted relief, improved circulation, and faster recovery. Built with medical-grade materials, every massager embodies safety, durability, and comfort.
Video 11.1: An overview of QUINEAR's commitment to wellness and their range of recovery systems. This video showcases various QUINEAR products, including leg recovery systems, and highlights the brand's focus on health and vitality.


