
1. Introduction
This manual provides detailed instructions for the safe and effective use of your VANPO Torque Screwdriver Set, Model VP3-80A. This precision tool is designed for applications requiring accurate torque settings between 10 and 80 inch-pounds, ensuring fasteners are tightened correctly without overtightening or stripping. Please read this manual thoroughly before operation and retain it for future reference.
2. Product Overview & Package Contents
The VANPO Torque Screwdriver Set (Model VP3-80A) is a 64-piece kit designed for precision fastening. It includes the torque screwdriver, various bits, and accessories, all organized in a durable case.

Figure 1: Complete VANPO Torque Screwdriver Set (Model VP3-80A) with all components.
Package Contents:
- 1 x Torque Screwdriver (10-80 in-lb)
- 1 x 1/4'' Extension Bar
- 1 x T-bar
- 1 x Quick Clamp
- 2 x Pozidriv Bits: PZ1, PZ2
- 3 x Flat Blades: 10Flat Blades, #11Flat Blades, #32Flat Blades
- 5 x Phillips Bits: PH0, PH1, PH2 (x2), PH3
- 6 x Pin Punch Sizes: 1/16", 3/32", 1/8", 5/32", 3/16", 1/4"
- 7 x Slotted Bits: SL 5/32”, SL 3/16”, SL3mm, SL4mm, SL5mm, SL6mm, SL7mm
- 9 x Torx Bits: T6, T8, T10, T15, T20, T25, T27, T30, T40
- 9 x 1/4" Sockets: 4mm, 4.5mm, 5mm, 5.5mm, 6mm, 7mm, 8mm, 9mm, 10mm
- 17 x Hex Bits: H1.5mm, H2mm, H2.5mm, H3mm, H4mm, H5mm, H6mm, H8mm, H1/16”, H5/64”, H3/32”, H7/64”, H1/8”, H9/64”, H5/32”, H3/16”, H1/4”

Figure 2: Detailed view of the torque screwdriver and included bits.
3. Setup
3.1. Bit Installation
- Select the appropriate bit for your application from the included 60+ precision bits.
- Insert the selected bit firmly into the 1/4" drive of the torque screwdriver. Ensure it is fully seated.
- For extended reach, attach the 1/4" Extension Bar to the screwdriver drive first, then insert the bit into the extension bar.
3.2. Using the T-Bar and Quick Clamp
The T-bar provides additional leverage for higher torque applications. The Quick Clamp assists in faster torque adjustment, especially for settings above 30 in-lb.
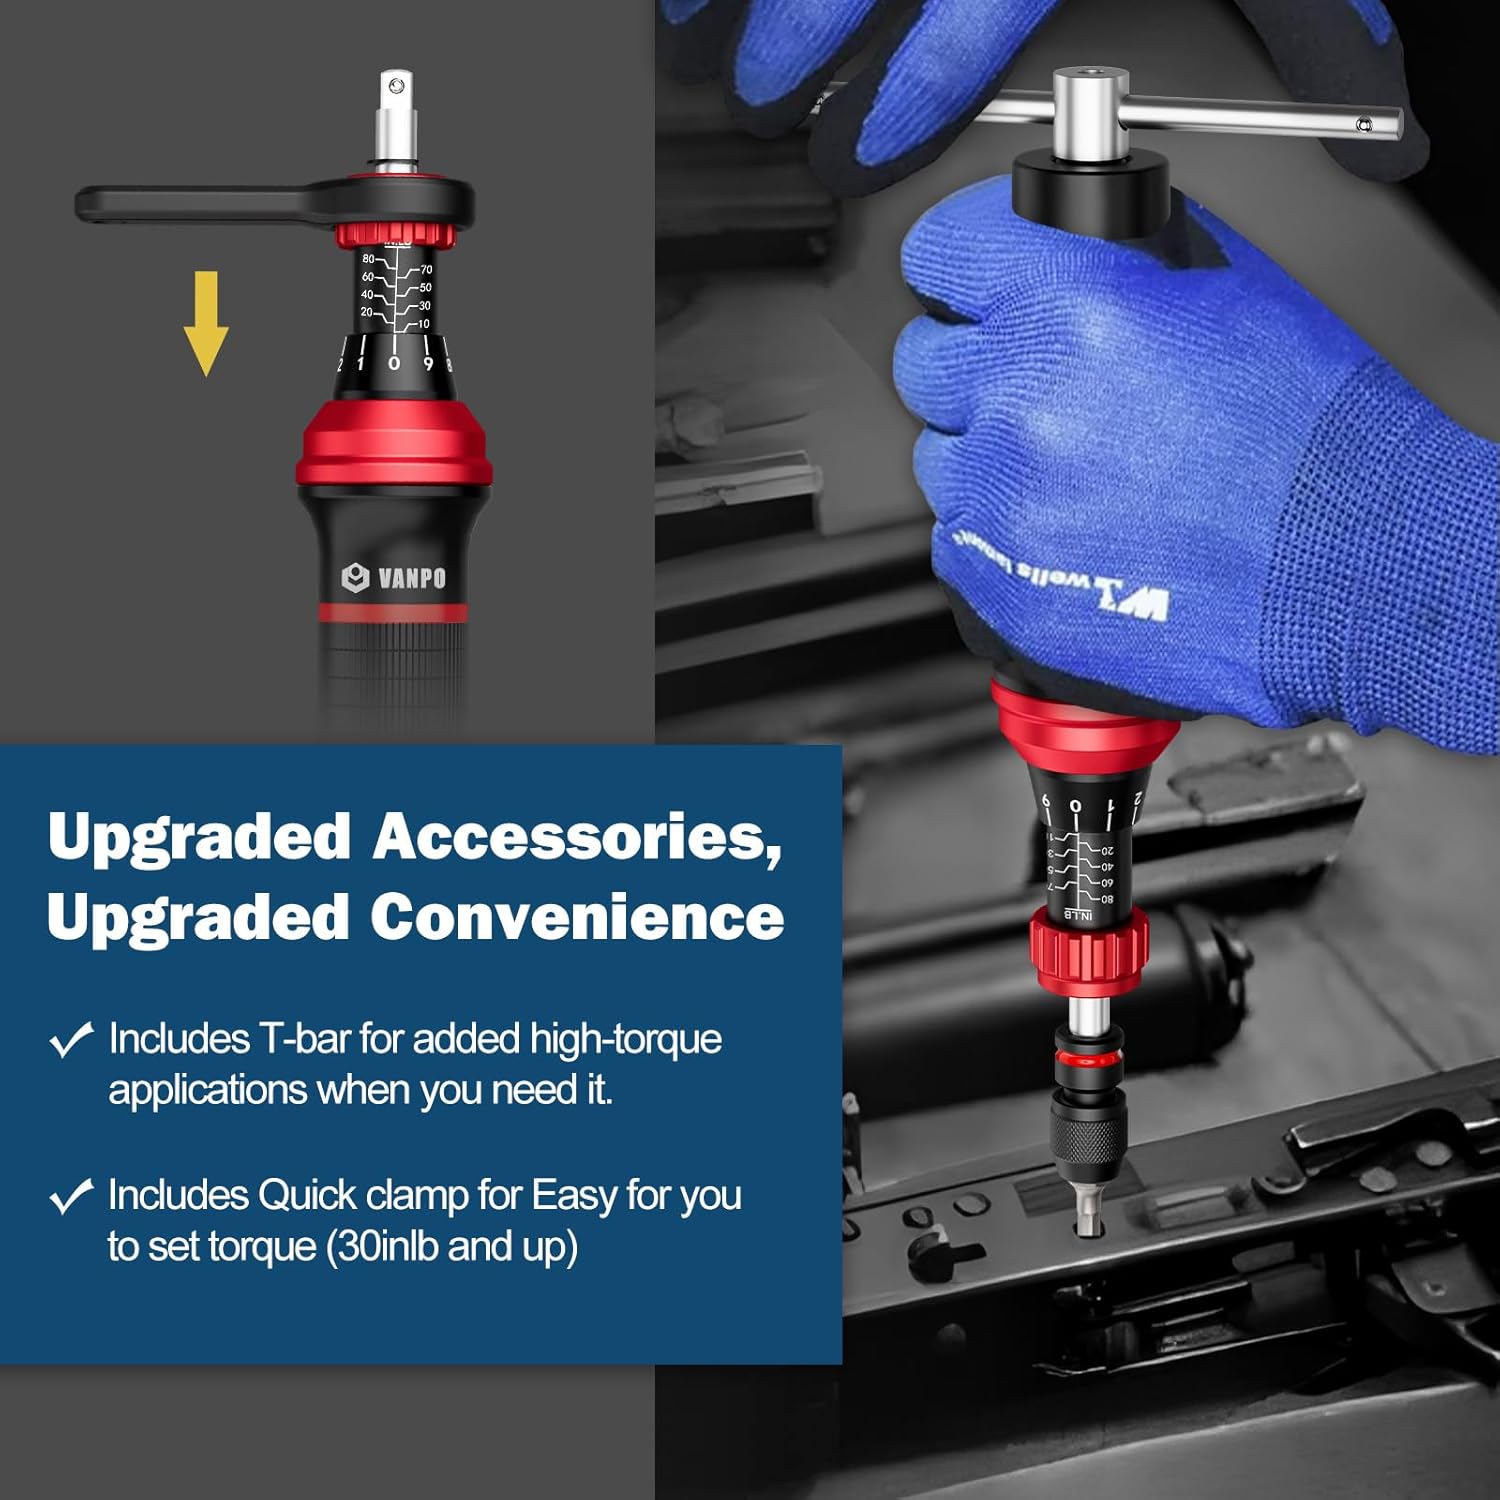
Figure 3: T-bar and Quick Clamp in use.
4. Operating Instructions
4.1. Torque Adjustment
To set the desired torque value (10-80 in-lb):
- Unlock: Pull down the knob at the base of the handle to unlock the adjustment mechanism.
- Adjust Main Scale: Rotate the handle to align the desired main torque value (e.g., 10, 20, 30 in-lb) with the indicator line on the main scale.
- Adjust Secondary Scale: Fine-tune the setting by rotating the handle until the desired incremental value (0-9 in-lb) on the secondary scale aligns with the main scale's indicator line. The total torque is the sum of the main scale value and the secondary scale value.
- Lock: Push the knob back up to lock the torque setting in place.

Figure 4: Steps for adjusting the torque setting.
4.2. Applying Torque
Once the torque is set and locked, apply the screwdriver to the fastener. Turn the screwdriver clockwise until you feel and hear a distinct "click." This click indicates that the preset torque has been reached, and no further tightening is required. For consistent results, it is recommended to apply torque smoothly and steadily.
Video 1: Demonstration of the torque screwdriver in use, showing the audible click when the preset torque is reached. This video highlights the precision and ease of use for various applications, including bicycle maintenance.

Figure 5: Using the torque screwdriver for precise fastening on optics.

Figure 6: Torque screwdriver in use on a bicycle component.
5. Maintenance
Proper maintenance ensures the longevity and accuracy of your torque screwdriver.
- Cleaning: After each use, wipe the screwdriver and bits with a clean, dry cloth to remove any dirt, grease, or debris. Do not use harsh chemicals or solvents.
- Storage: Store the torque screwdriver set in its original case in a dry, clean environment. Always set the torque to the lowest possible setting (10 in-lb) before storing to relieve spring tension and maintain calibration accuracy.
- Calibration: Torque tools require periodic recalibration to maintain accuracy. It is recommended to have your torque screwdriver recalibrated annually or after approximately 5,000 uses, whichever comes first. Refer to the included Certificate of Calibration for initial test results and recommended verification intervals.
Video 2: Overview of the VANPO Torque Screwdriver Set, demonstrating its components and features, useful for understanding proper handling and storage.
6. Troubleshooting
- Screwdriver not clicking: Ensure the torque setting is correctly locked. If the fastener is already tight, the screwdriver may not click if the applied torque is below the set value. Verify the torque setting is appropriate for the fastener.
- Bits slipping: Ensure the correct bit size and type are used for the fastener. Confirm the bit is fully inserted into the screwdriver's drive or extension bar. Replace worn or damaged bits.
- Inaccurate torque: Check if the torque setting is correctly adjusted and locked. Ensure the screwdriver is held perpendicular to the fastener. If issues persist, the tool may require recalibration.
7. Specifications

Figure 7: Key features and scales of the torque screwdriver.
| Feature | Specification |
|---|---|
| Brand | VANPO |
| Model Number | VP3-80A |
| Torque Range | 10-80 Inch Pounds (in-lb) |
| Accuracy | ±5% |
| Increment | 1 in-lb |
| Drive Size | 1/4 inch |
| Material | Chromium Molybdenum Steel, Aluminum |
| Item Weight | 1.24 kg |
| Product Dimensions | 33 x 11.5 x 5.5 cm |
| Head Style | Fixed Square |
| Special Features | Adjustable Torque |
8. Warranty and Support
For warranty information, technical support, or service inquiries, please refer to the warranty card included in your product packaging or contact VANPO customer service directly. Keep your purchase receipt as proof of purchase.