1. Introduction
This manual provides essential instructions for the proper installation, operation, and maintenance of your HP Mounting Sleeve (Model 99T55AA). This sleeve is designed to securely mount HP Mini PCs, power supplies, or other compatible devices to a display or VESA-compatible surface, optimizing workspace and organization. Please read this manual thoroughly before proceeding with installation.
2. Safety Information
- Ensure all mounting hardware is securely fastened to prevent accidental detachment.
- Do not exceed the weight capacity of the mounting sleeve or the VESA mount it is attached to. Refer to the specifications section for weight limits.
- Keep small parts and packaging materials away from children.
- If you encounter any difficulties during installation, consult a qualified technician.
3. Package Contents
Verify that all components are present before beginning installation:
- HP Mounting Sleeve (1 unit)
- Mounting Hardware (screws, washers, etc. - specific quantities may vary by region)
- Quick Start Guide (if included)
4. Setup and Installation
Follow these steps to install your HP Mounting Sleeve:
- Identify Mounting Location: Determine where you will mount the sleeve. It is designed for VESA 100 x 100 mm patterns, typically found on the back of computer monitors or dedicated VESA mounts.
- Attach Sleeve to VESA Mount: Align the mounting holes on the sleeve's VESA plate with the corresponding holes on your display or VESA arm. Use the provided screws to secure the sleeve firmly. Do not overtighten.
- Insert Device: Carefully slide your HP Mini PC, power supply, or other compatible device into the sleeve's enclosure. Ensure it fits snugly and is properly seated.
- Secure Device (if applicable): Some devices may have additional securing mechanisms within the sleeve. Follow any specific instructions provided with your device for final securing.
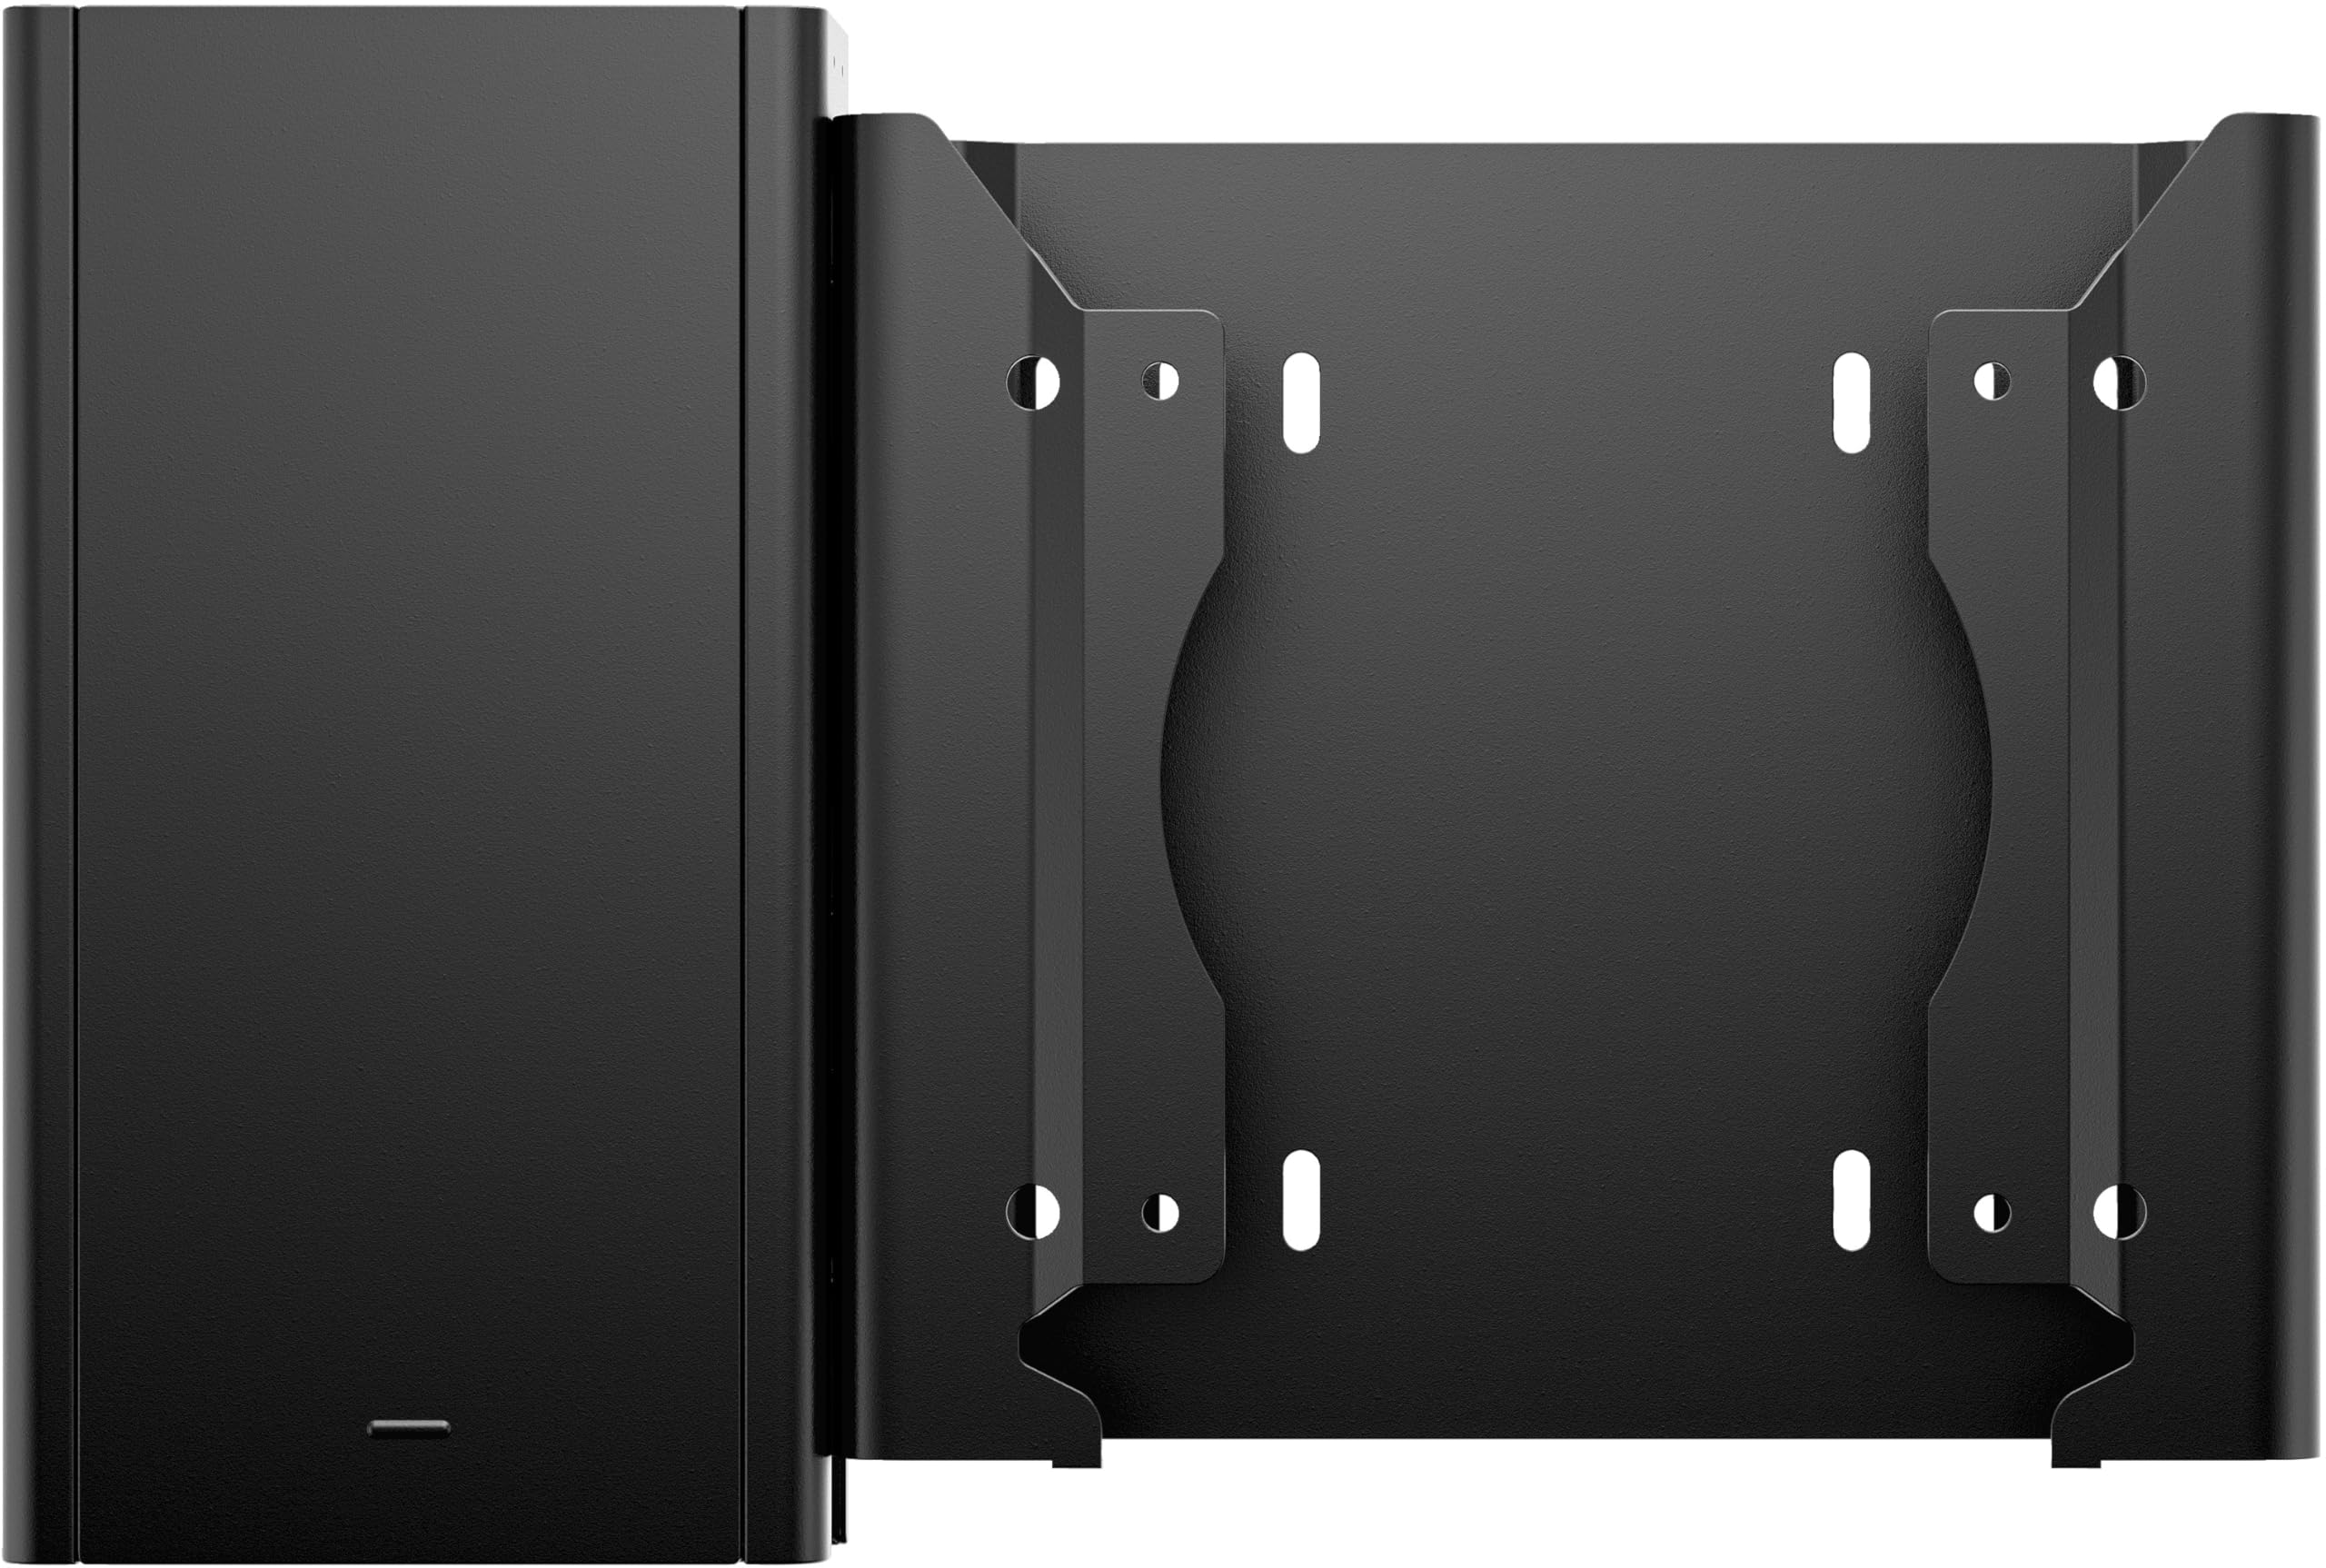
This image displays the HP Mounting Sleeve, featuring its two primary components: the enclosure for a mini PC or power supply on the left, and the VESA mounting plate on the right. The mounting plate includes multiple screw holes for attachment to a display or other VESA-compatible surface.
5. Operating the Mounting Sleeve
The HP Mounting Sleeve is a passive accessory designed to hold and organize your devices. Once installed and the device is secured, no further operational steps are typically required. Ensure that all cables connected to the mounted device have sufficient slack to prevent strain or damage.
6. Maintenance
To maintain the appearance and functionality of your mounting sleeve:
- Cleaning: Use a soft, dry cloth to wipe down the sleeve. For stubborn marks, a slightly damp cloth with mild soap can be used, followed by drying. Avoid abrasive cleaners or solvents.
- Inspection: Periodically check all mounting screws to ensure they remain tight. If any screws feel loose, gently tighten them.
7. Troubleshooting
If you encounter issues with your mounting sleeve, consider the following:
- Sleeve feels loose: Re-check all mounting screws. Ensure they are properly tightened to the VESA mount and that the VESA mount itself is secure.
- Device does not fit: Verify that your device's dimensions are compatible with the sleeve. Refer to the product specifications for internal dimensions.
- Sleeve is damaged: If the sleeve is physically damaged, discontinue use and contact HP support for assistance.
8. Specifications
| Model Number | 99T55AA |
| Manufacturer | HP Inc. |
| Item Weight | 14.2 ounces (approx. 0.4 kg) |
| Product Dimensions | 1.7 x 6.4 x 7.3 inches (4.3 x 16.3 x 18.5 cm) |
| VESA Compatibility | 100 x 100 mm |
| Material | Information Not Available |
9. Warranty Information
This HP product is covered by a limited warranty. For detailed information regarding warranty terms, conditions, and duration, please refer to the warranty documentation included with your original purchase or visit the official HP support website. Keep your proof of purchase for warranty claims.
10. Support
For technical assistance, product information, or to report issues, please visit the official HP support website or contact HP customer service through the channels provided on their website. Have your product model number (99T55AA) and serial number (if applicable) ready when contacting support.
- HP Support Website: www.hp.com/support
- Contact Information: Refer to the HP support website for regional phone numbers and chat options.