FOIFKIN F300
FOIFKIN F300 PC Case Instruction Manual
Model: F300 | Brand: FOIFKIN
1. Product Overview
The FOIFKIN F300 is an ATX Mid-Tower Gaming PC Case designed for optimal performance and aesthetic appeal. It features a 270° panoramic tempered glass panel, offering an expansive view of internal components. The case incorporates a dual-chamber design for efficient cable management and enhanced cooling. It comes pre-installed with four non-LED fans to facilitate immediate high-performance heat dissipation.
Key features include:
- 270° Panoramic Tempered Glass: Provides a wide field of vision and showcases internal hardware. The glass panel is hinged for easy access and tool-free disassembly.
- High-Performance Heat Dissipation: Supports up to 10 x 120mm fans and includes four pre-installed non-LED fans for effective cooling.
- Extra Large Capacity: Compatible with ATX, M-ATX, and ITX motherboards, supporting large CPU coolers (up to 170mm), GPUs (up to 400mm), and ATX power supplies (up to 220mm).
- Versatile I/O Ports: Front panel includes 1x Type-C 3.0, 1x USB 3.0, 1x USB 2.0, Microphone & Audio jacks, Power Button, Restart Button, and LED Switch Button.
- Dual Chamber Design: Separates the main components from cable routing and storage drives for a cleaner build and improved airflow.

2. Setup and Installation
This section provides step-by-step instructions for setting up your FOIFKIN F300 PC Case and installing components.
2.1 Unpacking and Inspection
- Carefully remove the PC case from its packaging.
- Inspect the case for any signs of damage during transit. Contact customer support immediately if damage is found.
- Verify all accessories are present, including screws, cable ties, and any additional brackets.
2.2 Accessing the Interior
The F300 features hinged tempered glass side panels for easy access.
- To open the side panel, gently pull the panel outwards from the front edge. The hinges allow it to swing open.
- For complete removal, lift the panel upwards once it is open to disengage it from the hinges.

2.3 Component Installation
Follow these steps to install your PC components:
- Motherboard Installation: Install the appropriate standoffs for your ATX, M-ATX, or ITX motherboard. Carefully place the motherboard and secure it with screws.
- CPU Cooler Installation: Install your CPU cooler. The case supports CPU coolers up to 170mm in height.
- Graphics Card (GPU) Installation: Install your graphics card into the PCIe slot. The case accommodates GPUs up to 400mm in length. Note that expansion slot covers may need to be broken off.
- Power Supply Unit (PSU) Installation: Install your ATX power supply in the dedicated compartment. The case supports PSUs up to 220mm.
- Storage Drive Installation: Install 1x HDD and 1x SSD, or 2x HDDs, in the designated mounting points.
- Fan and Radiator Installation: The case comes with 4 pre-installed non-LED fans. Additional fans (up to 10 x 120mm) or radiators (up to 360mm) can be installed on the top, side, and bottom mounts.


2.4 Cable Management
The F300 features a dual-chamber design and reserved holes for efficient cable routing.
- Route all power and data cables through the designated cutouts to the rear chamber.
- Utilize the included cable ties to bundle and secure cables, ensuring a clean appearance and unobstructed airflow.


3. Operating the PC Case
Once all components are installed and cables are connected, you can begin operating your PC.
3.1 Front Panel I/O Ports
The front panel provides convenient access to various ports and controls:
- Power Button: Press to turn on or off your computer.
- Restart Button: Press to restart your computer.
- LED Switch Button: If applicable, controls the lighting of compatible components.
- USB 3.0 Port (x1): For high-speed data transfer with compatible devices.
- USB 2.0 Port (x1): For standard data transfer and peripheral connections.
- Type-C 3.0 Port (x1): For modern USB-C devices, offering fast data transfer.
- Microphone Jack: For connecting a microphone.
- Audio Jack: For connecting headphones or speakers.
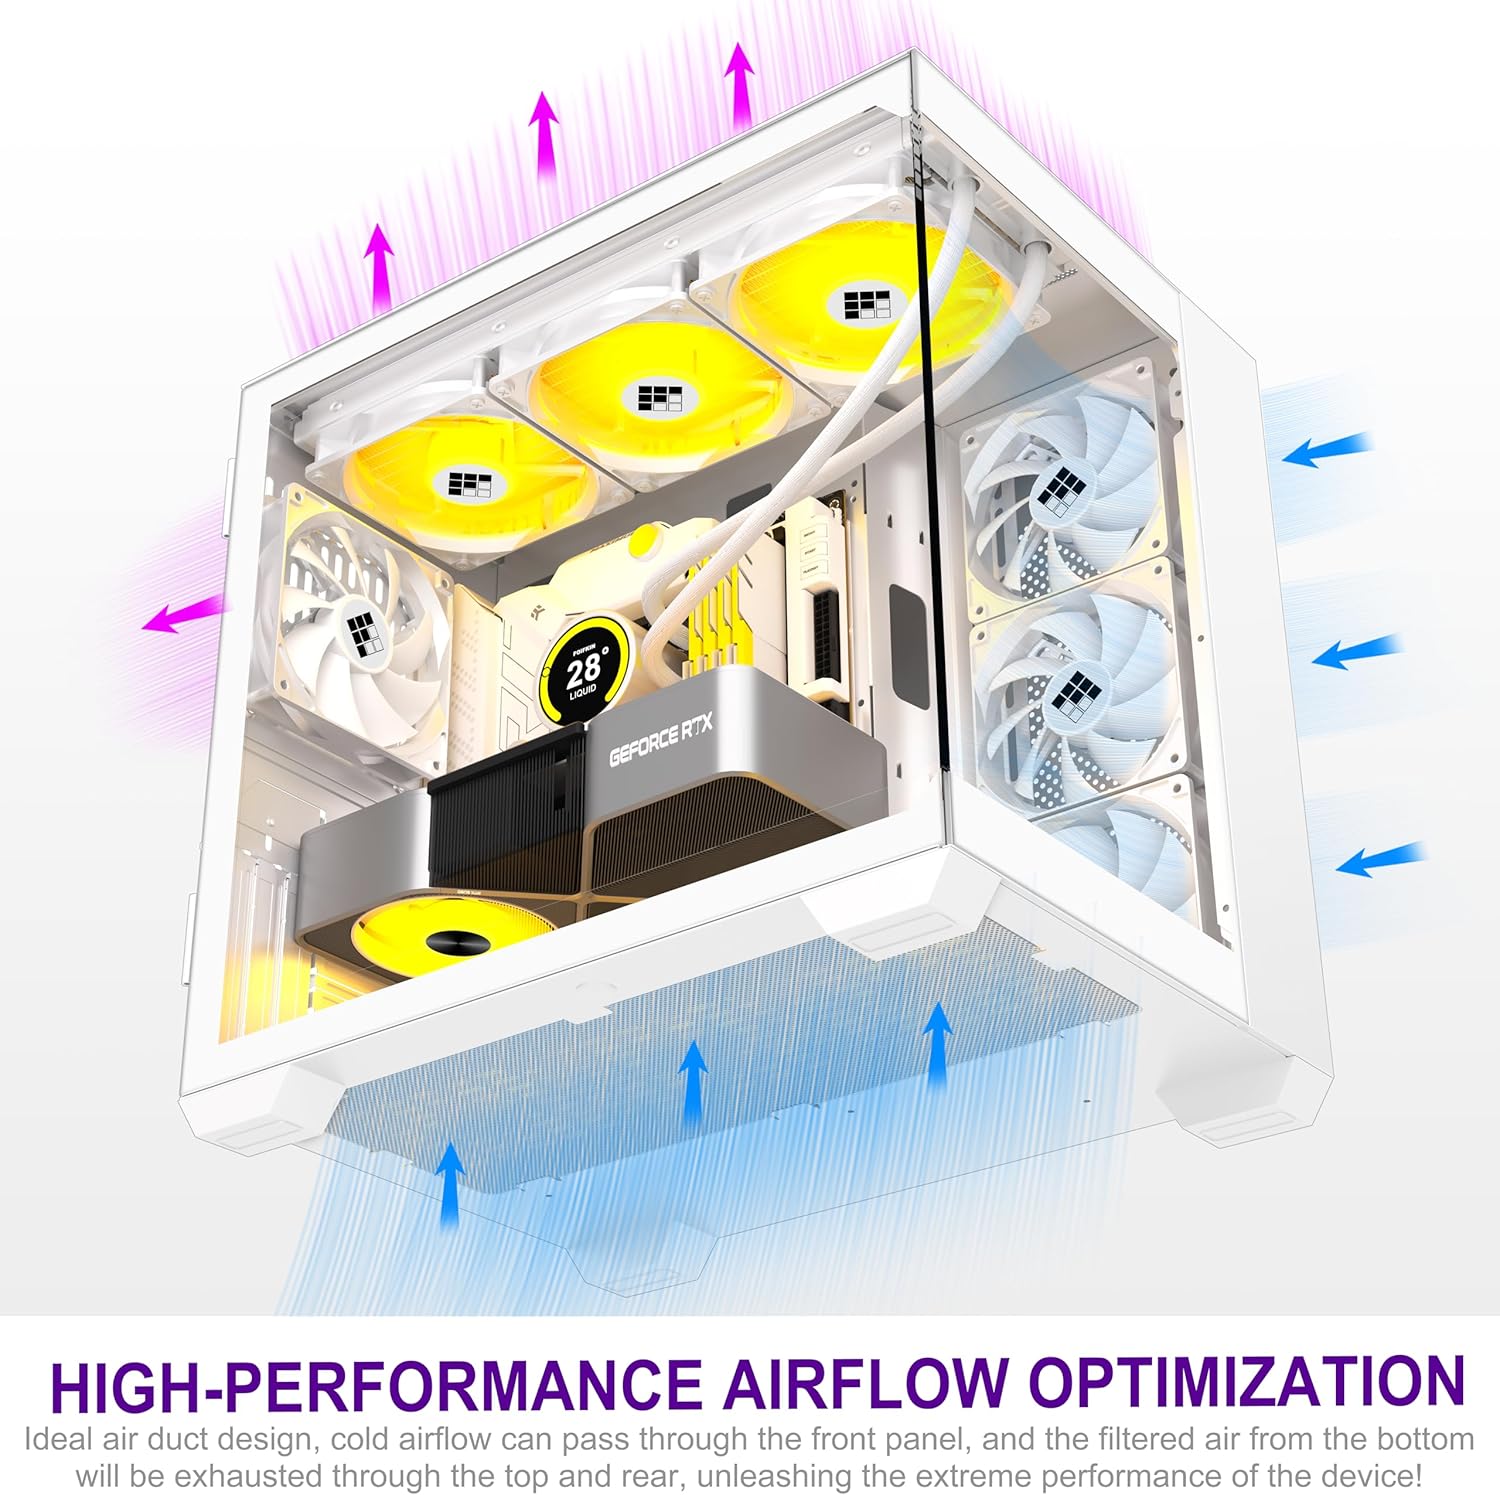
3.2 Airflow and Cooling
The F300 is designed for optimized airflow to maintain low temperatures for your components.
- Ensure adequate space around the case for proper air intake and exhaust.
- The pre-installed fans and potential additional fans work to create an efficient cooling path, drawing cool air in and expelling hot air.
4. Maintenance
Regular maintenance helps ensure the longevity and optimal performance of your PC case and its components.
4.1 Dust Cleaning
- Dust accumulation can impede airflow and lead to overheating. Periodically clean the dust filters and interior of the case.
- Use compressed air to blow dust out of fans and heatsinks.
- Wipe down exterior surfaces with a soft, damp cloth. Avoid abrasive cleaners.
4.2 Tempered Glass Care
- Clean the tempered glass panels with a microfiber cloth and a glass cleaner specifically designed for electronics or non-abrasive surfaces.
- Avoid applying excessive force or impact to the glass panels.
5. Troubleshooting
This section addresses common issues you might encounter with your PC case.
5.1 Fans Not Spinning / Loud Fans
- Check Connections: Ensure all fan power cables are securely connected to the motherboard or fan controller.
- BIOS/Software Settings: Verify fan speed settings in your motherboard's BIOS or fan control software.
- Obstructions: Check for any cables or debris obstructing fan blades.
- Dust Buildup: Clean fans and surrounding areas of dust.
5.2 Front Panel Ports Not Working
- Internal Connections: Ensure the front panel I/O cables (USB, Audio, Power, Reset, Type-C) are correctly and securely connected to the corresponding headers on your motherboard. Refer to your motherboard manual for correct pinouts.
- Driver Issues: For USB or Type-C ports, ensure the necessary motherboard drivers are installed.
5.3 Sagging Side Panel
- If a hinged side panel appears to sag, gently inspect the hinges for any misalignment or damage.
- Ensure the panel is fully seated on its hinges when closed.
6. Specifications
| Feature | Specification |
|---|---|
| Model | FOIFKIN F300 |
| Case Type | Mid Tower |
| Dimensions (LxWxH) | 16.4 x 15.2 x 11.8 inches (416 x 386 x 300 mm) |
| Weight | 19.36 pounds (8.78 kg) |
| Material | Metal, Plastic, Tempered Glass |
| Color | White |
| Motherboard Support | ATX, M-ATX, ITX |
| CPU Cooler Height Limit | 170mm (Max) |
| GPU Length Limit | 400mm (Max) |
| PSU Type & Length Limit | ATX, 220mm (Max) |
| Expansion Slots | 7+3 |
| Drive Bays | 1x 3.5" HDD + 1x 2.5" SSD or 2x 3.5" HDD |
| Pre-installed Fans | 4x Non-LED Fans |
| Fan Support | Up to 10x 120mm fans (various positions) |
| Radiator Support | 360mm, 280mm, 240mm, 120mm |
| Front I/O Ports | 1x Type-C 3.0, 1x USB 3.0, 1x USB 2.0, Microphone & Audio, Power, Reset, LED Switch |
| Special Features | 270° Panoramic Tempered Glass, Dual Chamber Design, Built-In Fan, Dust Filter, Noise Reduction Technology |
7. Warranty and Support
FOIFKIN is committed to providing high-quality products and customer satisfaction.
- Product Quality Guarantee: The product quality is guaranteed.
- Customer Support: If you encounter any problems with your FOIFKIN F300 PC Case, please contact FOIFKIN customer support. You can typically find contact information on the seller's page or the official FOIFKIN website.
- Risk-Free Purchase: FOIFKIN strives to provide the best support to its customers.
For the most up-to-date warranty terms and support options, please refer to the official FOIFKIN website or your purchase documentation.
Ask a question about this manual
Ask about setup, troubleshooting, compatibility, parts, safety, or missing instructions. Manuals+ will review the question and use this page’s manual context to help answer it.