
Introduction
This manual provides essential instructions for the installation, operation, and maintenance of your Generic NK5100-01100C-00/C Laptop Backlit Keyboard. Please read this manual thoroughly before installation to ensure proper function and to prevent damage.
Safety Information
- Always disconnect power from your laptop before attempting any installation or removal of components.
- Use appropriate tools to avoid damaging the keyboard or laptop chassis.
- Handle the keyboard by its edges to prevent damage to the keys or internal circuitry.
- Keep small parts away from children.
- If you are unsure about any step, seek professional assistance.
Package Contents
Verify that all items are present in the package:
- 1 x Generic NK5100-01100C-00/C Laptop Backlit Keyboard
- (No other accessories are typically included with a replacement keyboard unless specified by the seller.)
Setup and Installation
Tools Required: Small Phillips head screwdriver, plastic prying tool (spudger) (optional).
Important: Before starting, power off your laptop completely and remove the battery if it is external. If internal, disconnect the battery connector after opening the laptop.
- Prepare the Laptop: Close the laptop lid and place it upside down on a soft, clean surface to prevent scratches.
- Remove Back Panel (if necessary): Depending on your laptop model, you may need to remove the bottom cover to access the keyboard ribbon cable or screws. Refer to your laptop's service manual for specific instructions.
- Locate Keyboard Retaining Screws: Many laptops have screws on the bottom panel marked with a keyboard icon. Remove these screws.
- Remove Old Keyboard:
- Carefully pry up the keyboard bezel or the keyboard itself using a plastic tool, starting from the top edge.
- Once the keyboard is loose, gently lift it to expose the ribbon cables underneath.
- Unlock the ZIF (Zero Insertion Force) connectors for the main keyboard ribbon cable and the backlight ribbon cable (if present) by flipping up the small retaining clips.
- Carefully pull the ribbon cables out of their connectors. Remove the old keyboard.
- Install New Keyboard:
- Align the new Generic NK5100-01100C-00/C keyboard's ribbon cables with their respective ZIF connectors.
- Gently insert the ribbon cables fully into the connectors and then press down the retaining clips to secure them. Ensure the cables are not creased or bent sharply.
- Carefully place the new keyboard into its housing, ensuring all clips and tabs align correctly. Press down gently around the edges until it snaps into place.
- Reinstall any keyboard retaining screws from the bottom of the laptop.
- Reassemble Laptop: Reattach the back panel and any other components removed during the process. Reconnect the battery.
- Test Functionality: Power on your laptop and test all keys, including the backlight function (if applicable, usually activated via Fn + Fx key combination).
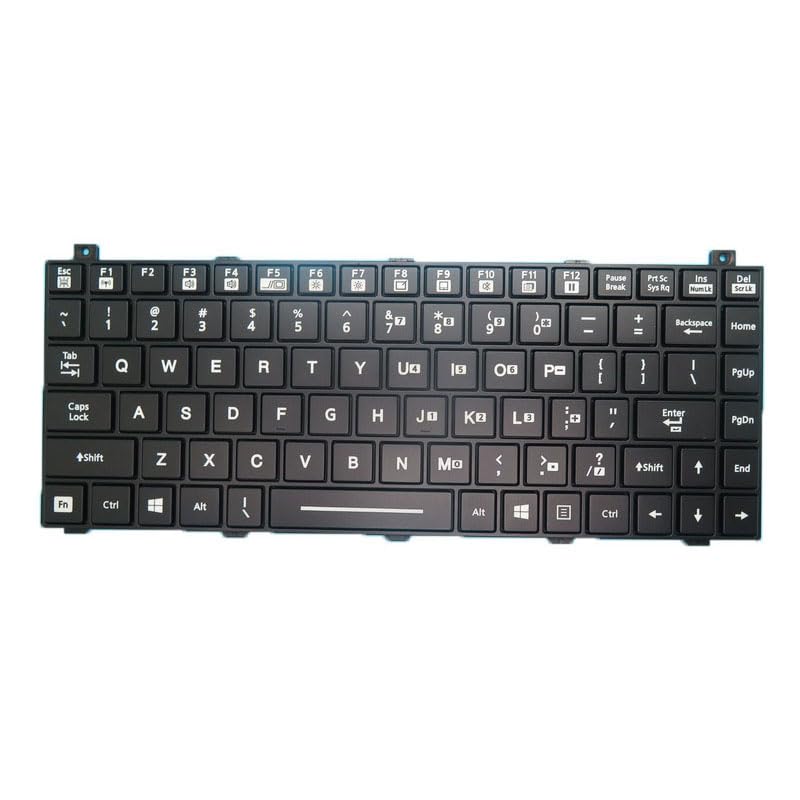
Figure 1: Generic NK5100-01100C-00/C Laptop Backlit Keyboard. This image shows the full keyboard with its frame, highlighting the key layout and backlit keycaps.
Operating Instructions
The Generic NK5100-01100C-00/C is a standard QWERTY layout keyboard. Its primary function is to provide input to your laptop.
- Standard Key Functions: All alphanumeric, symbol, and function keys operate as per standard keyboard layouts.
- Backlight Function: If your laptop supports a backlit keyboard and has the necessary drivers, the backlight can typically be toggled or adjusted using a specific function key combination (e.g., Fn + F3, Fn + F4, or similar, depending on your laptop model). Refer to your laptop's user manual for the exact key combination.
Maintenance
- Cleaning: Use a soft, lint-free cloth slightly dampened with water or a mild cleaning solution to wipe the keycaps. Avoid spraying liquids directly onto the keyboard.
- Dust Removal: Use compressed air to remove dust and debris from between the keys.
- Avoid Spills: Liquid spills can severely damage the keyboard. If a spill occurs, immediately power off your laptop, disconnect the battery, and allow the keyboard to dry completely before attempting to use it again.
Troubleshooting
- Keys Not Responding:
- Ensure the keyboard ribbon cables are securely connected to the laptop's motherboard.
- Restart your laptop.
- Check for updated keyboard drivers for your specific laptop model.
- Backlight Not Working:
- Verify that the backlight ribbon cable is properly connected.
- Confirm your laptop model supports a backlit keyboard and that the feature is enabled in the BIOS/UEFI settings or operating system.
- Try the appropriate Fn key combination to activate the backlight.
- Incorrect Key Output:
- Check your operating system's keyboard language settings to ensure it matches the physical layout (English US).
- Restart your laptop.
Specifications
| Model Number | NK5100-01100C-00/C US |
| Product Dimensions | 16.93 x 7.09 x 2.76 inches |
| Item Weight | 1.76 pounds |
| Manufacturer | Generic |
| ASIN | B0DZ22X5SR |
| Date First Available | March 3, 2025 |
Warranty and Support
This product comes with a 90-day warranty from the date of purchase. This warranty covers manufacturing defects. It does not cover damage caused by improper installation, misuse, accidents, or unauthorized modifications.
For technical support or warranty claims, please contact your retailer or the manufacturer with your purchase details and model number.
To ensure you receive the correct goods and for any post-payment inquiries, please check your registered email address.