1. Introduction
1.1 Welcome
Thank you for choosing the LONTEK SF10 12% Incline Foldable Treadmill. This manual provides essential information for the safe and effective use of your new fitness equipment. Please read it thoroughly before assembly or operation and retain it for future reference.
1.2 Product Overview
The LONTEK SF10 treadmill is designed for home and office use, offering a versatile workout experience. Key features include a 12% manual incline, a 3-screen touch display, a spacious running belt, and a powerful yet quiet 3.0HP motor. Its foldable design allows for convenient storage.
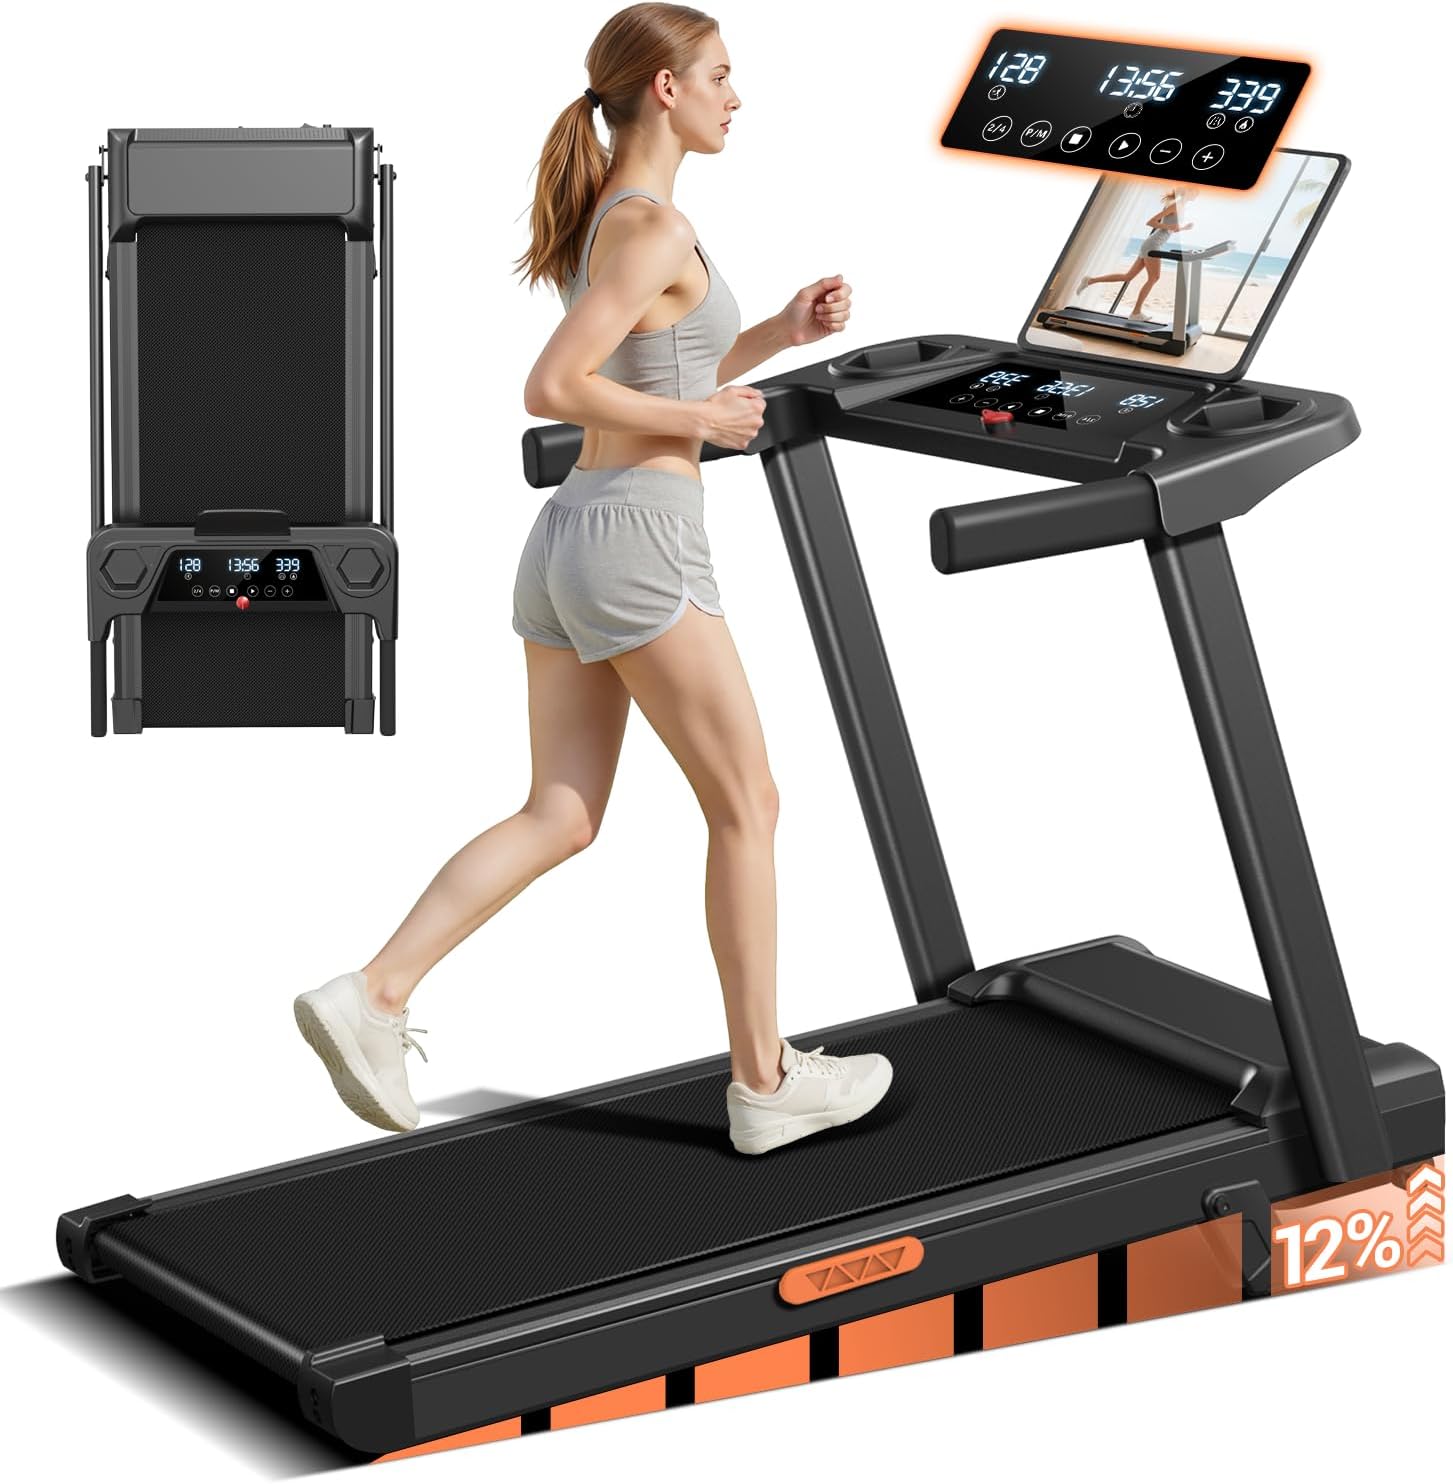
Image 1.1: LONTEK SF10 Treadmill in its operational state, with a person exercising.
2. Important Safety Information
To reduce the risk of serious injury, read all instructions before using the treadmill. LONTEK assumes no responsibility for personal injury or property damage sustained by or through the use of this product.
- Consult your physician before beginning any exercise program.
- Keep children and pets away from the treadmill during operation.
- Always wear appropriate athletic footwear.
- Use the safety key at all times. In case of emergency, the safety key will stop the treadmill.
- Place the treadmill on a flat, stable surface with adequate clearance around it.
- Do not operate the treadmill if it has a damaged cord or plug, or if it is not working properly.
- Maximum user weight capacity is 300 lbs (136 kg).
3. Package Contents
Verify that all components are present in the package:
- LONTEK SF10 Treadmill Unit
- Safety Key
- Tool Kit (for minor assembly)
- User Manual (this document)
4. Setup and Assembly
The LONTEK SF10 treadmill requires minimal assembly. Follow these steps to prepare your treadmill for use:
- Unpacking: Carefully remove the treadmill from its packaging.
- Unfolding: Lift the handlebar assembly from its folded position until it locks securely into place. Ensure all locking mechanisms are engaged.
- Securing Components: Use the provided tool kit to tighten any pre-installed screws that may have loosened during transit, particularly on the handlebar and display console.
- Placement: Position the treadmill on a level surface, ensuring at least 2 feet (0.6 meters) of clear space on all sides and 6 feet (1.8 meters) at the rear for safety.
- Power Connection: Plug the power cord into a grounded electrical outlet.
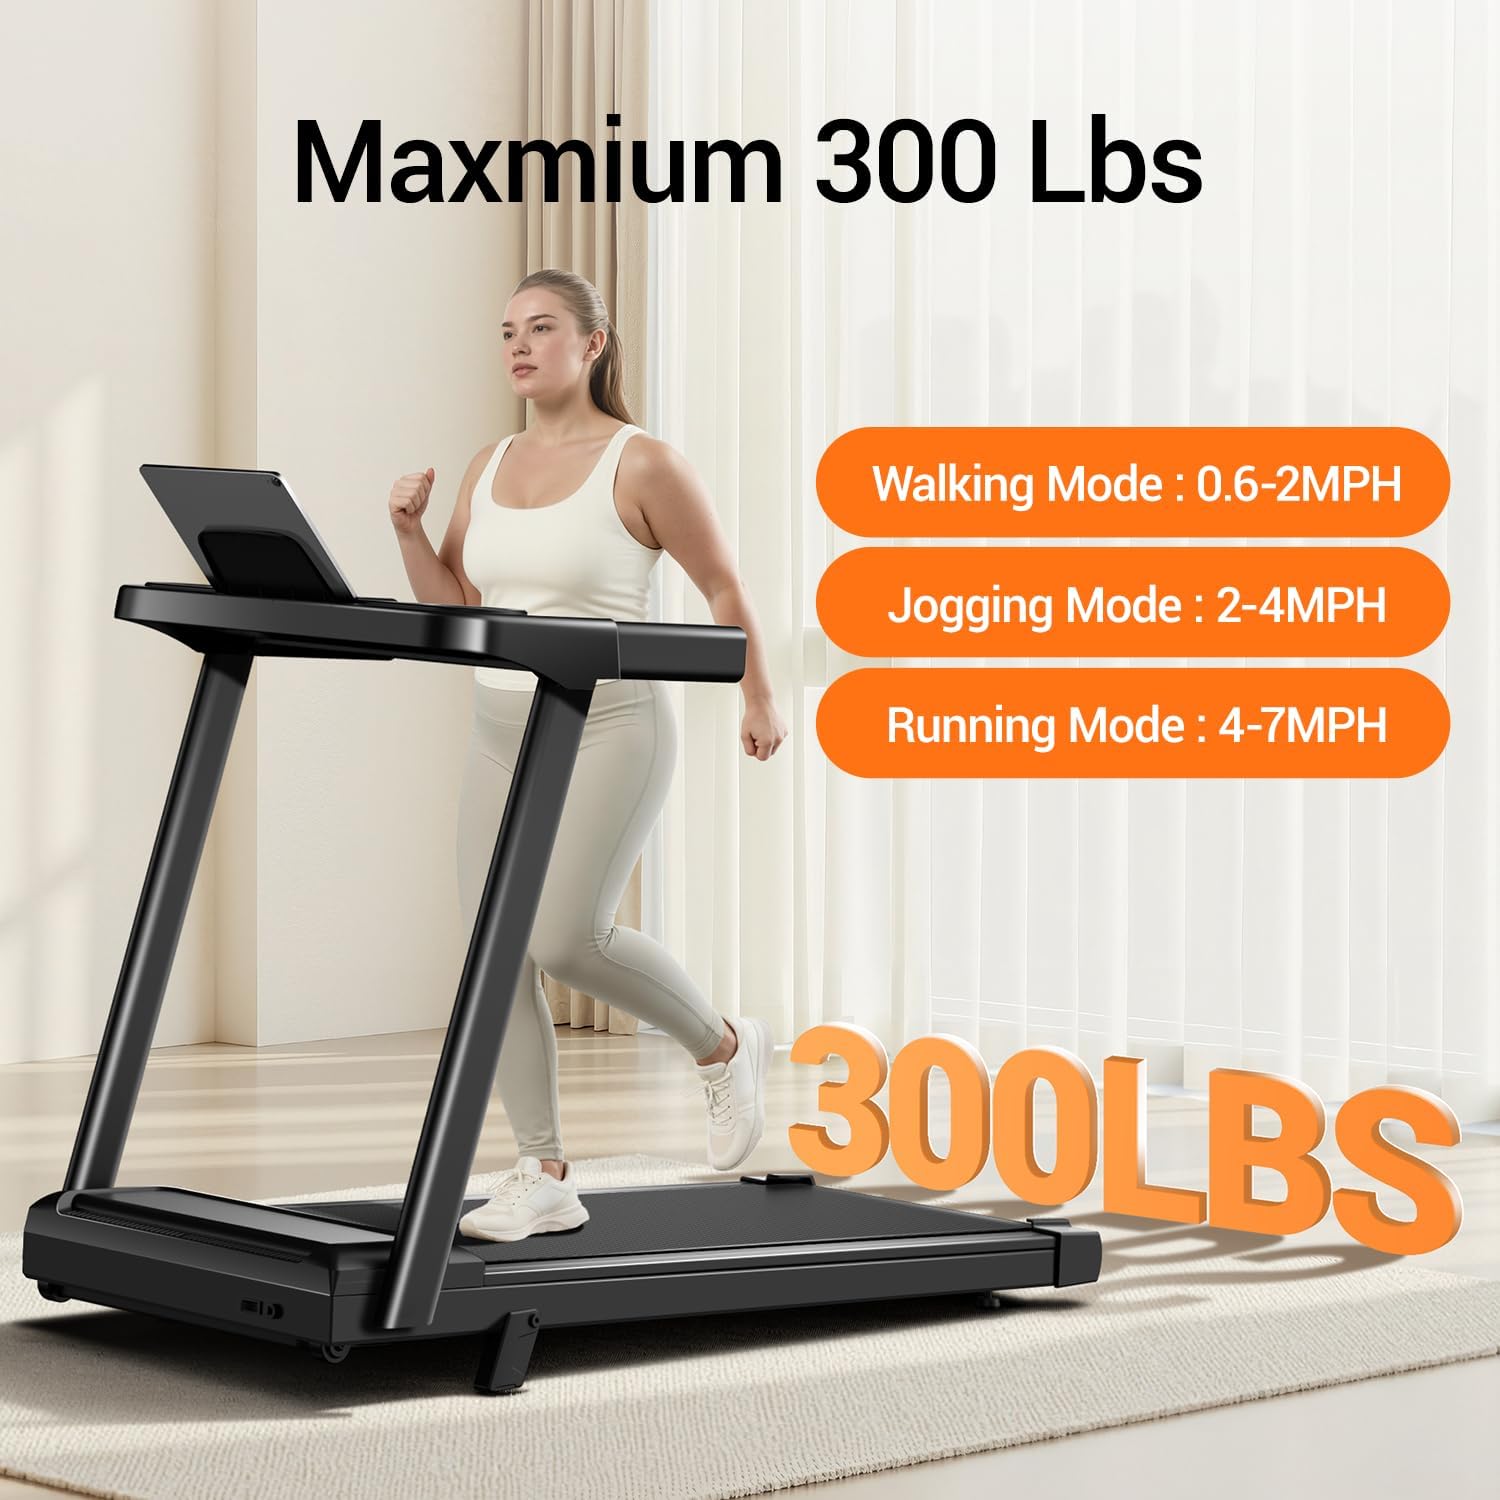
Image 4.1: Illustration of the treadmill's portable and foldable design, demonstrating how it can be stored.
5. Operating Instructions
5.1 Control Panel Overview
The treadmill features a three-screen touch control panel to manage your workout settings.

Image 5.1: The three-screen touch control panel with various function buttons.
- Start: Initiates the treadmill belt movement.
- Stop: Halts the treadmill belt movement.
- Speed + / -: Increases or decreases the running speed.
- 2/4 (Fast Adjustment): Quick speed selection buttons.
- P/M (Program/Mode): Cycles through pre-set workout programs or manual mode.
5.2 Starting and Stopping
- Attach the safety key clip to your clothing.
- Step onto the treadmill belt.
- Press the Start button on the control panel. The treadmill will begin at a low speed.
- To stop, press the Stop button or pull the safety key.
5.3 Adjusting Speed
Use the Speed + or Speed - buttons to adjust the speed incrementally. For quick adjustments, use the 2/4 buttons.
5.4 Adjusting Incline
The SF10 treadmill features a 12% manual incline. To adjust the incline, you must manually lift or lower the rear of the treadmill to the desired incline level before starting your workout. Refer to the physical treadmill for specific manual incline adjustment points.

Image 5.2: The treadmill demonstrating the 12% manual incline feature.
5.5 Workout Modes
The treadmill supports various workout intensities:
- Walking Mode: 0.6 - 2 MPH
- Jogging Mode: 2 - 4 MPH
- Running Mode: 4 - 7 MPH

Image 5.3: Visual representation of speed modes and weight capacity.
5.6 Using the Display
The three-screen display shows real-time workout data:
- Time: Duration of your workout.
- Speed: Current speed in Miles Per Hour (MPH).
- Distance: Total distance covered.
- Calories Burned: Estimated calories expended.
5.7 Safety Key
The safety key is a crucial safety feature. Always ensure it is properly placed on the console and clipped to your clothing before starting the treadmill. Removing the safety key will immediately stop the treadmill belt.
6. Maintenance
Regular maintenance ensures the longevity and optimal performance of your treadmill.
6.1 Cleaning
- After Each Use: Wipe down the console and other surfaces with a damp cloth to remove sweat and dust. Avoid abrasive cleaners.
- Weekly: Vacuum underneath the treadmill to prevent dust and debris from accumulating in the motor area.
6.2 Lubrication
The running belt requires periodic lubrication to reduce friction and extend its lifespan. Refer to the specific instructions provided with your treadmill's lubrication kit or contact customer support for guidance on the correct type and frequency of lubrication.
6.3 Running Belt Adjustment
If the running belt becomes off-center or slips, it may require adjustment. Consult the detailed instructions in the full user manual or contact customer support for assistance. Incorrect adjustment can damage the belt or motor.
7. Troubleshooting
This section addresses common issues you might encounter with your treadmill.
| Problem | Possible Cause | Solution |
|---|---|---|
| Treadmill does not start | Power cord not plugged in; Safety key not in place; Power switch off. | Ensure power cord is securely plugged in; Place safety key on console; Turn power switch on. |
| Running belt slips | Belt too loose; Belt requires lubrication. | Adjust belt tension (refer to full manual); Lubricate the running belt. |
| Unusual noise from motor | Loose components; Motor issue. | Check for and tighten any loose screws; If noise persists, contact customer support. |
| Display not working | Loose cable connection; Power issue. | Check all cable connections to the console; Ensure power supply is stable. |
If you encounter issues not listed here or if solutions do not resolve the problem, please contact LONTEK customer support.
8. Product Specifications
| Feature | Specification |
|---|---|
| Brand | LONTEK |
| Model Name | SF10 |
| Product Dimensions (LxWxH) | 47.2"D x 24.6"W x 5.5"H |
| Folded Size (LxWxH) | 40" x 20" x 5" |
| Item Weight | 45 Pounds |
| Material | Iron |
| Maximum Speed | 7 Miles per Hour |
| Maximum Incline Percentage | 12% (Manual) |
| Maximum Horsepower | 3.0 HP |
| Maximum Weight Recommendation | 300 Pounds |
| Running Belt Dimensions | 38.2" x 15.2" |
| Display Type | LED (Three-Screen Touch) |
| Power Source | Corded Electric |
| Noise Level | Below 45 decibels |
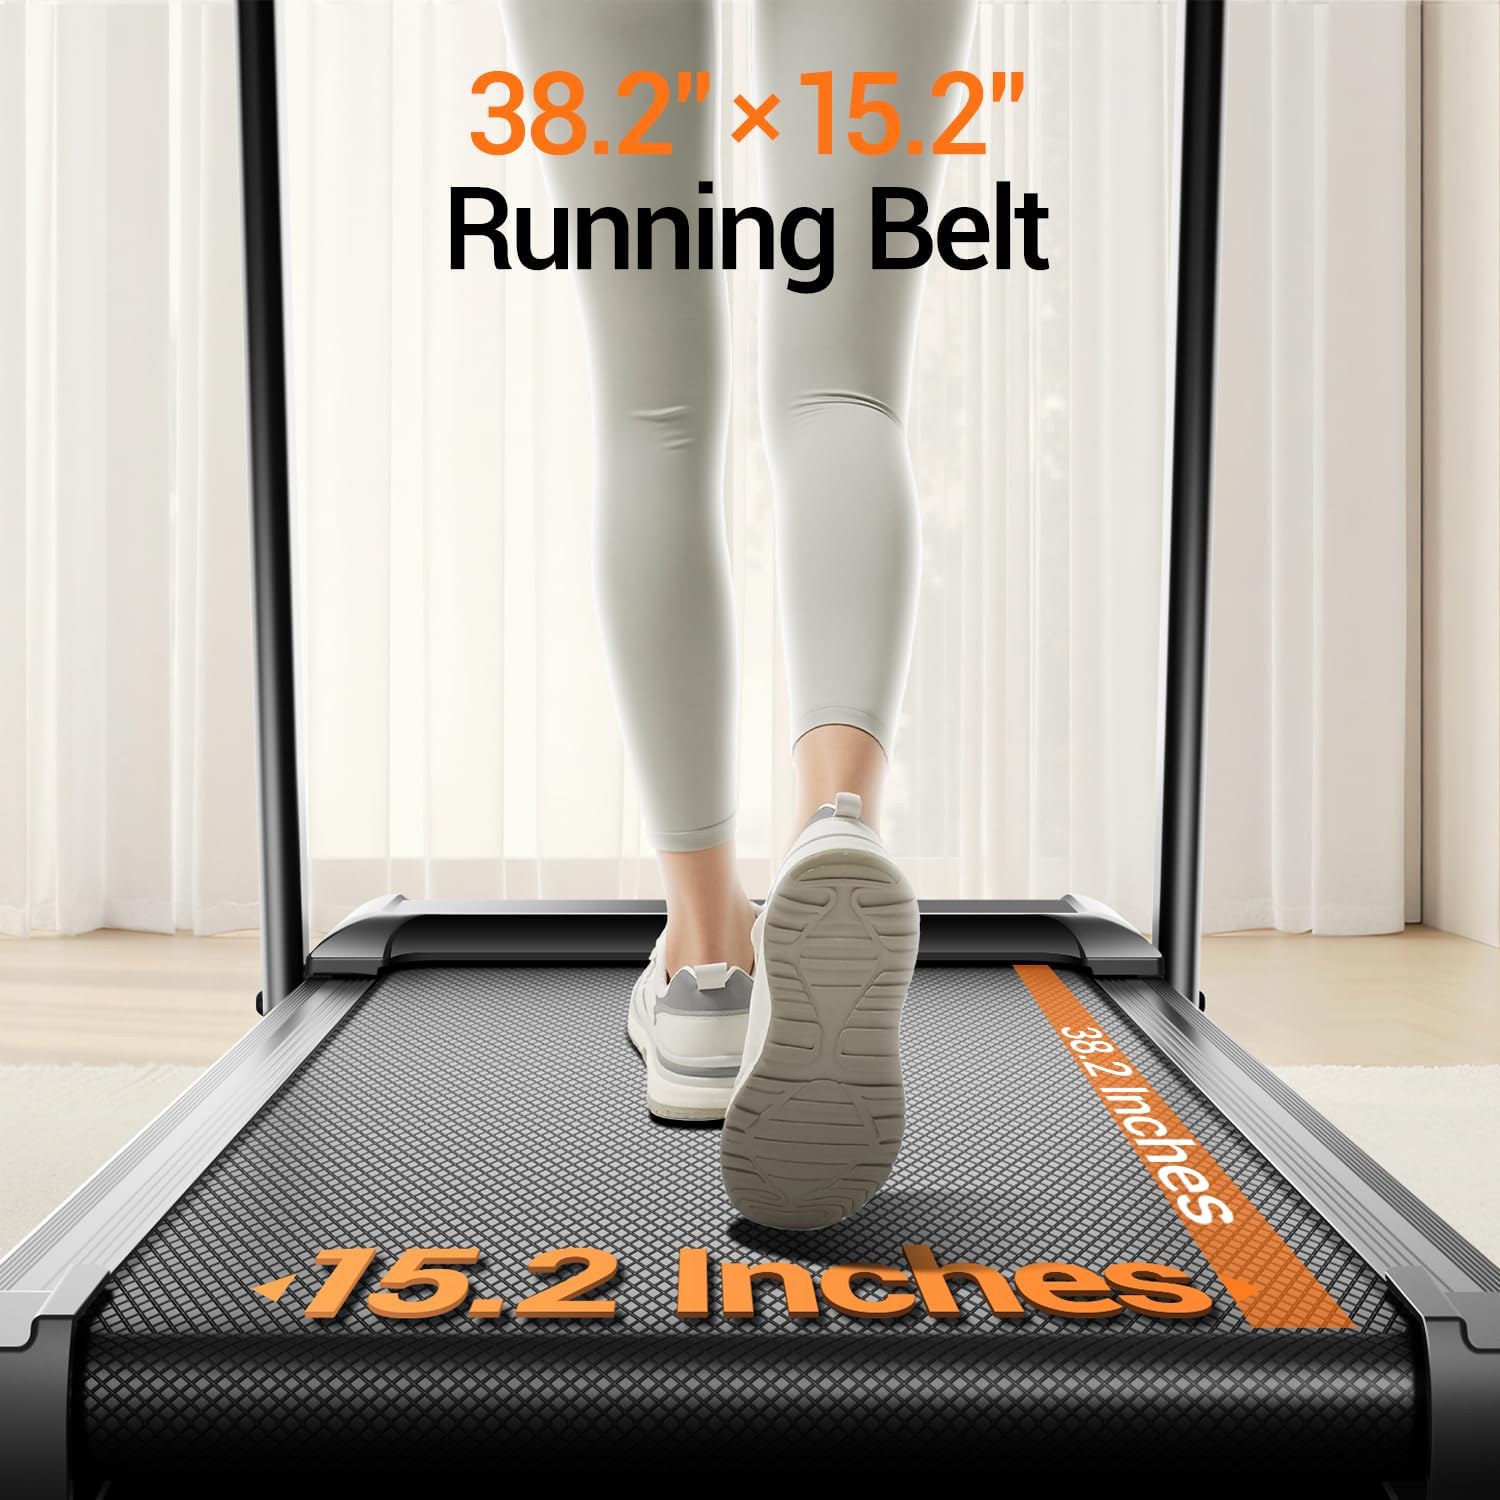
Image 8.1: Running belt dimensions.
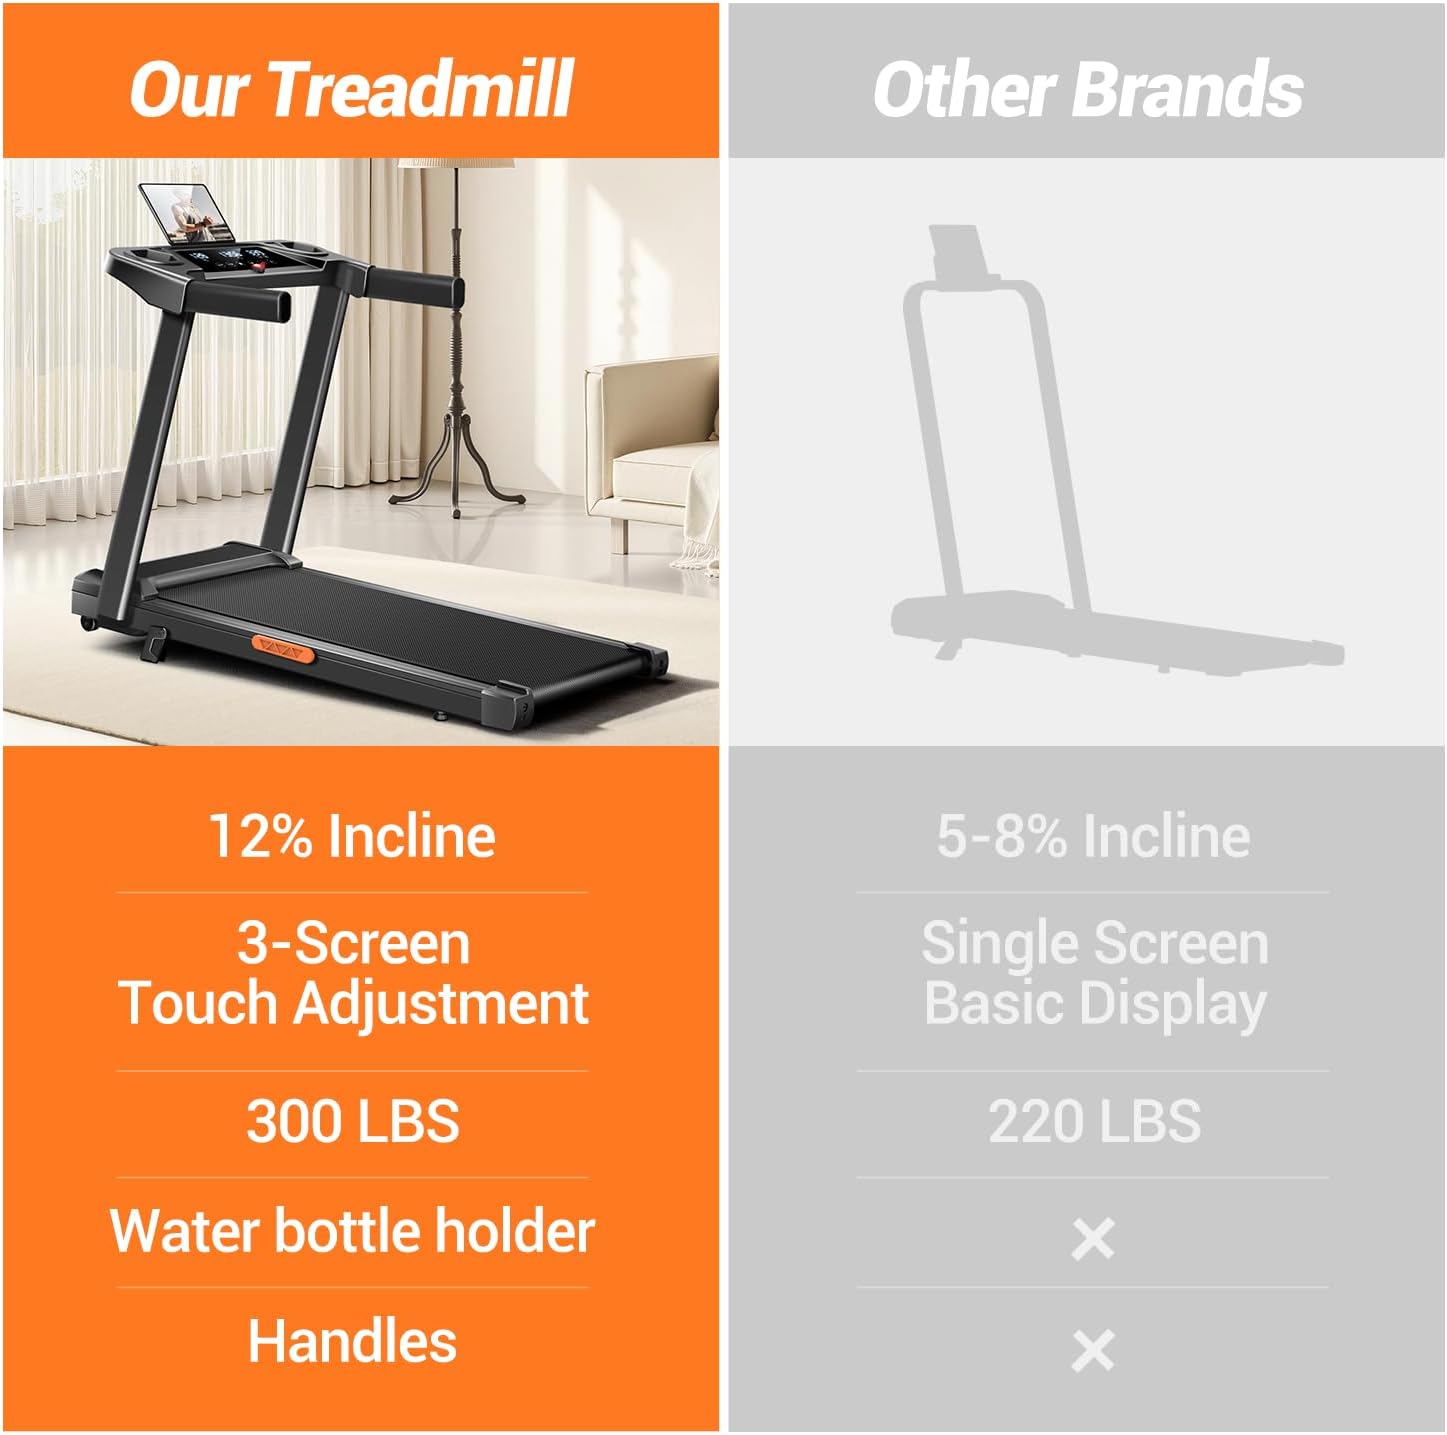
Image 8.2: Details of the 3.0HP motor and its performance characteristics.

Image 8.3: Illustration of the treadmill's shock-absorbing system.
9. Warranty and Support
9.1 Warranty Information
The LONTEK SF10 Treadmill comes with a 1-year warranty from the date of purchase. This warranty covers manufacturing defects and malfunctions under normal use. Please retain your proof of purchase for warranty claims. The warranty does not cover damage caused by misuse, accidents, unauthorized modifications, or improper maintenance.
9.2 Customer Support
For any questions, concerns, or technical assistance, our dedicated service team is available 24/7. We provide support for replacement parts, maintenance guidance, and any other product-related inquiries.
Please refer to the contact information provided on your product packaging or the official LONTEK website for the most current customer support details.


