1. Introduction
This manual provides detailed instructions for the RIJER Live Streaming Video Mixer (Model B0DYV9B5ZD). This device is designed to facilitate professional live streaming and video production by allowing seamless switching between multiple HDMI video sources and managing audio. Please read this manual thoroughly before operating the device to ensure proper use and optimal performance.
2. Safety Information
- Ensure the device is placed on a stable, flat surface to prevent accidental falls.
- Do not expose the device to water, moisture, or extreme temperatures.
- Use only the provided power adapter. Using an incorrect adapter may damage the device.
- Avoid blocking ventilation openings to prevent overheating.
- Do not attempt to open or repair the device yourself. Refer all servicing to qualified personnel.
- Keep the device away from strong magnetic fields.
- Disconnect the power supply during lightning storms or when unused for long periods.
3. Package Contents
Verify that all items listed below are included in your package:
- RIJER SDI/HDMI Video Switcher for Live Streaming
- 1M Type-C USB3.0 to USB-A 3.0 cable (10Gbps)
- DC/12V Power Adapter
- User Manual (this document)
- OBS Operation Reference (separate guide)
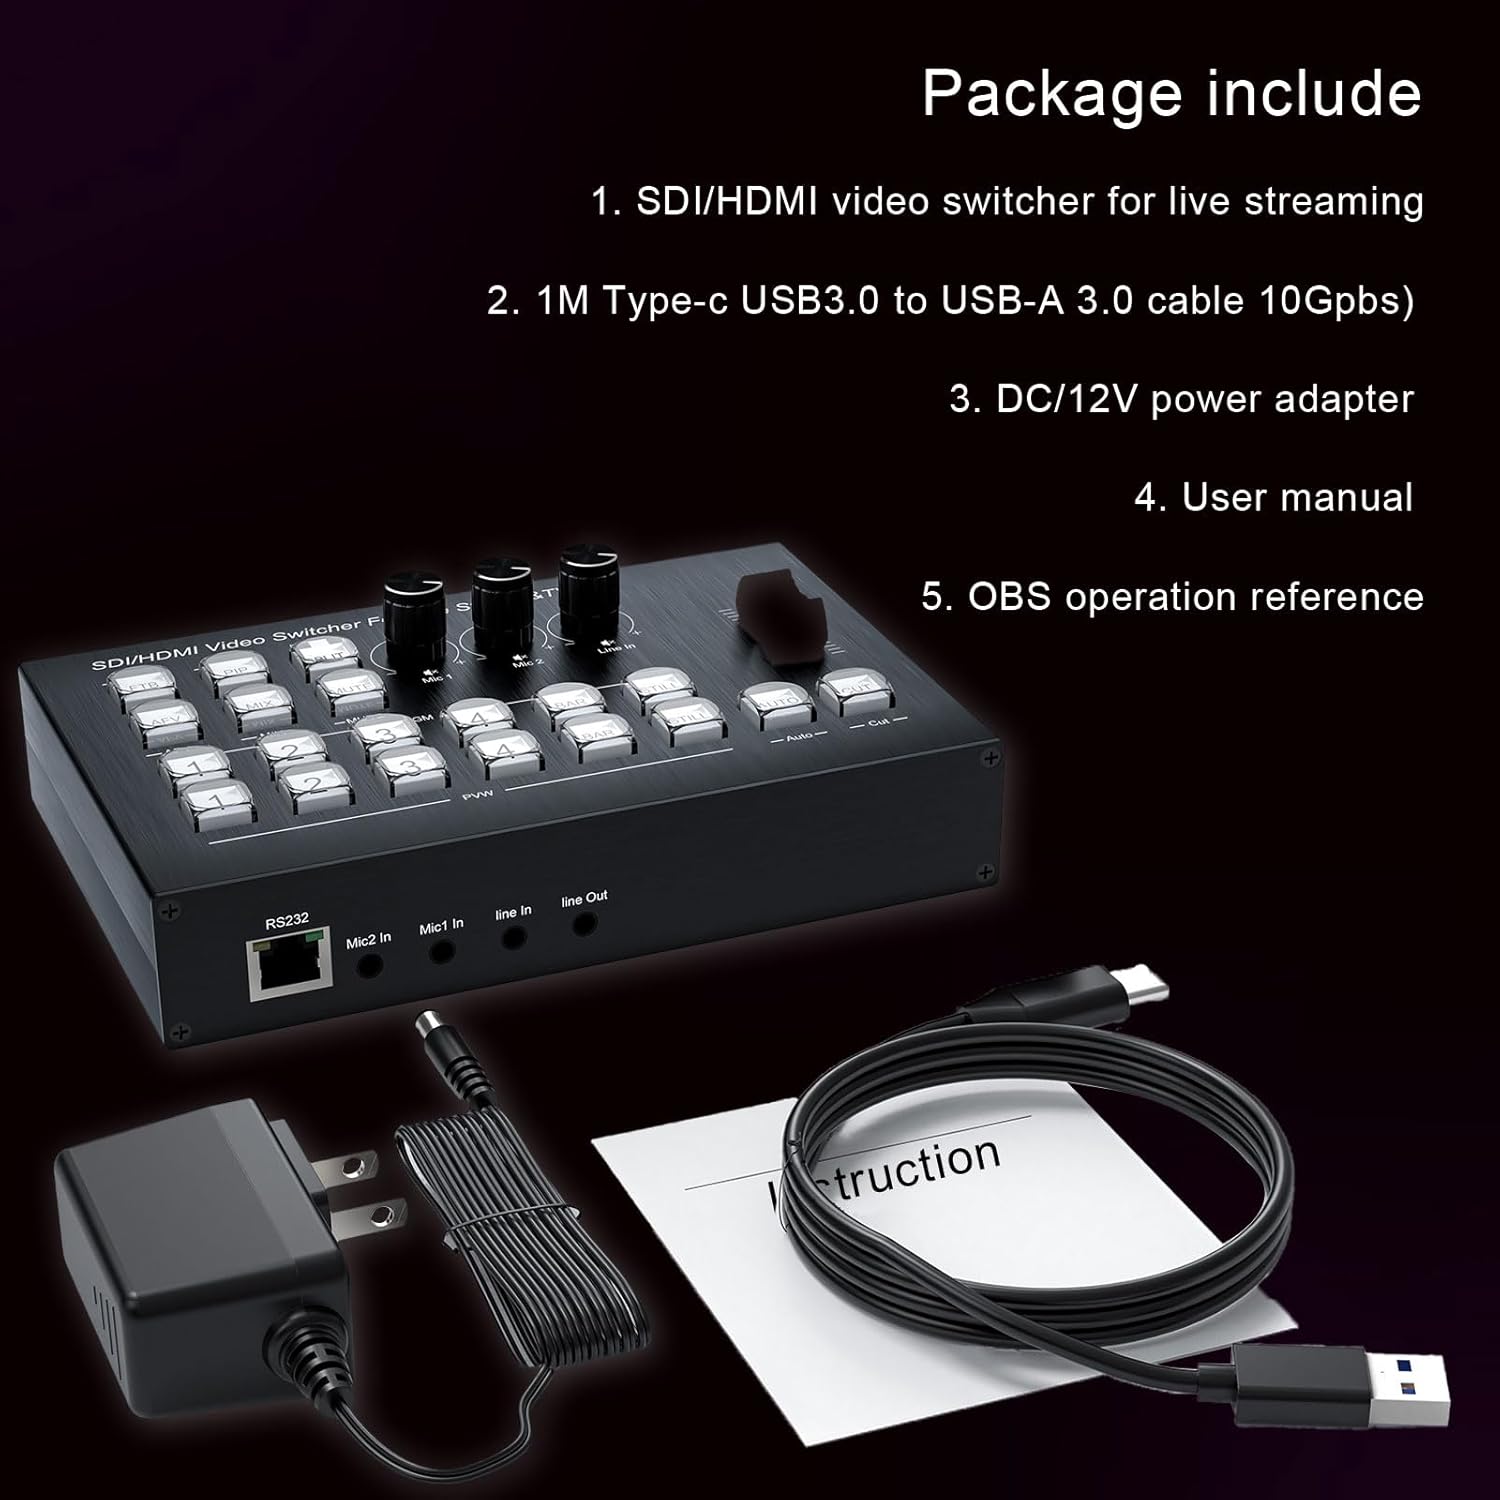
Figure 3.1: Contents of the RIJER Live Streaming Video Mixer package, including the mixer unit, USB-C cable, power adapter, and documentation.
4. Product Overview
The RIJER Live Streaming Video Mixer is a compact and powerful device designed for multi-camera live productions. It features multiple HDMI inputs, dual HDMI outputs, and integrated audio mixing capabilities.
4.1 Front Panel
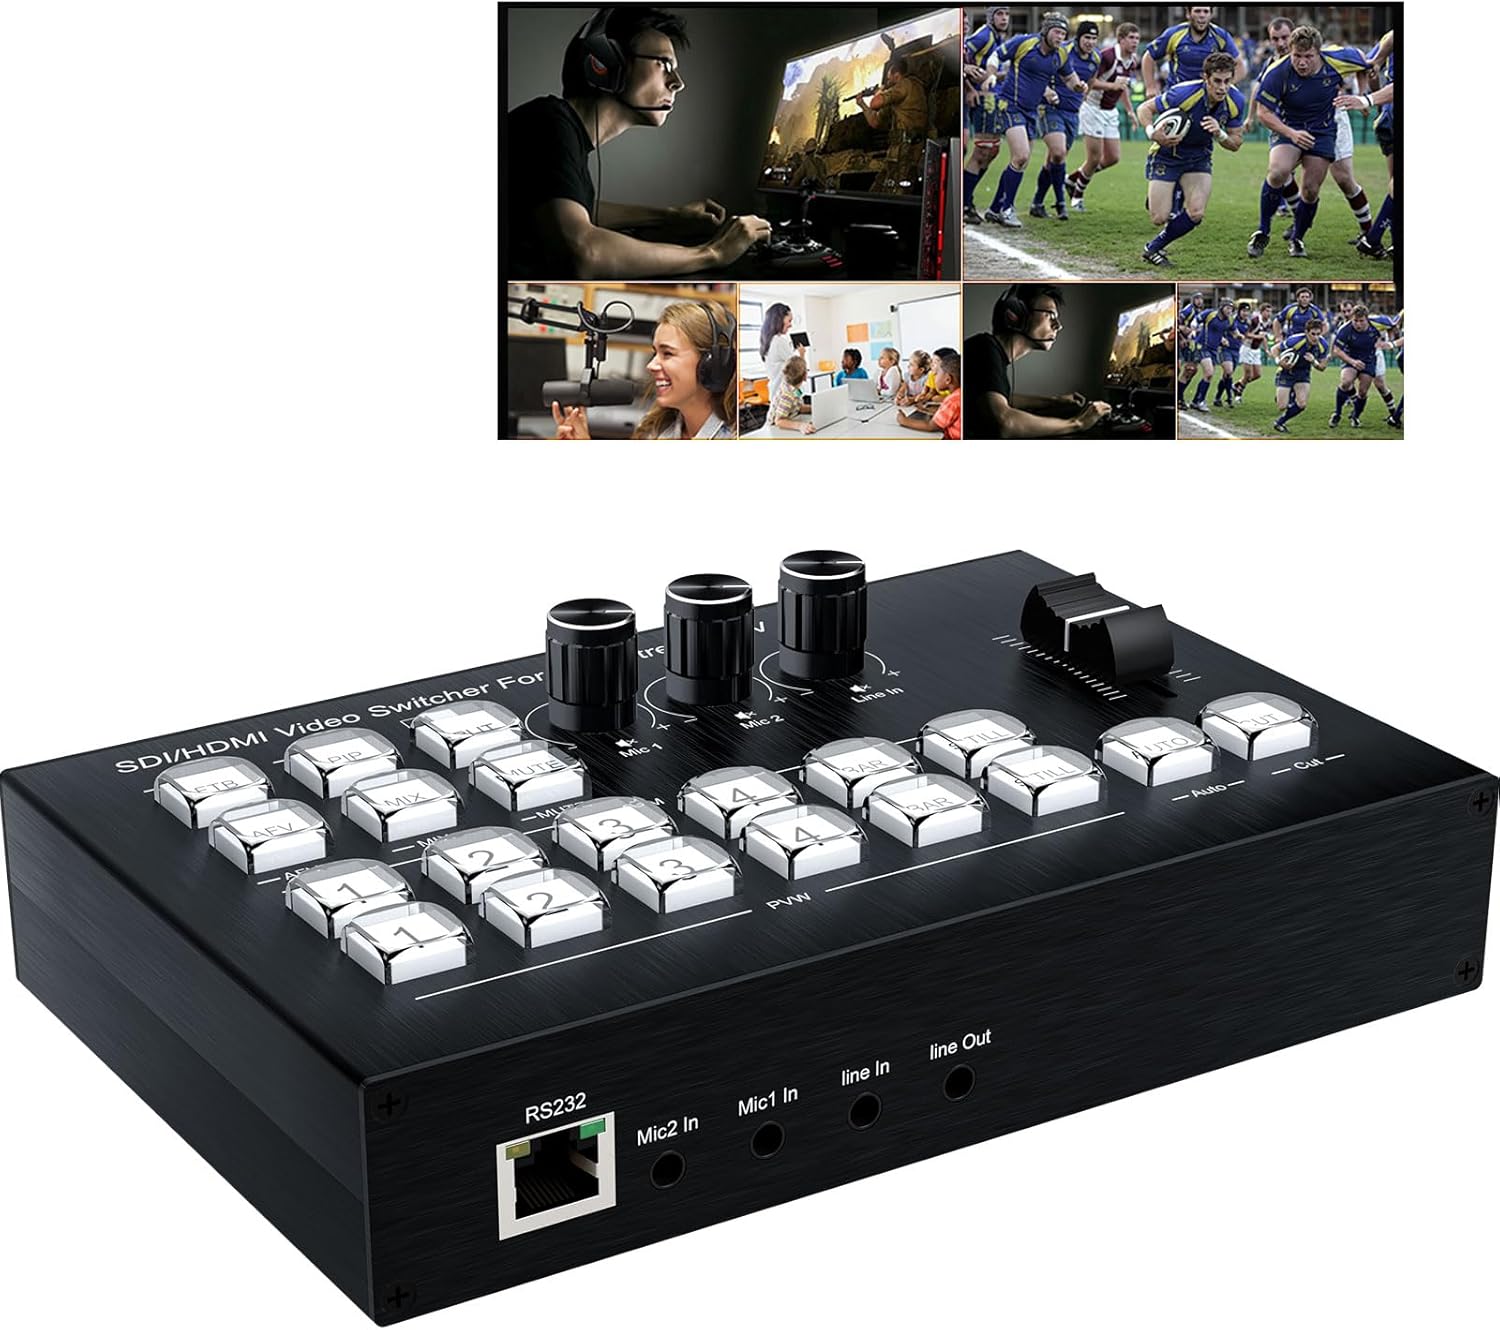
Figure 4.1: Front view of the RIJER Live Streaming Video Mixer, showing control buttons, audio knobs, and the T-bar fader.
The front panel provides access to all primary controls for video switching, audio mixing, and special effects. It includes input selection buttons, audio level knobs, and a T-bar for smooth transitions.
4.2 Rear Panel

Figure 4.2: Rear view of the RIJER Live Streaming Video Mixer, detailing the 4 HDMI input ports, 2 HDMI output ports, Type-C USB3.0 port, DC 12V power input, and audio input/output jacks.
The rear panel houses all connectivity ports, including four HDMI inputs for video sources, two HDMI outputs for program and preview monitoring, a Type-C USB3.0 port for streaming and capture, and audio input/output jacks.
5. Setup
Follow these steps to set up your RIJER Live Streaming Video Mixer:
- Connect Video Sources: Connect up to four HDMI devices (e.g., cameras, computers, game consoles, DVD players) to the HDMI IN 1-4 ports on the rear panel using HDMI cables.
- Connect Outputs:
- Connect an HDMI monitor to HDMI OUT 1 for your program output (what goes live).
- Connect a second HDMI monitor to HDMI OUT 2 for multi-view or preview.
- Connect to Computer (for Streaming/Capture): Connect the Type-C USB3.0 port on the mixer to a USB 3.0 port on your computer using the provided USB-C to USB-A cable. This connection enables video capture and streaming via software like OBS.
- Connect Audio:
- Connect microphones to Mic 1 In and Mic 2 In ports.
- Connect external audio sources to the Line In port.
- Connect headphones or external speakers to the Line Out port for monitoring.
- Power On: Connect the DC/12V power adapter to the mixer and then plug it into a power outlet. The device will power on automatically.

Figure 5.1: Diagram illustrating typical connections for video sources, outputs, USB, and audio peripherals to the mixer.

Figure 5.2: Examples of compatible devices such as cameras, webcams, computers, and game consoles, highlighting the mixer's versatility.
6. Operating Instructions
This section details the functions of the front panel controls and how to operate the video mixer.
6.1 Panel Button Functions

Figure 6.1: Front panel layout with numbered labels corresponding to specific button and knob functions.
- FTB (Fade to Black): Turns PGM (Program) output to black screen or exits picture-in-picture mode.
- PIP (Picture-in-Picture): Enters or exits picture-in-picture mode (PGM background, PVW small image, audio follows PGM).
- SPLIT: Enters and exits split screen segmentation (PGM on the left, PVW on the right).
- AFV (Audio Follow Video): Audio follows PGM image.
- MIX: Audio box (MIC1-2/Line In/HD).
- MUTE: Turns off or on the audio mute.
- PGM 1-4: PGM image switched to HD1, PGM 2 to HD2, PGM 3 to HD3, PGM 4 to HD4.
- BAR: PGM blue image turn on or off.
- STILL: PGM image is frozen or unfrozen.
- PVW 1-4: PVW image switched to HD1, PVW 2 to HD2, PVW 3 to HD3, PVW 4 to HD4.
- Mic 1 Knob: Adjusts the volume for Microphone 1 input.
- Mic 2 Knob: Adjusts the volume for Microphone 2 input.
- Line In Knob: Adjusts the volume for Line In audio input.
- Slider Key: Fades in and out between PVW and PGM images.
- AUTO: Fades in and out between PGM and PVW images automatically.
- CUT: Quick switch between PGM and PVW images.
6.2 Basic Switching Operations
- Direct Switching: Press any of the PGM 1-4 buttons to instantly switch the program output to the corresponding HDMI input.
- Preview Switching: Use the PVW 1-4 buttons to select a source for preview. The selected source will appear on the preview monitor (HDMI OUT 2).
- Transitioning:
- Use the CUT button for an immediate, hard cut between the preview and program outputs.
- Use the AUTO button for an automatic, smooth fade transition between the preview and program outputs.
- Manually control transitions using the Slider Key (T-bar) for a gradual fade or wipe effect.
6.3 Audio Mixing
Adjust the individual volume levels for Mic 1, Mic 2, and Line In using their respective knobs. Ensure the MUTE button is not active if you expect audio output. The AFV function allows audio to automatically follow the selected video input.
7. Maintenance
- Cleaning: Use a soft, dry cloth to clean the exterior of the device. Do not use liquid cleaners or aerosols.
- Storage: When not in use, store the device in a cool, dry place away from direct sunlight and dust.
- Ventilation: Regularly check that the ventilation openings are clear of obstructions to ensure proper airflow.
8. Troubleshooting
| Problem | Possible Cause | Solution |
|---|---|---|
| No video output |
|
|
| No audio output |
|
|
| Video flickering or unstable |
|
|
| Computer does not detect mixer via USB |
|
|
9. Specifications
| Feature | Detail |
|---|---|
| Model | B0DYV9B5ZD |
| Product Dimensions | 2 x 4.53 x 7 inches |
| Item Weight | 1.23 pounds |
| Video Inputs | 4 x HDMI (supports up to 4K/30Hz backward compatible) |
| Video Outputs | 2 x HDMI (outputs 1920x1080@60Hz) |
| USB Port | Type-C USB3.0 (for video capture and live streaming) |
| Audio Inputs | 2 x Mic In, 1 x Line In |
| Audio Outputs | 1 x Line Out |
| Supported Resolution | Input: up to 4K/30Hz; Output: 1080P@60Hz |
| HDCP Support | HDCP 1.4 |
| Special Features | Picture-in-Picture (PiP), Split Screen, Audio Follow Video (AFV), Seamless Switching, Digital Audio Mixer |
| Power Supply | DC 12V |
| Manufacturer | RIJER |
10. Warranty and Support
For warranty information and technical support, please refer to the documentation included with your purchase or contact RIJER customer service through the retailer where the product was purchased. Keep your proof of purchase for warranty claims.
For additional resources and software compatibility, please consult the "OBS Operation Reference" guide provided in your package.