1. Introduction and Overview
This manual provides essential instructions for the safe and efficient operation, setup, and maintenance of your EliteBloom A19 Portable Pneumatic Strapping Tool. This robust handheld baler is designed for industrial packaging applications, utilizing pneumatic power to tension and friction-weld PET and PP plastic strapping.
The A19 tool offers high fastening force and a reliable, fastener-free interface through friction heat welding, making it suitable for heavy-duty packaging across various industries including paper, aluminum, wood, chemical fiber, and metal products.
2. Safety Instructions
WARNING: Read all safety warnings and instructions before operating this tool. Failure to follow these instructions may result in serious injury.
- Always wear appropriate personal protective equipment, including safety glasses and hearing protection, when operating the tool.
- Ensure the air supply is clean, dry, and regulated to the specified pressure range.
- Never point the tool at yourself or others. Keep hands and body parts clear of moving parts and the strapping path during operation.
- Disconnect the tool from the air supply before performing any adjustments, maintenance, or when changing strapping.
- Inspect the tool for damage before each use. Do not operate a damaged tool.
- Be aware of pinch points and sharp edges of the strapping material.
- Use only strapping materials (PET/PP tape) within the specified width range (13-19mm).
3. Product Components
Familiarize yourself with the main components of the A19 Portable Pneumatic Strapping Tool:

Image 1: Close-up of the tool's upper section, highlighting the main body, handle, and control levers.
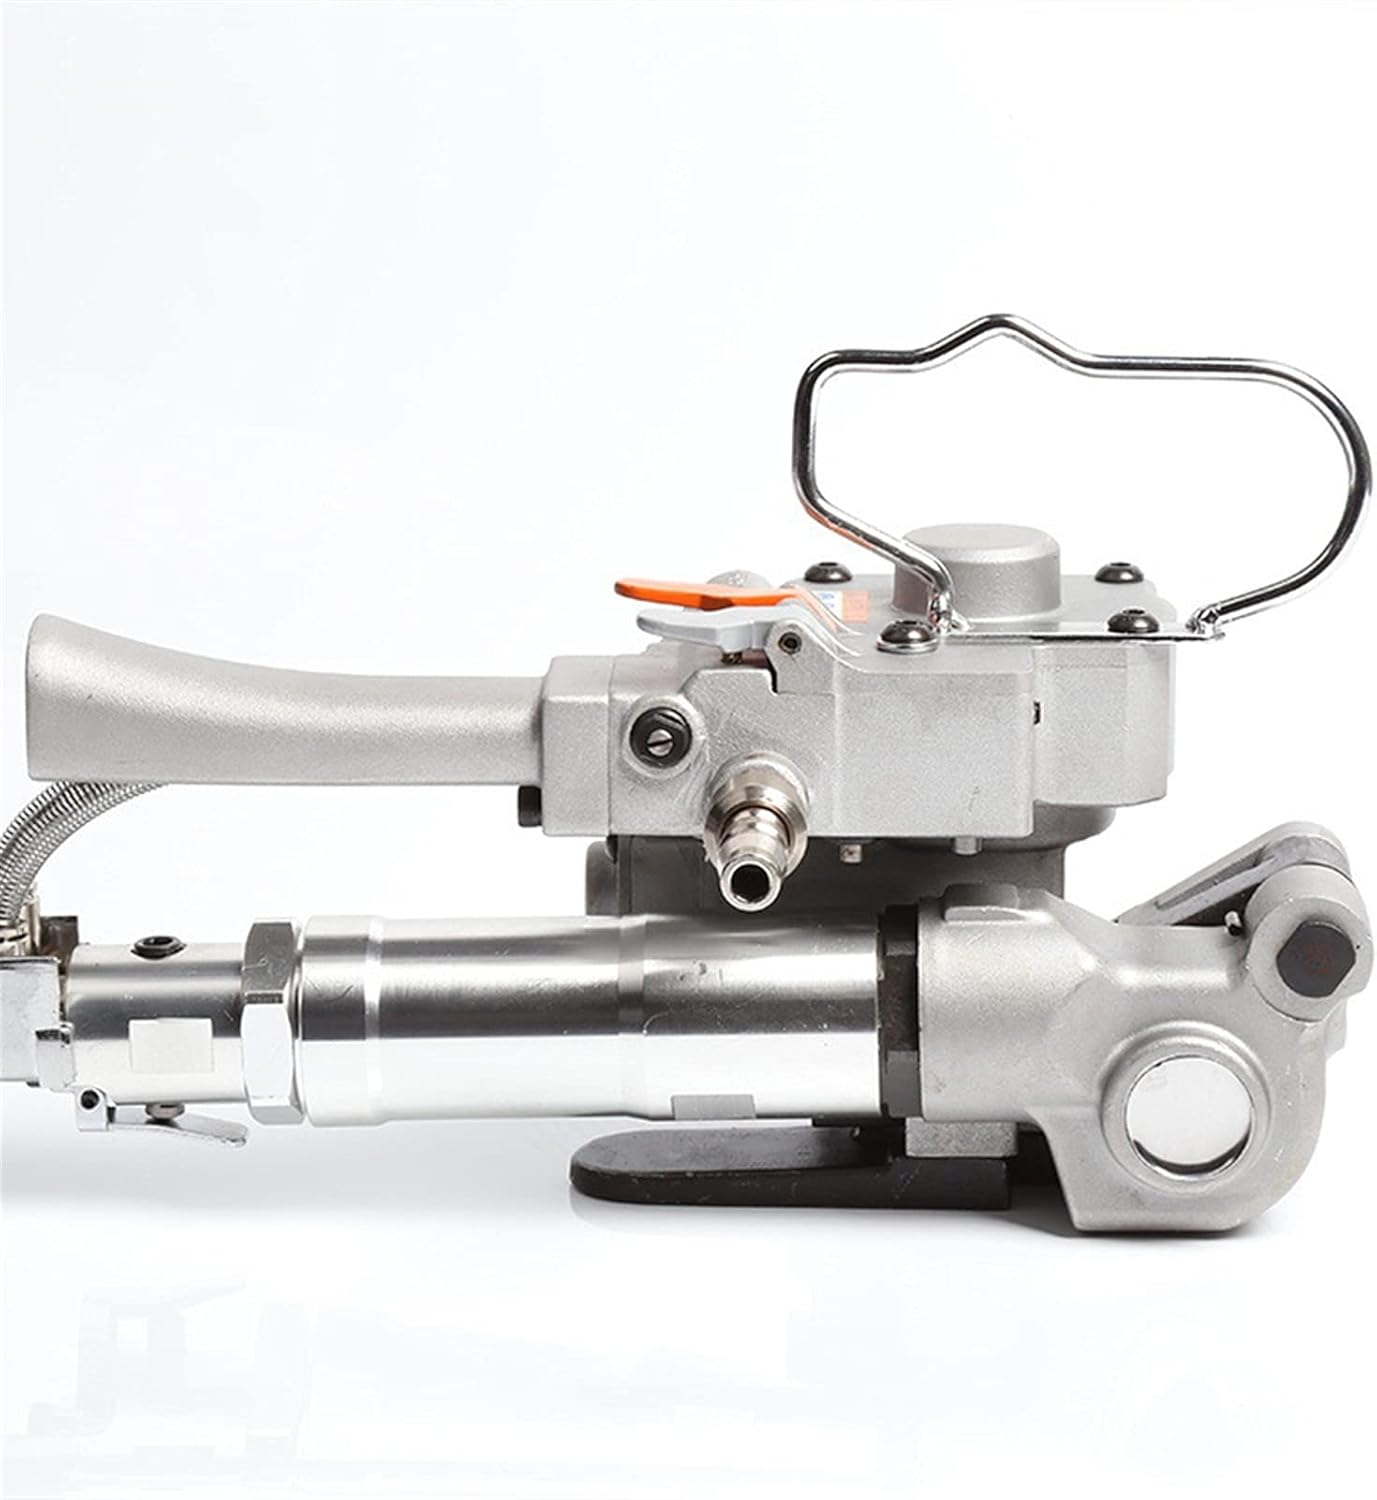
Image 2: Side profile of the A19 tool, illustrating its overall shape and the air hose connection point.

Image 3: Detailed side view, showing the air inlet quick connector and the mechanism for strap insertion.
4. Setup
- Connect Air Supply: Attach a suitable air hose with a quick connector to the tool's air inlet. Ensure the air supply is regulated to the recommended pressure (refer to specifications).
- Prepare Strapping: Select PET or PP strapping tape with a width between 13mm and 19mm. Ensure the strapping is free from kinks or damage.
- Load Strapping: Follow the tool's specific loading path. Typically, the strapping is fed through the front of the tool, under the tensioning mechanism, and then over the sealing mechanism. Ensure the strap is correctly aligned.
5. Operating Instructions
Once the tool is set up and the strapping is loaded, follow these steps for operation:
- Position the Tool: Place the tool on the package with the strapping encircling the item. Ensure the strapping is flat and properly positioned.
- Insert Strapping Ends: Feed the two ends of the strapping into the tool's designated slots. One end will be the fixed end, and the other will be the tensioning end.
- Tensioning: Press the tensioning lever (often an orange lever as seen in images) to activate the pneumatic tensioning mechanism. Hold until the desired strap tension is achieved. The tool is capable of a maximum tightening force of 3500N.
- Sealing (Friction Welding): After tensioning, activate the sealing mechanism (usually a separate button or lever). The tool will perform a friction heat weld, creating a strong, fastener-free joint. Hold until the welding cycle is complete.
- Cutting: Once the weld is complete, the tool will automatically cut the excess strapping, or a separate cutting lever may need to be activated.
- Remove Tool: Carefully remove the tool from the strapped package, ensuring the strap remains securely sealed.
6. Maintenance
Regular maintenance ensures the longevity and optimal performance of your A19 strapping tool:
- Daily Cleaning: Disconnect from air supply. Clean the tool's exterior and especially the strapping path and welding area to remove dust, debris, or plastic residue. Use a dry cloth or soft brush.
- Lubrication: Periodically apply a few drops of pneumatic tool oil into the air inlet to lubricate internal components. Refer to the manufacturer's recommendations for frequency.
- Inspect Air Connections: Regularly check air hoses and connections for leaks or damage. Replace worn components immediately.
- Inspect Wear Parts: Examine the tensioning wheels, welding plate, and cutting blade for wear. Replace these parts as needed to maintain efficient operation and quality seals.
- Storage: Store the tool in a clean, dry environment when not in use.
7. Troubleshooting
Here are some common issues and their potential solutions:
- Strap not tensioning properly:
- Check air pressure and supply.
- Ensure strapping is correctly loaded and not slipping.
- Inspect tensioning wheels for wear or debris.
- Poor or incomplete weld:
- Verify correct strapping material and width.
- Clean the welding plate for any residue.
- Ensure sufficient tension is applied before welding.
- Air leaks:
- Check all air hose connections and fittings.
- Inspect the tool body for visible damage or loose screws.
- Strap not cutting:
- Inspect the cutting blade for sharpness and damage.
- Ensure the cutting mechanism is fully actuated.
For issues not resolved by these steps, please contact EliteBloom customer support.
8. Specifications
| Feature | Specification |
|---|---|
| Model | A19 |
| Type | Portable Pneumatic Baler |
| Suitable Tape Material | PET tape, PP tape |
| Packing Belt Width | 13-19 mm |
| Maximum Tightening Force | 3500 N |
| Dimensions (L x W x H) | 26 cm x 16 cm x 18 cm |
| Weight | 3.6 kg |
| Power Source | Pneumatic (Adjustable) |
9. Warranty and Support
For warranty information, technical support, or to order replacement parts, please contact your EliteBloom retailer or visit the official EliteBloom website. Please have your product model (A19) and purchase details available when contacting support.