1. Introduction
This manual provides detailed instructions for the installation, operation, and maintenance of your ANNKE 8 Channel 3K Lite Hybrid 5-in-1 Digital Video Recorder (DVR). This DVR is designed to provide comprehensive surveillance solutions, supporting various camera types and offering advanced features such as AI-based human and vehicle detection, H.265+ video compression, and remote access capabilities.
Please read this manual thoroughly before using the product to ensure correct setup and optimal performance. Keep this manual for future reference.
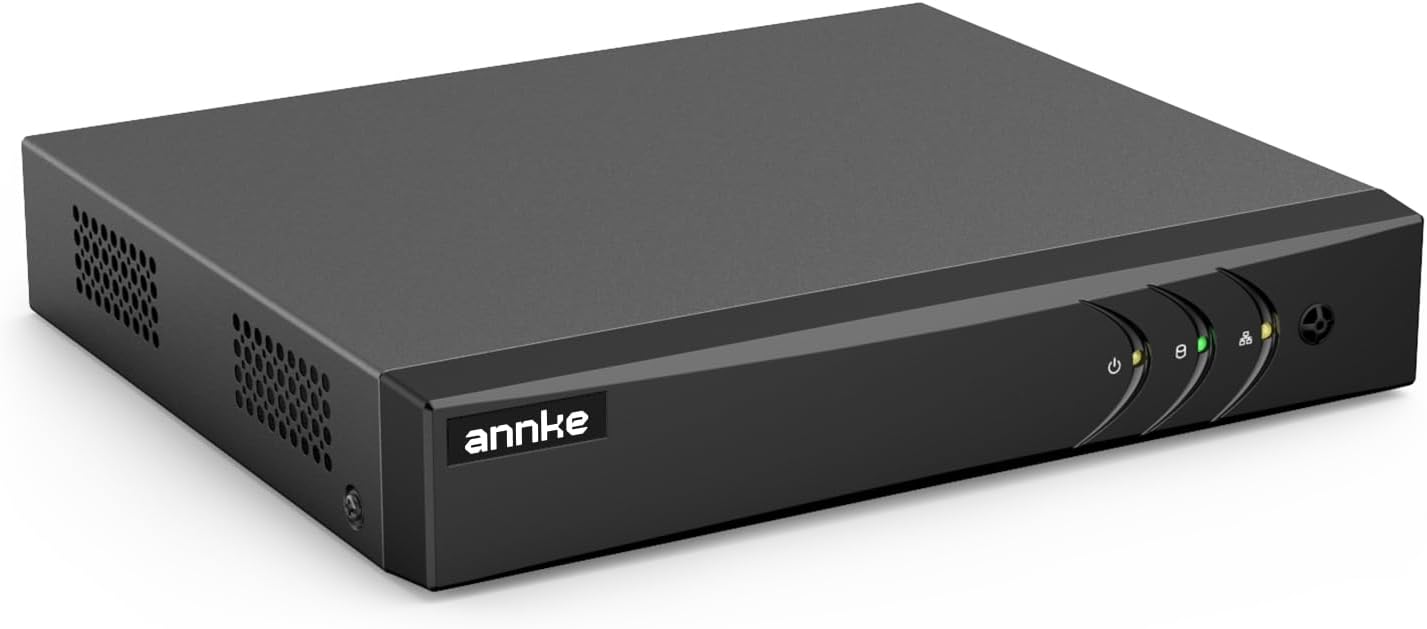
Figure 1: ANNKE 8 Channel 3K Lite Hybrid 5-in-1 DVR Unit
The ANNKE DVR is a versatile surveillance device capable of managing up to 8 analog cameras (TVI/AHD/CVI/CVBS) and 2 IP cameras (up to 6MP), with an enhanced mode supporting up to 12 channels. It features advanced H.265 Pro+ video compression for efficient storage and deep learning-based Motion Detection 2.0 for accurate human and vehicle classification.
2. Package Contents
Verify that all items listed below are included in your package. If any items are missing or damaged, please contact ANNKE customer support.
- 1x 3K Lite 8CH DVR (No Hard Drive included)
- 1x 5.9 ft/1.8 m HDMI Cable
- 1x 3.2 ft/1 m Ethernet Cable
- 1x Power Adapter
- 1x USB Mouse
- 1x User Manual
- 1x Wall Sticker

Figure 2: Included Accessories and DVR Unit
The image above illustrates the main components typically found within the ANNKE DVR product packaging, including the DVR unit, power adapter, cables, USB mouse, and user manual.
3. Product Overview
3.1 Front Panel
The front panel of the DVR typically includes status indicators for power, hard drive activity, and network connection. It may also feature a power button and USB ports for mouse connection or data backup.
3.2 Rear Panel
The rear panel provides all necessary connection ports for cameras, display monitors, network, and power.

Figure 3: DVR Rear Panel and Dimensions
This diagram details the rear panel connections, including BNC video inputs, VGA and HDMI video outputs, audio input/output, Ethernet port, USB ports, and the power input. Dimensions of the DVR unit are also provided for reference.
- Video Input (BNC): Connect analog cameras (TVI/AHD/CVI/CVBS).
- VGA Output: Connect to a VGA monitor.
- Audio Input (RCA): Connect an external microphone.
- Ethernet Port (RJ45): Connect to your network router for remote access.
- HDMI Output: Connect to an HDMI monitor or TV.
- Audio Output (RCA): Connect to external speakers.
- USB Ports: For connecting the USB mouse and for data backup.
- Power Adapter Input: Connect the provided power adapter.
4. Setup
4.1 Hard Drive Installation (Optional)
This DVR model does not include a pre-installed hard drive. For continuous recording and video storage, a SATA hard drive (up to 10TB) must be installed. Refer to the separate hard drive installation guide or ANNKE support resources for detailed instructions on how to open the DVR casing and securely install the hard drive.
4.2 Physical Connections
- Connect Cameras: Attach your analog security cameras to the BNC video input ports on the rear panel. If using IP cameras, ensure they are connected to the same network as the DVR.
- Connect Monitor: Connect a monitor to the DVR using either the HDMI or VGA output port.
- Connect Mouse: Plug the USB mouse into one of the USB ports on the DVR.
- Connect to Network: Use the provided Ethernet cable to connect the DVR's Ethernet port to your router or network switch.
- Connect Power: Plug the power adapter into the DVR's power input and then into a power outlet.
4.3 Initial Power On
Once all connections are secure, the DVR will power on automatically. Follow the on-screen instructions to complete the initial setup wizard, which includes setting up a strong password, configuring date/time, and network settings.
5. Operating Instructions
5.1 Hybrid 5-in-1 Capability
The ANNKE DVR supports multiple camera types, making it a versatile solution for various surveillance needs. It is compatible with TVI, AHD, CVI, CVBS analog cameras, and IP cameras.

Figure 4: 5-in-1 Hybrid DVR Compatibility
This image illustrates the DVR's compatibility with five different camera technologies: IP, AHD, CVI, CVBS, and TVI, allowing for flexible system integration.
The DVR operates in two primary modes:
- 8+2 Mode: Supports 8 BNC (analog) cameras and 2 IP cameras.
- NVR Mode: Can be configured to support up to 10 IP cameras when IP enhanced mode is enabled.

Figure 5: DVR Operating Modes
This image visually represents the two operational modes of the DVR: a hybrid mode supporting both analog and IP cameras, and a dedicated NVR mode for IP cameras only.
5.2 AI Motion Detection 2.0 (Human & Vehicle Detection)
The DVR features advanced Motion Detection 2.0, utilizing deep learning algorithms to distinguish between humans, vehicles, and other moving objects. This significantly reduces false alarms caused by animals, rain, or swaying branches.

Figure 6: AI Human & Vehicle Detection in Action
The image demonstrates the AI detection capability, highlighting a person and a vehicle within the camera's field of view, indicating accurate classification of detected objects.
To enable and configure AI Motion Detection:
- Access the DVR's main menu.
- Navigate to Configuration > Event > Motion Detection.
- Select the desired channel and enable Human & Vehicle Detection.
- Adjust sensitivity and define detection zones as needed.
- Configure alarm actions, such as app push notifications or email alerts.
5.3 Remote Access via ANNKE Vision App
Monitor your property from anywhere using the ANNKE Vision app on your smartphone or tablet. The app allows live viewing, playback, and system configuration remotely.

Figure 7: Remote Access via ANNKE Vision App
This image displays the ANNKE Vision mobile application interface, showing a live camera feed and indicating availability on both Google Play and the App Store for remote monitoring.
Steps for remote access setup:
- Ensure the DVR is connected to the internet.
- Download the "ANNKE Vision" app from the Google Play Store or Apple App Store.
- Create an ANNKE account and log in.
- Add your DVR to the app by scanning the QR code on the DVR or manually entering its serial number.
- Follow the in-app prompts to complete the device addition.
5.4 Smart Playback
The Smart Playback feature allows for quick searching of specific events, such as human or vehicle detection, saving time when reviewing recorded footage.

Figure 8: Smart Playback Interface
The image illustrates the Smart Playback function on a laptop, highlighting options for searching recorded events based on human or vehicle detection.
To use Smart Playback:
- Access the DVR's playback interface.
- Select the desired date and time range.
- Choose Smart Search and specify criteria like Human Search or Vehicle Search.
- The system will display relevant video segments, allowing for efficient review.
5.5 H.265 Pro+ Video Compression
The DVR utilizes advanced H.265 Pro+ video compression technology. This technology significantly reduces file sizes without compromising video quality, leading to substantial savings in storage space and bandwidth compared to older H.264 compression.

Figure 9: H.265+ Compression Efficiency
This graphic demonstrates the efficiency of H.265+ video compression, indicating that it can reduce storage requirements by up to 75% compared to the H.264 standard.
5.6 Recording Modes
The DVR supports various recording modes to suit different surveillance needs:
- Manual Recording: Start and stop recording manually.
- Scheduled Recording: Set specific times for continuous recording.
- Motion-Triggered Recording: Recording starts automatically when motion is detected (recommended with AI detection for efficiency).
Configure recording schedules and settings via the DVR's main menu: Configuration > Record > Schedule.
6. Maintenance
6.1 Regular Cleaning
To ensure optimal performance and longevity, regularly clean the DVR unit. Use a soft, dry cloth to wipe the exterior. Avoid using liquid cleaners or aerosols directly on the device. Ensure ventilation openings are free from dust and obstructions.
6.2 Firmware Updates
Periodically check the ANNKE official website for firmware updates. Firmware updates can improve system stability, add new features, and enhance security. Follow the instructions provided with the firmware update carefully to avoid damaging the device.
6.3 Hard Drive Management
If a hard drive is installed, ensure it is functioning correctly. The DVR can be configured to automatically overwrite older footage when the hard drive is full. Regularly back up important footage to an external storage device if needed.
7. Troubleshooting
| Problem | Possible Cause | Solution |
|---|---|---|
| No video output on monitor | Loose cable connection; Incorrect input source on monitor; DVR not powered on. | Check HDMI/VGA cable connections. Ensure monitor is set to correct input. Verify DVR power indicator is on. |
| Cameras not displaying | Camera power issue; Loose BNC connection; Incorrect camera type selected. | Check camera power supply. Secure BNC connections. Ensure camera type matches DVR settings (TVI/AHD/CVI/CVBS). |
| Remote access not working | No internet connection; Incorrect network settings; App configuration error. | Verify DVR has internet access. Check network settings (DHCP/Static IP). Re-add DVR to ANNKE Vision app. |
| No recording | No hard drive installed; Hard drive full or faulty; Recording schedule not configured. | Install a hard drive. Check hard drive status in DVR settings. Configure recording schedule. |
For further assistance, please refer to the ANNKE support website or contact customer service.
8. Specifications
| Feature | Detail |
|---|---|
| Model Number | AU-DW81KT000-OP |
| Video Compression | H.264+/H.264/H.265/H.265 Pro+ |
| Video Input | 8CH Analog HD/Analog + 2CH IP Video (up to 12 channels with IP enhanced mode) |
| Supported Analog Camera Types | TVI (3K/5MP@20FPS, 4MP, 3MP, 1080p, 720p), AHD (5MP@20FPS, 4MP, 1080p, 720P), CVI (5MP@20FPS, 4MP, 1080p, 720P), CVBS |
| Supported IP Camera Resolution | Up to 6MP (6MP/5MP/4MP/3MP/1080P/720P) |
| Video Output | HDMI and VGA Up to 1080P |
| Audio Input | 1-ch RCA, 8-ch via coaxial cable |
| Audio Output | 1-ch RCA |
| Analog HD Playback Resolution | 3K Lite/5MP Lite/4MP Lite@12fps, 1080p/720p@15fps |
| IPC Playback Resolution | Up to 6MP |
| Max Playback Channel | 8-ch |
| Remote Connection | 64 |
| Motion Detection 2.0 | All analog channels support human and vehicle detection |
| HDD Interface | 1 SATA interface |
| HDD Capacity | Up to 10TB capacity (HDD not included) |
| Connectivity Technology | Wired |
| Special Features | App Control, Automatic Overwrite, Human Detection, Smart Playback, Vehicle Detection |
| Power Source | Corded Electric |
| Dimensions (L x W x H) | 14.17 x 11.02 x 3.15 inches |
| Item Weight | 3.25 pounds |
9. Warranty and Support
ANNKE products are designed for reliability and performance. For information regarding product warranty, technical support, or service, please visit the official ANNKE website or contact their customer support team. Ensure you have your product model number (AU-DW81KT000-OP) and purchase details available when seeking support.
ANNKE Official Website: www.annke.com