1. Introduction
Thank you for choosing the AECOJOY 14x10FT Manual Retractable Awning. This awning is designed to provide shade and protection from UV rays for your patio, deck, balcony, or windows. Its manual operation allows for easy extension and retraction, offering flexible shade solutions for both residential and commercial applications. Please read this manual thoroughly before installation and use to ensure proper setup, safe operation, and optimal performance.

Image 1.1: The AECOJOY 14x10FT Manual Retractable Awning providing shade over a patio area.
2. Safety Information
Adhering to safety guidelines is crucial for preventing injury and damage. Please observe the following:
- Secure Installation: Always ensure the awning is securely attached to a solid wall or surface. Improper installation can lead to the awning detaching, causing severe injury or property damage.
- Wind Conditions: Do not use the awning in winds exceeding 30 mph (48 km/h). Strong winds can cause significant damage to the awning and its mounting structure. Retract the awning immediately during high winds or storms.
- Moving Parts: Keep children and pets away from moving parts during extension and retraction to prevent pinching or entanglement.
- Regular Inspection: Periodically inspect all mounting hardware, fabric, and moving components for wear, damage, or loosening. Address any issues promptly.
- Weight Limit: Do not hang objects from the awning frame or fabric. The awning is not designed to support additional weight.
- Snow and Ice: Do not leave the awning extended during snowfall or icy conditions. Accumulation of snow or ice can cause the awning to collapse.
3. Package Contents
Verify that all components are present and undamaged before beginning assembly. If any parts are missing or damaged, contact customer service.
- Awning Fabric Roll
- Main Frame Assembly (Roller Tube, Front Bar)
- Retractable Arms (Left and Right)
- Wall Mounting Brackets
- Manual Crank Handle
- Installation Hardware (Expansion bolts for concrete/brick, screws for wood)
- User Manual
4. Installation and Setup
The AECOJOY Manual Retractable Awning requires assembly and secure mounting. It can be installed on concrete, solid brick, or wooden walls. Ensure you have the necessary tools and assistance for a safe installation.
4.1 Recommended Installation Height
The recommended installation height is between 8FT and 13FT from the ground. When mounting above a patio door, ensure at least 8 inches of clearance above the door frame to prevent interference with door operation.

Image 4.1: Installation height guidelines for the awning.
4.2 Wall Mounting
The awning can be secured to reinforced concrete, brick, or wooden walls. Use appropriate fasteners for your wall type:
- Expansion Bolts: For reinforced concrete and brick walls.
- Wood Screws (M10): For wooden walls. It is recommended to pre-drill 0.25-inch pilot holes.
Ensure the mounting surface is structurally sound and capable of supporting the awning's weight and operational forces.

Image 4.2: Awning frame components and stability features.
4.3 Assembly Steps (General)
- Prepare the Wall: Mark the desired mounting locations for the brackets, ensuring they are level and correctly spaced according to the awning's dimensions.
- Install Brackets: Drill holes and securely fasten the wall mounting brackets using the appropriate hardware for your wall type.
- Assemble Frame: Connect the main frame components, including the roller tube and front bar, if they are in multiple pieces.
- Attach Retractable Arms: Secure the retractable arms to the main frame and the wall brackets.
- Mount Awning: Carefully lift and secure the assembled awning onto the wall mounting brackets. This step typically requires two people.
- Install Crank Handle: Attach the manual crank handle mechanism.
- Final Adjustments: Perform initial tests of extension and retraction, and adjust the pitch as needed.
5. Operation
The AECOJOY awning features a manual crank operation for easy extension, retraction, and angle adjustment.
5.1 Extending and Retracting the Awning
To extend or retract the awning, insert the manual crank handle into the designated loop or hook on the awning mechanism. Rotate the handle clockwise to extend the awning and counter-clockwise to retract it. Operate smoothly and avoid excessive force.

Image 5.1: Operating the manual crank handle to retract the awning.
5.2 Adjusting the Awning Angle (Pitch)
The awning's pitch can be adjusted between 40 and 90 degrees to optimize shade coverage. This adjustment is typically made by loosening and tightening specific bolts on the retractable arms or mounting brackets. Refer to the detailed diagrams in your included manual for precise adjustment points.

Image 5.2: Awning angle adjustment mechanism.
6. Maintenance
Regular maintenance ensures the longevity and optimal appearance of your awning.
- Fabric Cleaning: The awning fabric is made of 280g polyester with a PU coating, making it water-resistant and UV-resistant. Clean the fabric periodically with mild soap and water. Use a soft brush or sponge. Rinse thoroughly and allow to air dry completely before retracting to prevent mildew. Do not use harsh chemicals or abrasive cleaners.
- Frame Cleaning: Wipe down the powder-coated aluminum frame with a damp cloth to remove dirt and debris.
- Hardware Inspection: Annually inspect all bolts, screws, and connections for tightness. Tighten any loose fasteners. Check for signs of rust or corrosion on metal parts.
- Moving Parts Lubrication: Lightly lubricate moving joints and the crank mechanism with a silicone-based spray lubricant to ensure smooth operation.
- Winter Storage: In areas with harsh winters, it is recommended to keep the awning retracted to protect it from heavy snow and ice.
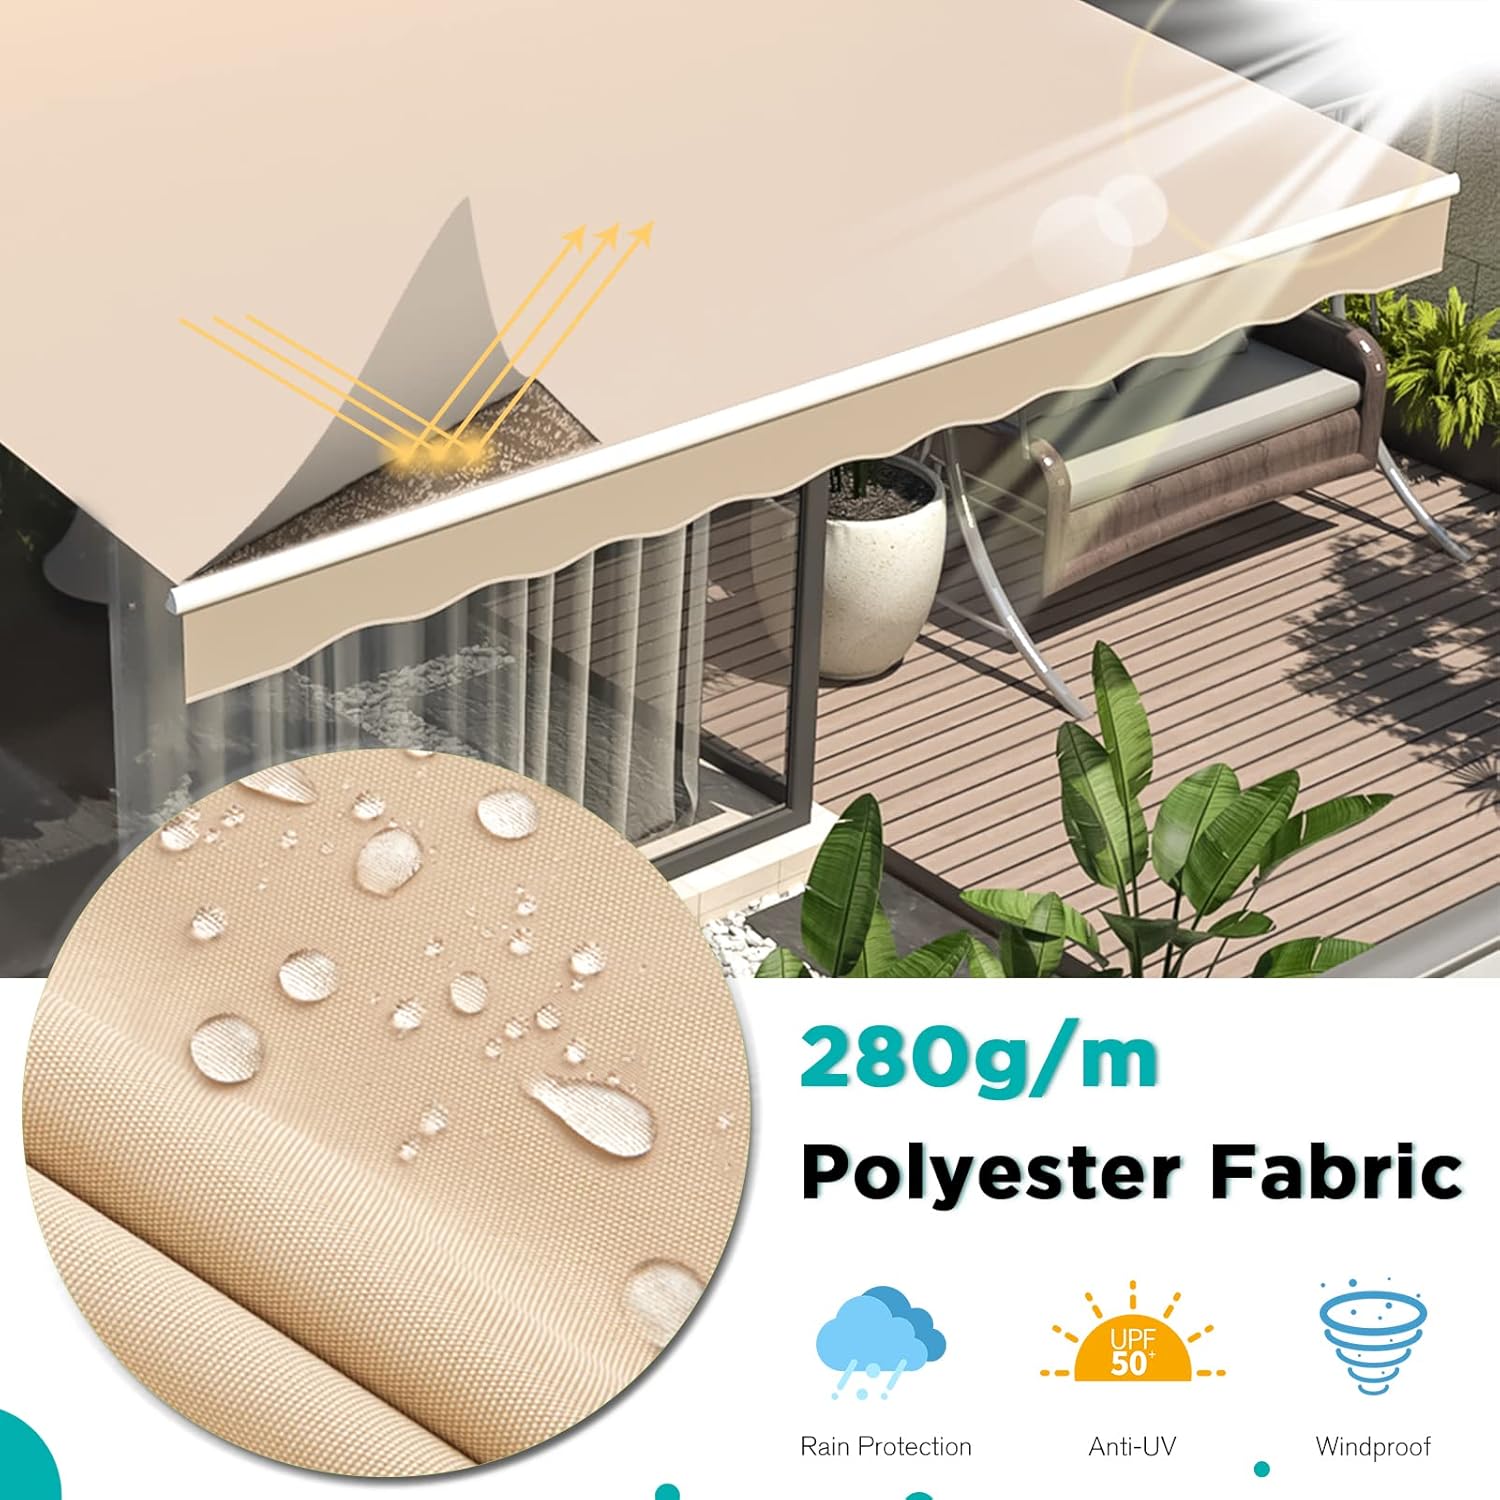
Image 6.1: The durable 280g polyester fabric with PU coating.
7. Troubleshooting
This section addresses common issues you might encounter with your awning.
| Problem | Possible Cause | Solution |
|---|---|---|
| Awning does not extend or retract smoothly. | Lack of lubrication; bent arm; obstruction. | Lubricate moving parts. Check arms for damage or obstructions. Ensure no fabric is caught. |
| Awning sags or appears uneven. | Loose mounting bolts; incorrect pitch adjustment; damaged arm. | Check and tighten all mounting bolts. Re-adjust the pitch evenly. Inspect arms for damage. |
| Crank handle is difficult to turn. | Mechanism needs lubrication; internal damage. | Apply lubricant to the crank mechanism. If problem persists, contact customer service. |
| Awning makes unusual noises during operation. | Loose components; lack of lubrication; worn parts. | Inspect all connections and moving parts. Lubricate as needed. If noise persists, contact customer service. |
| Awning fabric is torn or damaged. | Exposure to extreme weather; sharp objects; wear and tear. | Small tears may be repairable with awning repair kits. For significant damage, fabric replacement may be necessary. |
If you encounter issues not listed here or if the suggested solutions do not resolve the problem, please contact AECOJOY customer service for assistance.
8. Specifications
Detailed specifications for the AECOJOY 14x10FT Manual Retractable Awning:
- Model: 14x10FT Manual Retractable Awning
- Dimensions (Extended): 168" W x 120" D x 59" H (14ft W x 10ft D)
- Material: Polyester
- Fabric Type: 280g polyester with PU coating
- Frame Material: Rust-resistant, powder-coated aluminum
- Operation Mode: Manual (Crank Handle)
- UV Protection: 30UV+ solar protection
- Water Resistance: Yes
- Wind Resistance: Up to 30 mph (retract in higher winds)
- Adjustable Pitch: 40-90 degrees
- Required Assembly: Yes

Image 8.1: Dimensions of the 14x10FT awning, illustrating the large shade area.
9. Warranty and Customer Support
AECOJOY is committed to providing quality products and customer satisfaction. This product comes with a standard warranty against manufacturing defects. For specific warranty details, please refer to the documentation included with your purchase or contact AECOJOY customer service.
If you have any questions, require technical assistance, or need to report a missing or damaged part, please contact our customer support team. We are available to help you with installation, operation, and any other inquiries you may have.
Contact Information:
Please refer to your purchase documentation or the AECOJOY official website for the most current customer service contact details.