1. Safety Information
WARNING: This shed requires assembly. Adhere to all instructions carefully. Some components may be heavy; ensure adequate assistance is available for lifting. Do not assemble in wet conditions or on uneven surfaces. Keep children and pets away from the work area during assembly.
- Always wear appropriate safety gear, including gloves and eye protection, during assembly.
- Ensure the assembly area is clear of obstructions and well-lit.
- Verify all parts are present and undamaged before beginning assembly.
- Do not overtighten fasteners, as this may damage components.
- Securely anchor the shed to the ground after assembly to prevent wind damage.
2. Product Overview
The LZBEITEM 6x6FT Heavy-Duty Metal Outdoor Storage Shed is designed for outdoor storage of tools, equipment, and other items. It features durable metal construction, integrated vents for air circulation, and a clear window for natural light.

Image: The 6x6FT metal storage shed with its double hinged doors open, revealing ample interior space suitable for storing garden tools, a bicycle, and other outdoor equipment. The shed features a clear window on the side.
3. Specifications
| Brand | LZBEITEM |
| Model | 6x6FT Outdoor Storage Shed |
| Dimensions (Approx.) | 72.76in (W) x 71.65in (D) x 75.14in (H) |
| Material | Heavy-Duty Metal (Alloy Steel) |
| Color | Grey |
| Door Style | Double Hinged Doors |
| Water Resistance | Water Resistant |
| Assembly Required | Yes |

Image: A detailed diagram illustrating the external dimensions of the 6x6FT storage shed, including height, width, and depth measurements in inches. Two pairs of gloves are also shown, indicating they might be included for assembly.
4. Assembly and Setup
Careful assembly is crucial for the stability and longevity of your storage shed. Follow these general steps. Refer to the detailed assembly manual included in your product packaging for specific part numbers and diagrams.
- Prepare the Foundation: Ensure a level and stable foundation. This can be concrete, a wooden platform, or a gravel base.
- Unpack and Identify Parts: Carefully unpack all components. Refer to the parts list in your manual to identify each piece.
- Assemble the Base Frame: Connect the base frame components according to the diagrams. Ensure all connections are secure.
- Attach Wall Panels: Begin attaching the wall panels to the base frame. Pay attention to the orientation of each panel, especially those with vents or windows.
- Install Door Frames and Doors: Assemble and install the door frames, then attach the double hinged doors. Ensure they open and close smoothly.
- Construct the Roof Frame: Assemble the roof support structure.
- Install Roof Panels: Attach the roof panels, ensuring proper overlap for water resistance.
- Install Vents and Window: Secure the louver vents and the clear window into their designated positions.
- Final Fastening and Sealing: Double-check all fasteners for tightness. Apply any recommended sealants to joints for enhanced weather resistance.
- Anchor the Shed: Securely anchor the shed to your prepared foundation using appropriate anchoring hardware (not always included).
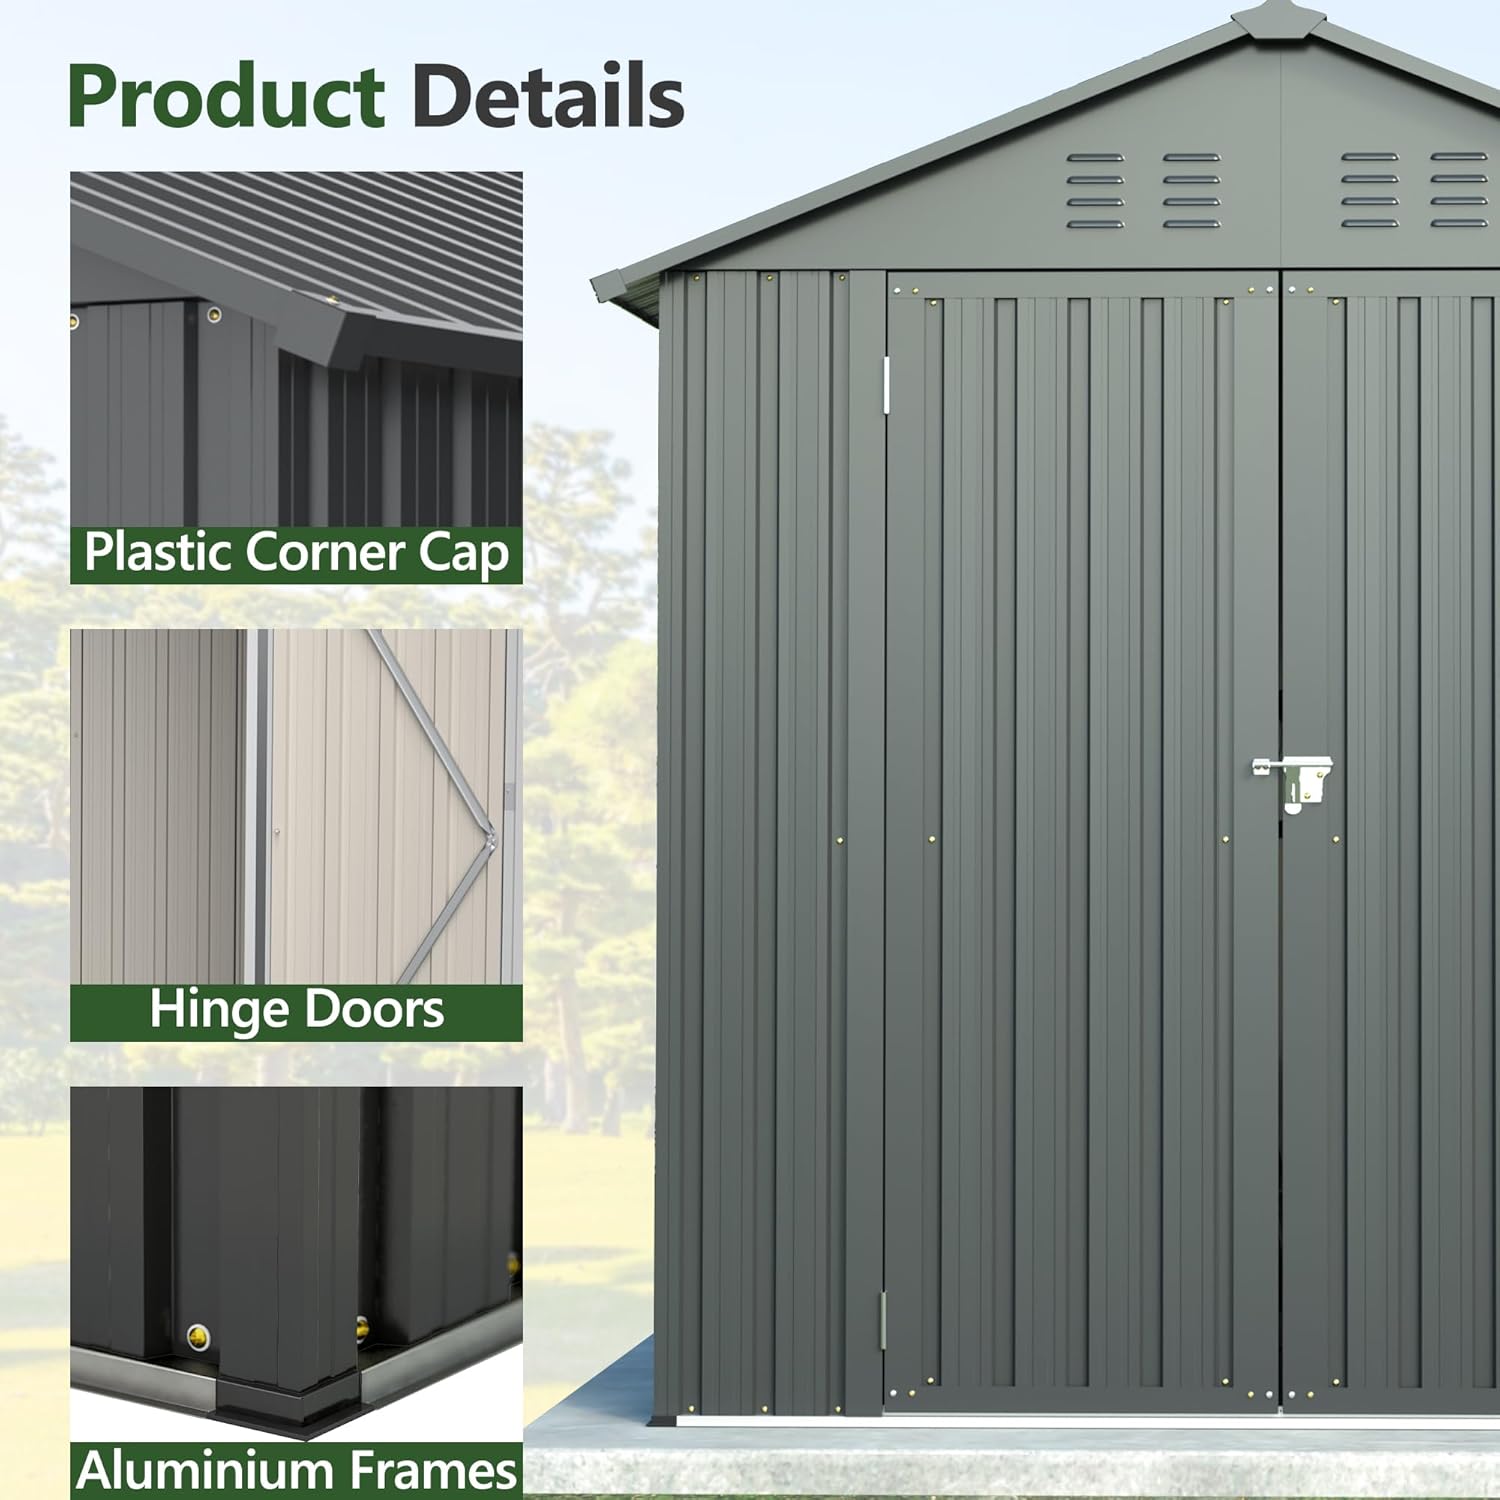
Image: Close-up views of key structural components of the shed. This includes a plastic corner cap for protection, the robust hinge mechanism of the doors, and the durable aluminum frames that provide structural integrity.
5. Operating Instructions
- Doors: The shed features double hinged doors. To open, unlatch the locking mechanism and pull the doors outwards. Ensure doors are fully closed and latched to protect contents from weather and unauthorized access.
- Vents: The shed is equipped with louver vents located on the upper sections. These vents are designed to promote air circulation and prevent dampness inside the shed. They operate passively and do not require manual adjustment.
- Window: The clear window provides natural light. It is fixed and does not open.

Image: A close-up view of the shed's upper section, highlighting the four louver vents on the roofline designed to promote air circulation and prevent dampness. Below, a clear window is visible on the side panel, providing natural light to the interior.
6. Maintenance
Regular maintenance will extend the life and appearance of your storage shed.
- Cleaning: Clean the exterior surfaces periodically with mild soap and water. Avoid abrasive cleaners or harsh chemicals that could damage the finish.
- Inspection: Annually inspect all fasteners, hinges, and panels for tightness and signs of wear or damage. Tighten any loose screws.
- Rust Prevention: Although the shed is made of water-resistant metal, inspect for any scratches or chips in the paint that could lead to rust. Touch up with appropriate rust-inhibiting paint if necessary.
- Ventilation: Ensure vents remain clear of debris to maintain proper air circulation.
- Door Operation: Lubricate door hinges if they become stiff or squeaky.

Image: The metal storage shed standing outdoors during a rain shower, demonstrating its weather-resistant properties. The image emphasizes the premium color-coated steel sheets, which are designed to be weather resistant, high strength, lasting, durable, and heavy-duty.
7. Troubleshooting
- Doors do not close properly:
- Check if the shed is assembled on a level surface. An uneven foundation can cause misalignment.
- Inspect hinges for damage or misalignment. Adjust if possible.
- Ensure no obstructions are blocking the door path.
- Water leakage:
- Verify all roof and wall panels are correctly overlapped and securely fastened.
- Check for any gaps or unsealed joints. Apply silicone sealant if necessary.
- Ensure the shed is properly anchored and not shifting.
- Difficulty during assembly (misaligned holes):
- Double-check that you are using the correct parts for each step as per the assembly manual.
- Loosen adjacent fasteners slightly to allow for minor adjustments, then retighten once holes align.
- Do not force parts; if significant misalignment occurs, contact customer support.
8. Warranty and Support
For warranty information, replacement parts, or technical assistance, please refer to the contact details provided in your product packaging or visit the official LZBEITEM website. Keep your purchase receipt as proof of purchase.
Manufacturer: LZBEITEM
ASIN: B0DYMYMWBZ