Introduction
The Bloepum AU-HP10 is a versatile 10-channel headphone amplifier designed to distribute a single audio input to up to ten headphones, each with independent volume control. This device is ideal for studio monitoring, live sound applications, and educational settings where multiple listeners require high-quality audio. This manual provides essential information for the safe and efficient operation of your AU-HP10 amplifier.
Safety Instructions
- Power Supply: Use only the provided DC 12-24V power adapter. Ensure the voltage matches your region's standard (AC110-220V for the US plug type).
- Ventilation: Do not block ventilation openings. Ensure adequate airflow around the unit to prevent overheating.
- Moisture: Keep the device away from water, rain, and excessive humidity. Do not operate with wet hands.
- Placement: Place the amplifier on a stable, flat surface. Avoid placing it near heat sources or in direct sunlight.
- Cleaning: Disconnect power before cleaning. Use a soft, dry cloth. Do not use liquid cleaners or aerosols.
- Servicing: Do not attempt to service this product yourself. Refer all servicing to qualified personnel.
Package Contents
Please check the package for the following items:
- 1 x Bloepum AU-HP10 Headphone Amplifier
- 1 x Audio Cable
- 1 x US Plug Power Adapter (AC110-220V)
Product Overview
Familiarize yourself with the components of your Bloepum AU-HP10 amplifier.
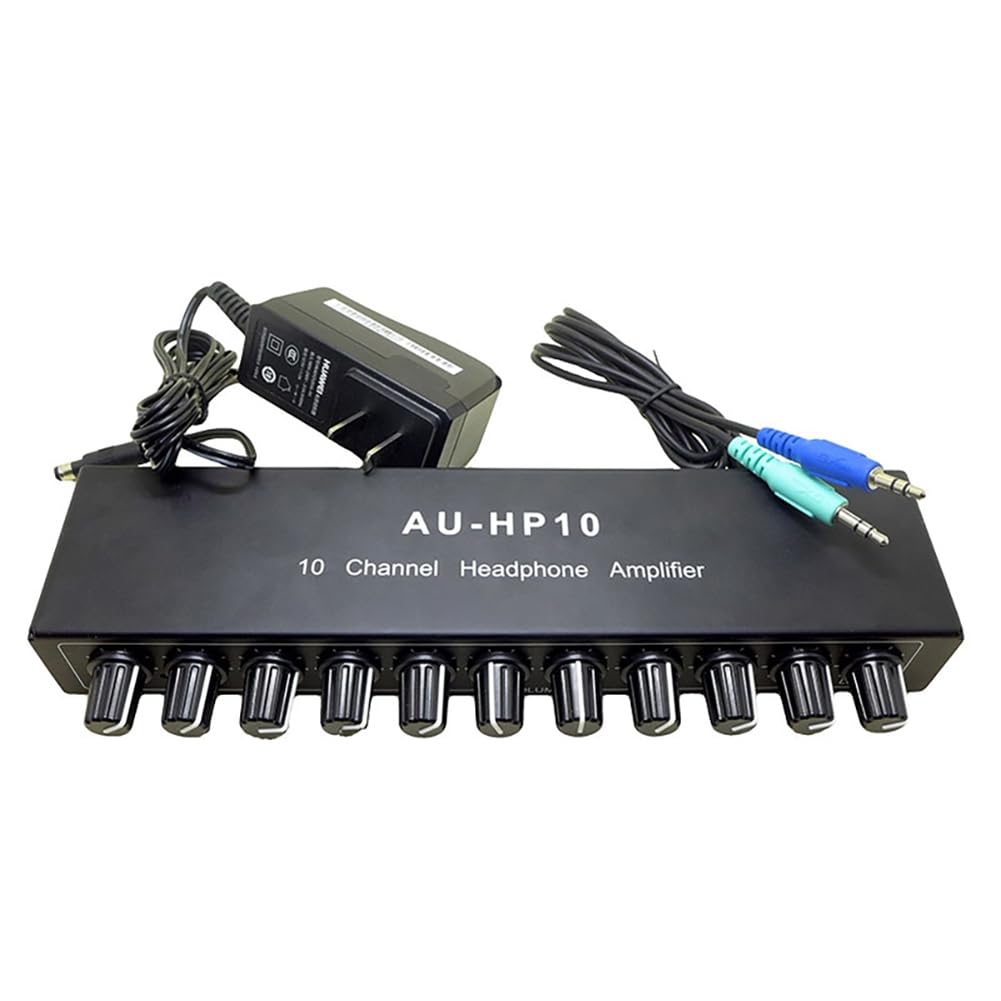
Image: Front panel of the AU-HP10 amplifier. It features an AUX input, ten 3.5mm output jacks (OUT1 to OUT10), and a DC12V power input port on the right side.

Image: Top view of the AU-HP10 amplifier, showcasing the ten individual volume control knobs for each output channel. The model name 'AU-HP10 10 Channel Headphone Amplifier' is printed on the top surface.

Image: A diagram highlighting the volume controls. 'Vol control (1-10)' indicates the individual channel volume knobs, and 'Total Vol (input)' refers to the master input volume control, though this model primarily features individual channel controls.

Image: A close-up shot of the individual volume control knobs on the AU-HP10 amplifier, showing their textured surface for easy grip and adjustment.

Image: The AU-HP10 amplifier set up and in use, positioned on a wooden speaker unit with a tablet displaying audio content in the background, demonstrating a typical usage scenario.

Image: A diagram highlighting the features of the AU-HP10, including '10 Channel Headphone Amplifier', 'Output level control per channel', 'With power switch and 3.5MM headphone output', '10 channels stereo sound, independent control', 'Aluminum alloy shell, good heat dissipation', and suggested uses like 'For stage, recording studio, conference room, etc.'.
Specifications
- Model: AU-HP10
- Input Impedance: 10K ohms
- Output Impedance: 16-150 ohms
- Interface: 3.5mm (input and output)
- Working Voltage: DC 12V (Power adapter included is 12-24V compatible)
- Gain: 14dB
- Output Power: 350mW * 2 / 32 ohms
- Frequency Response: 20Hz-20KHz
- Dimensions: 9.84 x 5.91 x 1.97 inches (25 x 15 x 5 cm)
- Item Weight: 1.26 pounds (0.57 kg)
- Material: Metal (Aluminum alloy shell)
- Plug Type: US Plug (AC110-220V)
Setup
- Power Connection: Connect the provided DC 12-24V power adapter to the 'DC12V' input port on the right side of the amplifier. Plug the power adapter into a suitable AC outlet (US plug type, AC110-220V).
- Audio Input: Connect your audio source (e.g., mixer, computer, audio interface) to the 'AUX' input jack on the left side of the amplifier using the supplied 3.5mm audio cable or a compatible cable.
- Headphone Connection: Plug your headphones into any of the 'OUT1' through 'OUT10' 3.5mm output jacks.
- Initial Volume Setting: Before powering on your audio source or playing audio, ensure all individual volume knobs (OUT1-OUT10) on the amplifier are turned down to their minimum setting to prevent sudden loud sounds.
Operating Instructions
- Power On: Once all connections are secure, power on your audio source. The amplifier does not have a separate power switch; it powers on when connected to the power adapter.
- Adjust Input Volume: Ensure the audio signal from your source is at an appropriate level.
- Adjust Headphone Volume: For each connected headphone, slowly turn the corresponding volume knob (OUT1-OUT10) clockwise to increase the volume to a comfortable listening level. Each channel's volume can be adjusted independently.
- Monitoring: Monitor the audio output through your headphones. Adjust individual volumes as needed for each listener.
- Power Off: To power off the amplifier, disconnect the power adapter from the AC outlet.
Maintenance
- Cleaning: Regularly wipe the amplifier's surface with a soft, dry, lint-free cloth. Do not use abrasive cleaners, solvents, or chemical sprays.
- Storage: When not in use for extended periods, store the amplifier in a cool, dry place, away from direct sunlight and extreme temperatures.
- Cable Care: Handle audio and power cables carefully. Avoid sharp bends or kinks that could damage the internal wiring.
Troubleshooting
- No Sound:
- Ensure the power adapter is securely connected and receiving power.
- Check all audio cable connections (AUX input, headphone outputs).
- Verify that the audio source is playing and its output volume is turned up.
- Confirm that the individual volume knob for the affected headphone channel is turned up.
- Test with different headphones and audio cables to rule out faulty accessories.
- Distorted Sound:
- Reduce the input volume from your audio source.
- Lower the individual headphone volume.
- Ensure your headphones' impedance (16-600 ohms) is within the amplifier's supported range (16-150 ohms for optimal performance).
- Intermittent Sound:
- Check for loose cable connections.
- Inspect cables for damage.
Warranty and Support
Bloepum products are designed for reliability and performance. For warranty information or technical support, please refer to the documentation provided at the time of purchase or contact your retailer. Keep your purchase receipt as proof of purchase.