Gavonde WX02
Gavonde 6K Digital Camera User Manual
Model: WX02
Introduction
This user manual provides comprehensive instructions for operating your Gavonde 6K Digital Camera. Designed for photography enthusiasts and beginners alike, this camera captures stunning 6K videos and 64MP UHD pictures, ensuring every memorable moment is recorded with clarity and detail. Please read this manual thoroughly before using the camera to ensure proper operation and to maximize your photographic experience.
What's in the Box
Verify that all items listed below are included in your package:
- 1 x Gavonde 6K Digital Camera
- 1 x 32GB TF Card
- 2 x 1500mAh Batteries
- 1 x Dual Charger
- 1 x Type C Cable
- 1 x 52mm Wide Angle & Macro Lenses
- 1 x Lens Cap
- 1 x Lanyard
- 1 x Camera Bag
- 1 x User Manual

Figure 1: Package Contents
Product Overview
The Gavonde 6K Digital Camera is equipped with advanced features for versatile photography and videography.

Figure 2: Camera and Accessories

Figure 3: Key Camera Features
Key Features:
- 6K UHD Video & 64MP Photos: Capture high-resolution content.
- Autofocus: Ensures sharp images.
- 3-inch 180° Flip Screen: Ideal for vlogging and selfies.
- 16X Digital Zoom: Magnify your subjects (note: digital zoom affects quality).
- Detachable 52mm Wide-angle & Macro Lenses: For diverse shooting scenarios.
- Built-in Flash: For low-light conditions.
- Wireless WiFi Function: Instant sharing and remote control via mobile app.
- Webcam Function: Use as a webcam for live streams or video calls.
- 9 Shooting Modes: Including Photo, Video, Slow Motion, Time Lapse, Loop, Auto, Burst, and Timer.
- Multiple Filters & Beauty Face: Enhance your photos.
- HDMI Output: Connect to a TV for screen projection (HDMI cable not included).
- Standard Hot Shoe Interface: For external accessories like microphones or flashes (not included).
Setup
1. Charging the Battery
Insert the two 1500mAh batteries into the dual charger. Connect the charger to a power source using the provided Type C cable. The indicator light on the charger will show charging status. Ensure batteries are fully charged before first use.

Figure 4: Dual Battery Charging
2. Inserting the SD Card
Locate the SD card slot on the camera. Insert the provided 32GB TF card into the slot until it clicks into place. Ensure the card is inserted correctly to avoid damage.

Figure 5: SD Card Insertion (refer to camera side for slot)
3. Attaching Lenses
The camera comes with a detachable 52mm wide-angle lens and macro lens. To attach, remove the lens cap from the camera body. Align the lens with the camera's lens mount and gently twist clockwise until it locks securely. To use the macro lens, detach the wide-angle lens and attach the macro lens directly.

Figure 6: Attaching Lenses
Operating Instructions
1. Powering On/Off
Press and hold the power button located on the top of the camera to turn it on or off. The 3-inch flip screen will display "Welcome" upon startup.
2. Navigating the Menu
Use the directional buttons and the "OK" button on the back of the camera to navigate through the menu options. The menu allows you to adjust various settings including:
- Pixel Setting: Adjust image resolution (e.g., 64MP, 48MP).
- Focus Mode: Select between Auto Focus, Manual Focus, and Fixed Focus.
- Grid: Enable framing grids (Crosshatch, Golden Ratio, Rule of Thirds) for better composition.
- Photo Frequency: Adjust frequency for flicker reduction.
- White Balance: Set color temperature (Auto, Sunny, Cloudy, Incandescent, Fluorescent).
- Filter: Apply various creative filters (17 options).
- EV (Exposure Value): Adjust brightness.
- Metering: Select metering mode.
- ISO: Adjust light sensitivity.
- Time Watermark: Add date/time stamp to photos.
- Backlight: Adjust screen brightness.
- Frequency: Set display refresh rate.
- LED Indicator Light: Turn on/off.
- Automatic Screen Saver: Set idle time before screen dims.
- Automatic Shutdown: Set idle time before camera powers off.
- Prompt Tone Setting: Adjust sound effects.
- Turn on Music: Enable/disable startup music.
- Icon Display: Show/hide icons on screen.
- WiFi: Enable/disable Wi-Fi.
- Language: Select display language.
- Time Format: Set date display format.
- Time Setting: Adjust current time.
- Date Setting: Adjust current date.
- Format Card: Erase all data on the SD card.
- Device Information: View camera details.
- Factory Reset: Restore default settings.
3. Shooting Modes
Rotate the mode dial on the top of the camera to select from 9 different shooting modes:
- Photo Mode: Standard photo capture.
- Continuous Shooting: Capture multiple photos in quick succession.
- Timed Shooting (Self-timer): Set a delay before taking a photo.
- Auto Photo Mode: Camera automatically adjusts settings.
- Normal Photo Mode: Standard photo capture.
- Video Mode: Standard video recording.
- Time Lapse Recording: Capture a series of images over time to create a time-lapse video.
- Loop Recording: Continuously record video, overwriting older footage when storage is full.
- Slow Motion Recording: Record video at a higher frame rate for slow-motion playback.

Figure 7: Mode Dial and Available Modes
4. Digital Zoom
Use the W/T button (Wide/Telephoto) to zoom in and out. The camera supports 16X digital zoom. Please note that digital zoom may affect image quality, especially at higher magnifications.

Figure 8: Digital Zoom Levels
5. Wireless WiFi Function
The camera features built-in Wi-Fi for instant sharing and remote control:
- Scan the QR code (https://qr04.cn/B9lhOx) with your smartphone to download the companion app.
- Hold the UP/Flash button for 3 seconds on the camera to enable Wi-Fi.
- Connect your phone to the camera's Wi-Fi network. The network name is "WD02-6K" and the password is "12345678".

Figure 9: Wireless WiFi Connection
6. Webcam Function
Connect the camera to your computer using the Type C USB cable. Select "PC Camera" mode on the camera's screen to use it as a webcam for live streaming or video calls on platforms like YouTube, Facebook, or Twitter.
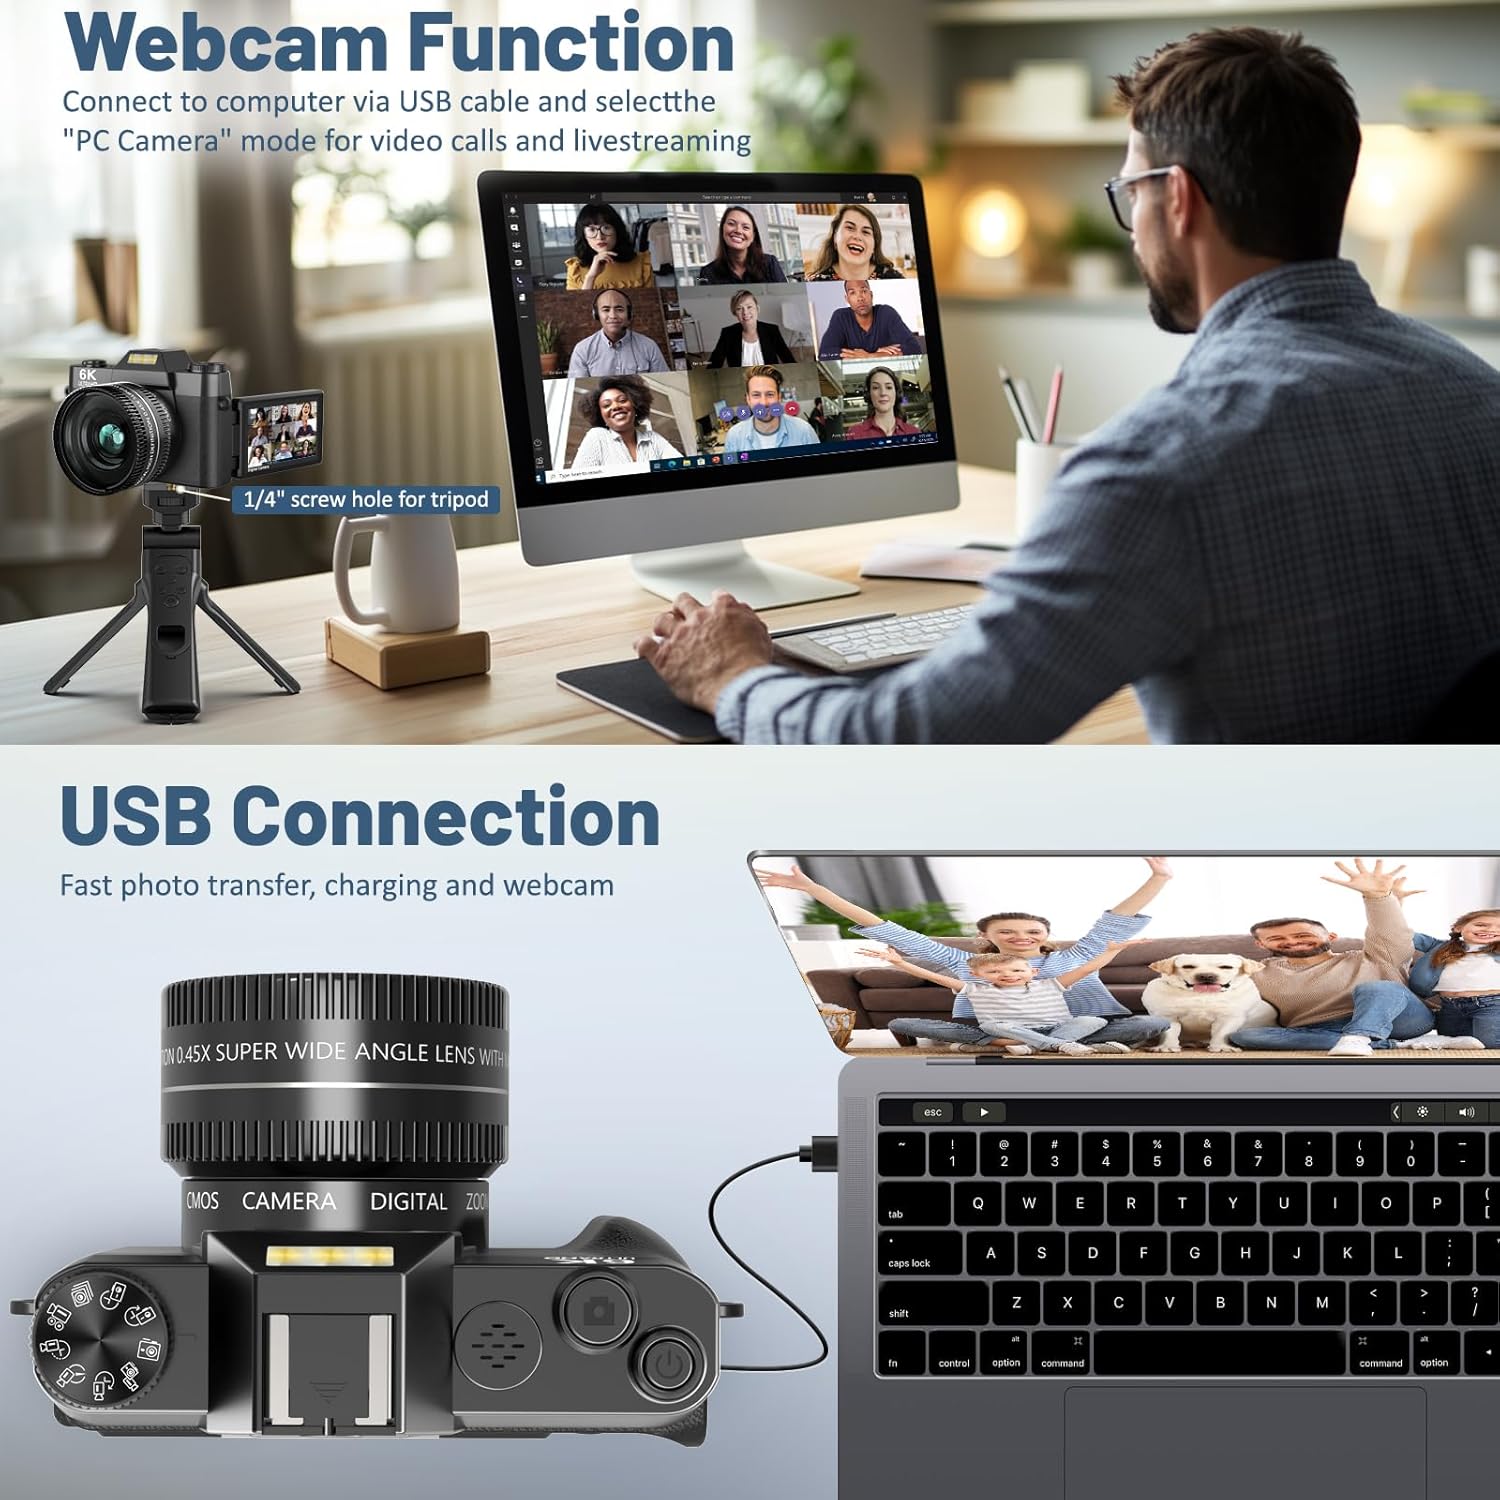
Figure 10: Webcam and USB Connection
7. Downloading Files
You can download photos and videos from your camera using one of the following methods:
- Wi-Fi Connection: Use the companion app on your smartphone to transfer files wirelessly.
- USB Connection: Connect the camera to your computer using the Type C USB cable. The camera will appear as a removable drive, allowing you to copy files directly.
- Card Reader: Remove the TF card from the camera and insert it into a card reader (not included) connected to your computer.

Figure 11: File Download Methods
Maintenance
- Cleaning the Camera Body: Use a soft, dry cloth to wipe the camera body. Do not use strong detergents or solvents.
- Cleaning Lenses: Use a lens cleaning cloth and specialized lens cleaning solution. Avoid touching the lens surface with your fingers. Always keep the lens cap on when not in use to protect against dust and scratches.
- Battery Care: Store batteries in a cool, dry place. If not using the camera for an extended period, remove the batteries.
- Storage: Store the camera in a dry, dust-free environment, away from direct sunlight and extreme temperatures.

Figure 12: Lens Cap for Protection
Troubleshooting
| Problem | Possible Cause | Solution |
|---|---|---|
| Camera does not power on. | Battery is low or not inserted correctly. | Ensure batteries are fully charged and correctly inserted. |
| "TF card reading completed" message. | This is a normal startup message indicating the camera has recognized the SD card. | No action required. Proceed with camera operation. |
| Poor image quality with digital zoom. | Digital zoom, unlike optical zoom, can reduce image clarity. | Minimize use of high digital zoom levels for best quality. |
| Cannot connect to Wi-Fi. | Incorrect password or Wi-Fi not enabled on camera. | Ensure Wi-Fi is enabled on camera and correct password ("12345678") is entered. |
| External microphone not working. | External microphone requires its own power supply; camera does not power it. Microphone must be dual-channel with 3.5mm interface. | Ensure external microphone is powered and compatible (dual-channel, 3.5mm). |
Specifications
| Feature | Detail |
|---|---|
| Brand | Gavonde |
| Model Name | WX02 |
| Effective Still Resolution | 64 MP |
| Video Resolution | 6K/30FPS, 5K/30FPS, 4.7K/30FPS, 4K/60FPS, 4K/30FPS, 2.7K/30FPS, 1080P/60FPS, 1080P/30FPS, 720P/120FPS, 720P/60FPS, 720P/30FPS |
| Digital Zoom | 16 x |
| Screen Size | 3 Inches (180° Flip Screen) |
| Photo Sensor Technology | CMOS |
| Autofocus | Yes |
| Connectivity Technology | Wi-Fi, USB, HDMI |
| External Memory Size | 32 GB (Supports up to 256GB SD card) |
| Battery Type | 2 x 1500mAh Lithium-Ion batteries (included) |
| Dimensions (L x W x H) | 4.7'' x 1.9'' x 3.1'' |
Warranty and Support
Gavonde is committed to providing high-quality products and professional service. If you encounter any problems with your camera, such as defects, damage, items not as described, or missing accessories, please do not hesitate to contact us. We offer lifetime 24-hour responsive after-sales service to resolve any issues you may experience.
For support, please refer to the contact information provided with your purchase or visit the official Gavonde store on Amazon: Gavonde Store.

Figure 13: Dedicated Customer Support
Ask a question about this manual
Ask about setup, troubleshooting, compatibility, parts, safety, or missing instructions. Manuals+ will review the question and use this page’s manual context to help answer it.