
XikeStor 10 Port │ 8x2.5G│ 1x10G SFP+ Managed
XikeStor 10-Port 2.5G Web Managed Ethernet Switch User Manual
Model: 10 Port │ 8x2.5G│ 1x10G SFP+ Managed
Brand: XikeStor
1. Introduction
This manual provides detailed instructions for the installation, operation, and maintenance of your XikeStor 10-Port 2.5G Web Managed Ethernet Switch. This device is designed to offer high-performance network connectivity with advanced Layer 2 management features, suitable for home, small office, and business environments.

Image: The XikeStor 10-Port 2.5G Web Managed Ethernet Switch, showcasing its compact metal housing and port layout.
2. Safety Information
Please read and follow these safety guidelines to prevent damage to the device or injury to yourself:
- Ensure the power adapter voltage matches your local power supply.
- Do not open the device casing. Refer all servicing to qualified personnel.
- Keep the device away from water, fire, high humidity, or extreme temperatures.
- Avoid placing heavy objects on the switch.
- Ensure proper ventilation around the device to prevent overheating.
- This device is equipped with 6KV lightning protection and 8KV ESD shielding for enhanced reliability.
3. Package Contents
Verify that all items are present in the package:
- XikeStor 10-Port 2.5G Web Managed Ethernet Switch
- Power Adapter
- User Manual (this document)
- Warranty Card
4. Product Overview
The XikeStor 10-Port 2.5G Web Managed Ethernet Switch features 8 auto-adaptive RJ45 ports (100M/1G/2.5G) and 2 10G SFP+ ports (supporting 1G/2.5G/10G speeds). It is housed in a durable, fanless metal casing for silent operation and efficient heat dissipation.
4.1 Front Panel Layout

Image: Front view of the switch highlighting 8x 2.5G RJ45 ports and 2x 10G SFP+ ports, along with power and system indicators.
The front panel includes:
- DC 12V Power Input: For connecting the power adapter.
- PWR LED: Indicates power status.
- SYS LED: Indicates system status.
- RJ45 Ports (1-8): 2.5 Gigabit Ethernet ports for connecting network devices. Each port has Link/Act LEDs.
- SFP+ Ports (9-10): 10 Gigabit SFP+ slots for fiber or DAC/AOC connections. Each port has Link/Act LEDs.
- RST Button: Reset button (typically recessed).
4.2 Design and Cooling

Image: An exploded view illustrating the internal metal heatsinks and the robust all-metal casing, emphasizing the fanless and silent cooling design.
The switch features an all-metal casing and efficient heatsinks for passive cooling, ensuring stable and silent operation without the need for internal fans.
5. Setup
5.1 Physical Installation
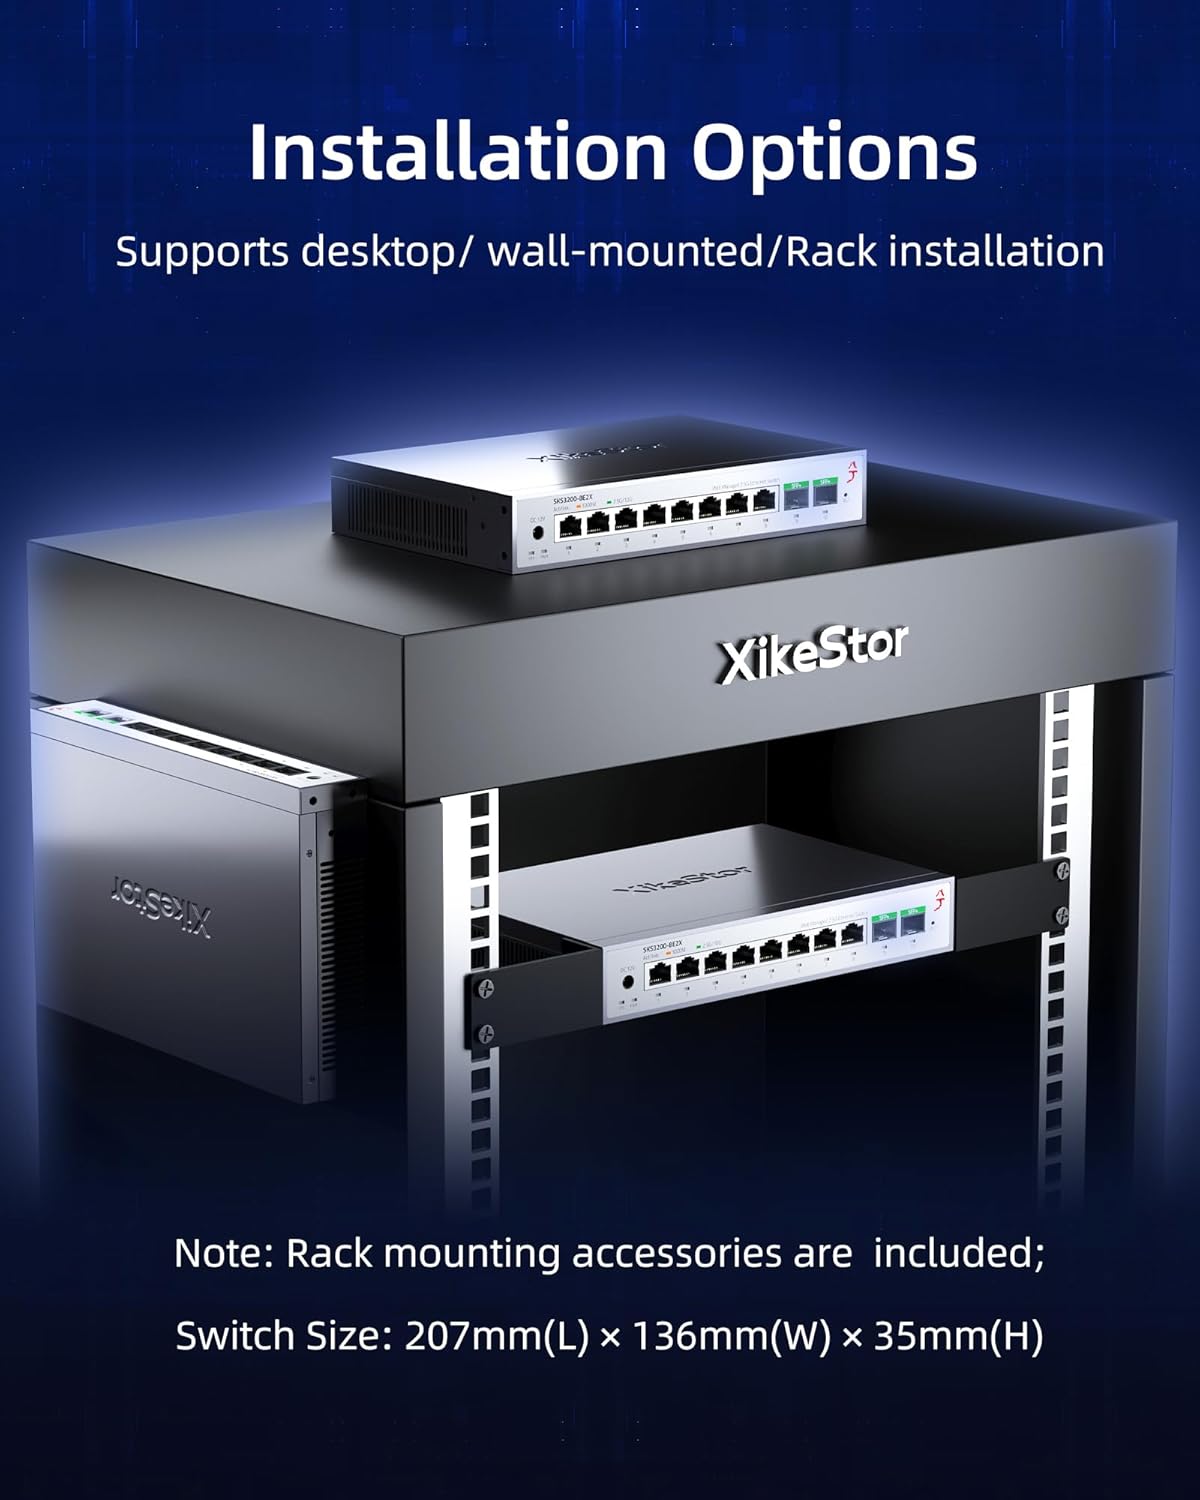
Image: Demonstrates the versatility of installation, showing the switch placed on a desktop, mounted on a wall, and installed in a rack. Rack mounting accessories are included.
The switch supports multiple installation methods:
- Desktop Placement: Place the switch on a flat, stable surface.
- Wall-Mount: Use appropriate screws and anchors (not included) to mount the switch to a wall.
- Rack-Mount: Rack mounting accessories are included for installation in a standard network rack.
5.2 Power Connection
- Connect the provided power adapter to the DC 12V input port on the switch.
- Plug the power adapter into a standard electrical outlet. The PWR LED will illuminate.
5.3 Network Connection
- Connect your network devices (e.g., computers, NAS, WiFi 6 APs) to the RJ45 ports (1-8) using Ethernet cables.
- For high-speed backbone connections, insert compatible SFP+ transceivers (not included) into the SFP+ ports (9-10) and connect with appropriate fiber optic or DAC/AOC cables.
5.4 Initial Configuration Access

Image: Illustrates connecting a PC to the switch and accessing the web management interface through a browser, showing the default IP address and login credentials.
To access the web management interface for configuration:
- Connect your PC directly to any RJ45 port on the switch.
- Configure your PC's IPv4 address to be in the same subnet as the switch's default IP. For example, if the switch's default IP is 192.168.10.12, set your PC's IP to 192.168.10.X (where X is not 12) with a subnet mask of 255.255.255.0.
- Open a web browser and enter the default IP address: 192.168.10.12
- Enter the default login credentials:
Username: admin
Password: admin - It is highly recommended to change the default password immediately after the first login.
6. Operating the Switch
The XikeStor switch offers a range of Layer 2 management features accessible via its web interface.
6.1 Web Management Interface

Image: A screenshot of the web-based management interface, showing options for VLAN, LACP, STP, IGMP, Storm Control, and Port Mirroring.
The web interface allows you to configure advanced network settings, including:
- VLAN (Virtual Local Area Network): Segment your network for improved security and performance.
- LACP (Link Aggregation Control Protocol): Combine multiple physical links into a single logical link for increased bandwidth and redundancy.
- QoS (Quality of Service): Prioritize network traffic for critical applications.
- STP (Spanning Tree Protocol): Prevent network loops.
- IGMP Snooping: Optimize multicast traffic delivery.
- Port Mirroring: Monitor network traffic by sending a copy of packets from one port to another.
- Storm Control: Prevent network performance degradation due to excessive broadcast, multicast, or unknown unicast traffic.
6.2 Saving Configuration
After making any changes in the web management interface, it is crucial to save your configuration to ensure settings persist after a power cycle. Look for 'Apply' and 'Save' options within the interface. Typically, you need to click 'Apply' for changes to take effect immediately, and then 'Save' to store them permanently to the device's non-volatile memory.
6.3 VLAN Setup Example

Image: A simplified diagram showing how different ports can be assigned to separate VLANs (VLAN1, VLAN2, VLAN3) to segment network traffic.
For detailed instructions on VLAN setup or other advanced features, please refer to the online documentation or contact technical support.
7. Maintenance
7.1 Cleaning
- Use a soft, dry cloth to clean the exterior of the switch.
- Do not use liquid or aerosol cleaners, as they may damage the device.
7.2 Firmware Updates
Periodically check the XikeStor official website for firmware updates. Firmware updates can improve performance, add new features, or fix bugs. Follow the instructions provided with the firmware update package carefully.
7.3 Environmental Considerations
- Operate the switch within its specified temperature and humidity ranges.
- Ensure adequate airflow around the device, especially if it is placed in an enclosed space.
8. Troubleshooting
If you encounter issues with your switch, refer to the following common troubleshooting steps:
- No Power: Ensure the power adapter is securely connected to both the switch and a working power outlet. Check the PWR LED.
- No Link/Activity on Port: Verify that the Ethernet cable is properly connected at both ends. Check the Link/Act LED for the specific port. Ensure the connected device is powered on and functioning correctly.
- Cannot Access Web UI:
- Confirm your PC's IP address is in the same subnet as the switch (default 192.168.10.12).
- Ensure you are using the correct default IP address (192.168.10.12) and credentials (admin/admin).
- Try a different web browser.
- Temporarily disable any firewall or antivirus software on your PC.
- Forgotten Password: If you have forgotten the login password, you may need to perform a factory reset.
- Factory Reset: To restore the switch to its factory default settings, press and hold the recessed RST button for approximately 5-10 seconds until the SYS LED blinks. This will erase all custom configurations.
9. Specifications
Technical specifications for the XikeStor 10-Port 2.5G Web Managed Ethernet Switch:
| Feature | Specification |
|---|---|
| Model Number | 10 Port │ 8x2.5G│ 1x10G SFP+ Managed |
| Number of Ports | 10 (8x 2.5G RJ45, 2x 10G SFP+) |
| RJ45 Port Speed | 100M/1G/2.5G Auto-adaptive |
| SFP+ Port Speed | 1G/2.5G/10G |
| Switching Capacity | Up to 80Gbps |
| Packet Forwarding Rate | 59.52Mpps |
| MAC Address Table | 4K |
| Packet Buffer | 12Mbit |
| Interface Type | RJ45, SFP+ |
| Management Type | Web Managed (Layer 2) |
| Supported Features | VLAN, LACP, QoS, STP, IGMP Snooping, Loop Prevention, Port Mirroring, Storm Control |
| Housing Material | Metal |
| Cooling | Fanless Passive Cooling |
| Voltage | 12 Volts |
| Current Rating | 2 Amps |
| Item Weight | 1.1 Kilograms (2.42 pounds) |
| Package Dimensions | 9.8 x 8.6 x 2.3 inches |
| Color | Grey |
| Protection | 6KV Lightning Protection, 8KV ESD Shielding |
| Compatible Devices | 2.5G NAS, 4K Video Streaming, Desktop, Gaming Console, Printer |
10. Warranty
Your XikeStor 10-Port 2.5G Web Managed Ethernet Switch comes with a warranty. Please refer to the included Warranty Card in your package for specific terms, conditions, and duration of the warranty coverage. Keep your proof of purchase for warranty claims.
11. Technical Support
For technical assistance, troubleshooting beyond this manual, or inquiries regarding advanced configurations (e.g., complex VLAN setups), please contact XikeStor customer support. Refer to the contact information provided on the Warranty Card or the official XikeStor website.
Related documents10 Port │ 8x2.5G│ 1x10G SFP+ Managed


Ask a question about this manual
Ask about setup, troubleshooting, compatibility, parts, safety, or missing instructions. Manuals+ will review the question and use this page’s manual context to help answer it.