
1. Introduction
This manual provides detailed instructions for the safe and effective use of your DARKFANG Compact Green Laser Light Combo, Model 9086. This device integrates a high-lumen flashlight with a green laser aiming module, designed for attachment to 1913 Picatinny rails. Please read this manual thoroughly before operating the device.
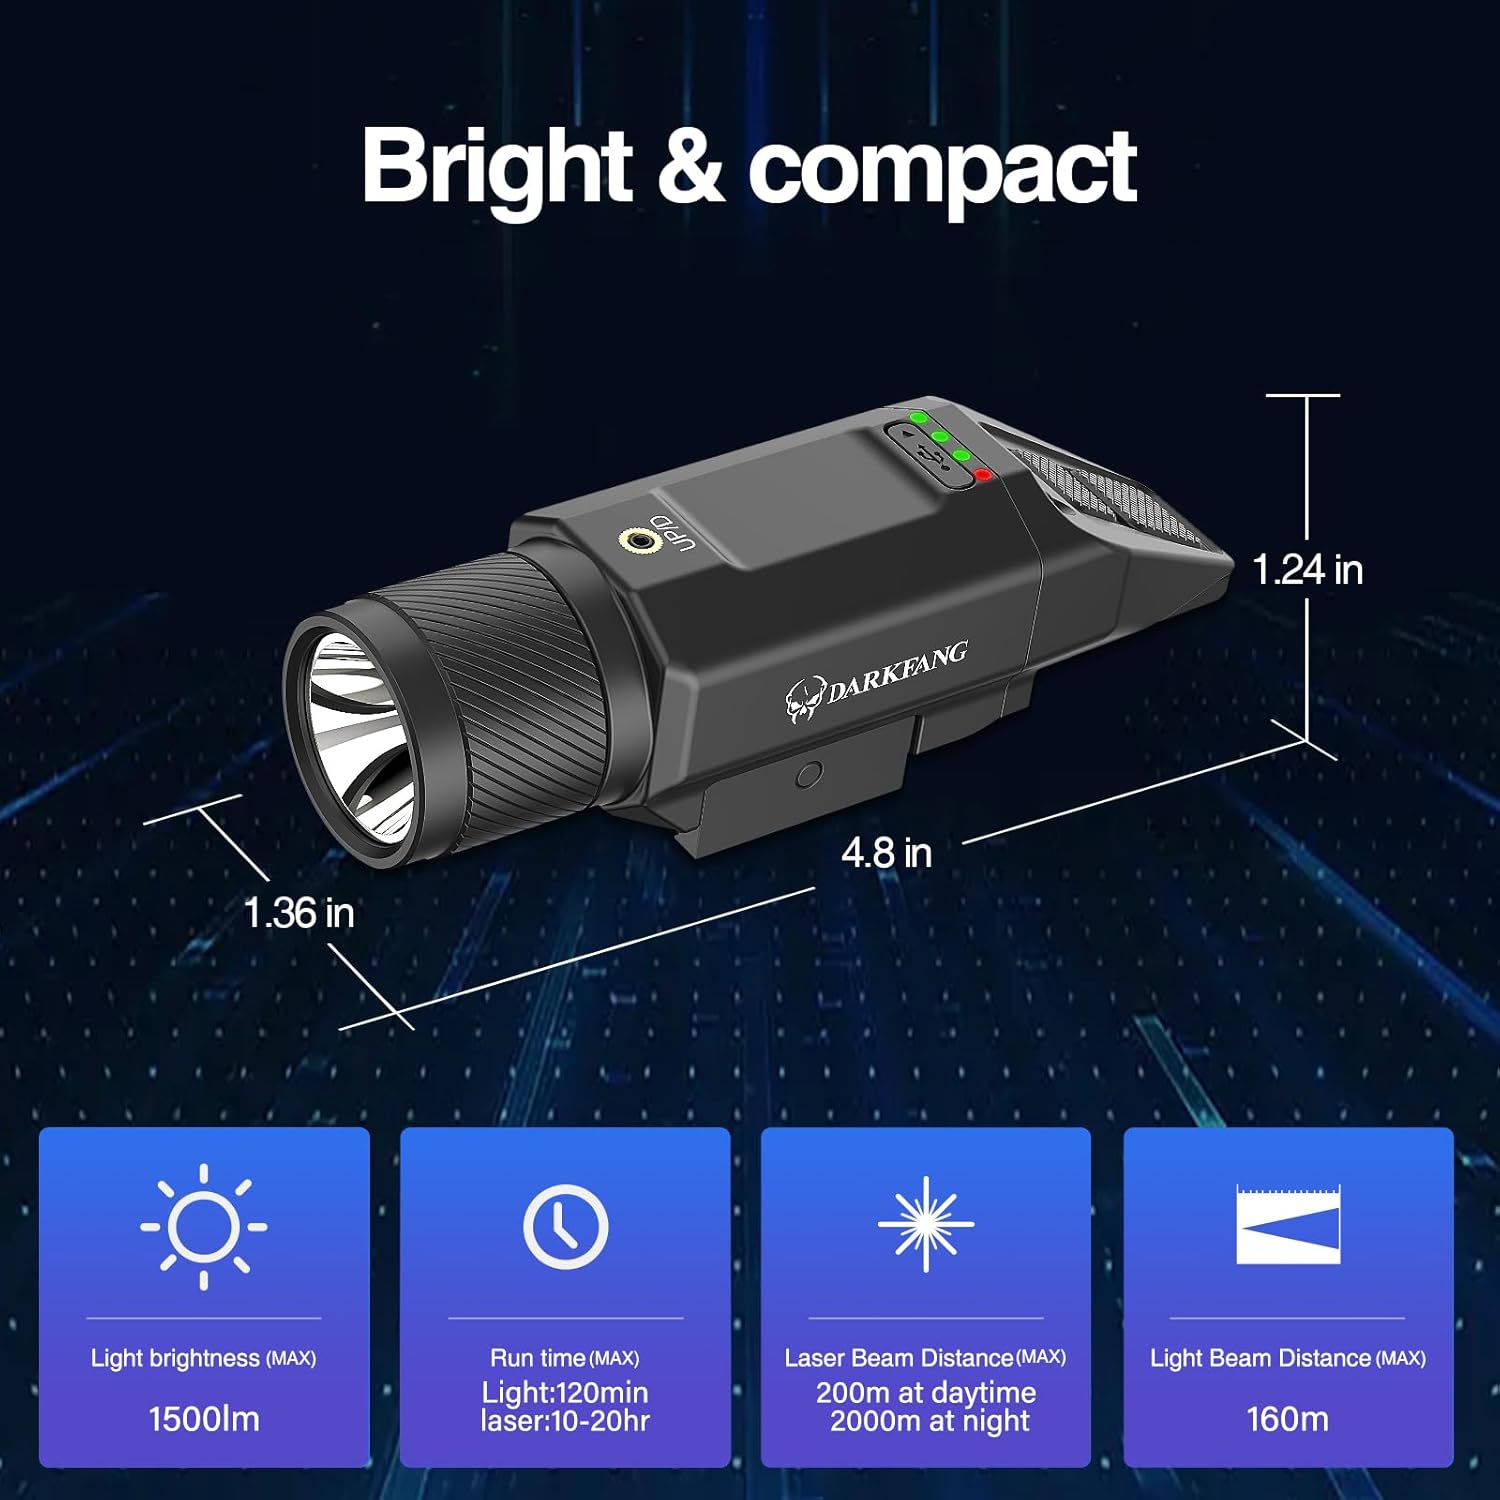
Figure 1: Product overview with key dimensions and specifications. The device measures approximately 3.23 inches in depth, 1.21 inches in width, and 1.36 inches in height. It features a 1500 lumen light, a green laser with a beam distance of 200m (daytime) to 2000m (night), and a light beam distance of 160m.
2. Safety Information
- Laser Safety: The green laser beam is Class IIIa, with power less than 5mW. Avoid direct eye exposure to the laser beam. Do not point the laser at aircraft or individuals.
- Mounting: Ensure the device is securely mounted to a 1913 Picatinny rail before use. Improper mounting can lead to detachment or misalignment.
- Battery: Use only the provided Type-C charging cable. Do not attempt to disassemble or modify the internal rechargeable battery.
- Water Resistance: The device is water resistant (IP65 rated), but not waterproof. Avoid submersion.
- Heat: The flashlight can generate heat during prolonged use. Handle with care.
3. Package Contents
Verify that all items are present in the package:
- DARKFANG Compact Green Laser Light Combo (Model 9086)
- Type-C Charging Cable
- Coin screwdriver
- Laser adjustment wrench
- User Manual (this document)

Figure 2: Contents of the DARKFANG product package. Includes the main unit, a Type-C charging cable, a coin screwdriver, and a laser adjustment wrench.
4. Setup
4.1 Charging the Battery
The device features a rechargeable Lithium Ion Polymer battery.
- Locate the Type-C charging port on the device.
- Connect the provided Type-C charging cable to the device and a suitable USB power source.
- The battery level indicators (four small lights near the charging port) will illuminate to show charging status. They will turn off when fully charged.

Figure 3: USB rechargeable battery and smart power indicator. The four indicator lights show battery levels: <25%, 25-50%, 50-75%, and >75%.
4.2 Mounting the Device
The device is designed for mounting on a 1913 Picatinny rail.
- Align the device's mounting clamp with the Picatinny rail.
- Tighten the mounting screw securely using the coin screwdriver to ensure the device is firmly attached.
- Ensure the device is positioned to allow comfortable access to the light and laser switches.

Figure 4: Flexible mounting on a Picatinny rail, allowing for optimal positioning for fingertip operation.
5. Operating Instructions
5.1 Controls Overview

Figure 5: Labeled diagram of the device's controls. Key features include the charging indicator, USB-C charging port, vertical adjustment screw, light switch, laser switch, horizontal adjustment screw, laser emitter, and light emitter.
- Light Switch: Controls the flashlight functions.
- Laser Switch: Controls the green laser functions.
- Battery Level Indicators: Four small lights near the charging port show current battery status.
- Adjustment Screws: Used for fine-tuning laser windage (L/R) and elevation (U/D).
5.2 Light and Laser Modes
Both the tactical light and green laser support three operating modes:
- Constant On: The light/laser remains on until manually turned off.
- Momentary On: The light/laser activates only while the switch is pressed and held.
- Strobe Mode: The light/laser flashes intermittently.
Use the two independent buttons to control the laser mode, light mode, or a combination of both.
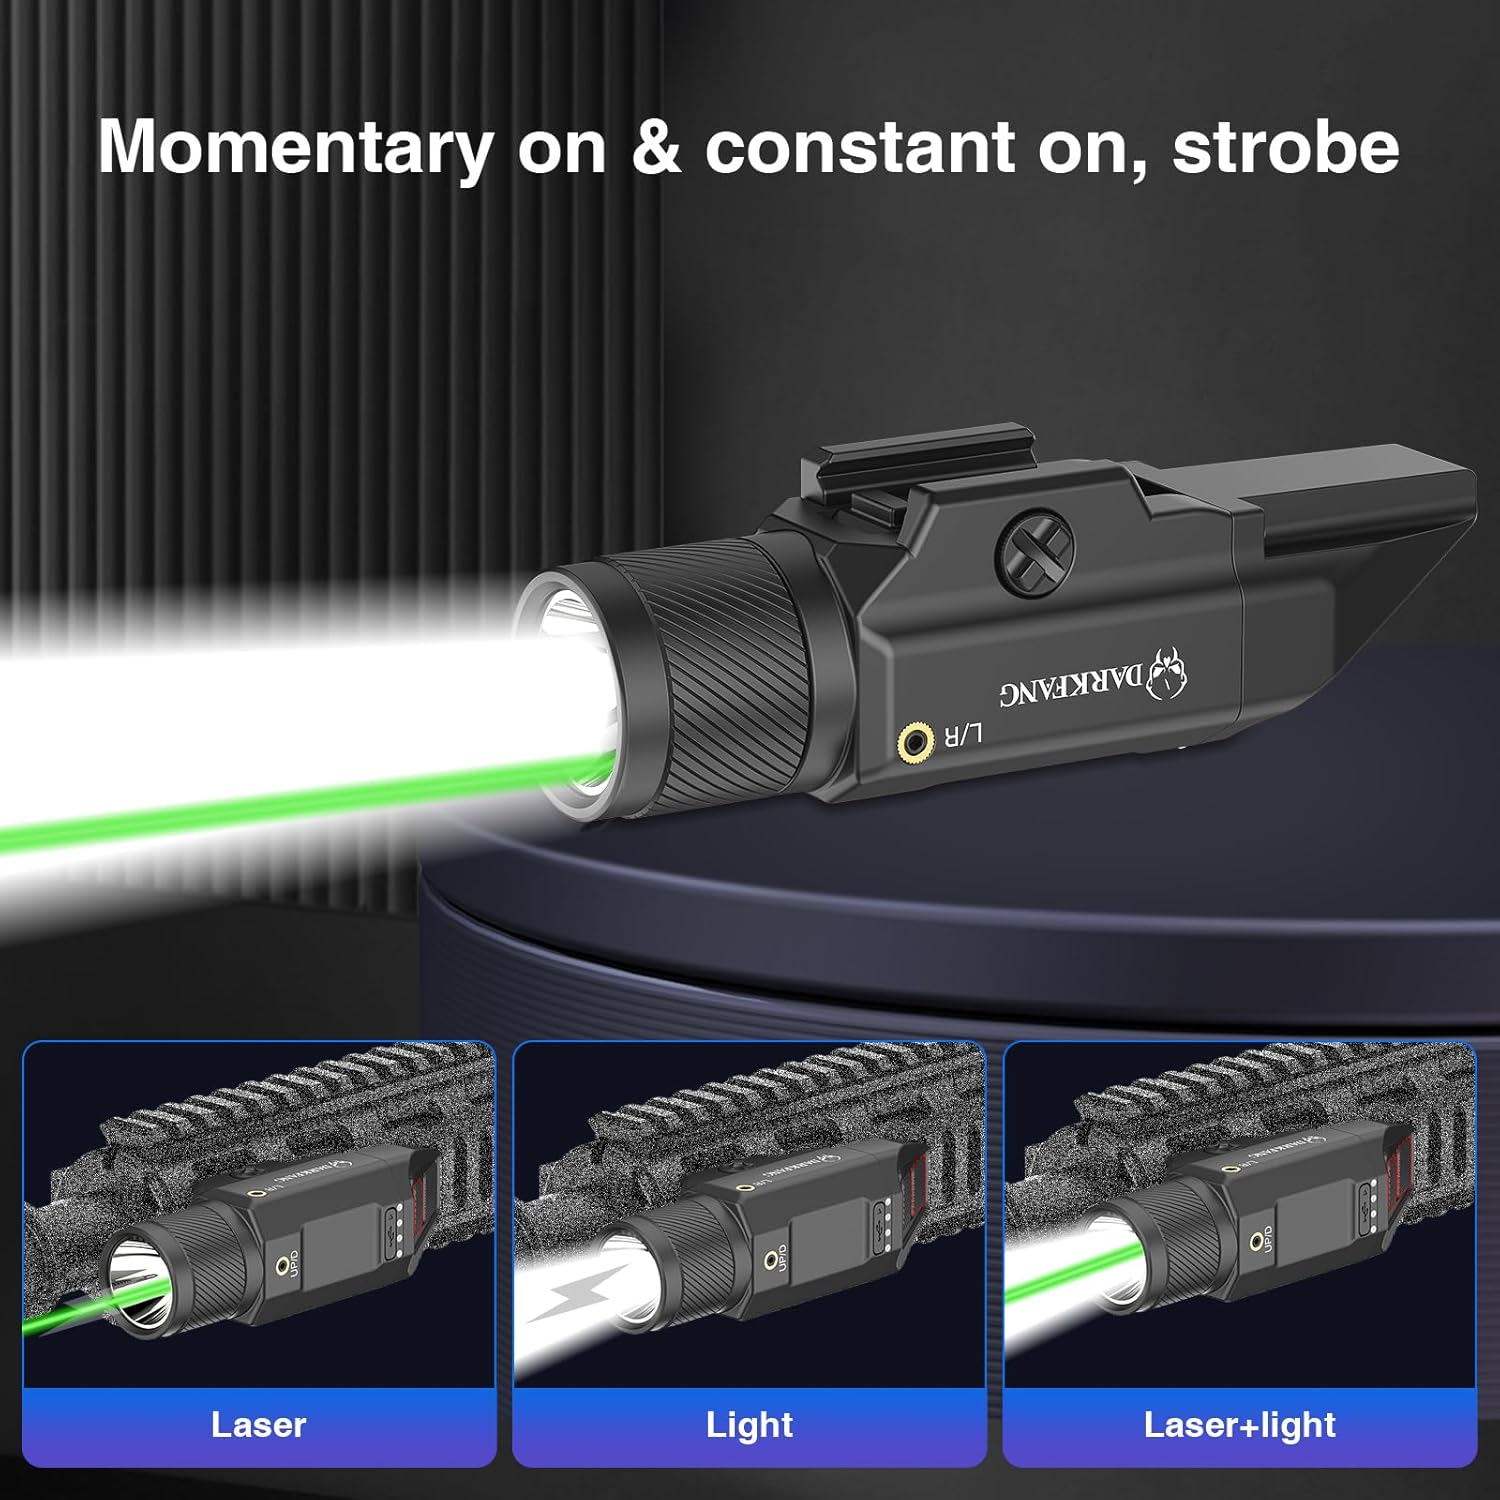
Figure 6: Illustration of the various operating modes: Laser only, Light only, and combined Laser+Light. Each mode can be set to constant, momentary, or strobe.
5.3 Battery Level Indicator
When either the light or laser switch is pressed, the four small indicators near the charging port will light up for 3 seconds to display the current battery power level:
- One light: <25%
- Two lights: 25% to 50%
- Three lights: 50% to 75%
- Four lights: >75%
5.4 Laser Adjustment (Zeroing)
To ensure accuracy, the laser can be adjusted for windage and elevation.
- Use the provided laser adjustment wrench.
- Locate the "L/R" (windage) and "U/D" (elevation) adjustment screws on the device (refer to Figure 5).
- Carefully turn the screws to align the laser dot with your point of impact.
6. Maintenance
- Cleaning: Wipe the device with a soft, dry cloth. Do not use abrasive cleaners or solvents.
- Storage: Store the device in a cool, dry place away from direct sunlight and extreme temperatures.
- Battery Care: Recharge the battery regularly, even if not in use, to maintain optimal battery life.
7. Troubleshooting
| Problem | Possible Cause | Solution |
|---|---|---|
| Light/Laser does not turn on. | Low or depleted battery. | Charge the device using the provided Type-C cable. |
| Light/Laser is dim. | Low battery. | Recharge the device. |
| Laser dot is not accurate. | Laser needs zeroing. | Adjust the laser using the windage and elevation screws (refer to Section 5.4). |
| Device feels loose on rail. | Mounting screw is not tight. | Securely tighten the mounting screw with the coin screwdriver. |
8. Specifications
| Feature | Detail |
|---|---|
| Model Number | 9086 |
| Light Output | 1500 Lumens |
| Laser Type | Green Laser, Class IIIa (<5mW) |
| Power Source | Rechargeable Lithium Ion Polymer Battery |
| Charging Port | Type-C |
| Material | VLF Polymer + Aluminum |
| Mounting Type | 1913 Picatinny Rail |
| Water Resistance | IP65 (Water Resistant) |
| Dimensions (L x W x H) | 3.23" x 1.21" x 1.36" |
| Item Weight | 6.4 ounces |
9. Warranty and Support
For warranty information or technical support, please contact DARKFANG customer service. Refer to the product packaging or the official DARKFANG website for contact details.