Introduction
Welcome to the world of crochet with your LetCart Floppy Rabbit Crochet Kit. This kit is designed for beginners, providing all the necessary materials and guidance to create your own adorable floppy rabbit plush toy and keychain. Follow these instructions carefully to ensure a successful and enjoyable crafting experience.
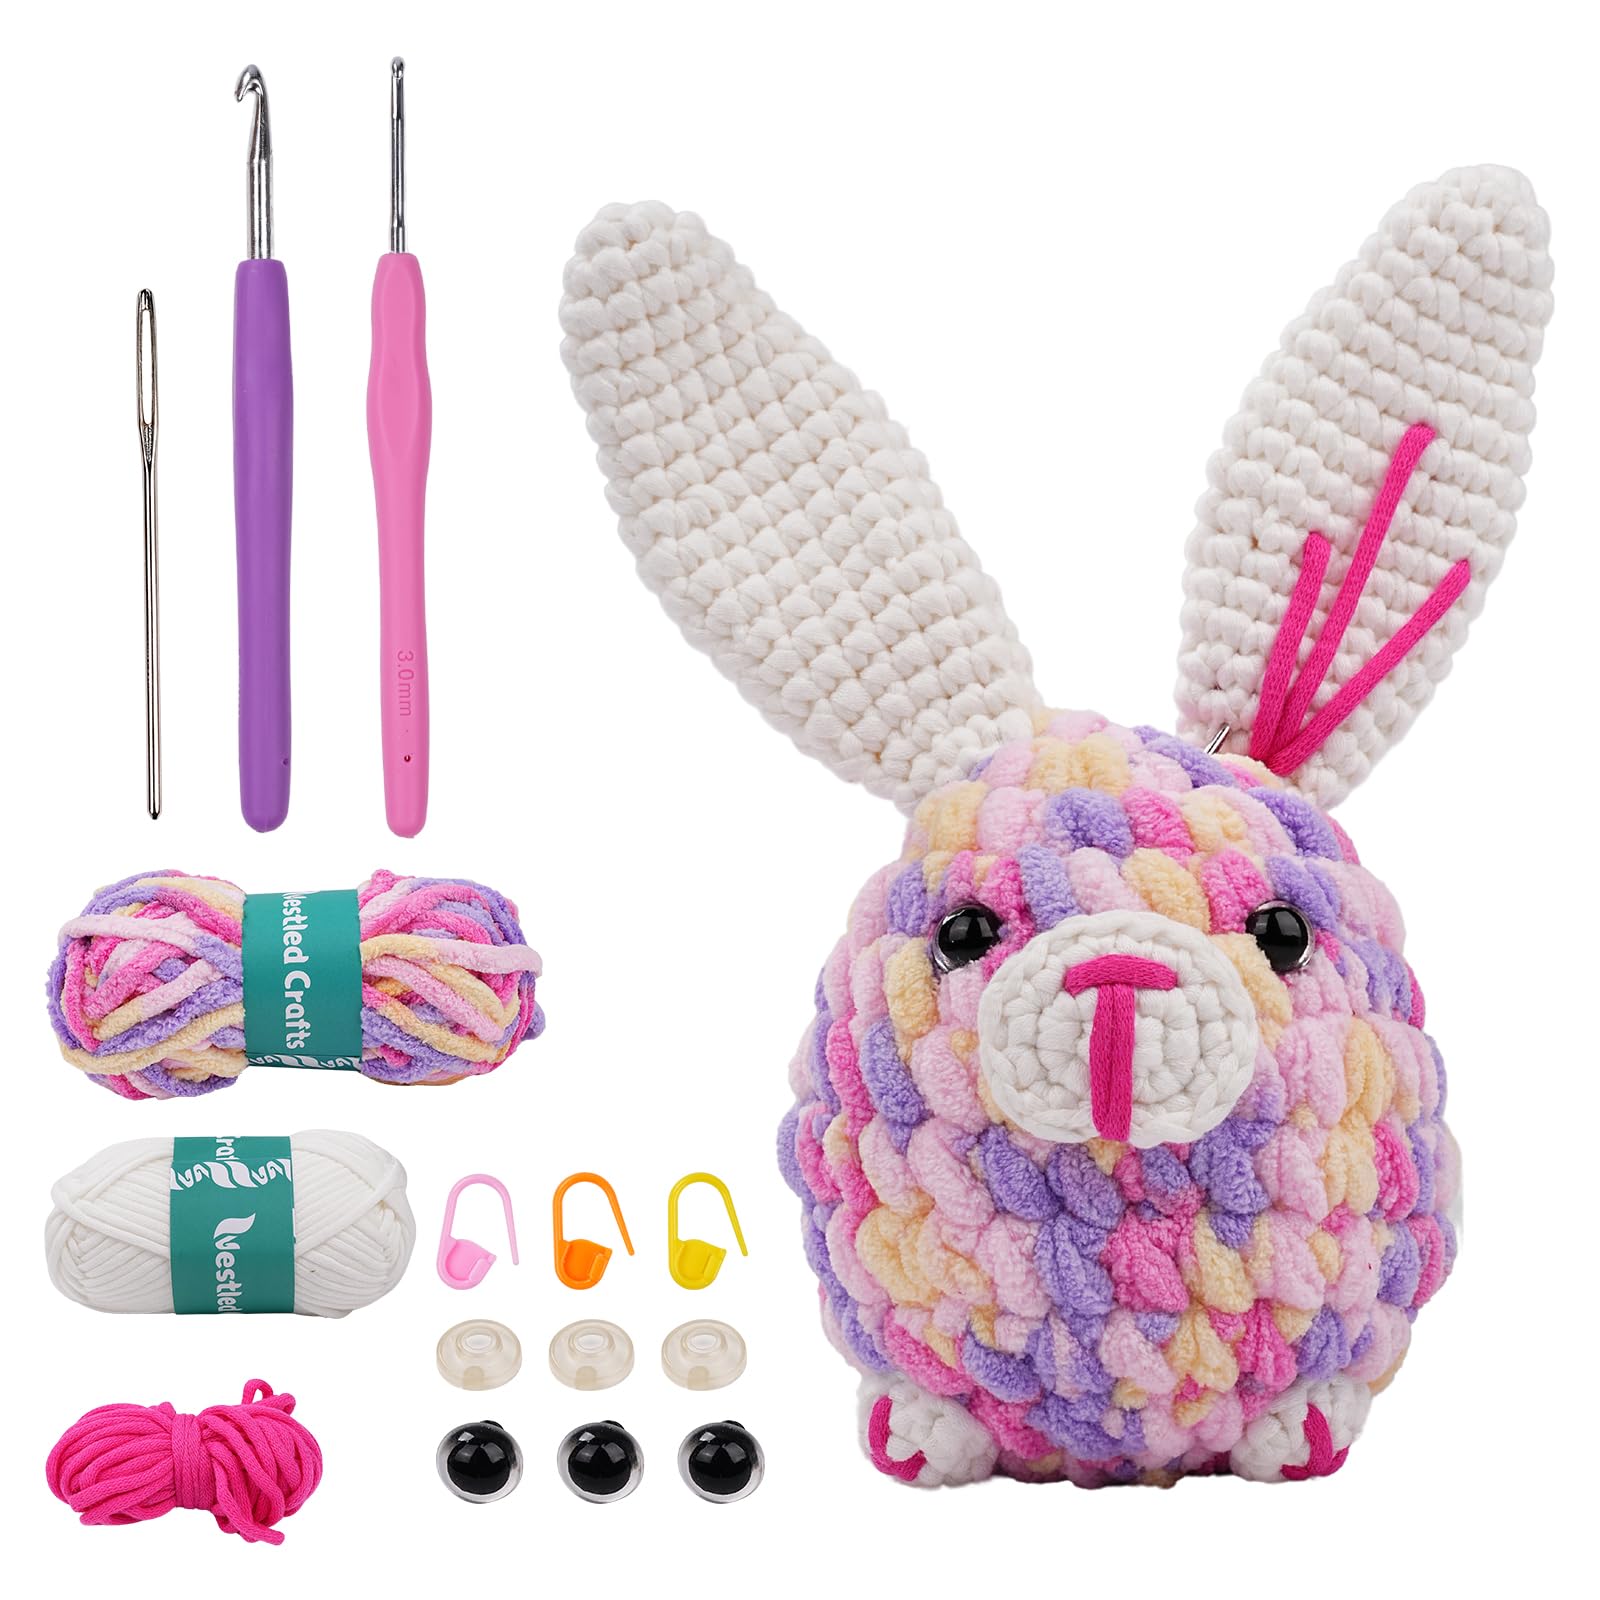
Image: A completed LetCart Floppy Rabbit crochet toy, showcasing its colorful chenille yarn and floppy ears.
What's Included
Your LetCart Floppy Rabbit Crochet Kit contains the following components:
- Chenille yarn (mixed colors + white + rose red)
- Acrylic yarn (white + rose red)
- Safety eyes
- Stitch marker
- Darning needle
- Crochet hook
- Keychain clips
- Filling wadding
- QR code instructions (for video tutorials)

Image: All components of the crochet kit laid out, including yarn, hooks, safety eyes, and other accessories.
Setup
Before you begin crocheting, ensure you have a well-lit and comfortable workspace. Organize all the materials from your kit. It is recommended to scan the QR code provided in your kit to access the step-by-step video tutorials, which will guide you through the entire process.
- Unpack: Carefully remove all items from the kit packaging.
- Identify Components: Familiarize yourself with the different types of yarn, the crochet hook, safety eyes, and other tools.
- Access Tutorials: Locate the QR code in your kit and scan it with your smartphone or tablet to access the video instructions. These videos are crucial for visual learners and beginners.
- Prepare Yarn: Select the appropriate yarn color for the first step as indicated in the instructions.
Operating Instructions
The primary method for learning to crochet with this kit is through the provided video tutorials. These tutorials offer clear, step-by-step guidance for each part of the Floppy Rabbit. Below is a general overview of the process.
- Start with Basic Stitches: The video tutorials will first cover fundamental crochet stitches. Practice these until you feel comfortable.
- Follow Pattern Sections: The project is typically broken down into sections (e.g., head, body, ears, limbs). Follow the video for each section sequentially.
- Assemble Parts: Once individual parts are crocheted, the videos will demonstrate how to assemble them using the darning needle.
- Attach Safety Eyes: Securely attach the safety eyes as shown in the tutorial. Ensure they are firmly in place before proceeding.
- Stuffing: Fill the plush toy with the provided wadding to achieve the desired shape and firmness.
- Finishing Touches: Add any remaining details, such as the nose or keychain clip, as instructed.
Important: Refer to the video tutorials for precise stitch counts, techniques, and assembly steps. The QR code provides access to these detailed visual guides.
Instructional Videos
Video: A comprehensive crochet tutorial for beginners, demonstrating various techniques and steps for creating a complete project.
Video: A beginner's crochet kit tutorial focusing on creating animal figures, providing visual guidance for each step.
Video: A general presentation of a crochet kit, demonstrating the contents and the potential for creating various plush toys.
Video: Another beginner's crochet kit tutorial, offering guidance on starting and completing a crochet project.
Maintenance
To keep your crochet tools and finished product in good condition:
- Tool Care: Clean your crochet hook after use. Store all tools in a dry place to prevent rust or damage.
- Yarn Storage: Keep unused yarn in its original packaging or a sealed bag to protect it from dust, moisture, and pests.
- Finished Product Care: If your finished Floppy Rabbit toy becomes dirty, gently hand wash it with mild soap and cold water. Air dry thoroughly. Avoid machine washing or harsh detergents to preserve the yarn quality and shape.
Troubleshooting
Here are some common issues beginners might encounter and how to address them:
- Difficulty with Stitches: If your stitches are too tight or too loose, try adjusting your tension. Watch the video tutorials again, focusing on how the yarn is held and looped. Practice basic stitches on a scrap piece of yarn until you achieve consistent tension.
- Losing Count: Use the provided stitch marker to mark the beginning of each round, especially when working in a spiral. This helps prevent losing your place.
- Uneven Fabric: This is common for beginners. Consistency comes with practice. Ensure you are inserting your hook into the correct part of the stitch and maintaining even tension.
- Yarn Fraying/Breaking: While the chenille yarn is designed to be durable, excessive pulling or incorrect hook insertion can cause fraying. If yarn breaks, tie a small, secure knot and continue crocheting, trying to hide the knot on the inside of the piece.
- QR Code Not Scanning: Ensure your device's camera is clean and has good lighting. If issues persist, try manually searching for "LetCart crochet tutorials" on video platforms.
Specifications
| Brand | LetCart |
| Model | Floppy Rabbit (Let001) |
| Product Dimensions | 19.4 cm x 8.5 cm x 20 cm (approximate finished toy size) |
| Package Dimensions | 20.5 x 20 x 2 cm |
| Weight | 220 grams |
| Material | Chenille yarn, plastic (for eyes and hook) |
| Number of Pieces | 15 (including all components) |
| Theme | Easter (Floppy Rabbit design) |

Image: Visual representation of the Floppy Rabbit's dimensions, showing it is approximately 20cm tall and 10cm wide.
Warranty and Support
For any questions regarding your LetCart Floppy Rabbit Crochet Kit, please refer to the seller's contact information on the product packaging or the platform where it was purchased. While specific warranty details are not provided, customer support is available for assistance with product defects or missing components.