1. Introduction
Thank you for choosing the WorkBless 1600W 6"/7" Rotary Car Polisher. This powerful and versatile tool is designed for a wide range of polishing tasks, from automotive detailing to restoring the shine of boats, floors, and furniture. Featuring a robust 1600W motor and 7 adjustable speed settings, it provides precise control for various applications. Please read this manual thoroughly before operation to ensure safe and effective use and to maximize the lifespan of your polisher.
2. Safety Instructions
Always follow basic safety precautions when using electrical tools to reduce the risk of fire, electric shock, and personal injury.
- Read All Instructions: Familiarize yourself with the polisher's operation and safety guidelines.
- Wear Personal Protective Equipment: Always wear safety glasses, hearing protection, and gloves.
- Keep Work Area Clean and Well-Lit: Cluttered or dark areas invite accidents.
- Avoid Dangerous Environments: Do not use power tools in damp or wet locations, or expose them to rain.
- Keep Children Away: Do not let children or untrained persons operate the polisher.
- Secure Workpiece: Always secure the item being polished to prevent movement.
- Avoid Accidental Starting: Ensure the switch is in the off position before plugging in.
- Do Not Overreach: Maintain proper footing and balance at all times.
- Disconnect Power: Unplug the polisher when not in use, before changing accessories, or performing maintenance.
- Use Correct Accessories: Only use accessories recommended by the manufacturer.
- Inspect Tool Before Use: Check for damaged parts and ensure proper function.
3. Package Contents
Your WorkBless Rotary Car Polisher kit includes the following items:
- 1 x WorkBless 1600W Rotary Polisher Unit
- 2 x Carbon Brushes (replacement set)
- 1 x U-Handle (with 2 screws for attachment)
- 1 x Side Handle
- 1 x Hex Wrench
- 3 x 7-inch Wool Pads
- 3 x 6-inch Sponge Pads
- 10 x 7-inch Sandpaper Discs
- 1 x 7-inch Backing Disc
- 1 x 6-inch Backing Disc
- 1 x Microfiber Towel
- 1 x Tool Bag
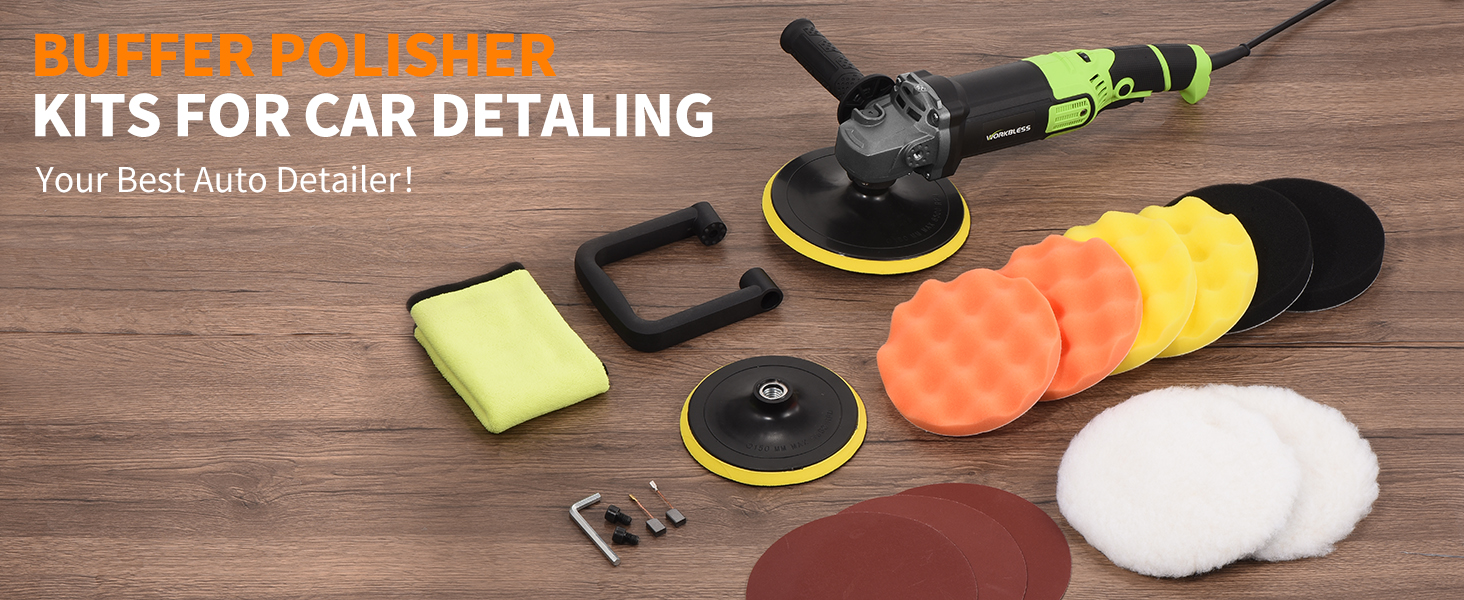
Image: The complete WorkBless Polisher kit, including the polisher, various pads, handles, and accessories, neatly arranged.
4. Product Features
- 1600W High Performance Motor: Equipped with a rugged pure copper motor for reliable and consistent power. Built-in carbon brushes and multiple heat sinks ensure stable operation and extended tool life, even during prolonged use.
- 7 Adjustable Speed Settings: Customize your polishing experience with speeds ranging from 1300 RPM to 3500 RPM. Lower speeds are ideal for fine waxing and polishing, medium speeds for removing paint defects, and higher speeds for tackling stubborn dirt and grime.
- Versatile 3 Handle Modes: Choose from three ergonomic handle configurations for optimal comfort and control: side handles (can be fixed on either side), a U-shaped handle for easy movement, or operate handle-free for intricate tasks.
- Multi-Purpose Pad Kit: The kit includes a variety of pads for different applications: soft wool pads for gentle polishing, durable sponge pads for general-purpose use, and hard sandpaper pads for heavy grime removal or surface preparation.

Image: An illustration highlighting the 1600W powerful motor, 7-speed adjustment, and multiple polishing pad compatibility of the WorkBless polisher.

Image: Demonstrates the three handle methods: D-handle, and two ways to grip with the side handle, offering flexibility for different tasks.
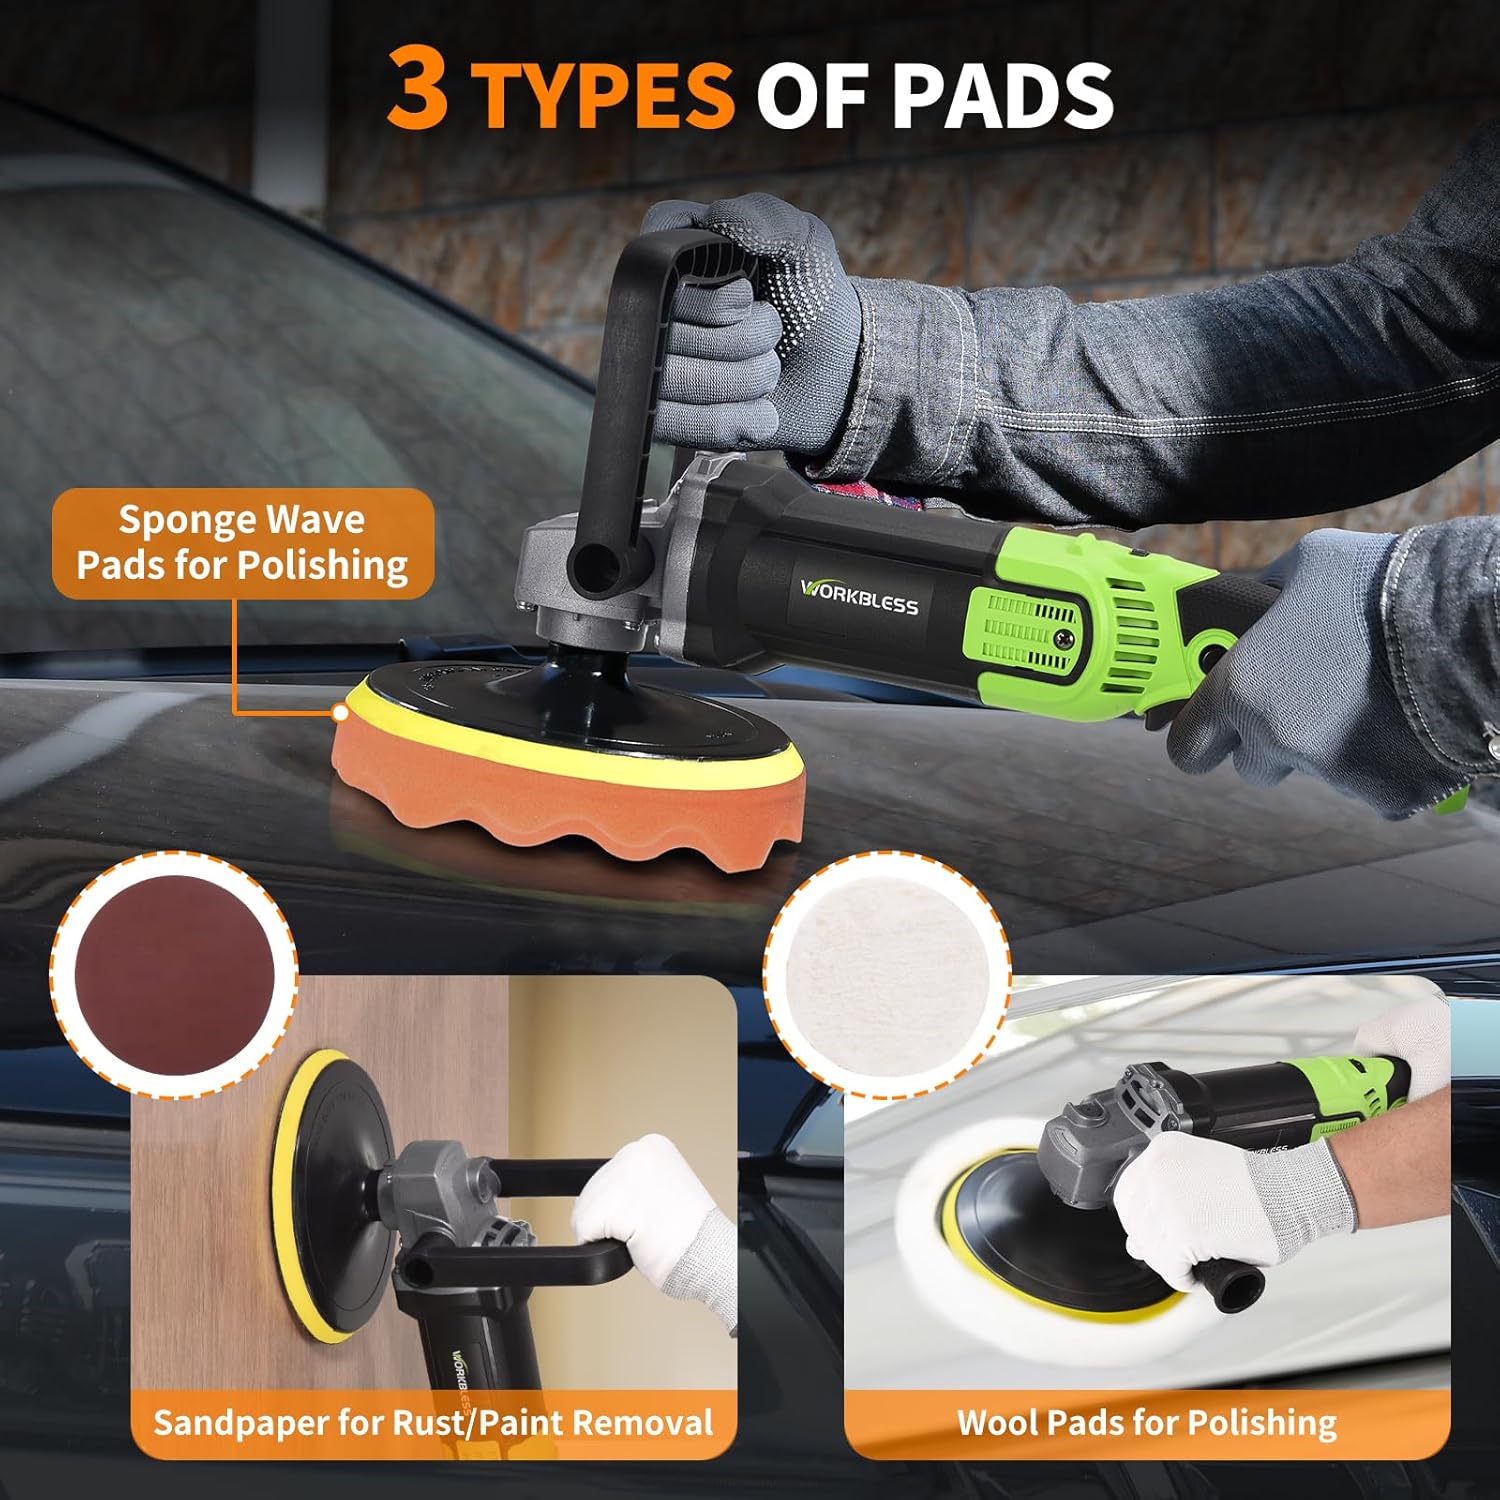
Image: Illustrates the three types of pads included: sponge wave pads for polishing, sandpaper for rust/paint removal, and wool pads for polishing.
5. Setup
Before operating your WorkBless polisher, ensure it is properly assembled and all accessories are securely attached.
- Attach the Backing Disc: Select the appropriate 6-inch or 7-inch backing disc. Align it with the spindle of the polisher and screw it on clockwise until secure. Use the provided hex wrench to tighten if necessary, ensuring the spindle lock button is pressed to prevent rotation.
- Attach the Polishing Pad: Choose the desired pad (wool, sponge, or sandpaper) for your task. These pads attach to the backing disc via a hook-and-loop (Velcro) system. Simply align the pad with the backing disc and press firmly to secure it.
- Install Handles (Optional):
- U-Handle: Attach the U-handle to the designated mounting points on the polisher head using the provided screws and hex wrench.
- Side Handle: Screw the side handle into either the left or right side mounting hole on the polisher head, depending on your preference and comfort.
- Power Connection: Ensure the polisher's power switch is in the 'OFF' position before plugging the power cord into a suitable electrical outlet.
6. Operating Instructions
Follow these steps for effective and safe operation of your WorkBless polisher.
- Prepare the Surface: Ensure the surface to be polished is clean and free of loose dirt or debris. For automotive applications, wash and dry the vehicle thoroughly.
- Apply Compound/Polish: Apply a small amount of your chosen polishing compound or wax directly onto the pad or the working surface. Do not apply excessive amounts.
- Select Speed Setting: Use the variable speed dial to select the appropriate RPM for your task. Refer to the table below for general guidelines:
Speed Setting Application 1-2 (Low) Fine waxing and finishing, delicate surfaces. 3-4 (Medium) General polishing and cleaning, light paint defects. 5-7 (High) Removing stubborn paint defects, heavy grime, sanding. 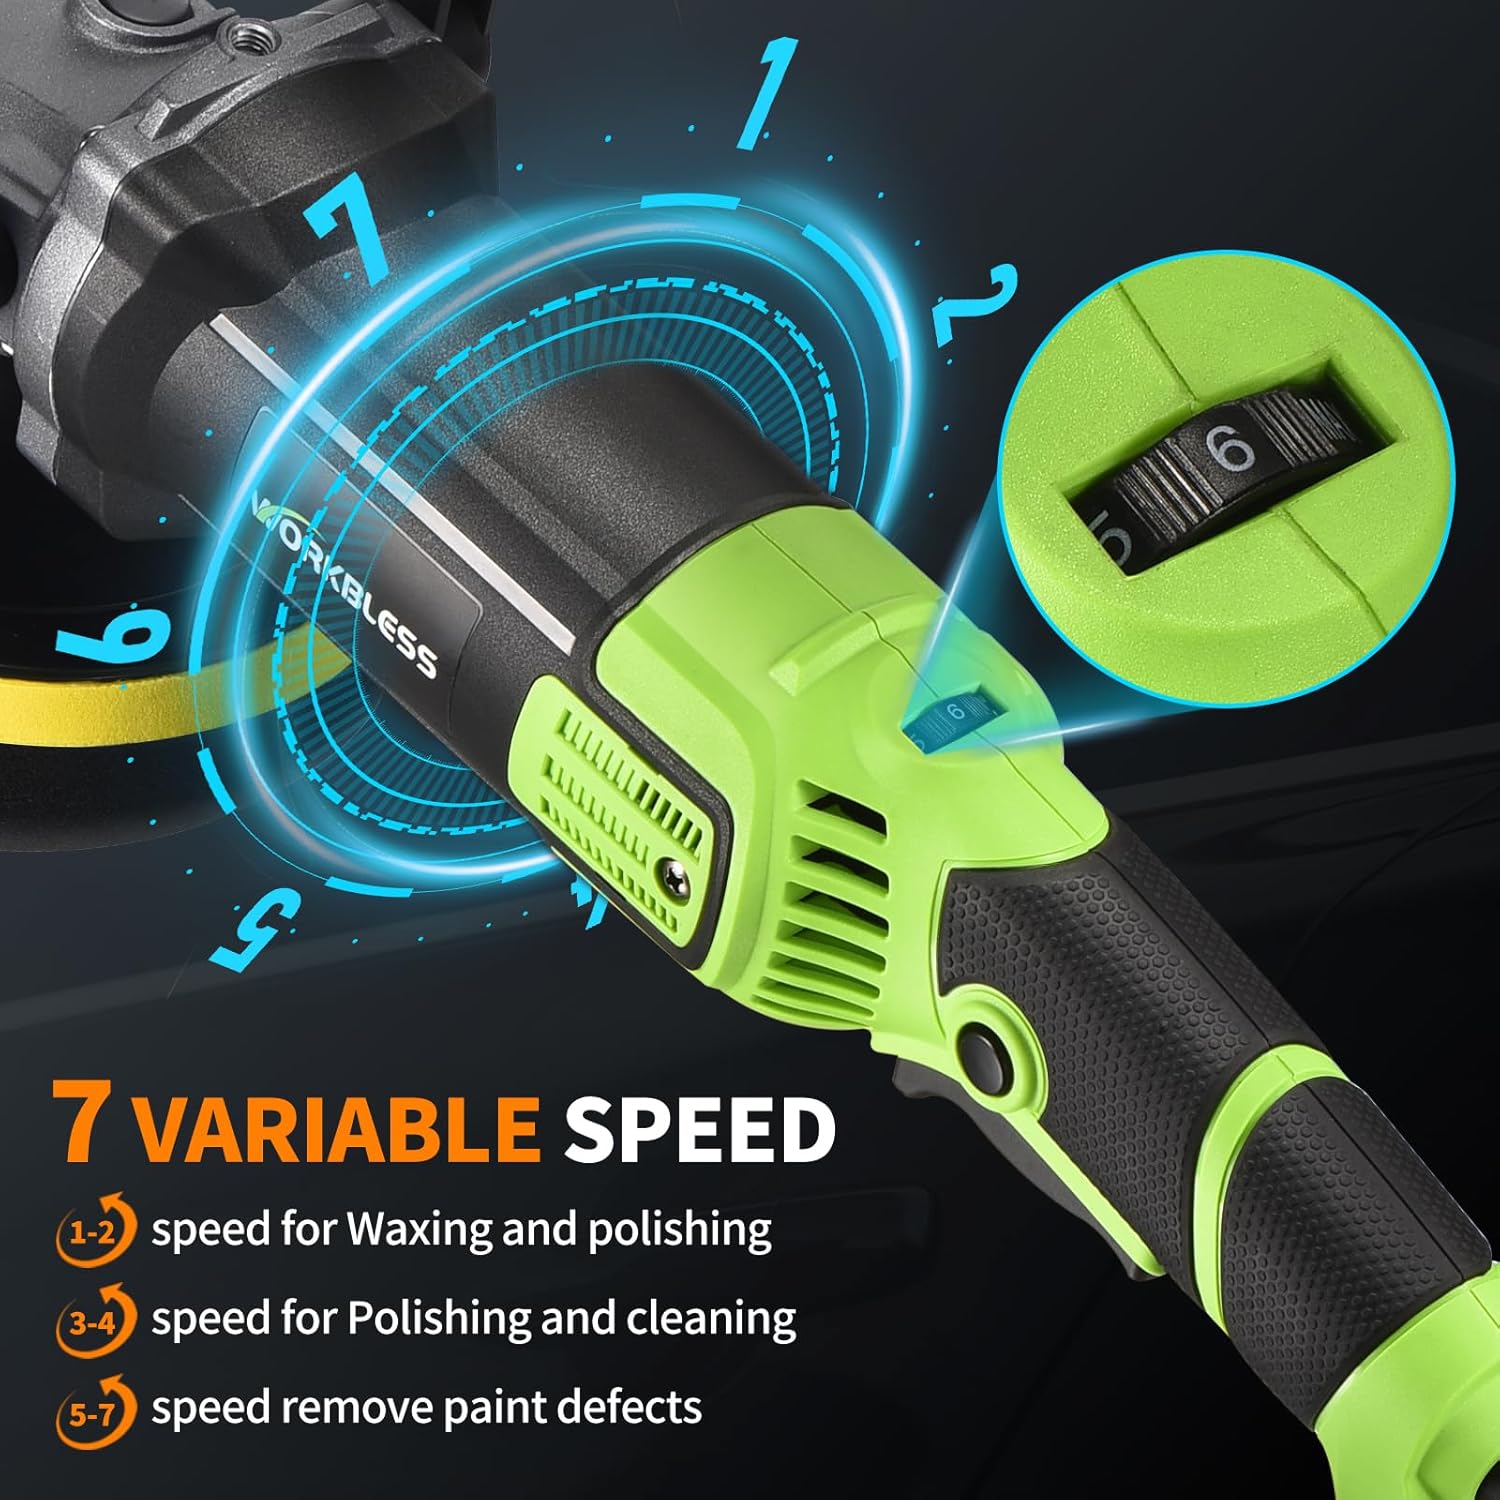
Image: Close-up of the polisher's body showing the 7-speed adjustment dial, indicating different speed ranges for various tasks.
- Start Polishing: Place the pad flat on the surface before turning the polisher ON. Press the ON/OFF trigger to start. For continuous operation, engage the trigger-lock button.
- Maintain Even Pressure: Move the polisher slowly and steadily across the surface, applying light to moderate, even pressure. Use overlapping passes to ensure uniform coverage.
- Monitor Temperature: Avoid excessive pressure or prolonged operation in one spot, as this can generate heat and damage the surface.
- Finish: Once polishing is complete, turn the polisher OFF before lifting it from the surface. Wipe off any excess compound with the provided microfiber towel.

Image: A person demonstrating the use of the WorkBless polisher on a car's body, highlighting proper technique.

Image: A split image showing the significant improvement in a car's finish before and after using the WorkBless polisher, demonstrating efficient polishing and waxing.
7. Maintenance
Regular maintenance ensures optimal performance and longevity of your WorkBless polisher.
- Cleaning: After each use, wipe down the polisher body with a clean, dry cloth. Remove any compound residue from the backing disc and pads. Pads can be washed with mild soap and water, then air-dried.
- Carbon Brush Replacement: The polisher is equipped with carbon brushes that wear down over time. When performance decreases or sparks become excessive, replace the carbon brushes using the spare set provided. Refer to the product diagram for the location of the carbon brush covers.
- Cord Inspection: Regularly inspect the power cord for any signs of damage. Do not use the polisher if the cord is frayed or cut.
- Storage: Store the polisher and its accessories in the provided tool bag in a dry, clean place, away from direct sunlight and extreme temperatures.
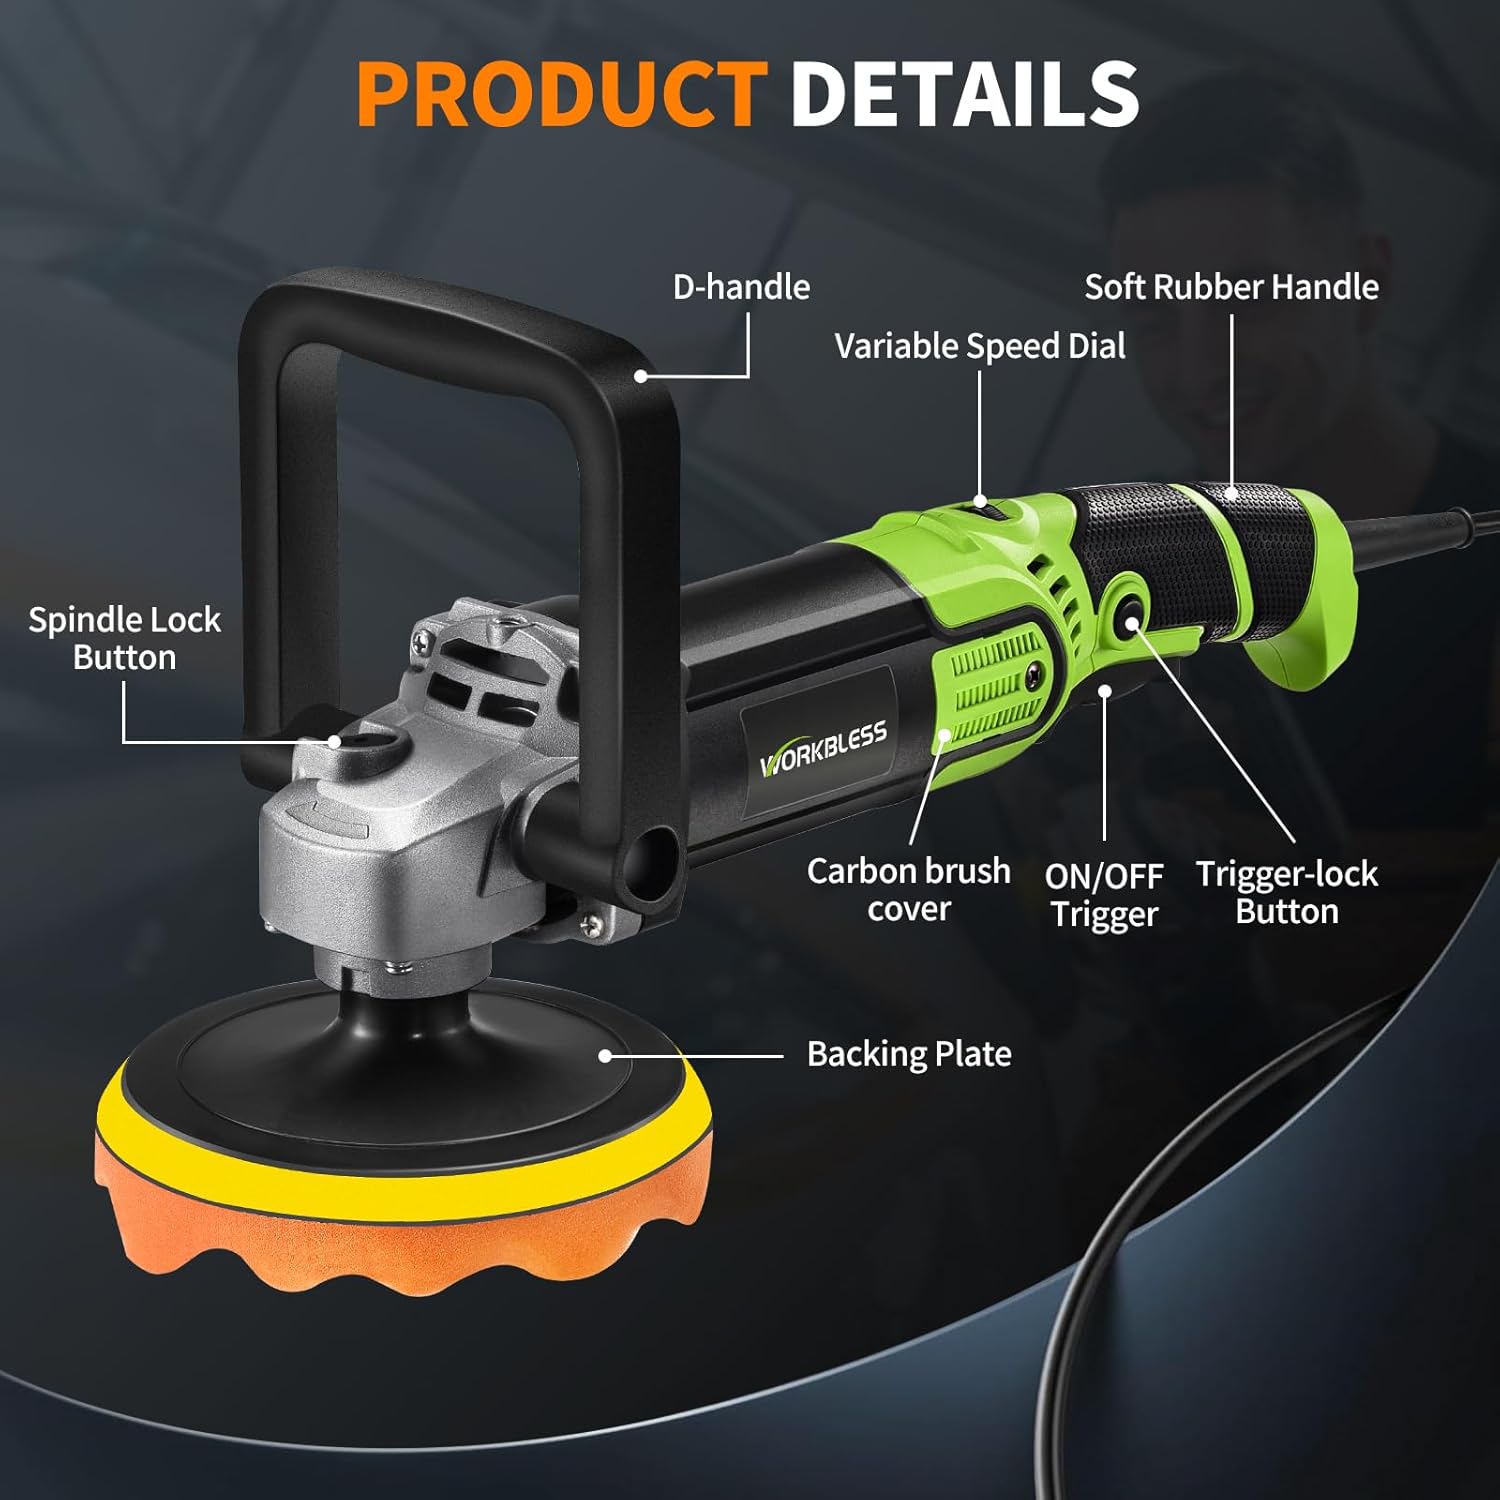
Image: A detailed view of the WorkBless polisher, labeling key components such as the D-handle, variable speed dial, soft rubber handle, spindle lock button, carbon brush cover, ON/OFF trigger, trigger-lock button, and backing plate.
8. Troubleshooting
If you encounter issues with your WorkBless polisher, refer to the following common troubleshooting tips:
- Polisher Does Not Start:
- Check if the power cord is securely plugged into a working outlet.
- Ensure the ON/OFF trigger is fully pressed.
- Inspect the power cord for any visible damage.
- Reduced Performance/Excessive Vibration:
- Check if the polishing pad is securely attached and not worn out. Replace if necessary.
- Ensure the backing disc is properly tightened.
- Inspect carbon brushes for wear; replace if they are short or sparking excessively.
- Overheating:
- Avoid applying too much pressure during operation.
- Ensure the ventilation slots are clear of debris to allow for proper airflow.
- Allow the tool to cool down if it becomes excessively hot.
9. Specifications
| Feature | Specification |
|---|---|
| Brand | WorkBless |
| Model Number | WB0201 |
| Power Source | Electric |
| Motor Power | 1600W |
| Speed Settings | 7 Adjustable Speeds |
| RPM Range | 1300-3500 RPM |
| Backing Disc Sizes | 6 inch / 7 inch |
| Included Components | Polisher, 2 Handles, Pads, Sandpaper, Towel, Tool Bag, Carbon Brushes, Hex Wrench |
10. Warranty and Support
For warranty information, product support, or service inquiries, please refer to the warranty card included in your package or contact WorkBless customer service directly. Keep your purchase receipt as proof of purchase.