Onkyo TX-8470
ONKYO TX-8470 Network Stereo Amplifier User Manual
Model: TX-8470 | Brand: Onkyo

Front view of the ONKYO TX-8470 Network Stereo Amplifier.
1. Introduction
The ONKYO TX-8470 is a high-performance network stereo amplifier designed to deliver rich and dynamic sound. It features Onkyo's unique amplifier design for high current supply and dynamic characteristics, ensuring faithful reproduction of audio information. This amplifier supports a wide range of modern audio sources, including various music streaming services, high-resolution audio, and traditional analog inputs like phono.
Key features include:
- Powerful 110W/ch (8Ω) output for dynamic sound.
- Integrated 768kHz/32bit compatible DAC for high-resolution audio.
- Built-in AirPlay2, Chromecast built-in, and Roon Ready for seamless music streaming.
- Dedicated MM/MC Phono amplifier circuit for superior vinyl playback.
- HDMI 8K and ARC compatibility for advanced home theater integration.
- Bluetooth connectivity for wireless audio streaming.
2. What's Included
Please ensure all the following items are present in the package:
- Main unit (TX-8470) x1
- Remote control (RC-903S) x1
- Dry batteries (AAA) x2
- Power cord x1
- Initial setup guide x1
- Safety precautions x1
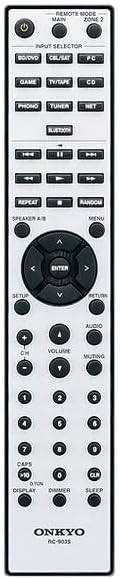
The included RC-903S remote control for the TX-8470 amplifier.
3. Setup
3.1 Physical Placement
Place the amplifier on a stable, level surface with adequate ventilation to prevent overheating. Avoid placing it near heat sources or in direct sunlight.
3.2 Connecting Speakers
Connect your speakers to the speaker terminals on the rear panel. Ensure correct polarity (positive to positive, negative to negative) for optimal sound quality. The TX-8470 supports two channels.
3.3 Connecting Audio/Video Sources
The TX-8470 offers various input options:
- HDMI Inputs: Connect your 8K-compatible devices (e.g., Blu-ray player, game console) to the HDMI IN ports.
- HDMI ARC: If your TV supports Audio Return Channel (ARC), connect the TV's HDMI ARC output to the amplifier's HDMI ARC input. This allows TV audio to be sent back to the amplifier using a single HDMI cable.
- Phono Input: For turntables, connect to the PHONO input. The amplifier features a dedicated MM/MC phono stage.
- Analog Audio Inputs: Use RCA cables to connect devices like CD players, tuners, or other auxiliary sources to the respective CD, TUNER, or AUX inputs.
- Digital Audio Inputs: Optical and Coaxial digital inputs are available for compatible devices.
- Network Connection: Connect an Ethernet cable to the NETWORK port for wired network access.

Rear panel showing various input and output connections, including HDMI, Phono, and speaker terminals.
3.4 Power Connection
Once all audio and speaker connections are made, connect the supplied power cord to the amplifier's AC inlet and then to a wall outlet.
3.5 Initial Network Setup
For network features like AirPlay2, Chromecast built-in, and Roon Ready, ensure your amplifier is connected to your home network (either via Ethernet or Wi-Fi, if available). Follow the on-screen instructions or refer to the dedicated network setup guide for your specific streaming service.
3.6 Bluetooth Pairing
To pair a Bluetooth device:
- Turn on the amplifier and select the Bluetooth input.
- Enable Bluetooth on your mobile device (smartphone, tablet, etc.).
- On your device, search for available Bluetooth devices and select "ONKYO TX-8470" (or similar name).
- Once connected, the Bluetooth indicator on the amplifier will illuminate steadily.
4. Operating Instructions
4.1 Basic Controls
- Power: Press the Power button on the front panel or remote control to turn the unit on or off.
- Volume: Use the large VOLUME knob on the front panel or the Volume +/- buttons on the remote control to adjust the sound level.
- Input Selection: Press the INPUT SELECTOR buttons on the front panel or remote control to switch between connected audio sources (e.g., CD, PHONO, HDMI, NETWORK, BLUETOOTH).

Close-up of the front panel controls, including power, input selectors, and volume knob.
4.2 Network Audio Playback
The TX-8470 integrates seamlessly with popular streaming platforms:
- AirPlay2: Stream audio directly from Apple devices. Select the TX-8470 from the AirPlay menu on your iPhone, iPad, or Mac.
- Chromecast built-in: Cast music from compatible apps (e.g., Spotify, Amazon Music, TuneIn, Deezer) on your smartphone or tablet to the amplifier.
- Roon Ready: For Roon users, the TX-8470 can be discovered and controlled as a Roon endpoint for high-quality audio playback.

The amplifier integrated into a home setup, highlighting its compatibility with various network streaming services and technologies.
4.3 Playing Records (Phono Input)
To play vinyl records:
- Ensure your turntable is connected to the PHONO input.
- Select the PHONO input on the amplifier.
- Place a record on your turntable and start playback. The TX-8470's dedicated MM/MC phono stage will amplify the signal for optimal sound.

The ONKYO TX-8470 amplifier connected to a turntable, ready for vinyl playback.
5. Maintenance
To ensure the longevity and optimal performance of your TX-8470 amplifier:
- Cleaning: Wipe the exterior with a soft, dry cloth. Do not use abrasive cleaners, waxes, or solvents.
- Ventilation: Ensure the ventilation openings are not blocked. Proper airflow is crucial to prevent overheating.
- Power: Disconnect the power cord from the wall outlet if the unit will not be used for an extended period.
- Environment: Avoid exposing the unit to extreme temperatures, humidity, or dust.
6. Troubleshooting
If you experience issues with your TX-8470, please refer to the following common solutions before contacting support:
- No Power: Check if the power cord is securely connected to both the amplifier and the wall outlet. Ensure the power outlet is functional.
- No Sound:
- Verify that the correct input source is selected.
- Check all speaker connections for proper polarity and secure fit.
- Ensure the volume is not set to minimum or muted.
- If using digital inputs, confirm the source device is outputting audio in a compatible format.
- Network Connection Issues:
- For wired connections, check the Ethernet cable.
- Restart your router and the amplifier.
- Ensure the amplifier is within range of your Wi-Fi network (if applicable).
- Bluetooth Pairing Failure:
- Ensure the amplifier is in Bluetooth pairing mode.
- Make sure the Bluetooth device is not already connected to another device.
- Try restarting both the amplifier and your Bluetooth device.
7. Specifications
| Feature | Detail |
|---|---|
| Brand | Onkyo |
| Model Number | TX-8470 |
| Connection Technology | HDMI |
| Controller Type | Push Button |
| Features | Built-in Bluetooth |
| Compatible Devices | TV |
| Product Weight | 9 kg |
| Number of Channels | 2 |
| Communication/Connection Interface | HDMI |
| Amplifier Output (8Ω, 20-20kHz, 0.08% THD, 2ch) | 110W/ch |
| Amplifier Output (JEITA 6Ω, 1kHz, 10% THD, 1ch) | 210W/ch |
| DAC | 768kHz/32bit compatible |
| Phono Input | MM/MC compatible |
| Streaming Services Supported | Spotify, Amazon Music, TuneIn, Deezer |
| Network Technologies | AirPlay2, Chromecast built-in, Roon Ready |
| AM/FM Tuner | Not available in Japanese model |
8. Warranty and Support
8.1 Warranty Information
The ONKYO TX-8470 Network Stereo Amplifier comes with a 1-year manufacturer's warranty from the date of purchase. Please retain your proof of purchase for warranty claims.
8.2 Customer Support
For technical assistance, troubleshooting beyond this manual, or warranty service, please contact Onkyo customer support. Refer to the contact information provided in your product packaging or visit the official Onkyo website for your region.
Related Documents - TX-8470
 |
Onkyo TX-8260/8250 Firmware Update Guide and History Comprehensive guide detailing firmware updates for Onkyo TX-8260 and TX-8250 stereo receivers, including release notes, features, and instructions for updating via USB and Network. |
 |
Onkyo AV Receiver Firmware Update (02-02-2022) Official firmware update details for Onkyo TX-NR555, TX-NR656, TX-NR757, TX-RZ610, TX-RZ710, TX-RZ810, HT-R695, and HT-S7800 AV receivers, including bug fixes, stability improvements, and new feature support from 2018 to 2022. Learn how to update via USB or network. |
 |
Onkyo TX-8470 Network Stereo Receiver: Initial Setup Guide Concise guide to setting up your Onkyo TX-8470 Network Stereo Receiver, including connections for speakers, HDMI, Wi-Fi, and Bluetooth. |
 |
Onkyo TX-NR595 Firmware Update Details and Instructions Comprehensive details on the latest firmware updates for the Onkyo TX-NR595 AV Receiver, including installation instructions via USB and Network, and important precautions. |
 |
Onkyo TX-8270 Firmware Update Information and Instructions Details the latest firmware updates for the Onkyo TX-8270 Stereo Receiver, including release dates, improvements, new features, and instructions for updating via USB or Network. |
 |
Onkyo TX-NR5100 Firmware Update Information Details on firmware updates for the Onkyo TX-NR5100 AV Receiver, including bug fixes, feature enhancements, and compatibility improvements for speakers and streaming services. |
Ask a question about this manual
Ask about setup, troubleshooting, compatibility, parts, safety, or missing instructions. Manuals+ will review the question and use this page’s manual context to help answer it.