1. Introduction
Thank you for choosing the Generic HXQ908 Electronic Door Lock. This wireless security system provides convenient and enhanced access control for your home or office. Please read this manual thoroughly before installation and operation to ensure proper use and to maximize the lifespan of your product.
2. Safety Information
- Do not attempt to disassemble or repair the lock unit yourself. Refer to qualified personnel for service.
- Keep remote key fobs away from water, high temperatures, and strong magnetic fields.
- Ensure proper battery installation and replacement to prevent damage to the device.
- This lock is designed for security; however, no lock can provide absolute security. Always take other necessary precautions.
- Keep all components, especially small parts and batteries, out of reach of children.
3. Package Contents
Verify that all items are present in your package:
- 1 x Electronic Lock Unit
- 5 x Remote Control Key Fobs
- 1 x Mounting Hardware Set (screws, anchors)
- 1 x Strike Plate
- 1 x User Manual (this document)
4. Product Overview
4.1 Components
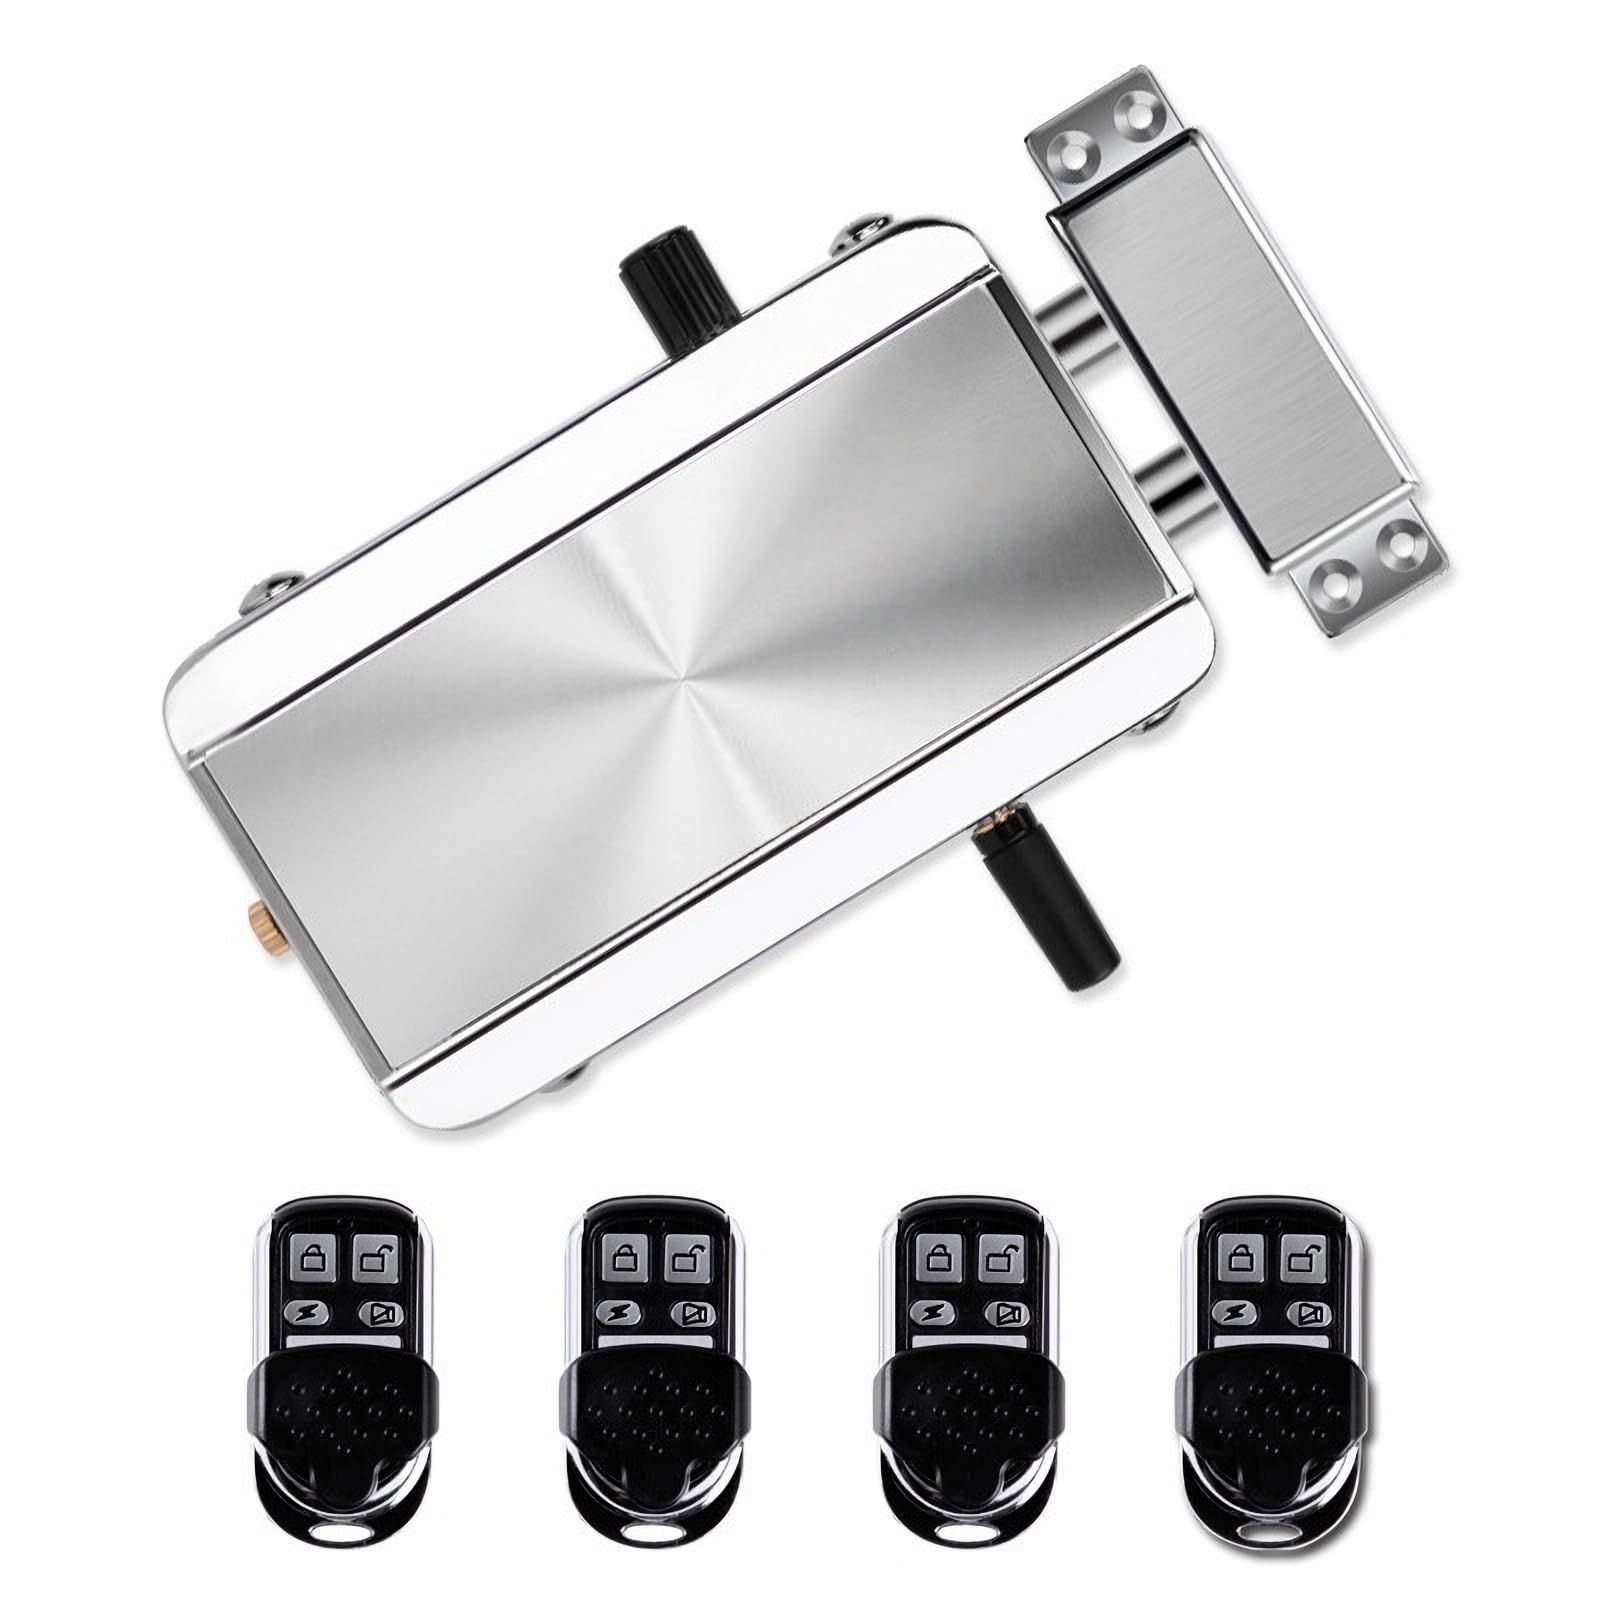
Image 4.1.1: The main electronic door lock unit. This unit houses the locking mechanism and electronic components.

Image 4.1.2: Five remote key fobs included with the lock system. Each fob allows for wireless control of the lock.

Image 4.1.3: Close-up view of the manual knob on the lock unit, used for manual operation from the inside.
4.2 Features
- Wireless Security: Electronic door lock system with remote control capability for keyless entry.
- Multiple Remotes: Includes 5 programmable key fobs with lock/unlock buttons for convenient access control.
- Easy Installation: Sleek silver-finished lock mechanism with straightforward mounting hardware for most door types.
- Remote Range: Wireless remote controllers feature reliable signal transmission for operation from a distance.
- Durable Design: Constructed from durable metal with a modern brushed finish.
- Emergency Unlock: Features an emergency unlock mechanism for manual access.
5. Setup and Installation
Before beginning installation, ensure you have the necessary tools (e.g., screwdriver, drill). Refer to the product dimensions to ensure compatibility with your door.

Image 5.1: Dimensions of the electronic lock unit and strike plate for installation planning.
5.1 Battery Installation
- Locate the battery compartment on the electronic lock unit.
- Open the compartment cover.
- Insert the required batteries (typically AA or AAA, check packaging for specifics) according to the polarity markings (+/-).
- Close the battery compartment cover securely.
5.2 Mounting the Lock Unit
- Determine the optimal position for the lock unit on your door frame, ensuring it aligns with the strike plate.
- Mark the drilling points for the mounting screws.
- Drill pilot holes as marked.
- Secure the electronic lock unit to the door frame using the provided mounting hardware. Do not overtighten.
5.3 Installing the Strike Plate
- Align the strike plate with the lock unit's bolts on the door jamb.
- Mark the drilling points for the strike plate screws.
- Drill pilot holes.
- Attach the strike plate securely with the provided screws.
6. Operating Instructions
6.1 Using the Remote Key Fobs
Each remote key fob has dedicated buttons for locking and unlocking the door.
- To Lock the door: Press the lock button on the remote fob. The lock unit will engage its bolts.
- To Unlock the door: Press the unlock button on the remote fob. The lock unit will retract its bolts.
- Ensure you are within the effective range of the lock for reliable operation.
6.2 Manual Operation (from inside)
The lock unit features a manual knob for operation from the interior side of the door.
- To Lock: Turn the manual knob to the locked position.
- To Unlock: Turn the manual knob to the unlocked position.
6.3 Emergency Unlock
In case of electronic failure or dead batteries, an emergency unlock mechanism is available.

Image 6.3.1: Location of the emergency unlock screw on the lock unit.
- Locate the emergency unlock screw on the lock unit (refer to Image 6.3.1).
- Use a flathead screwdriver or similar tool to turn the screw, which will manually retract the lock bolts.
7. Maintenance
7.1 Battery Replacement
When the batteries in the lock unit are low, you may notice a decrease in performance or an indicator light/sound (if applicable). Replace all batteries simultaneously with new ones of the same type.
- Follow the battery installation steps outlined in Section 5.1.
- Dispose of old batteries responsibly according to local regulations.
7.2 Cleaning
- Wipe the lock unit and remote fobs with a soft, dry cloth.
- Do not use abrasive cleaners, solvents, or harsh chemicals, as these can damage the finish and electronic components.
8. Troubleshooting
| Problem | Possible Cause | Solution |
|---|---|---|
| Lock does not respond to remote. | Low batteries in lock unit or remote fob. Remote out of range. Interference. | Replace batteries in both the lock and remote. Move closer to the lock. Check for sources of interference. |
| Lock mechanism is stiff or jammed. | Misalignment during installation. Obstruction. | Check alignment of lock unit and strike plate. Ensure no debris is obstructing the bolts. |
| Remote signal is weak or intermittent. | Low remote battery. Obstacles between remote and lock. | Replace remote battery. Reduce obstacles between remote and lock. |
9. Specifications
| Feature | Detail |
|---|---|
| Brand | Generic |
| Model Number | HXQ908 |
| Dimensions (L x W x H) | 5.12 x 2.95 x 1.3 inches |
| Material | Metal, Plastic |
| Lock Type | Electronic Lock, Remote Control Lock, Wireless Lock |
| Special Features | Electronic Access, Multiple Remote Fobs, Remote Control Operation, Wireless Security |
| Included Components | Electronic Lock Unit, 5 Remote Control Key Fobs, Mounting Hardware, Strike Plate |
| Connectivity Protocol | RF, Wireless |
| Control Method | Remote |
| Color | Silver |
| Finish Type | Chrome Plated |
10. Warranty Information
This product comes with a limited warranty. Please refer to the product packaging or contact the manufacturer/seller for specific warranty terms and conditions. Keep your purchase receipt as proof of purchase.
11. Customer Support
If you encounter any issues or have questions not covered in this manual, please contact your retailer or the manufacturer for assistance. Provide your product model number (HXQ908) and a detailed description of the issue when seeking support.