1. Introduction
Thank you for choosing the iPormis King Size Floating Bed Frame. This manual provides essential information for the safe assembly, operation, and maintenance of your new bed frame. Please read these instructions carefully before beginning assembly and retain them for future reference.

Image 1.1: The iPormis King Size Floating Bed Frame, showcasing its wooden headboard, under-bed LED lighting, and overall design.
2. Safety Information
Important Safety Instructions:
- Always follow the assembly instructions carefully to ensure the bed frame is stable and secure.
- Be cautious when handling the bed frame components to prevent any potential injuries.
- Ensure all screws and bolts are tightened securely before use. Periodically check and re-tighten as necessary.
- Do not exceed the maximum weight recommendation of 1000 pounds.
- Keep children away from the assembly area. Small parts may pose a choking hazard.
- Only use the bed frame for its intended purpose.
3. Package Contents
Before assembly, verify that all components are present and undamaged. If any parts are missing or damaged, please contact customer support.
- Bed Frame Components (metal frame, wooden headboard, side rails, support legs)
- Steel Slats
- LED Light Strips (21ft for under-bed, 6ft for behind headboard)
- Charging Station Unit (2 AC outlets, 1 Type A USB port, 1 Type C USB port)
- Remote Control for LED Lights
- Installation Manual
- Installation Tools

Image 3.1: Overview of bed frame dimensions and key included components like LED strips and charging station.
4. Setup and Assembly
The iPormis bed frame is designed for easy assembly. Follow the step-by-step instructions provided in the included Installation Manual. All necessary tools are provided.
- Unpack Components: Carefully remove all parts from the packaging and lay them out on a clean, soft surface to prevent scratches.
- Assemble Frame: Connect the main frame components using the provided hardware. The buckle design facilitates a hassle-free assembly process.
- Install Steel Slats: Place the steel slats onto the frame. The EVA material on the slats helps prevent creaks and noise.
- Attach Headboard: Secure the wooden headboard to the assembled frame.
- Install LED Strips: The LED light strips are designed to be fastened with Velcro, ensuring a secure fit without sagging or requiring additional bolts. Attach the 21ft strip under the bed frame and the 6ft strip behind the headboard.
- Connect Charging Station: Integrate the charging station into the designated slot on the headboard.

Image 4.1: Illustration of the Velcro fastening method for LED strips, designed for secure and easy installation.
5. Operating Instructions
5.1. LED Lights Operation
The bed frame features integrated RGB LED lights under the bed and behind the headboard, controllable via a mobile application or the included remote control.
- APP Control: Download the designated mobile application (refer to the Installation Manual for QR code or app name). Connect your device to the LED lights via Bluetooth. The app allows access to over 60,000 colors, music mode, mic mode, and timer functions.
- Remote Control: Use the provided remote control to power the lights on/off, change colors, adjust brightness, and select various lighting modes. Ensure the remote has working batteries.

Image 5.1: Control options for the LED lights, including APP and remote control, with various functions like color selection and music synchronization.
5.2. Charging Station Usage
The integrated charging station in the headboard provides convenient power access for your electronic devices.
- Power Connection: Ensure the charging station's power cord is securely plugged into a functional wall outlet.
- AC Outlets: Use the two 110V/12A AC outlets for standard electronic devices.
- USB Ports: Utilize the Type A and Type C USB ports (5V/2A) for charging smartphones, tablets, and other USB-powered devices.
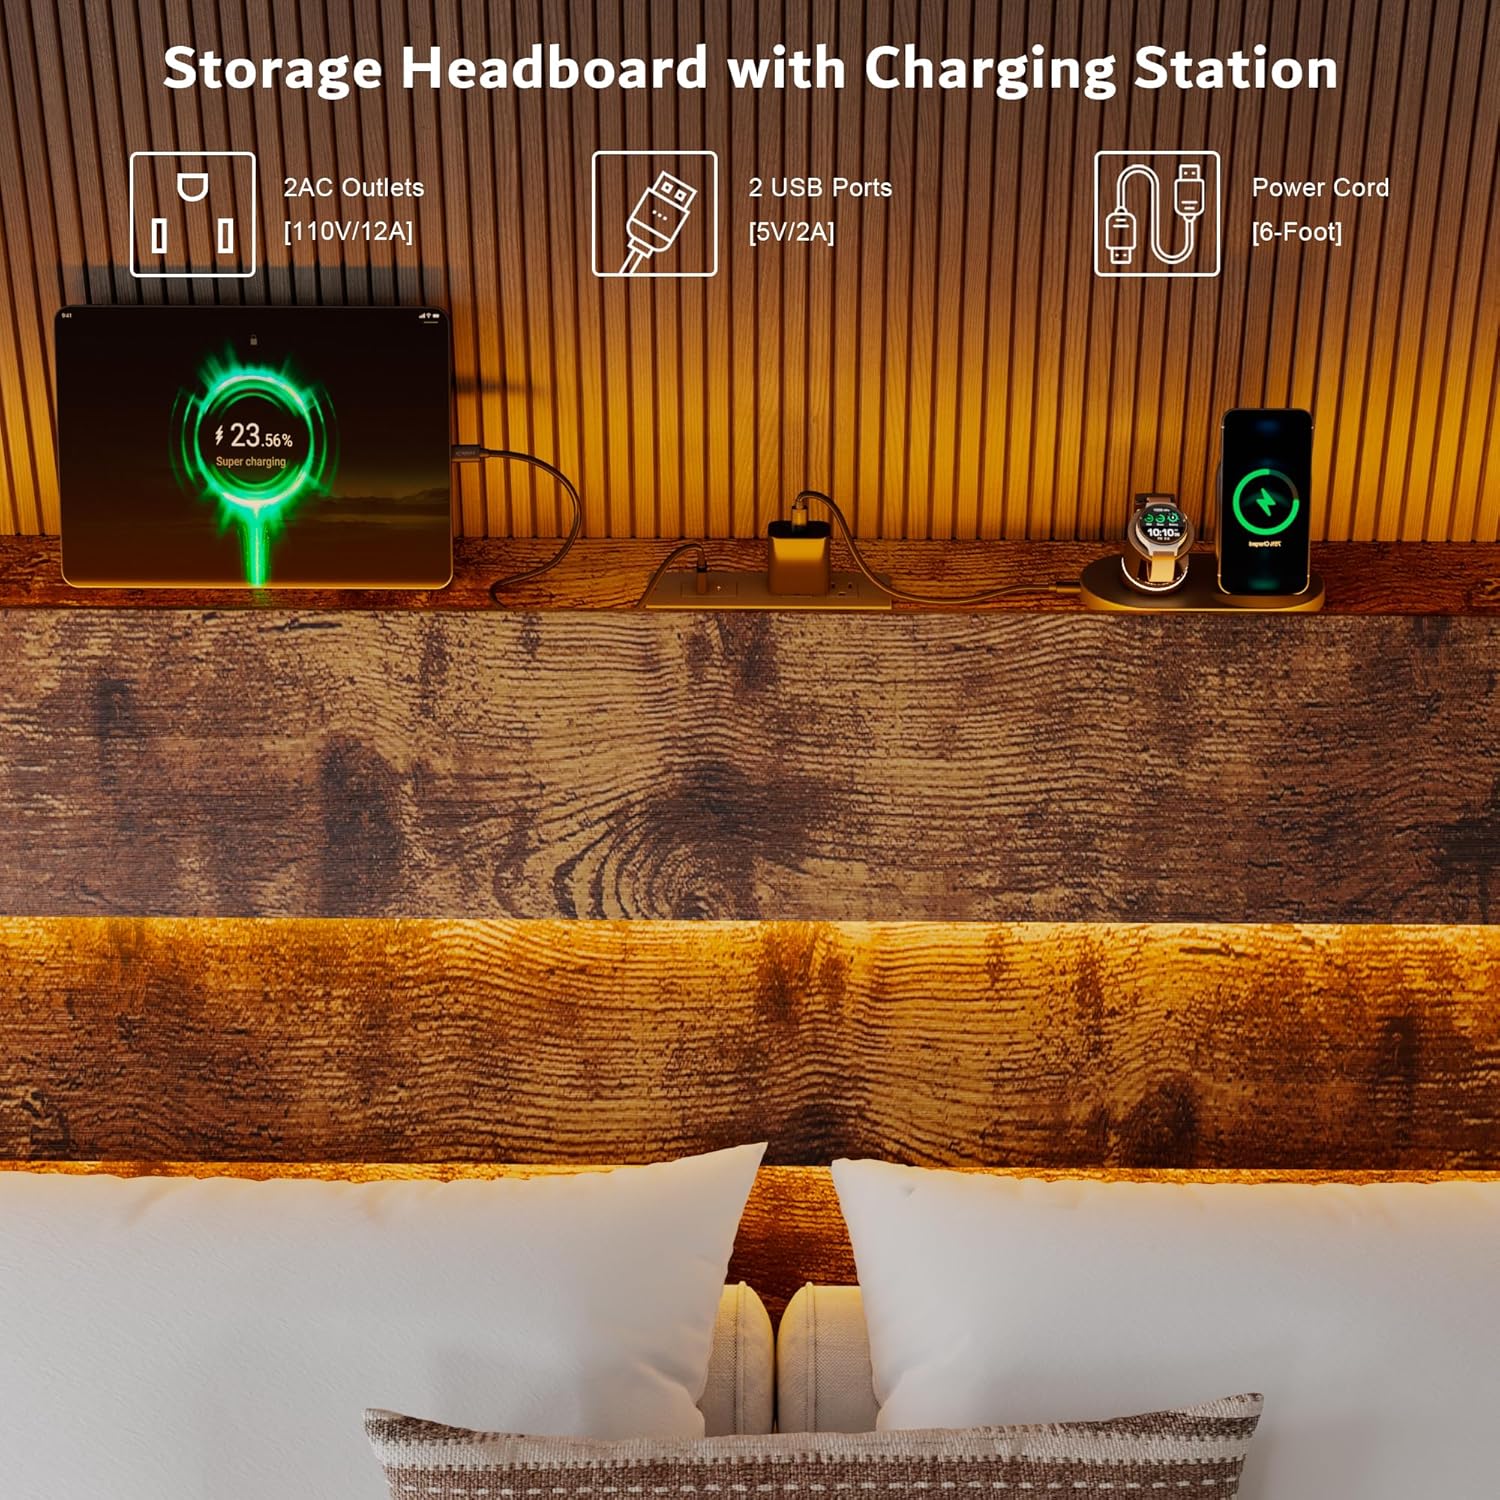
Image 5.2: The storage headboard with its integrated charging station, featuring AC outlets and USB ports.
6. Maintenance
Regular maintenance will help prolong the life and appearance of your bed frame.
- Cleaning: Wipe the wooden and metal surfaces with a soft, damp cloth. Avoid harsh chemicals or abrasive cleaners.
- Hardware Check: Periodically inspect all bolts and screws to ensure they remain tight. Re-tighten if necessary to maintain stability and prevent noise.
- LED Lights: If LED lights malfunction, check connections. If issues persist, contact customer support.
- Charging Station: Keep the charging ports free of dust and debris. Do not expose the charging station to liquids.
7. Troubleshooting
| Problem | Possible Cause | Solution |
|---|---|---|
| Bed frame is squeaking/noisy | Loose hardware; uneven assembly; mattress movement. | Ensure all bolts and screws are tightened. Check that the frame is assembled evenly. The EVA material on slats is designed to reduce noise. |
| LED lights not working | Loose connection; remote battery dead; app not connected. | Check all power connections for the LED strips. Replace remote control batteries. Ensure the mobile app is correctly paired via Bluetooth. |
| Charging station not providing power | Power cord unplugged; wall outlet not working; device cable faulty. | Verify the charging station's power cord is fully plugged into a live wall outlet. Test the wall outlet with another device. Try a different charging cable for your device. |
| Bed frame feels unstable | Incomplete assembly; loose connections; uneven floor. | Review assembly steps to ensure all parts are correctly installed. Tighten all hardware. Consider placing shims under legs if the floor is uneven. |
8. Specifications
| Feature | Detail |
|---|---|
| Size | King |
| Product Dimensions | 86"L x 76.5"W x 38"H |
| Color | Vintage Brown |
| Material | Metal and Wood |
| Special Features | Charging Station, Lighted, No Box Spring Needed, Squeak Resistant, Wooden Headboard |
| Maximum Weight Recommendation | 1000 Pounds |
| Assembly Required | Yes |
| Compatible Mattress Size | King (8"-14" thickness recommended) |
| Included Components | Installation Manual, Installation Tools, Wooden Headboard |

Image 8.1: Mattress recommendation for optimal fit and support.
9. Warranty and Support
For warranty information or technical support, please refer to the contact details provided in your product packaging or visit the official iPormis website. Please have your purchase receipt and model information ready when contacting support.