Sailnovo B0GBTJ7NY4
Sailnovo 24 Eggs Incubator Instruction Manual
Model: B0GBTJ7NY4
Brand: Sailnovo
1. Introduction
This manual provides detailed instructions for the safe and efficient operation of your Sailnovo 24 Eggs Incubator. Please read this manual thoroughly before use to ensure optimal performance and successful hatching results.
Key Features:
- 24-Egg Capacity with 4 Hatching Modes: Features 3 smart auto-modes (Chicken, Duck, Quail) for precise temperature and timing, plus a Manual Mode for custom settings.
- User-Friendly Digital Panel: 360° clear panoramic window and digital display show real-time temperature, humidity, and countdown days.
- Stable Temperature: Advanced circulation fan system ensures consistent temperature. Includes styrofoam for insulation in cold climates.
- Effortless Humidity Control: External A/B water ports and an air vent allow humidity adjustment without opening the lid. Features a smart humidity alarm.
- Built-In Egg Turner & Candler: Automatic egg turning every 2 hours prevents embryo sticking and stops near hatch day. Integrated top candling light for monitoring egg development.
- Memory Backup Feature: Automatically resumes operation from where it left off after a power interruption.
2. Package Contents
Verify that all items listed below are included in your package:
- Sailnovo 24 Eggs Incubator Unit
- Power Adapter and Cord
- Watering Can / Spray Bottle
- Incubation Record Card
- Instruction Manual
- Styrofoam Insulation (for base)
- Rubber Plug for water channels
Video: Demonstrates the process of unboxing and showing what's included in the Sailnovo incubator package.
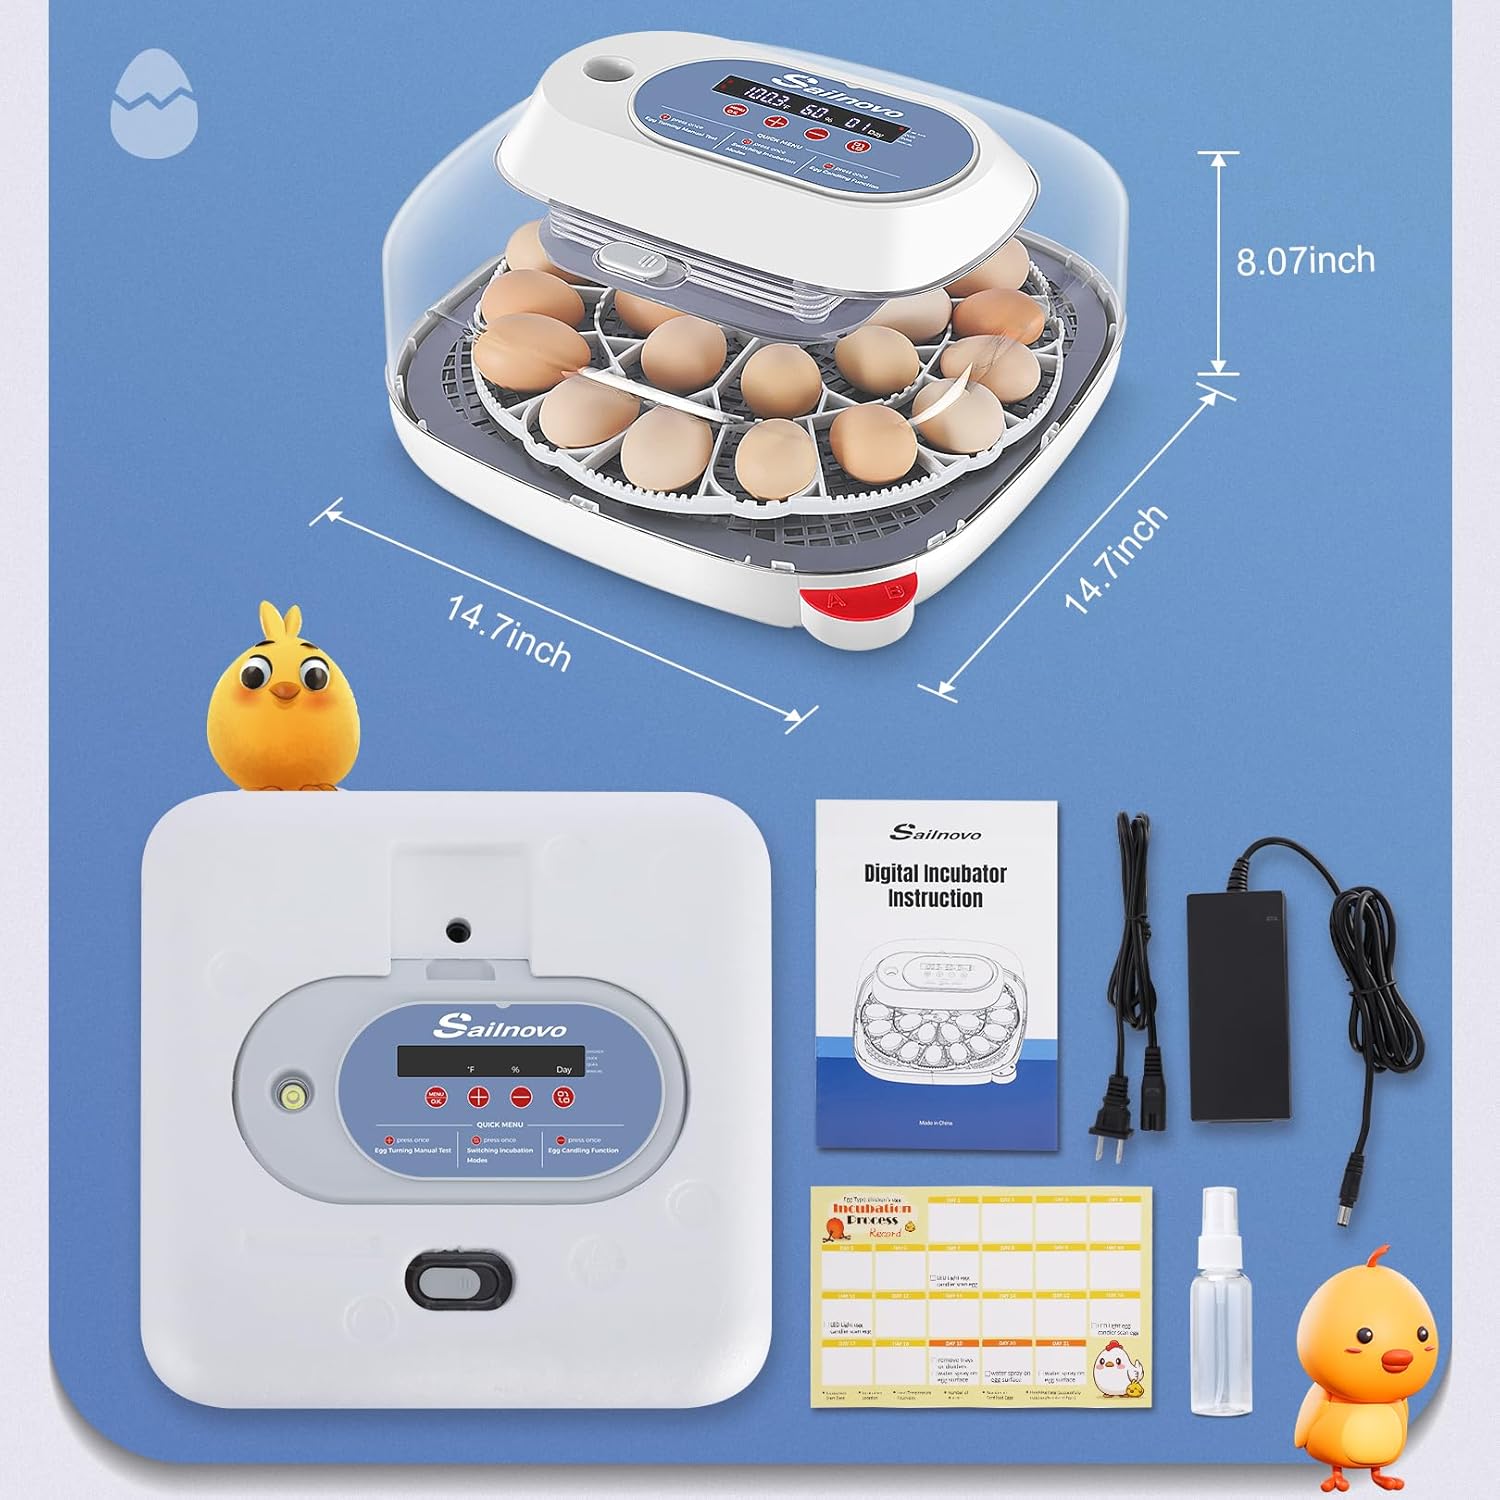
Image: The Sailnovo incubator shown with its various components and accessories, including the power adapter, water bottle, and instruction manual.
3. Setup Instructions
- Unpack and Inspect: Carefully remove all components from the packaging. Inspect for any damage. Keep the styrofoam base as it provides insulation.
- Clean the Incubator: Before first use, clean all parts of the incubator with a mild disinfectant solution and wipe dry. Ensure no water enters the electronic components.
- Assemble the Egg Tray: Place the egg turning tray onto the base.
- Connect Power: Plug the power adapter into the incubator's power port and then into a suitable electrical outlet.
- Add Water for Humidity:
- Locate the external water filling ports (A and B) on the side of the incubator base.
- For initial setup and during the first 18 days of incubation, fill water pot A with water (approximately 100ml) using the provided watering can. Ensure the water level does not exceed the highest water mark.
- During days 19-21 (or the last 3 days of incubation), fill both water pots A and B with water (approximately 600ml) to increase humidity for hatching.
Video: Demonstrates the process of adding water to the incubator's external water ports for humidity control.
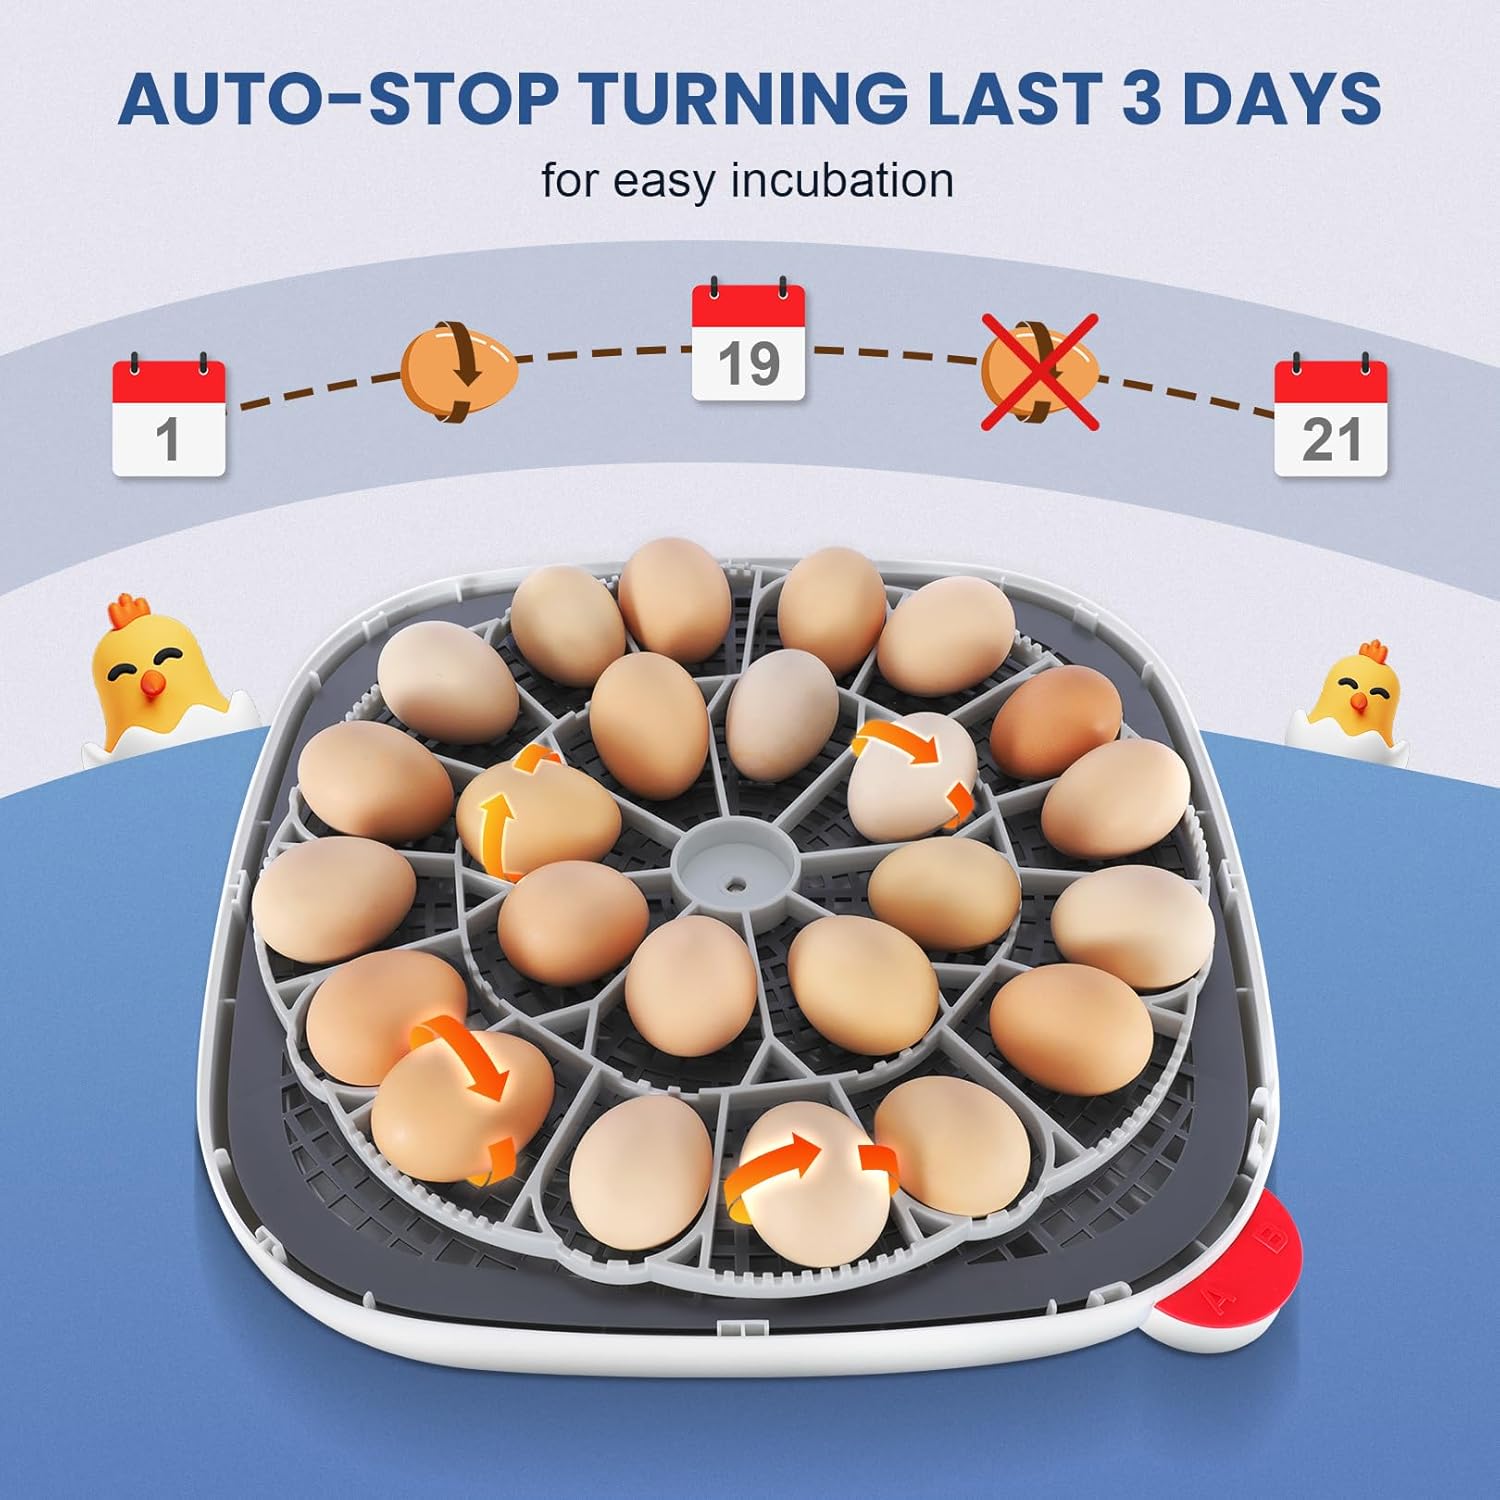
Image: The external water addition system, showing how to intuitively monitor internal water levels and fill ports A and B.
- Pre-heat the Incubator: Allow the incubator to run for at least 20-30 minutes to stabilize temperature and humidity before placing eggs.
4. Operating Instructions
4.1 Selecting Incubation Mode
The incubator offers 4 modes: Chicken, Duck, Quail, and Manual. The default mode is Chicken.
- Factory Reset (if needed): Press and hold the "+" and "-" buttons simultaneously for 2-3 seconds until the display resets.
- Choose Mode: Press the "Turn" button (often labeled with an egg icon) once to cycle through the modes (Chicken, Duck, Quail, Manual). The corresponding indicator light will illuminate.
- Confirm Mode: Once your desired mode is selected, press and hold the "Menu/OK" button for 3 seconds until the number of days for that mode is displayed.
Video: Guide on how to select different incubation modes on the Sailnovo incubator.

Image: The control panel illustrating the four available incubation modes: Chicken, Duck, Quail, and Manual, with their respective indicators.
4.2 Manual Mode Temperature Adjustment
If you select Manual Mode, you can adjust the temperature to your desired value:
- In Manual Mode, the temperature number on the screen will flash.
- Use the "+" or "-" buttons to adjust the temperature.
- Once set, press and hold the "Menu/OK" button for 3 seconds to save the settings. The display will show "OK DAY" and the incubation process will start.
Video: Instructions on how to use the manual mode to adjust the temperature settings.
4.3 Temperature and Humidity Guidelines:
Refer to the Incubation Record Card for recommended temperature and humidity settings for different egg types and stages:
| Mode | Hatch Days | Incubation Period | Hatching Period | ||
|---|---|---|---|---|---|
| Temperature °F | Humidity % | Temperature °F | Humidity % | ||
| Chicken | 21 | 100.3 | 55-65 | 100 | 70-80 |
| Duck | 28 | 100.3 | 55-65 | 99.3 | 70-80 |
| Quail | 18 | 101.3 | 55-65 | 100.3 | 70-80 |
| Manual | - | 95-105 (initial) | 55-65 | 95-105 (initial) | 70-80 |

Image: The incubator's digital display provides accurate real-time temperature and humidity readings, crucial for monitoring the incubation process.
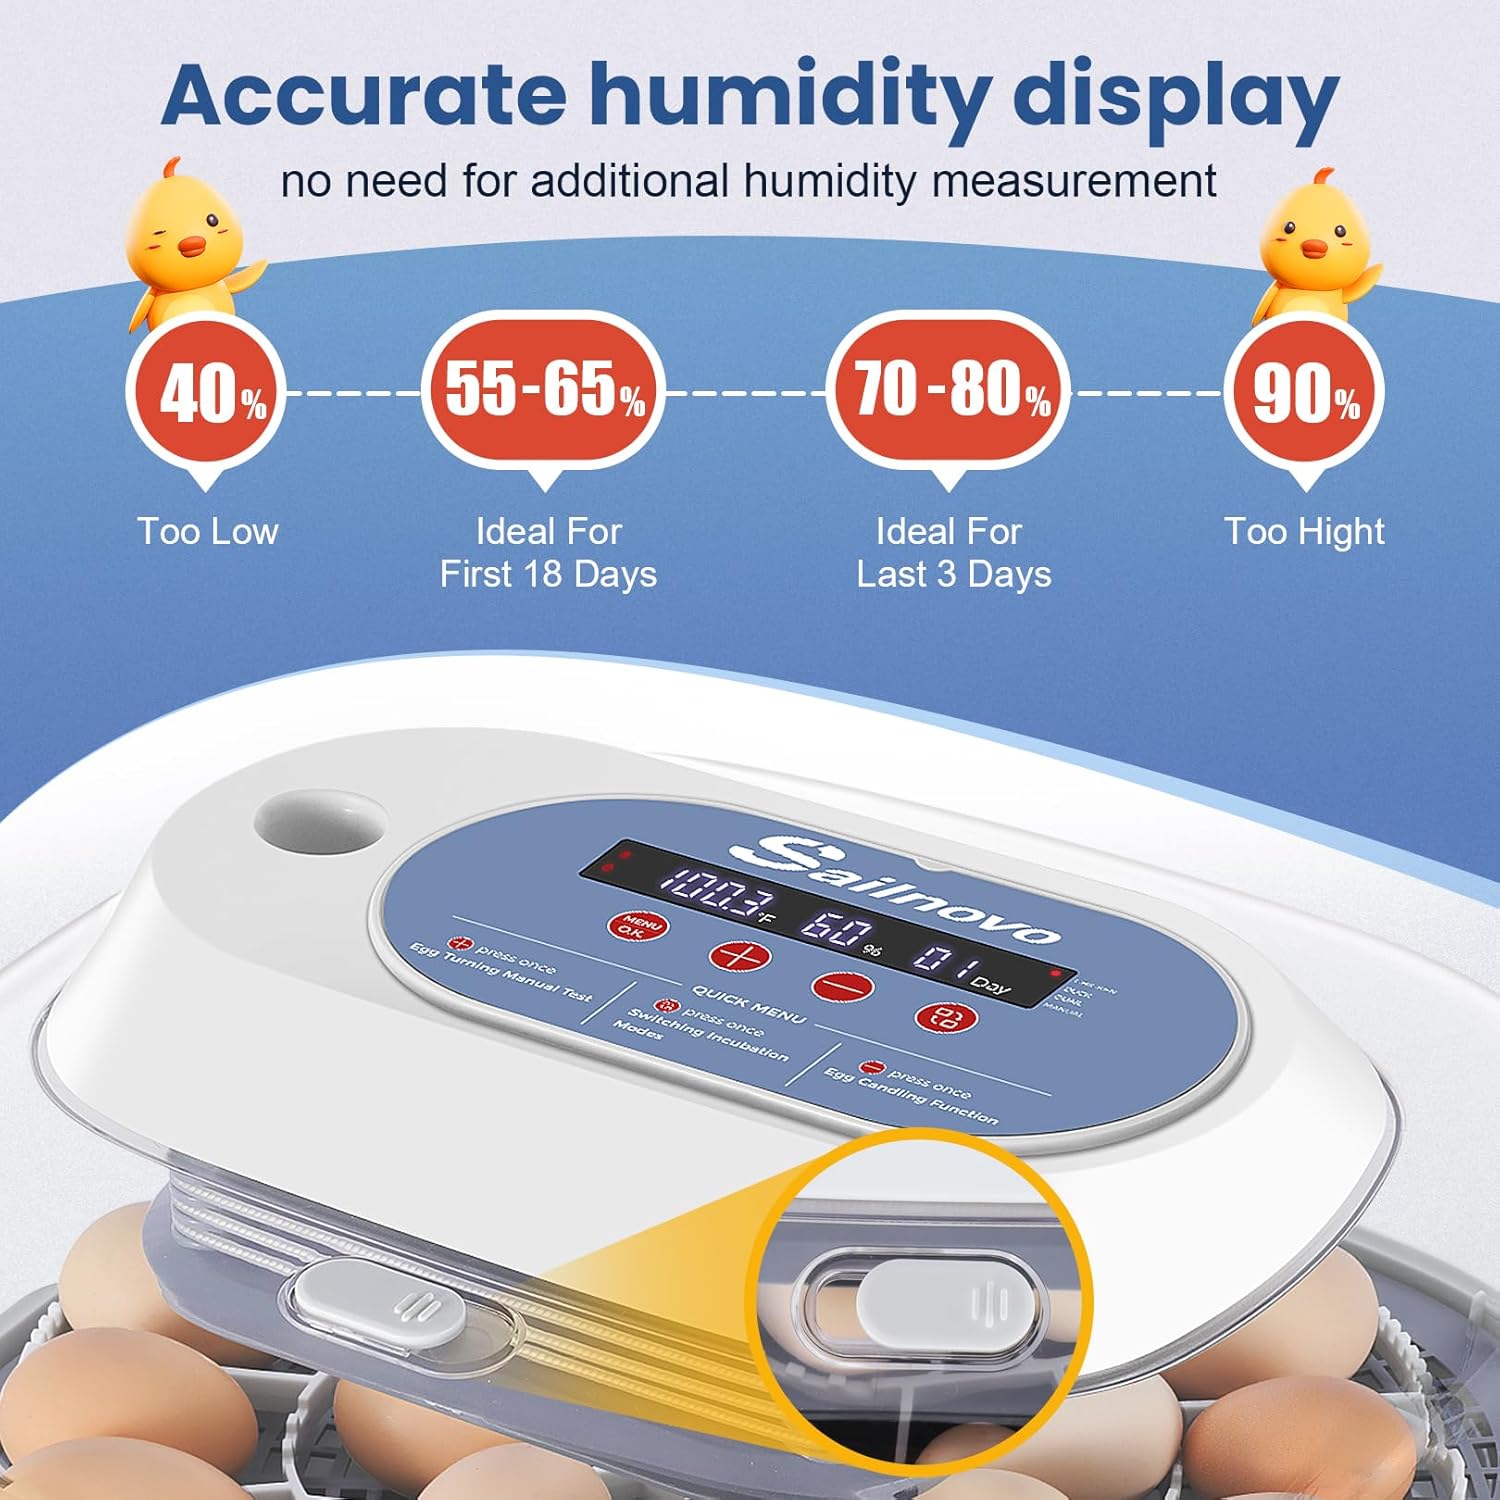
Image: The automatic temperature control system uses internal airflow to maintain a stable and consistent temperature throughout the incubator.
4.4 Adjusting Humidity with Air Vent
During incubation, if the humidity displayed on the screen is too low or too high, you can adjust it by opening or closing the grey air vent. It is recommended to keep the grey air vent closed from Day 1 until the last 3 days before hatch day.
Video: Demonstrates how to adjust humidity levels using the grey air vent on the incubator.
4.5 Automatic Egg Turning
The incubator features an automatic egg turning mechanism that rotates eggs every 2 hours. This prevents embryos from sticking to the shell and ensures even development. The automatic turning function will stop approximately 3 days before the expected hatch date.
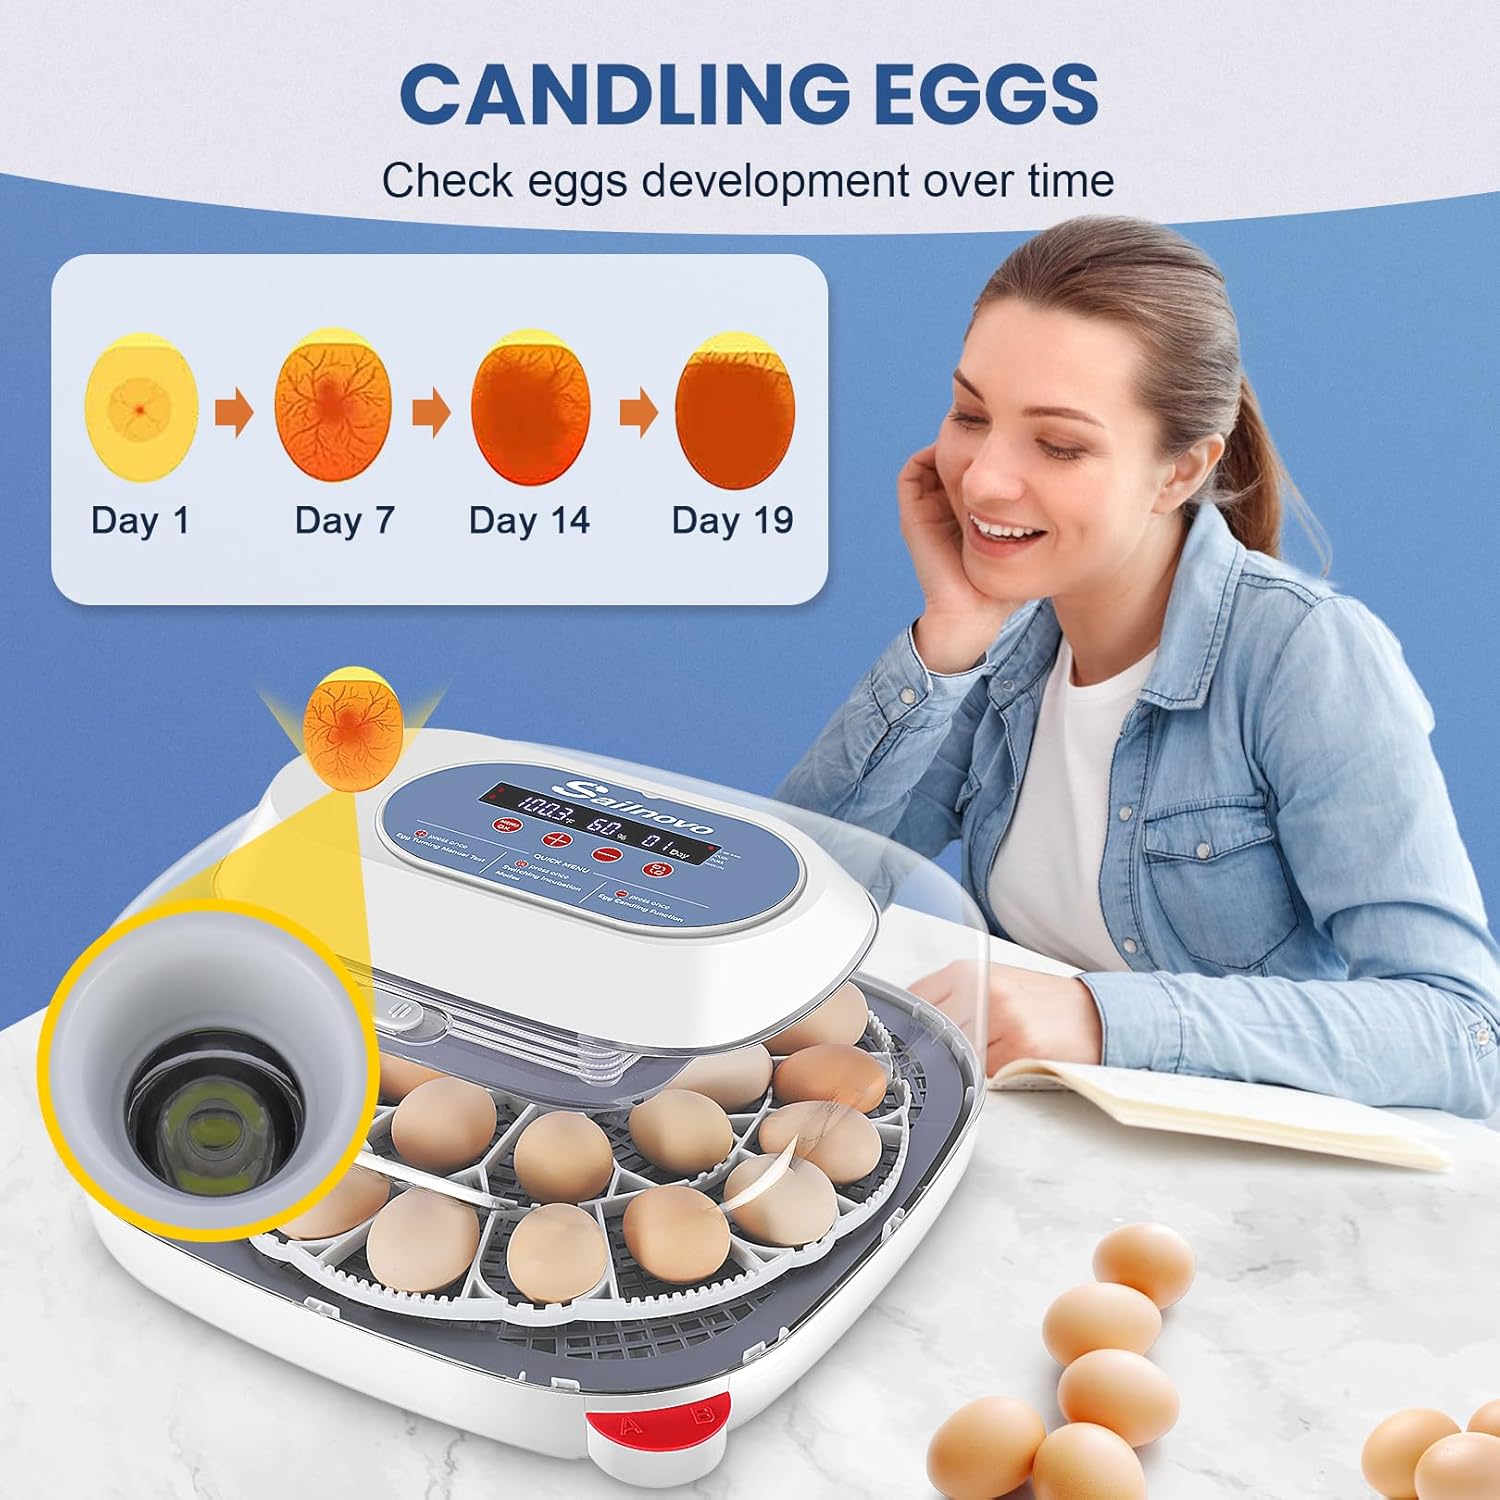
Image: The automatic egg turning mechanism ensures eggs are rotated regularly, stopping automatically in the last 3 days for easier hatching.
4.6 Egg Candling Function
Use the built-in top candling light to monitor the development of the embryos without disturbing the incubation process. Press the candling button (often labeled with a light bulb icon) once to activate the light. Press it again to turn it off.
Video: Demonstrates how to use the built-in candling light to check egg development.
Image: The integrated egg candler allows for easy observation of embryo growth and viability over time.
4.7 Spraying Eggs
From the 15th day of hatching, it is recommended to spray water on the eggs with a kettle once a day. This helps to soften the eggshells and assist in the hatching process. For more detailed operations, please refer to the instruction manual.
Video: Demonstrates the process of spraying eggs with water during the later stages of incubation.
5. Maintenance
Regular cleaning and maintenance will prolong the life of your incubator and ensure hygienic conditions for hatching.
- Cleaning:
- After each hatch, unplug the incubator and allow it to cool.
- Remove the egg tray and any remaining eggshells or debris.
- Wipe down all surfaces with a mild disinfectant solution. Ensure no liquid enters the control panel or motor area. Use the provided rubber plug to seal the motor opening during cleaning if necessary.
- Rinse removable parts with clean water and allow them to air dry completely before reassembly.
- Storage: Store the incubator in a clean, dry place when not in use.
6. Troubleshooting
If you encounter issues with your incubator, please refer to the following common problems and solutions:
- Temperature Fluctuations: Ensure the incubator is placed in a stable environment away from drafts or direct sunlight. Check that the styrofoam insulation is correctly in place.
- Humidity Too Low/High: Adjust water levels in channels A/B and use the grey air vent as described in Section 4.4.
- Eggs Not Turning: Verify the egg turning motor is properly connected and the egg tray is correctly installed. Perform a manual egg turning test (refer to Section 4.5).
- Power Interruption: The incubator has a memory backup feature and should resume previous settings once power is restored.
- Alarm Sounds: Check the display for error codes or indicators (e.g., low humidity alarm) and address the underlying issue.
For further assistance, please contact Sailnovo customer support.
7. Specifications
- Product Dimensions: 14 x 7.6 x 14 inches
- Item Weight: 8.31 pounds
- Manufacturer: Sailnovo
- ASIN: B0GBTJ7NY4
- Egg Capacity: 24 eggs (approximate, varies by egg size)
- Incubation Modes: Chicken, Duck, Quail, Manual
- Features: Automatic Egg Turning, Digital Temperature & Humidity Display, Built-in Egg Candler, External Water Ports, Memory Backup
8. Warranty and Support
Your Sailnovo incubator comes with detailed manuals and video tutorials. For any questions, technical assistance, or warranty claims, please contact Sailnovo customer support. Our professional support team is ready to address your needs.
Please refer to your purchase documentation for specific warranty terms and contact information.
Ask a question about this manual
Ask about setup, troubleshooting, compatibility, parts, safety, or missing instructions. Manuals+ will review the question and use this page’s manual context to help answer it.