EVER PACIFIC EP-92038
EVER PACIFIC Digital Projection Alarm Clock User Manual
Model: EP-92038
Introduction
This manual provides detailed instructions for the setup, operation, and maintenance of your EVER PACIFIC Digital Projection Alarm Clock, Model EP-92038. Please read this manual thoroughly before using the product to ensure proper function and longevity.
The EVER PACIFIC digital alarm clock is designed to enhance your daily routine with its advanced features. It includes a 180° adjustable projector to display time on your ceiling or wall, real-time temperature and humidity monitoring, dual alarm functionality with an integrated radio, a USB charging port for your smartphone, and a clear, adjustable LED screen with a snooze function. Its elegant and compact design makes it suitable for any bedside table or office desk.
Package Contents
Upon unboxing, please verify that all components are present:
- 1 x EVER PACIFIC Digital Projection Alarm Clock (Model EP-92038)
- 1 x USB Power Cable (1.5m)
- 1 x User Manual
- 1 x Memory Battery (pre-installed or included separately)
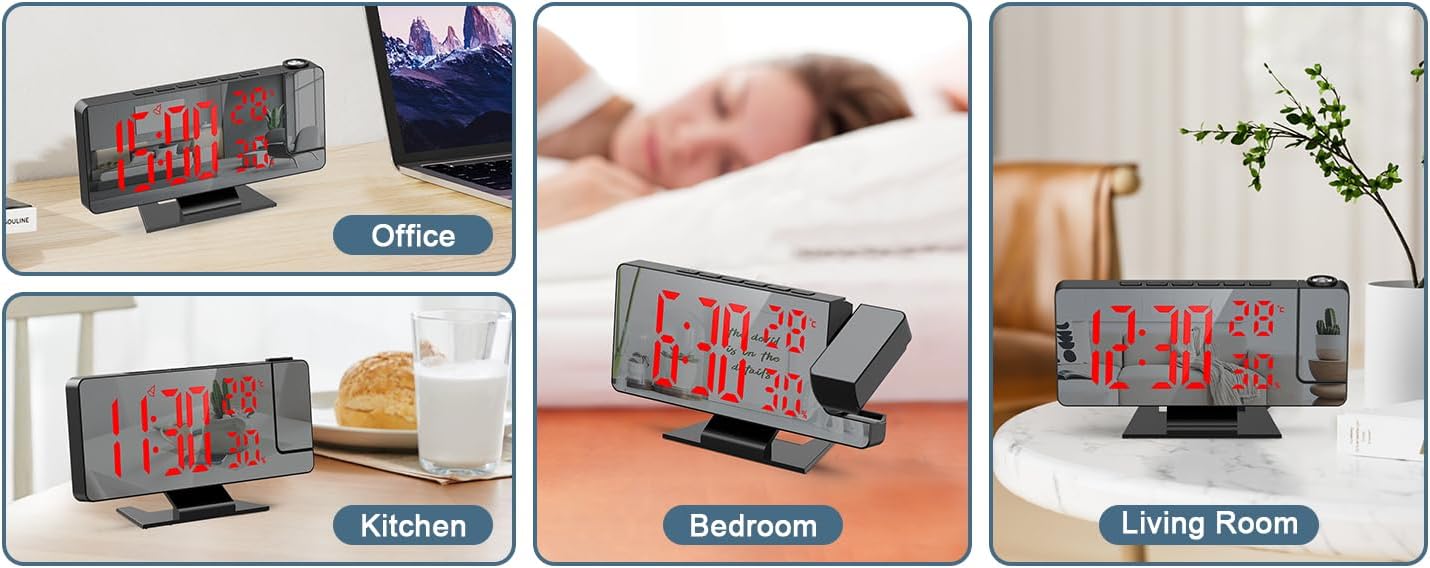
Image: Contents of the product package, including the alarm clock unit, USB power cable, user manual, and a small memory battery.
Product Overview
Familiarize yourself with the various parts and controls of your alarm clock.
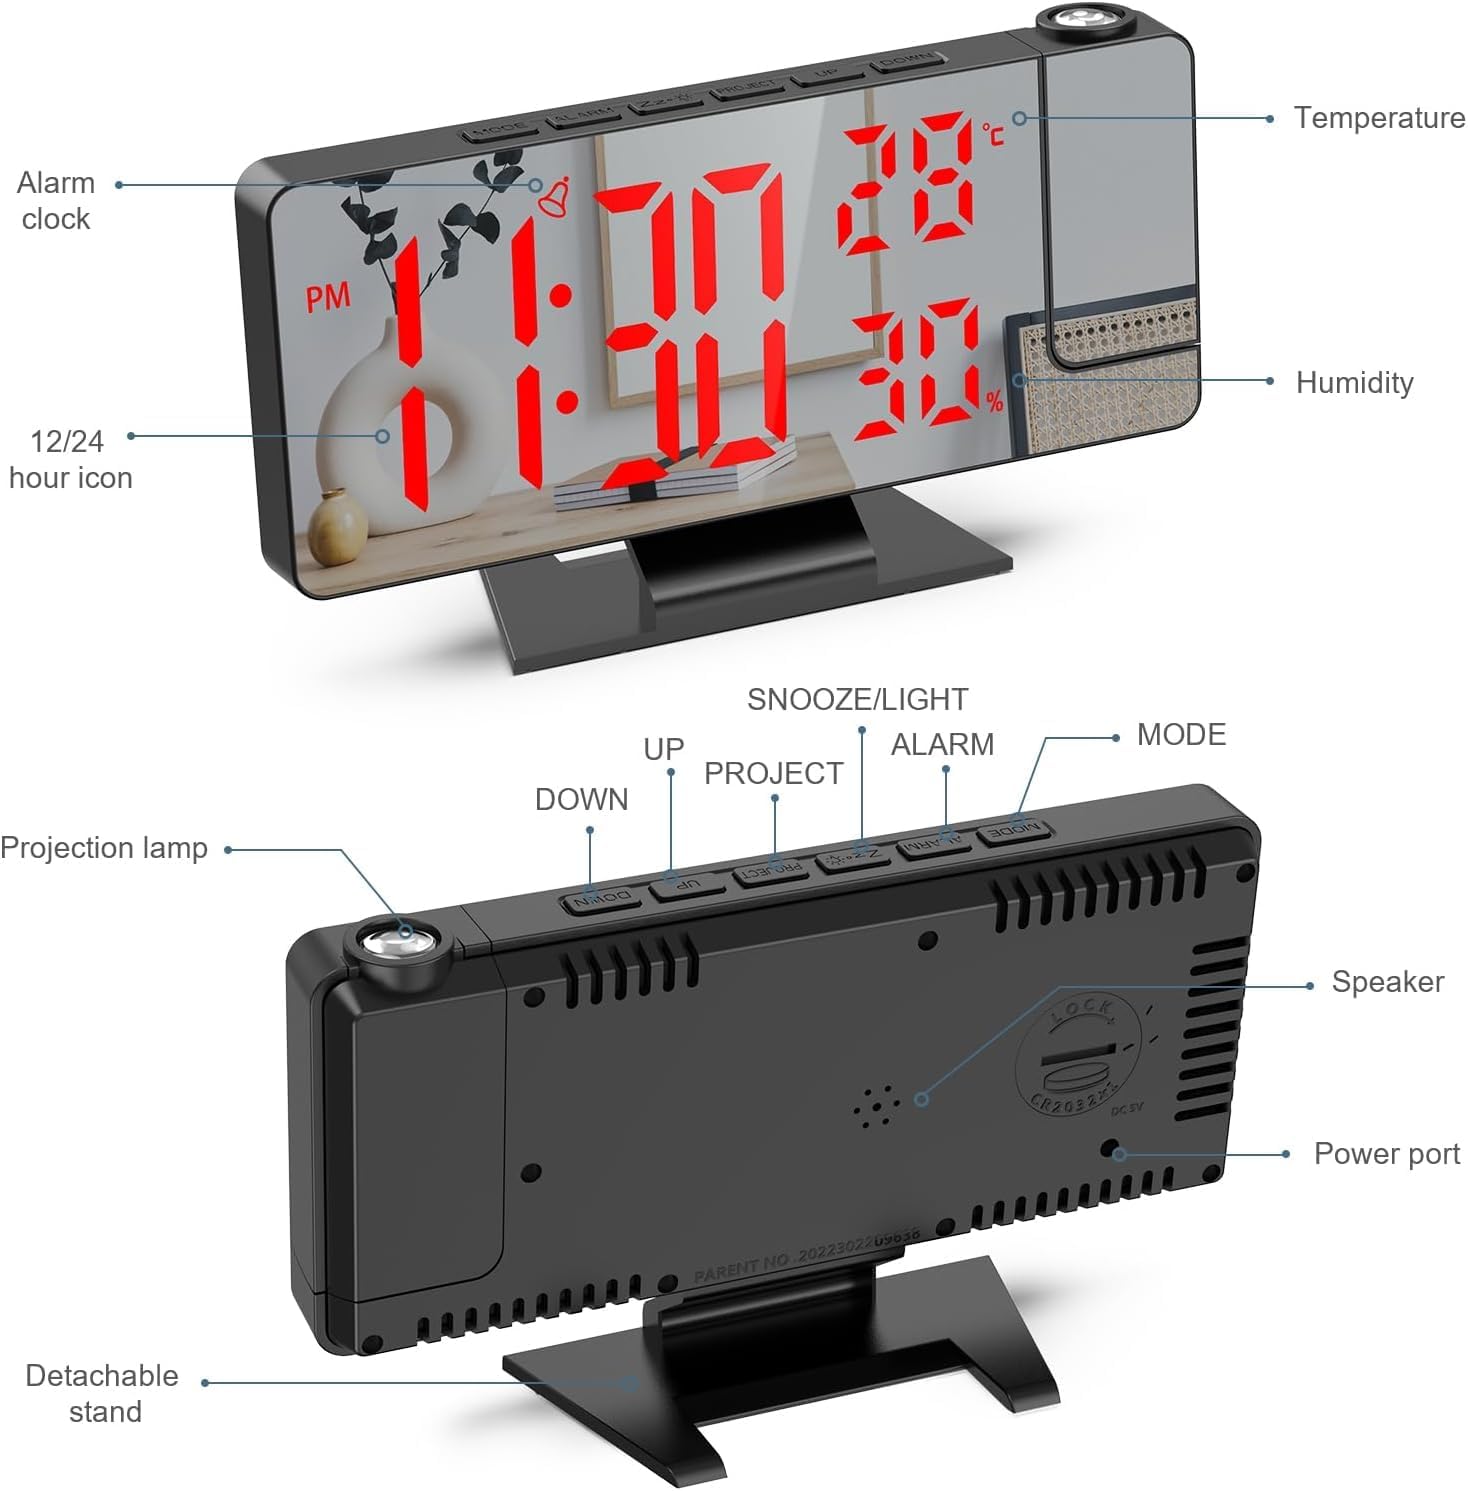
Image: Labeled diagram of the alarm clock, highlighting key components such as the temperature and humidity display, 12/24 hour icon, alarm clock display, projection lamp, detachable stand, speaker, and power port.
Control Buttons:
- MODE: Used to switch between time display, alarm settings, and radio mode.
- ALARM: Enters alarm setting mode.
- Z-Z / LIGHT: Snooze function; also adjusts screen brightness.
- PROJECT: Activates/deactivates projection and adjusts projection brightness/orientation.
- UP / DOWN: Adjusts values during settings, changes radio stations, or adjusts volume.
Setup
Power Connection:
Connect the provided USB power cable to the power port on the back of the alarm clock. Plug the other end into a standard USB power adapter (not included) or a powered USB port. The alarm clock will power on automatically.
The included memory battery (backup battery) ensures that time settings are retained during a power outage. This battery is for memory retention only and does not power the display or functions.
Initial Time Setting:
- Press the MODE button once to enter time setting mode. The hour digits will flash.
- Use the UP and DOWN buttons to adjust the hour.
- Press MODE again to set the minutes. Use UP and DOWN to adjust.
- Press MODE a third time to select 12-hour or 24-hour format. Use UP and DOWN to toggle.
- Press MODE to confirm and exit time setting.
Operating Instructions
Adjusting Display Brightness:
The alarm clock features 4 levels of screen brightness adjustment, including an OFF mode. This allows for comfortable viewing day or night.

Image: Visual representation of the four adjustable brightness levels for the LED display: Bright, Medium, Dim, and Off.
Press the Z-Z / LIGHT button repeatedly to cycle through the brightness levels: Bright, Medium, Dim, and OFF. In OFF mode, the display is completely dark.
The clock also has a default night mode setting where the screen automatically switches to low brightness from 6:00 PM to 5:59 AM.
Setting Alarms:
The alarm clock supports dual alarms and various alarm modes.
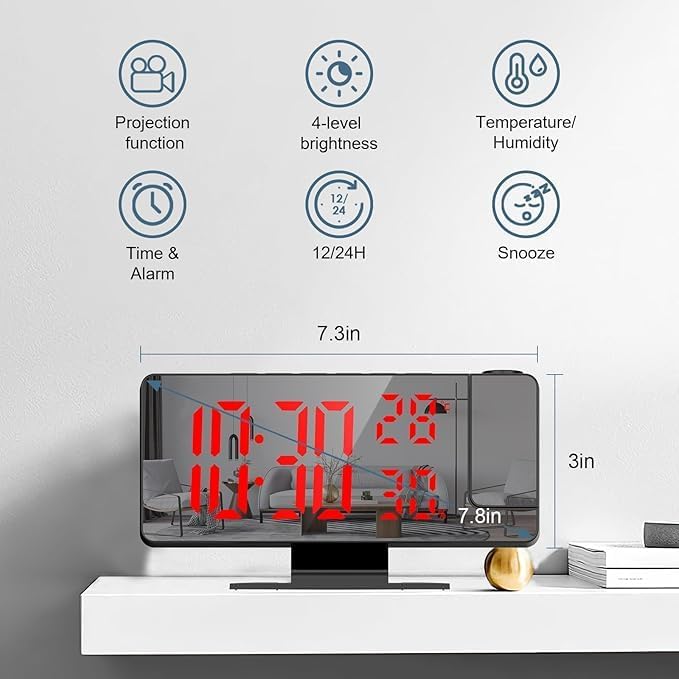
Image: Examples of the three available alarm modes: weekdays (Monday to Friday), weekdays and Saturday, and everyday.
- Press the ALARM button once to set Alarm 1. The alarm hour digits will flash.
- Use UP and DOWN to adjust the hour.
- Press ALARM again to set the minutes. Use UP and DOWN to adjust.
- Press ALARM a third time to select the alarm mode (1-5 Monday to Friday, 1-6 Monday to Saturday, 1-7 Everyday). Use UP and DOWN to cycle.
- Press ALARM to confirm and exit Alarm 1 setting.
- Repeat the process by pressing ALARM twice to set Alarm 2.
To activate or deactivate an alarm, press the ALARM button briefly when not in setting mode. An alarm icon will appear/disappear on the display.
Snooze Function:
When an alarm sounds, press the Z-Z / LIGHT button to activate the snooze function. This will provide an additional 1 to 60 minutes of sleep (adjustable). To cancel the alarm completely, press any other button.
Using the Projection Feature:
The alarm clock can project the time onto a wall or ceiling with a 180° rotation capability.

Image: The alarm clock projecting the time onto a surface, demonstrating the projection distance and the three adjustable brightness levels for the projected image.
- Press the PROJECT button briefly to turn the projection on or off.
- Long press the PROJECT button to flip the projection image 180°.
- The projection also has 3 brightness levels. Cycle through them by pressing the PROJECT button repeatedly while projection is active.
- Adjust the angle of the projection by manually rotating the projection lamp on the side of the unit.
Temperature and Humidity Display:
The alarm clock continuously monitors and displays the current indoor temperature and humidity. This information is shown on the main LED display alongside the time.
USB Charging Port:
A USB port is integrated into the alarm clock, allowing you to charge your smartphone or other small electronic devices. Connect your device's charging cable to this port.
Radio Function:
The alarm clock includes an integrated FM radio. To use the radio:
- Press the MODE button until "FM" appears on the display.
- Use the UP and DOWN buttons to tune to your desired radio station.
- Long press UP or DOWN to auto-scan for the next available station.
- Adjust the volume using the UP and DOWN buttons when in radio mode.
Maintenance
- Cleaning: Use a soft, dry cloth to clean the surface of the alarm clock. Do not use abrasive cleaners or solvents.
- Mirror Surface: The large LED mirror surface can also be used as a mirror for daily use. Clean it gently to avoid scratches.
- Storage: If storing the device for an extended period, disconnect it from power and remove the memory battery. Store in a cool, dry place.
- Battery Replacement: If the memory battery needs replacement, refer to the product overview for its location and replace it with a compatible battery type (e.g., CR2032, if applicable).
Troubleshooting
| Problem | Possible Cause | Solution |
|---|---|---|
| Display is off or dim. | Not powered, brightness set to OFF/Dim, or power outage. | Ensure USB cable is securely connected and power adapter is working. Press Z-Z / LIGHT to adjust brightness. Check if power is restored after an outage. |
| Alarm does not sound. | Alarm not activated, volume too low, or incorrect alarm time. | Verify alarm icon is displayed. Check alarm volume in settings. Re-set alarm time. |
| Projection is blurry or not visible. | Projection lamp not focused, brightness too low, or too far from surface. | Adjust the focus of the projection lamp (if applicable). Press PROJECT to cycle brightness. Ensure projection distance is within optimal range (e.g., up to 2m). |
| Time/settings reset after power loss. | Memory battery is dead or not installed. | Replace the memory battery. Ensure it is correctly installed. |
| Radio reception is poor. | Weak signal, interference, or antenna not extended. | Reposition the alarm clock. Extend any built-in antenna fully. Try auto-scanning for stations. |
Specifications
| Feature | Detail |
|---|---|
| Brand | EVER PACIFIC |
| Model Number | EP-92038 |
| Color | Red |
| Dimensions (L x W x H) | 11 x 3.81 x 19.1 cm (4.33 x 1.5 x 7.5 inches) |
| Weight | 240 grams (0.53 lbs) |
| Material | Plastic |
| Display Type | Digital LED |
| Power Source | Electric Cord (USB) |
| Special Features | Projection, Temperature Display, Humidity Display, Illuminated, Adjustable Brightness, Dual Alarm, Snooze, FM Radio, USB Charging Port |
| Backup Battery | 1 x A (type not specified, assuming common coin cell like CR2032 for memory) |
Warranty and Support
Warranty Information:
This product comes with a 1-year warranty on spare parts availability, as per the manufacturer's specifications. Please retain your proof of purchase for warranty claims.
Customer Support:
For any questions, technical assistance, or warranty claims, please contact your retailer or the manufacturer directly. Refer to the product packaging or the retailer's website for contact information.
Ask a question about this manual
Ask about setup, troubleshooting, compatibility, parts, safety, or missing instructions. Manuals+ will review the question and use this page’s manual context to help answer it.