1. Introduction
This manual provides detailed instructions for the installation, operation, and maintenance of your Nilight 4-Pin Trailer Wiring Harness Kit, model 56459. This kit is specifically designed for 2021-2025 Nissan Rogue vehicles, providing a standard 4-way flat connector for trailer lighting functions. Please read these instructions carefully before beginning installation to ensure proper function and safety.
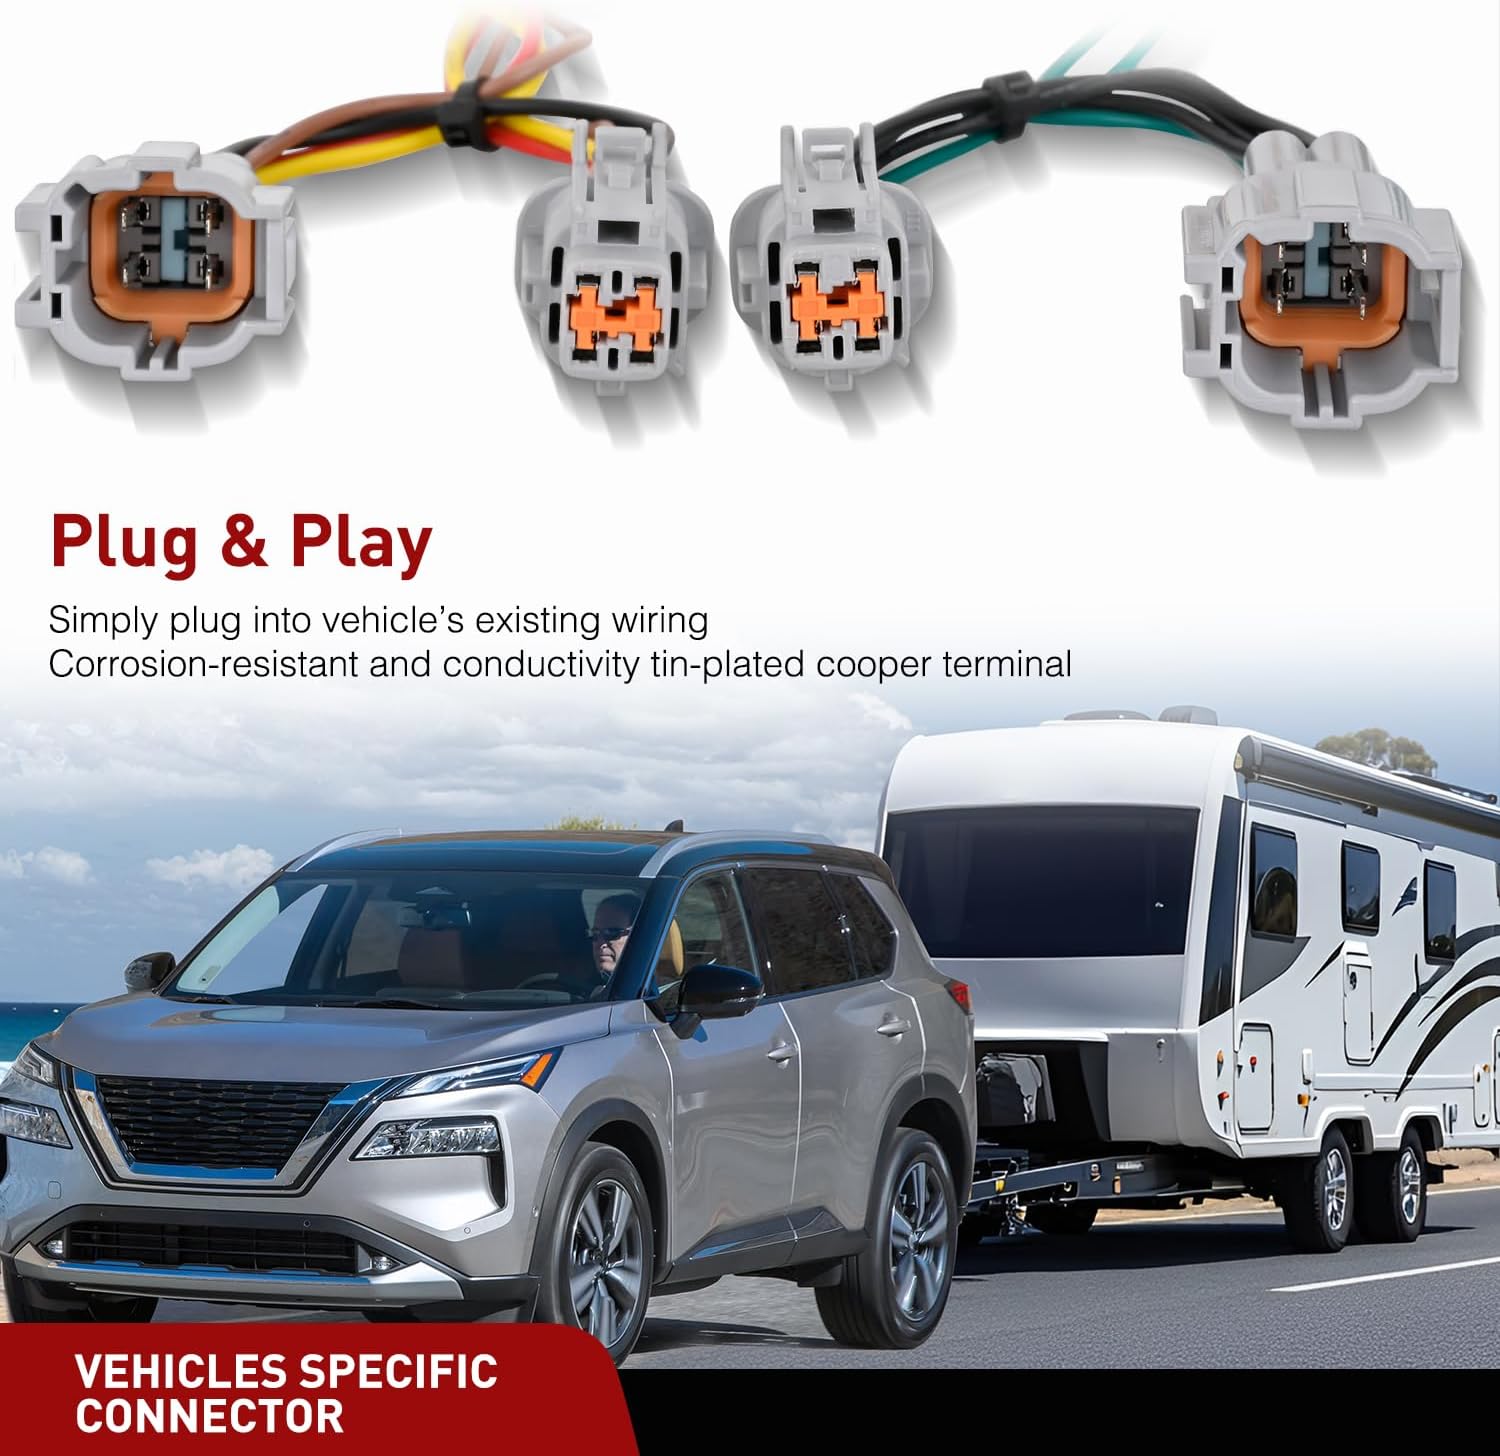
Image 1.1: The Nilight 4-Pin Trailer Wiring Harness Kit, showing the vehicle-specific connectors and a Nissan Rogue towing a trailer, illustrating its intended use.
2. Package Contents
Verify that all components are present in your package:
- Custom 4-Pin Trailer Wiring Harness (1)
- Zip ties (9)
- Screw (1)
- 10 A Fuse (1)

Image 2.1: An overview of the product components, including the converter, various wiring sections, vehicle-specific connectors, fuse holder, ground wire, and power wire extension.
3. Installation Instructions
Follow these steps for proper installation of the trailer wiring harness:
- Preparation: Ensure your vehicle is turned off and the parking brake is engaged. It is recommended to disconnect the negative battery cable before wiring the power line to prevent electrical shorts.
- Locate Taillight Wiring: The vehicle-specific connectors are designed to plug into your Nissan Rogue's existing wiring harness, typically located behind the driver and passenger side taillight housing. Access these areas by removing the taillight assemblies as per your vehicle's service manual.
- Connect Harness: Plug the OEM-compatible connectors of the Nilight harness into the corresponding vehicle wiring. These are designed for a direct, plug-and-play fit, eliminating the need for cutting or splicing factory wires.
- Route Wiring: Carefully route the wiring from the taillight connections to the rear of the vehicle where the 4-way flat connector will be stowed. Ensure the wiring is secured using the provided zip ties, away from hot or moving parts.
- Power Connection: Route the black power wire to the positive terminal of your vehicle's battery. Install the provided 10A fuse holder in-line with the power wire, close to the battery. Use butt connectors for secure connections.
- Ground Connection: Attach the ring terminal of the white ground wire to a clean, unpainted metal surface on the vehicle body using the provided screw. If necessary, drill a 3/32" hole.
- Secure Converter: Mount the converter box in a secure, dry location using double-sided tape or by screwing it into place.
- Final Check: Once all connections are made and secured, reconnect the negative battery cable. Test the trailer lights (tail lights, brake lights, turn signals) with a compatible trailer or trailer light tester.

Image 3.1: Visual guide for connecting the harness behind the taillight and the final placement of the 4-way flat connector near the hitch.

Image 3.2: A comprehensive wiring diagram illustrating how to connect the harness components, including the battery, converter, and the color-coded wires for trailer lights (Green-Right turn, Red-Brake, Yellow-Left turn, Brown-Taillight).
4. Operating Instructions
The Nilight 4-Pin Trailer Wiring Harness provides a standard 4-way flat connector for basic trailer lighting functions. This connector is compatible with most light-duty trailers.
- Connecting a Trailer: Align the 4-way flat connector from your trailer with the vehicle's 4-way flat connector and push firmly to ensure a secure connection.
- Functionality: Once connected, the harness will transmit signals for trailer tail lights, brake signal lights, and turn signals, synchronizing with your vehicle's lighting system.
- Disconnecting: When not towing, disconnect the trailer connector and use the provided dust cover to protect the vehicle's 4-way flat connector.
5. Maintenance
Proper maintenance ensures the longevity and reliability of your wiring harness:
- Dust Cover: Always use the tight-fitting rubber dust cover on the 4-way flat connector when it is not in use. This protects the terminals from dust, dirt, moisture, and other outdoor elements, preventing corrosion and ensuring consistent electrical contact.
- Inspect Connections: Periodically check all wiring connections for tightness and signs of wear or corrosion. Clean any corroded terminals with a wire brush and apply dielectric grease if necessary.
- Wire Integrity: Inspect the wiring for any cuts, pinches, or abrasions. Repair or replace damaged sections to prevent electrical issues.

Image 5.1: The standard 4-Pin trailer wiring connector, highlighting the importance of the dust cover for protection against environmental damage.
6. Troubleshooting
If you encounter issues with your trailer wiring harness, consider the following:
- No Trailer Lights:
- Check the 10A fuse in the power wire. Replace if blown.
- Ensure all connections, especially the ground wire, are secure and free of corrosion.
- Verify the trailer's wiring and lights are functional by testing them on another vehicle or with a dedicated tester.
- Incorrect Light Function (e.g., brake lights activate turn signals):
- Double-check the wiring diagram (Image 3.2) to ensure all wires are connected to their correct terminals.
- Inspect the vehicle-specific connectors for proper seating and any bent pins.
- Wires Seem Too Short: Some users have reported that the wire lengths may be challenging for certain routing paths or vehicle configurations. If wires are too short for your intended routing, professional installation or wire extension may be required. Ensure any extensions maintain proper gauge and insulation.
7. Specifications
| Feature | Detail |
|---|---|
| Brand | Nilight |
| Model Number | 51094TR |
| Connector Type | 4-pin Flat |
| Material | Copper (Core), Polyvinyl Chloride (PVC) (Insulation) |
| Item Weight | 1.52 Pounds |
| Compatible Vehicles | 2021-2025 Nissan Rogue |
| Included Components | Custom 4-Pin Trailer Wiring Harness, 9 Zip ties, 1 Screw, 10 A Fuse |

Image 7.1: Compatibility information for the Nilight 4-Pin Trailer Wiring Harness, confirming fitment for Nissan Rogue models from 2021 to 2025.
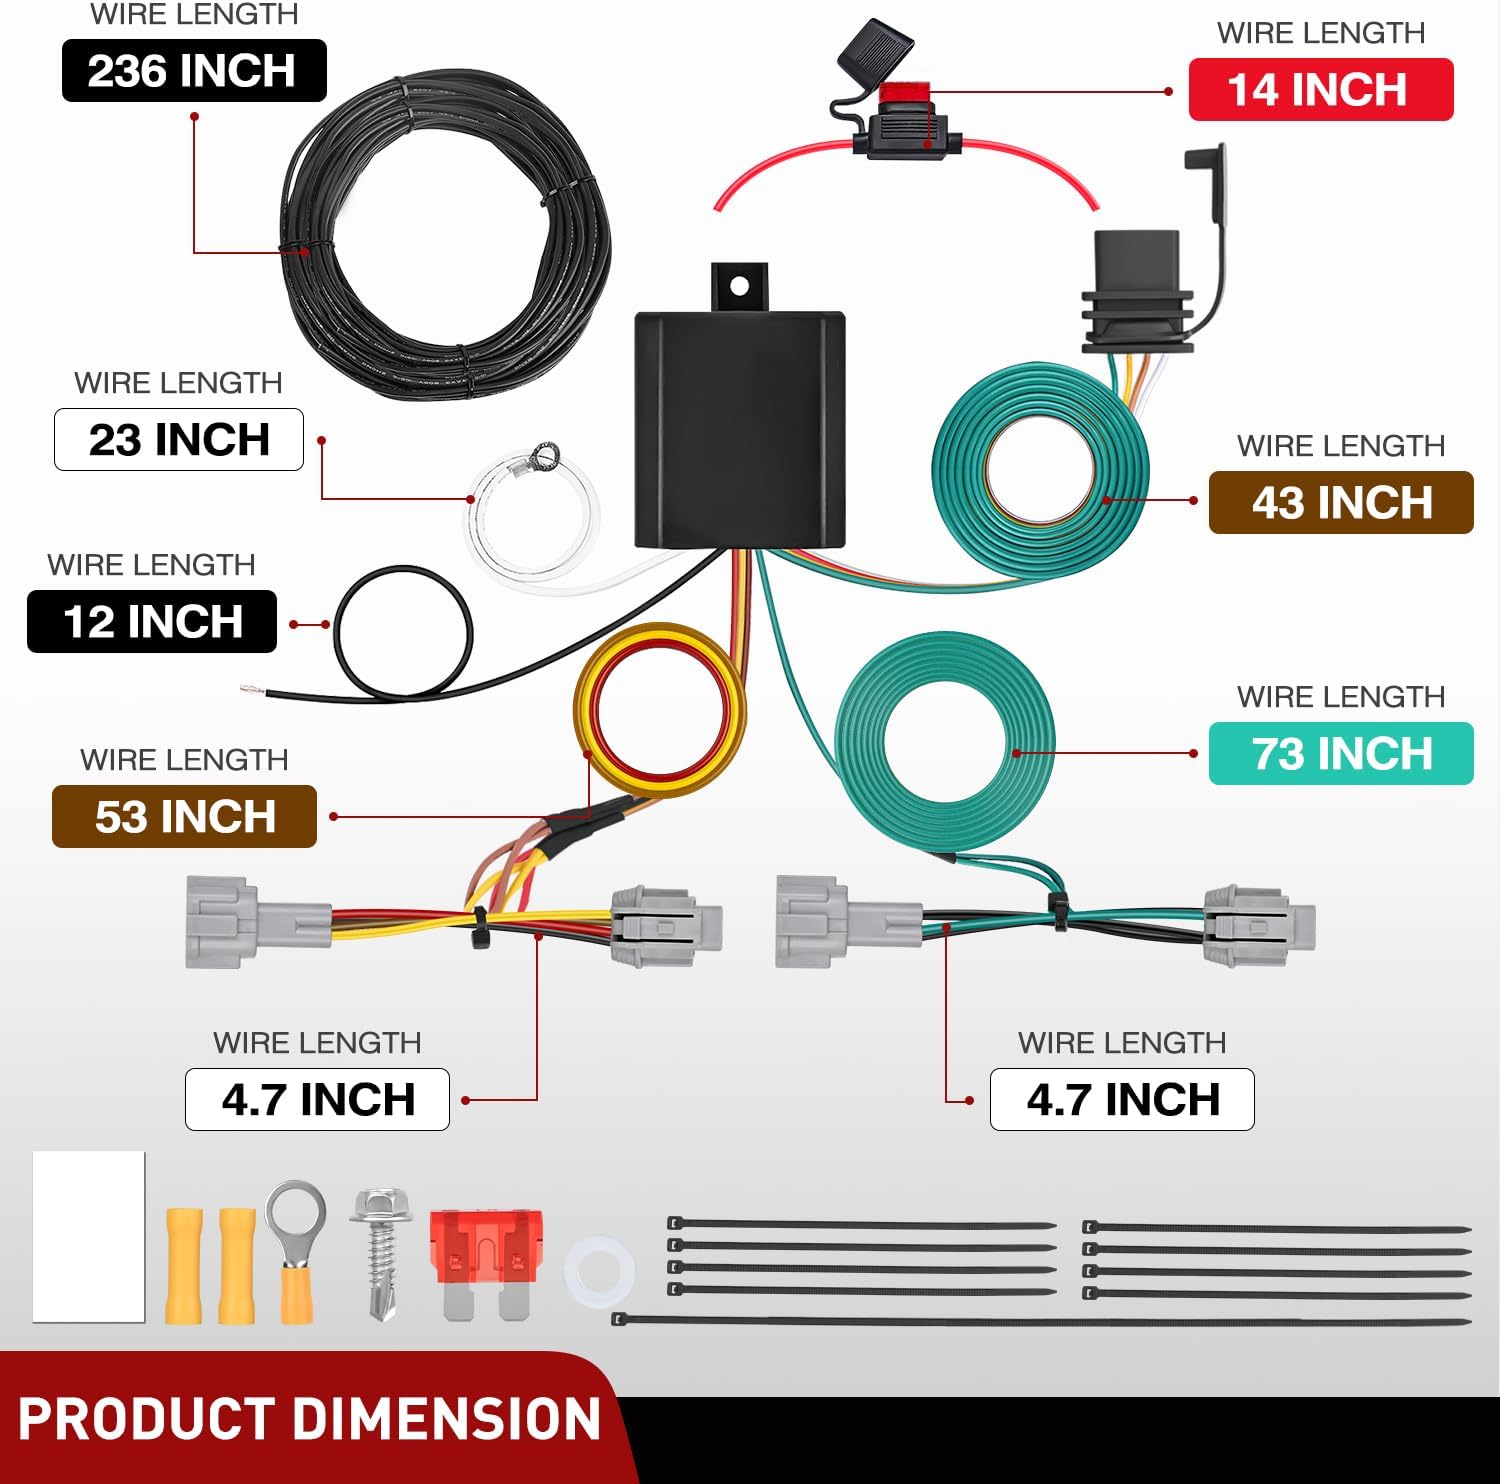
Image 7.2: Detailed product dimensions and wire lengths for various components of the harness, including the power wire extension (236 inches), converter wiring, and connector leads.
8. Warranty
This Nilight product comes with a 2-Year Warranty. For warranty claims or further details, please contact Nilight customer support.
9. Support
For technical assistance, installation questions, or warranty inquiries, please visit the official Nilight website or contact their customer service department. Refer to the product packaging or the Nilight website for the most current contact information.
You can also visit the Nilight Store on Amazon for more product information and support resources.


