Introduction
This manual provides detailed instructions for the Keychron K8 HE TKL Wireless Mechanical Keyboard. It covers setup, operation, maintenance, and troubleshooting to ensure optimal performance and user experience. The K8 HE features Hall Effect magnetic switches, tri-mode connectivity (2.4 GHz, Bluetooth, Wired), and extensive customization options via the Keychron Launcher web app.
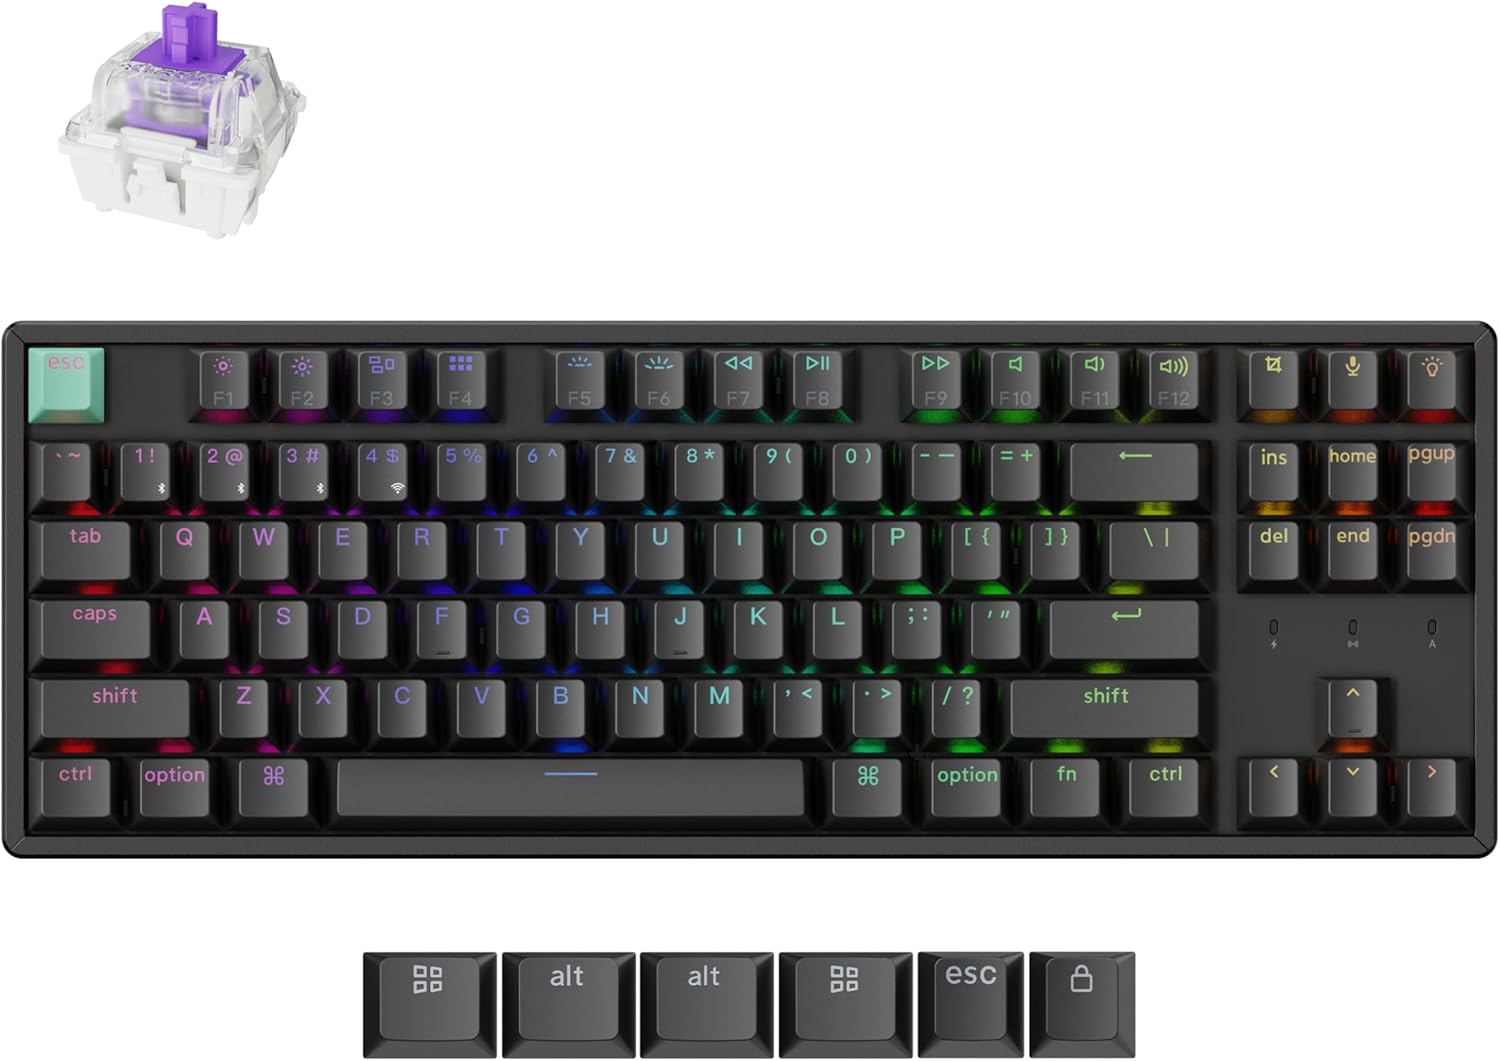
Image: The Keychron K8 HE TKL Wireless Mechanical Keyboard, showcasing its compact design and vibrant RGB backlighting.
Setup
What's in the Box

Image: An illustration detailing the components included with the Keychron K8 HE Special Edition, such as the keyboard, cables, receiver, and tools.
The Keychron K8 HE package includes:
- 1x Fully Assembled Keyboard
- 1x Type-A to Type-C Cable
- 1x Type-A 2.4GHz Receiver
- 1x Extension Adapter For Receiver
- 1x Keycap & Switch Puller
- 1x Screwdriver
- 1x Hex Key
- Additional components for Special Edition: Case, PCB, Aluminum Plate, Sound Absorbing Foam, EPDM Foam, Bottom Case PET Film, Silicone Bottom Pad, Stabilizers, Keycaps (PBT Double-shot), Magnetic Switches.
Initial Connection
The K8 HE supports three connection modes: 2.4 GHz wireless, Bluetooth 5.1, and USB-C wired. Use the switch on the side of the keyboard to select your desired mode.

Image: A close-up of the keyboard's side, highlighting the USB-C port, 2.4 GHz/Bluetooth/Wired mode switch, and Mac/Windows toggle.
- 2.4 GHz Wireless:
- Plug the included 2.4GHz receiver into your device's USB-A port.
- Set the keyboard switch to "2.4G".
- The keyboard should connect automatically, indicated by a stable light.
- Bluetooth 5.1:
- Set the keyboard switch to "BT".
- On your device, search for Bluetooth devices and select "Keychron K8 HE".
- The keyboard can pair with up to three devices. Switch between paired devices using Fn + 1, Fn + 2, or Fn + 3.
- USB-C Wired:
- Connect the keyboard to your device using the provided USB-C cable.
- Set the keyboard switch to "Cable".
Operating System Switch
The K8 HE is compatible with Mac, Windows, and Linux. Use the OS switch located next to the connectivity mode switch to select your operating system for proper key mapping.
Operating Instructions
Key Functions and Backlight Control
The keyboard features standard TKL layout keys and dedicated function keys. Backlight settings can be adjusted directly on the keyboard or through the Keychron Launcher web app.
- Function Keys (F1-F12): Access media controls and other system functions.
- Backlight Control: Use the dedicated backlight key (usually top right) or Fn + arrow keys to cycle through RGB effects and adjust brightness.
Customization with Keychron Launcher
The Keychron Launcher is a web-based application that allows extensive customization of your keyboard without requiring software downloads. Access it via your web browser.

Image: A visual representation of the Keychron Launcher web interface, demonstrating options for key remapping, macro creation, and firmware updates.
- Key Remapping: Assign custom functions to any key.
- Macros: Create complex sequences of commands.
- Actuation Point Adjustment: Fine-tune the distance at which a keypress registers (0.2mm to 3.8mm).
- Rapid Trigger: Enable faster key response by activating and resetting keystrokes based on real-time travel distance.
- Dynamic Keystrokes (DKS): Assign up to four actions per key based on press depth, allowing for layered input.

Image: A diagram illustrating the Rapid Trigger functionality of magnetic switches, showing how activation and reset points are dynamic compared to fixed points in traditional mechanical switches.
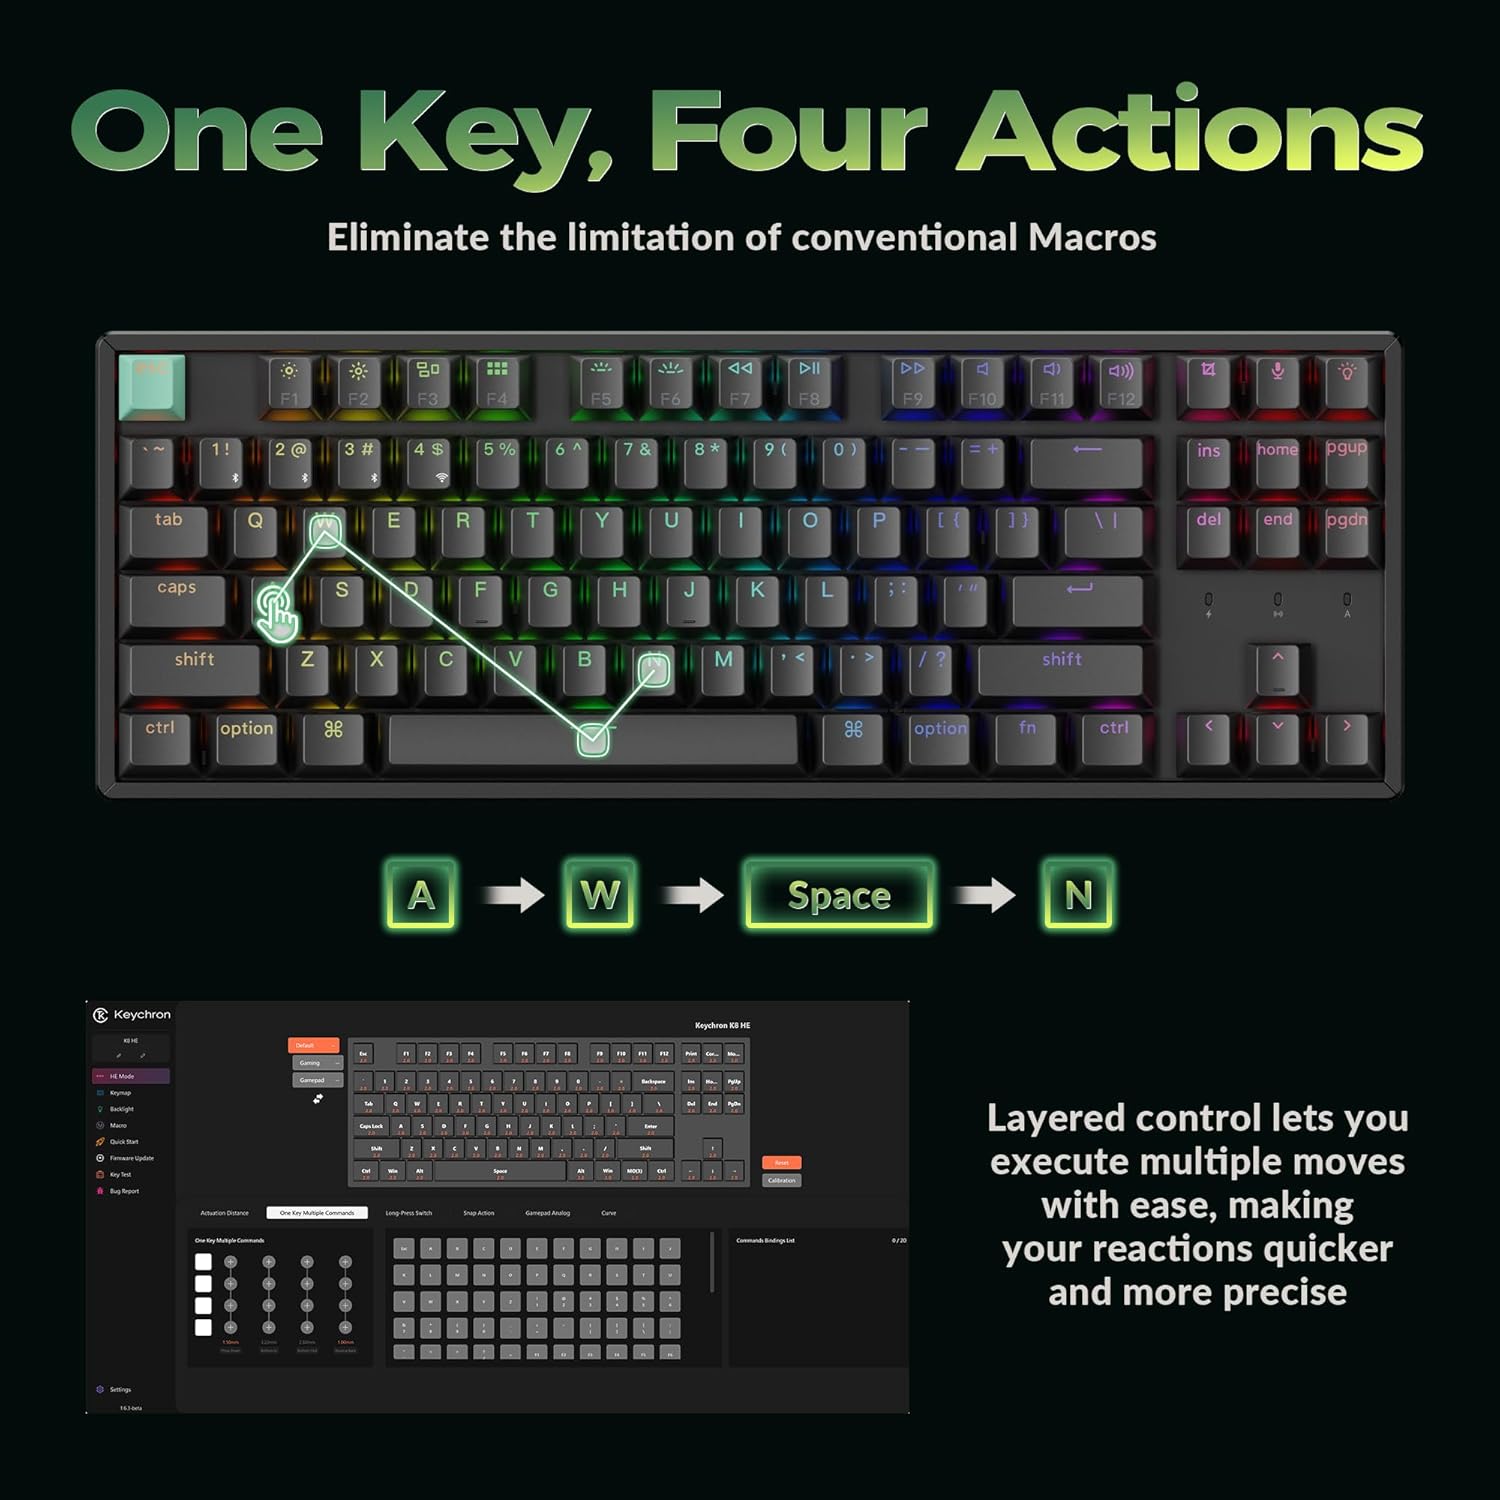
Image: A visual explanation of Dynamic Keystrokes (DKS), demonstrating how a single key can perform up to four different actions based on the depth of the press.
Hall Effect Magnetic Switches
The K8 HE utilizes Hall Effect magnetic switches, which detect keypresses using magnetic sensors instead of physical contact. This design reduces wear and tear, offering enhanced durability and a smooth typing experience. These switches are hot-swappable, allowing for easy replacement without soldering.
Video: An official Keychron video demonstrating the features of the K8 HE Wireless Hot Swappable Hall Effect Keyboard, including its magnetic switches and customization options.
Maintenance
Cleaning Your Keyboard
To maintain your keyboard's appearance and functionality:
- Disconnect the keyboard from your device.
- Use a soft, lint-free cloth to wipe down the keycaps and frame.
- For deeper cleaning, use the included keycap puller to remove keycaps and clean underneath with compressed air or a small brush.
- Avoid using harsh chemicals or abrasive materials.
Hot-Swapping Switches and Keycaps
The K8 HE features hot-swappable switches, allowing you to change them without soldering. The included keycap and switch puller facilitate this process.

Image: The Keychron K8 HE keyboard with several keycaps and switches removed, illustrating the hot-swappable nature of the magnetic switches.
- Removing Keycaps: Use the keycap puller to gently lift keycaps straight up.
- Removing Switches: Use the switch puller to grasp the top and bottom clips of the switch and pull it straight out.
- Installing Switches: Align the new switch with the holes on the PCB and press down firmly until it clicks into place. Ensure the pins are not bent.
- Installing Keycaps: Align the keycap with the switch stem and press down gently.
Troubleshooting
- Keyboard not responding:
- Check the connection mode switch (2.4G, BT, Cable) and ensure it matches your connection method.
- For wireless modes, ensure the keyboard is charged.
- Try reconnecting the USB-C cable or re-pairing Bluetooth.
- Ensure the OS switch is set correctly for your operating system.
- Keys not registering or double-typing:
- This can sometimes be resolved by recalibrating the switches using the Keychron Launcher web app.
- Ensure switches are fully seated. If a switch is faulty, it can be hot-swapped.
- Backlight not working:
- Check backlight brightness settings using Fn + arrow keys or the dedicated backlight key.
- Ensure the keyboard is not in a low-power mode.
- Connectivity issues (lag, disconnections):
- For 2.4 GHz, ensure the receiver is not obstructed and is close to the keyboard. Use the extension adapter if needed.
- For Bluetooth, ensure no other devices are interfering and try re-pairing.
- Update firmware via the Keychron Launcher if available.
Specifications

Image: A technical diagram illustrating the dimensions and TKL (80%) layout of the Keychron K8 HE keyboard.
| Feature | Detail |
|---|---|
| Model | K8 HE |
| Layout | TKL (80%), 87 Keys |
| Switches | Hall Effect Magnetic Switches, Hot-Swappable |
| Actuation Point | Adjustable from 0.2mm to 3.8mm |
| Connectivity | 2.4 GHz Wireless, Bluetooth 5.1, USB-C Wired |
| Polling Rate | 1000 Hz (2.4G and Wired modes) |
| Keycaps | Cherry Profile Double-shot PBT (Shine-Through) |
| Frame Material | Aluminum |
| Backlighting | RGB |
| Compatible OS | Mac, Windows, Linux |
| Power Source | Battery Powered |
Warranty and Support
The Keychron K8 HE TKL Wireless Mechanical Keyboard comes with a 1 Year Manufacturer Warranty.
For technical support, firmware updates, or additional resources, please visit the official Keychron website or contact Keychron customer service. The Keychron Launcher web app is also a valuable resource for customization and troubleshooting.
Online Resources:
- Keychron Official Website: www.keychron.com
- Keychron Launcher Web App: www.keychron.com/launcher