VISAUTO M10
VISAUTO M10 Dash Cam Mirror User Manual
Model: M10
1. Introduction
Thank you for choosing the VISAUTO M10 Dash Cam Mirror. This device is designed to enhance your driving safety and provide comprehensive recording of your journeys. It features a 2.5K front camera, 1080p rear camera, a 10-inch IPS touchscreen, WiFi connectivity, integrated GPS, advanced driver-assistance systems (ADAS), night vision, and voice control. This manual provides detailed instructions for installation, operation, maintenance, and troubleshooting to ensure optimal performance of your device.
2. Package Contents
Please verify that all items listed below are included in your package:
- VISAUTO M10 Dash Cam Mirror (with 10-inch touchscreen)
- Front Camera (integrated)
- Rear Camera
- GPS Module
- 32GB MicroSD Card
- Car Charger (Cigarette Lighter Power Adapter)
- Mounting Hardware (straps/clips for mirror attachment)
- Rear Camera Cable
- User Manual

Image: VISAUTO M10 Dash Cam Mirror, rear camera, GPS module, and 32GB SD card.
3. Setup and Installation
3.1 Installing the Dash Cam Mirror
- Attach to Rearview Mirror: Securely attach the VISAUTO M10 dash cam mirror over your existing rearview mirror using the provided rubber straps or clips. Ensure it is centered and stable.
- Insert MicroSD Card: Insert the included 32GB MicroSD card into the designated slot on the side of the dash cam. Ensure it clicks into place.
- Connect GPS Module: Plug the GPS module into its dedicated port on the dash cam. Position the GPS module on your dashboard or windshield with a clear view of the sky for optimal signal reception.
3.2 Installing the Rear Camera
- Choose Mounting Location: The rear camera can be mounted inside the rear window or externally above the license plate. For external mounting, professional installation is recommended.
- Route Cable: Carefully route the rear camera cable from the back of your vehicle to the front dash cam mirror. Hide the cable along the headliner and A-pillars for a clean installation.
- Connect to Dash Cam: Plug the rear camera cable into the AV-in port on the dash cam mirror.
- Connect to Reverse Light (Optional): For reverse assist functionality, connect the red wire from the rear camera cable to your vehicle's reverse light positive wire. This will automatically display the rear view with parking guidelines when reversing.
3.3 Power Connection
- Connect Car Charger: Plug the car charger into your vehicle's cigarette lighter socket.
- Connect to Dash Cam: Plug the other end of the car charger cable into the power input port on the dash cam mirror. The device will power on automatically when the vehicle's ignition is turned on.
- 24/7 Parking Monitor (Optional): For continuous parking monitoring, an additional hardwire kit (ASIN: B0DZGR77XR) is required and sold separately. This kit connects directly to your vehicle's fuse box to provide constant power.
4. Operating Instructions
4.1 Basic Operation
- Power On/Off: The device powers on automatically with vehicle ignition. To manually power on/off, press and hold the power button.
- Recording: The dash cam automatically starts loop recording when powered on. A red dot indicator on the screen confirms recording is active.
- Screen On/Off: Briefly press the power button to turn the screen on or off while recording continues in the background.
4.2 Touchscreen Navigation
The 10-inch IPS touchscreen allows for intuitive control:
- Switch Camera Views: Swipe left or right on the screen to switch between front camera view, rear camera view, or split-screen display.
- Access Settings: Swipe down from the top of the screen to access the settings menu.
- Playback: Swipe up from the bottom of the screen to access recorded videos for playback.
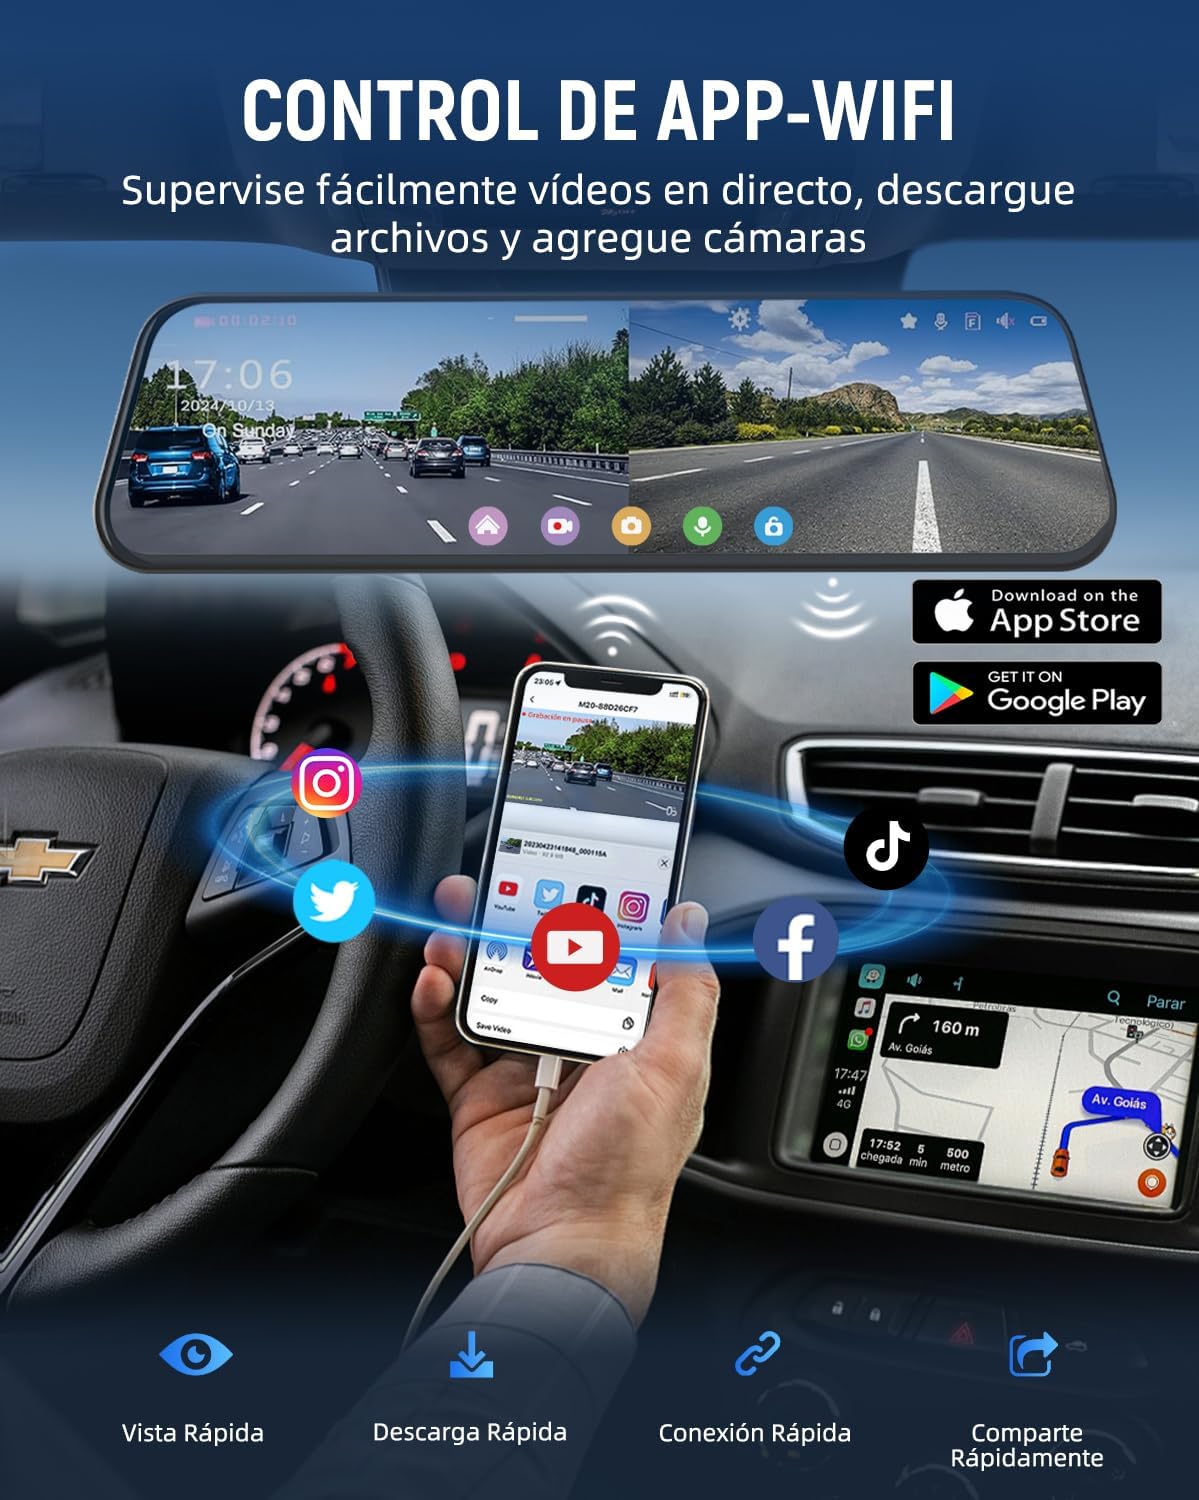
Image: Touchscreen interface and app connectivity.
4.3 Voice Control (English Only)
The M10 supports voice commands for hands-free operation. Speak clearly and directly to the device:
- "Turn on screen"
- "Turn on Audio"
- "Take photo"
- "Show front camera"
- (Other commands may be available, refer to on-screen prompts or app for full list)
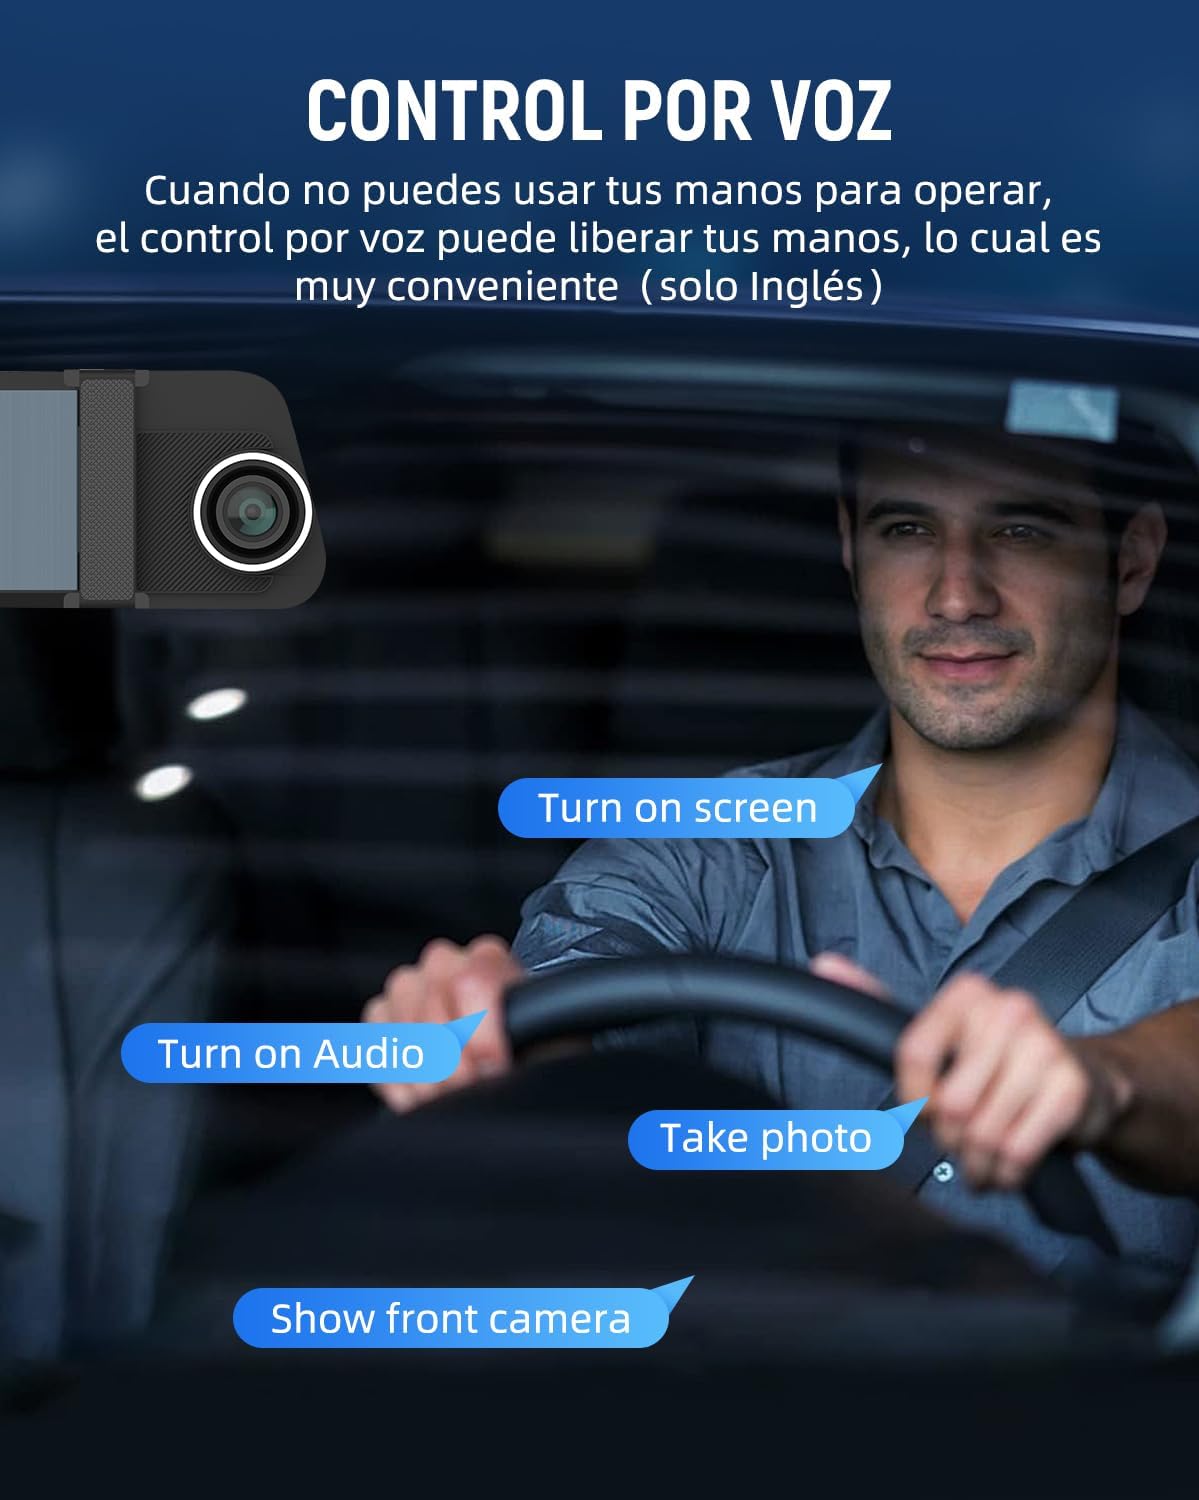
Image: Voice control functionality.
4.4 WiFi Connectivity and App
Connect your smartphone to the dash cam via WiFi to manage recordings, download videos, and adjust settings remotely.
- Download App: Search for the official VISAUTO app on the App Store (iOS) or Google Play Store (Android).
- Enable WiFi: On the dash cam, navigate to settings and enable WiFi. The screen will display the WiFi network name (SSID) and password.
- Connect Phone: On your smartphone, go to WiFi settings, find the dash cam's network, and enter the password to connect.
- Use App: Open the VISAUTO app. You can now view live footage, download videos, change settings, and share content.
5. Key Features
5.1 Dual High-Definition Cameras
The M10 features a 2.5K Ultra HD (2560x1440) front camera and a 1080p rear camera, providing clear and detailed recordings of both the road ahead and behind your vehicle. Enhanced with WDR (Wide Dynamic Range) technology and improved night vision, it captures crucial details in various lighting conditions, day or night.

Image: Dual 2.5K Front and 1080p Rear Recording.
5.2 Super Night Vision
Equipped with advanced night vision technology, the M10 ensures clear recordings even in low-light environments, guaranteeing impeccable video footage during nighttime or rainy conditions. Features like WDR and anti-glare help minimize blind spots and improve visibility.
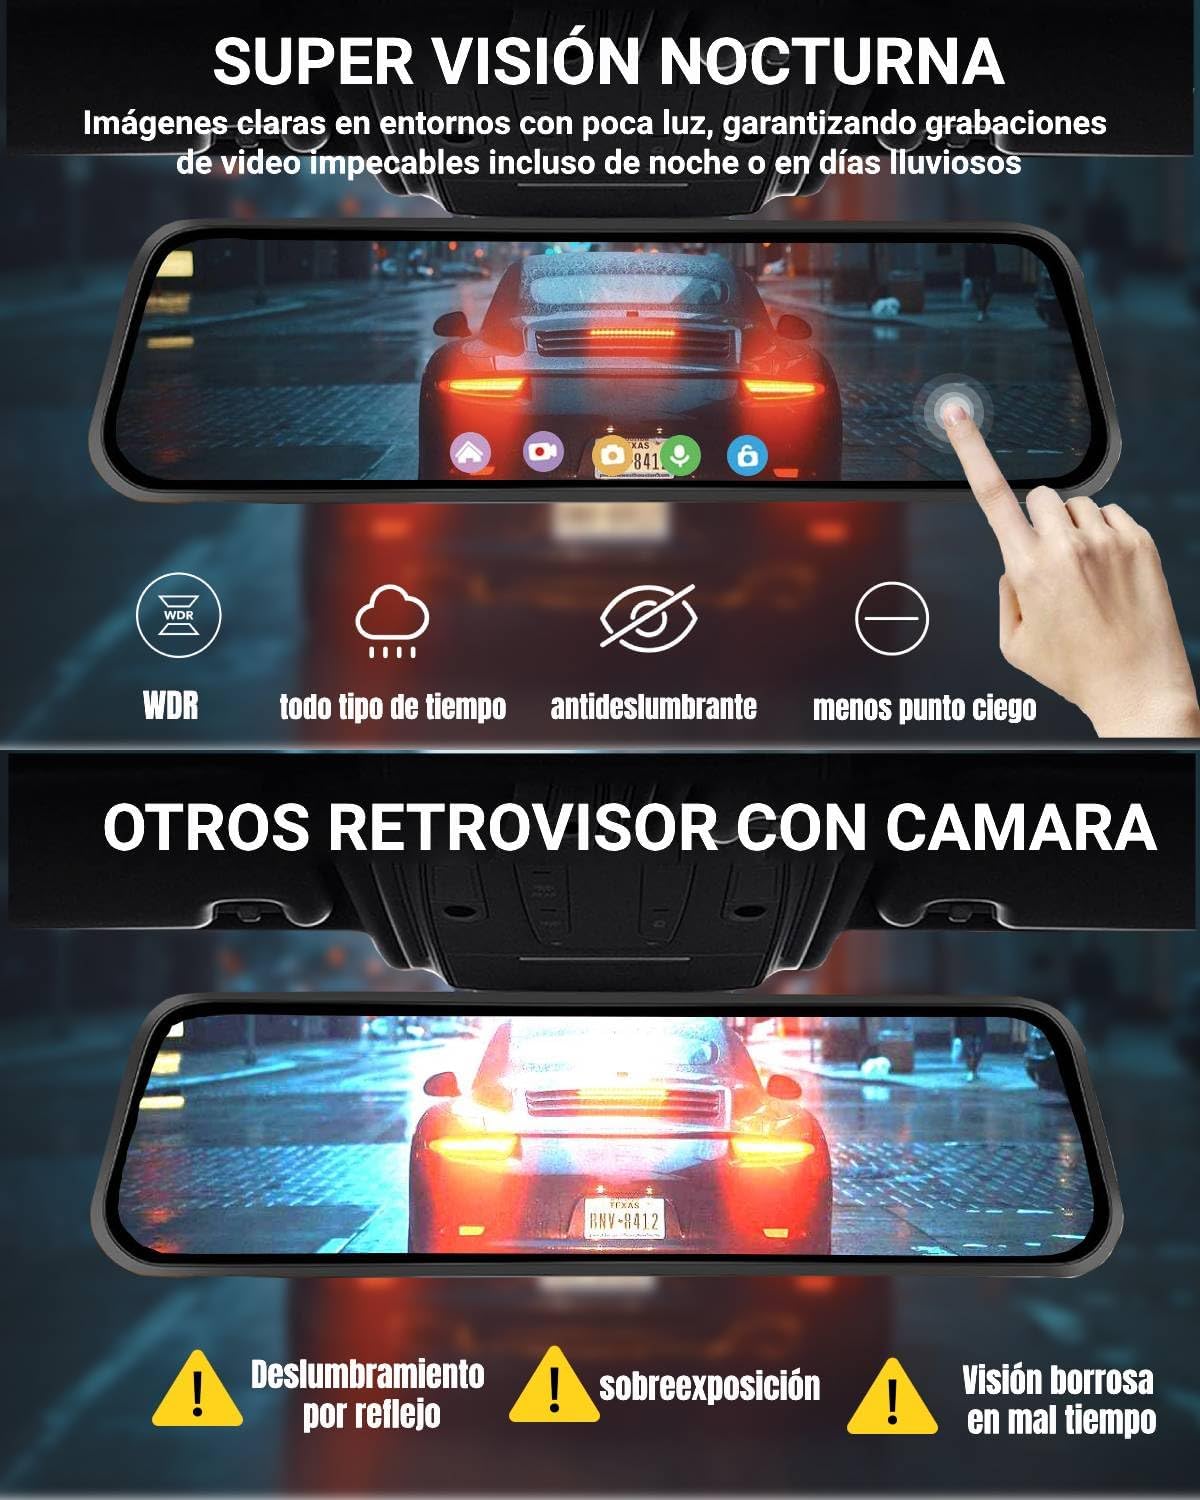
Image: Super Night Vision capabilities.
5.3 Advanced Driver-Assistance Systems (ADAS)
The M10 integrates a cutting-edge chip to provide voice alerts for critical situations, enhancing driving safety:
- ADAS (Advanced Driving Assistance System): Helps perceive the environment in front of the vehicle and provides information to the driver.
- BSD (Blind Spot Detection): Warns the driver of objects in the vehicle's rear blind spot area.
- LCA (Lane Change Assist): Alerts the driver of vehicles approaching in adjacent lanes, assisting with safe lane changes.
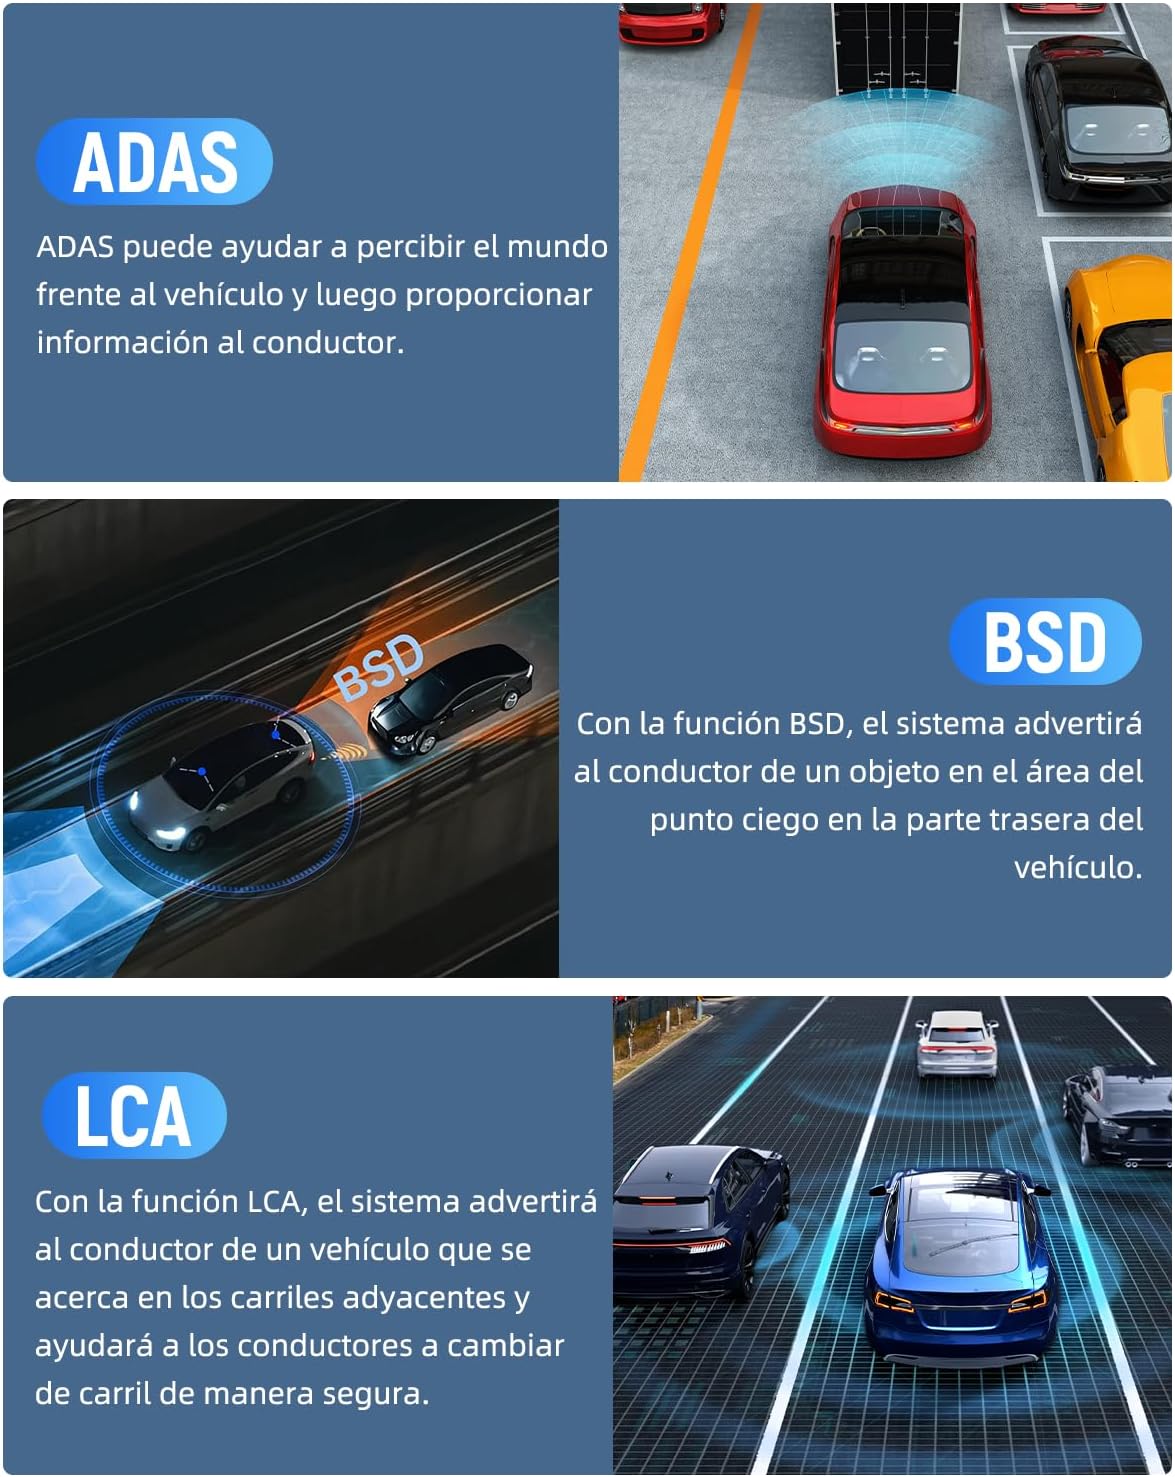
Image: ADAS, BSD, and LCA intelligent features.
5.4 24/7 Parking Monitor & G-Sensor
With the parking monitor function (requires optional hardwire kit ASIN: B0DZGR77XR), the dash cam provides continuous surveillance, protecting your car from theft and vandalism 24 hours a day. The built-in G-Sensor automatically detects sudden shakes or collisions and locks the current video footage to prevent it from being overwritten, ensuring important evidence is secured.

Image: 24-hour parking monitor, G-Sensor, and loop recording.
5.5 Integrated GPS
The always-active GPS module records your driving route, speed, and location data. This information can be viewed and analyzed using the dedicated player software on your computer (compatible with macOS and Windows), providing a comprehensive record of your travels.

Image: Integrated GPS tracking.
5.6 Reverse Assist
When the rear camera is properly connected to your vehicle's reverse light, the dash cam mirror will automatically display a real-time, wide-angle view of the area behind your vehicle with parking guidelines, making parking and reversing safer and easier.

Image: HD 1080 Rear Camera with reverse assist.
6. Maintenance
- Clean Lenses and Screen: Regularly clean the front and rear camera lenses, as well as the touchscreen, with a soft, lint-free cloth. Avoid abrasive cleaners that could scratch the surfaces.
- Format MicroSD Card: It is recommended to format the MicroSD card every 2-4 weeks to ensure stable recording performance and prevent data corruption. This can usually be done through the dash cam's settings menu.
- Check Connections: Periodically check all cable connections (power, rear camera, GPS) to ensure they are secure and free from damage.
- Firmware Updates: Check the official VISAUTO website or app for any available firmware updates. Keeping your device's firmware up-to-date can improve performance and add new features.
7. Troubleshooting
| Problem | Possible Cause | Solution |
|---|---|---|
| Device does not power on. | No power supply; loose connection. | Ensure the car charger is securely plugged into the cigarette lighter and the dash cam. Check vehicle's cigarette lighter fuse. |
| Recording stops or freezes. | SD card full; faulty SD card; low power. | Format the MicroSD card. Try a new, high-speed (Class 10 or U3) MicroSD card. Ensure stable power supply. |
| Video quality is poor/blurry. | Protective film on lens; dirty lens; incorrect resolution setting. | Remove any protective film from lenses. Clean lenses with a soft cloth. Check video resolution settings in the menu. |
| GPS signal is weak or not found. | GPS module obstructed; poor satellite reception. | Ensure the GPS module has a clear view of the sky (e.g., on the dashboard). Avoid placing it under metallic tints or near other electronic devices. |
| Voice control not responding. | Incorrect command; language setting. | Speak clearly and use the exact commands listed in the manual (English only). Ensure the microphone is not obstructed. |
| Rear camera not displaying. | Loose connection; faulty camera/cable. | Check the rear camera cable connection to the dash cam. Ensure the cable is not damaged. |
8. Specifications
| Feature | Detail |
|---|---|
| Brand | VISAUTO |
| Model Name | M10 |
| Front Camera Resolution | 2.5K Ultra HD (2560x1440) |
| Rear Camera Resolution | 1080P |
| Display Size | 10 inches IPS Touchscreen |
| Included Memory Card | 32 GB MicroSD Card |
| Special Features | Motion Detection, G-Sensor, Loop Recording, Parking Monitoring (requires additional hardwire kit), Voice Control, Touchscreen, App Control, Blind Spot Detection, Automatic Incident Detection, Night Vision, Built-in WiFi |
| Mounting Type | Rearview Mirror Mount |
| Real View Angle | 170 Degrees (approx.) |
| Product Dimensions | 5 x 25 x 5 cm; 1.02 kg |
| Power Source | Vehicle's cigarette lighter socket (no internal battery) |
9. Warranty and Support
VISAUTO provides responsive technical support for any questions or issues you may encounter with your M10 Dash Cam Mirror. Please refer to the contact information provided on the product packaging or the official VISAUTO website for assistance.
For warranty details, please retain your proof of purchase. The warranty typically covers manufacturing defects. Damage caused by improper installation, misuse, or unauthorized modifications is not covered.