1. Introduction
Thank you for choosing the XAXAX Portable Bag Closer Sewing Machine GK9 370. This manual provides essential information for the safe and efficient operation, setup, maintenance, and troubleshooting of your new machine. Please read this manual thoroughly before operating the machine and keep it for future reference.
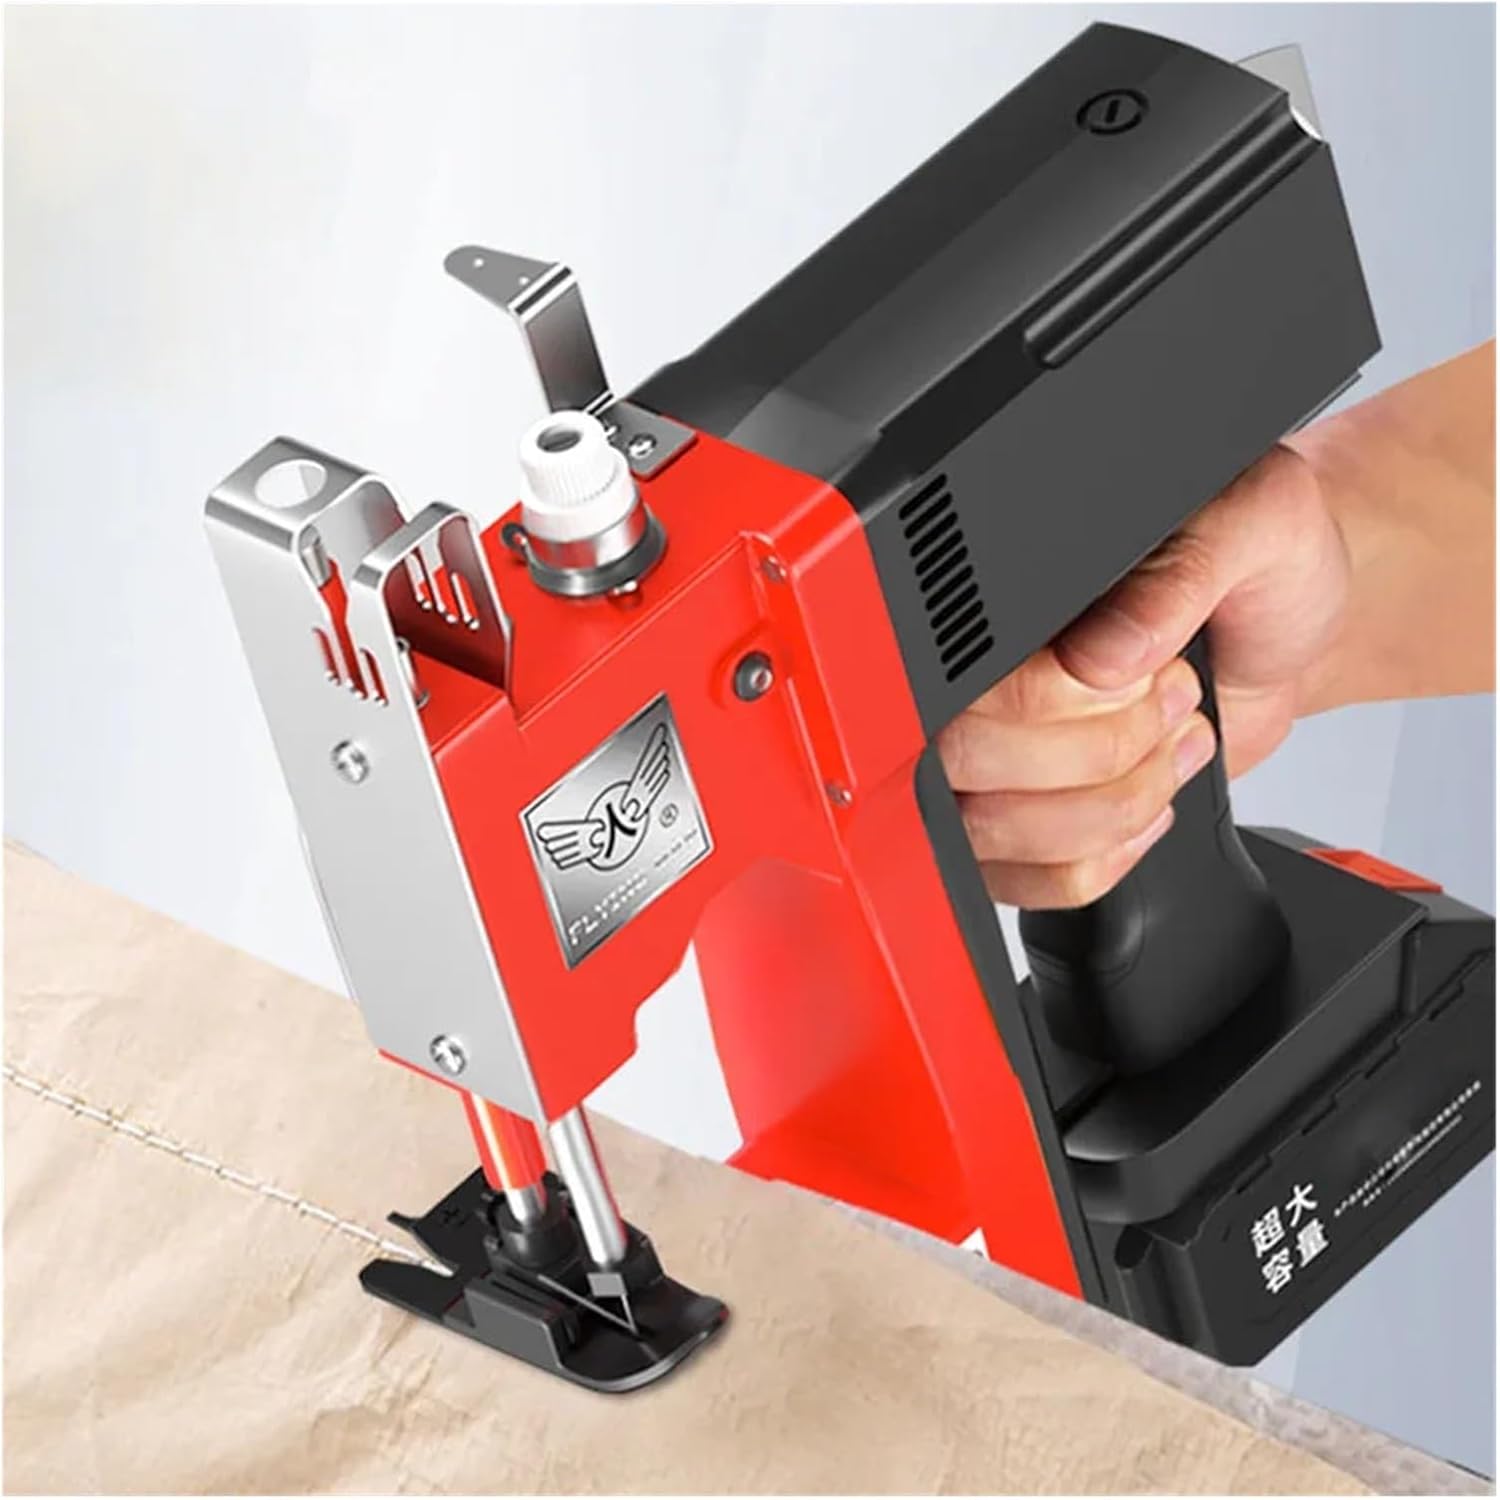
This portable electric packaging machine is designed for closing various types of bags, including agricultural textile bags, woven bags, and other packaging materials, offering a single-line chain stitch.
2. Safety Instructions
- Always wear appropriate personal protective equipment, such as safety glasses, when operating the machine.
- Ensure the power supply matches the machine's requirements (210W, specific voltage as per model variant).
- Keep hands and loose clothing away from moving parts, especially the needle and looper area, during operation.
- Disconnect the power before performing any maintenance, cleaning, or when changing needles.
- Do not operate the machine in wet or damp conditions.
- Keep the work area clean and well-lit.
- Store the machine in a dry, secure place when not in use, out of reach of children.
- Only use genuine XAXAX replacement parts and accessories.
3. Package Contents
Upon unpacking, please verify that all items listed below are present and undamaged. If any items are missing or damaged, contact your supplier immediately.
- XAXAX Portable Bag Closer Sewing Machine (GK9 370)
- Power Cord (for plug-in models) or Battery/Charger (for cordless models)
- Needles (spare set)
- Thread (starter spools)
- Lubricating Oil Bottle
- Drive Belt (spare)
- Wrench and Hex Keys (for adjustments)
- Instruction Manual

4. Product Overview
The XAXAX GK9 370 is a robust and efficient portable sewing machine designed for industrial bag closing applications. It features a durable aviation aluminum casing and a powerful pure copper motor for reliable performance.

5. Setup
5.1. Threading the Machine
- Place the thread spool on the spool pin.
- Guide the thread through the tension discs. Ensure the thread is properly seated to maintain consistent tension.
- Pass the thread through the thread guides, following the numbered path indicated on the machine (if applicable).
- Thread the needle from front to back.
- Pull approximately 6 inches of thread through the needle eye.
5.2. Power Connection
- For plug-in models: Connect the power cord securely to the machine and then to a suitable electrical outlet.
- For cordless models: Ensure the battery is fully charged and securely inserted into the battery compartment.
6. Operating Instructions
6.1. Preparing for Sewing
- Ensure the machine is properly threaded and powered on.
- Adjust the stitch length if necessary (refer to specific machine controls).
- Position the bag opening evenly under the presser foot.
6.2. Sewing Process
- Gently press the trigger or power button to start the machine.
- Guide the bag smoothly through the machine, maintaining a steady pace. The machine will automatically form a single-line chain stitch.
- Continue sewing until the bag opening is completely sealed.
- Release the trigger/power button to stop the machine.
- Carefully lift the presser foot and remove the sealed bag. Cut the thread, leaving a short tail.

7. Maintenance
7.1. Cleaning
- Regularly clean lint and dust from the needle plate, feed dogs, and looper area using a small brush or compressed air.
- Wipe the exterior of the machine with a soft, dry cloth. Do not use harsh chemicals or solvents.
7.2. Lubrication
- Apply a few drops of sewing machine oil to designated lubrication points (e.g., needle bar, looper mechanism) as indicated in the machine's specific diagrams (if provided).
- Lubricate regularly, especially after extended periods of use, to ensure smooth operation and prevent wear.
7.3. Needle Replacement
- Turn off and unplug the machine.
- Loosen the needle clamp screw with the provided wrench.
- Remove the old needle and insert a new one, ensuring the flat side of the needle faces the correct direction (usually away from the operator).
- Tighten the needle clamp screw securely.
8. Troubleshooting
Refer to the table below for common issues and their solutions. If the problem persists, contact customer support.
| Problem | Possible Cause | Solution |
|---|---|---|
| Machine not starting | No power, loose connection, battery low | Check power cord/outlet, charge battery, ensure connections are secure. |
| Skipped stitches | Incorrect threading, bent needle, wrong needle type | Re-thread machine, replace needle, ensure correct needle for material. |
| Thread breakage | High tension, poor quality thread, burr on thread path, damaged needle | Adjust tension, use quality thread, check thread path for obstructions, replace needle. |
| Machine runs slowly/jammed | Lack of lubrication, lint buildup, foreign object | Lubricate moving parts, clean thoroughly, remove any obstructions. |
9. Specifications
| Feature | Specification |
|---|---|
| Product Name | Portable Electric Packaging Machine |
| Brand | XAXAX |
| Model Number | GK9 370 (Item Model Number: 1005005927578076) |
| Product Casing | Aviation Aluminum Material |
| Stitch Type | Single Line Chain Type |
| Product Power | 210W |
| Product Weight | 3.5 KG (7.7 lbs) |
| Item Weight (Shipping) | 1.76 ounces (50 Grams) - Note: This may refer to a component or packaging, not the full machine. |
| Dimensions (Package) | 1.18 x 0.79 x 0.39 inches - Note: This likely refers to a small accessory package, not the machine itself. |
10. Warranty and Support
For warranty information, please refer to the documentation provided at the time of purchase or contact your retailer. XAXAX is committed to providing quality products and customer satisfaction. If you encounter any issues or require technical assistance, please contact XAXAX customer support through the contact information provided with your purchase or on the official XAXAX website.