
Introduction
This manual provides instructions for the Taylor Multi-Functional Device, which integrates a weather station, alarm clock, and phone charger with an external sensor. Please read this manual thoroughly before use to ensure proper operation and longevity of your device.
Key Features
- All-in-One Weather Station: Displays indoor & outdoor temperature, humidity, and weather forecast.
- Wireless Phone Charging: Built-in charging pad for convenient overnight charging.
- Multi-Function Alarm Clock: Features a digital clock with alarm and snooze function.
- External Sensor Included: Accurately monitors outdoor conditions and transmits real-time data.
- Easy-to-Read LCD Display: Large screen with backlight for clear visibility day or night.

Image: The main unit and wireless sensor displaying various weather and time information. The main unit shows indoor temperature (70.5°F), humidity (41%), forecast (partly cloudy), outdoor temperature (55.5°F), humidity (37%), time (11:43 AM), and date (5/29 WE). The wireless sensor shows 74.4°F and 43% humidity.
Setup Instructions
1. Unpacking and Placement
Carefully remove all components from the packaging. Place the main unit on a flat, stable surface indoors, away from direct sunlight or heat sources. The external sensor should be placed outdoors in a shaded area, protected from direct rain and sunlight, for accurate readings. Ensure the sensor is within the wireless transmission range of the main unit.

Image: The main unit and wireless sensor positioned on a wooden table, demonstrating typical indoor placement near plants.
2. Powering the Device
Insert the required batteries into both the main unit and the external sensor. Ensure correct polarity. The main unit can also be powered via the included USB cable for continuous operation and wireless charging functionality.
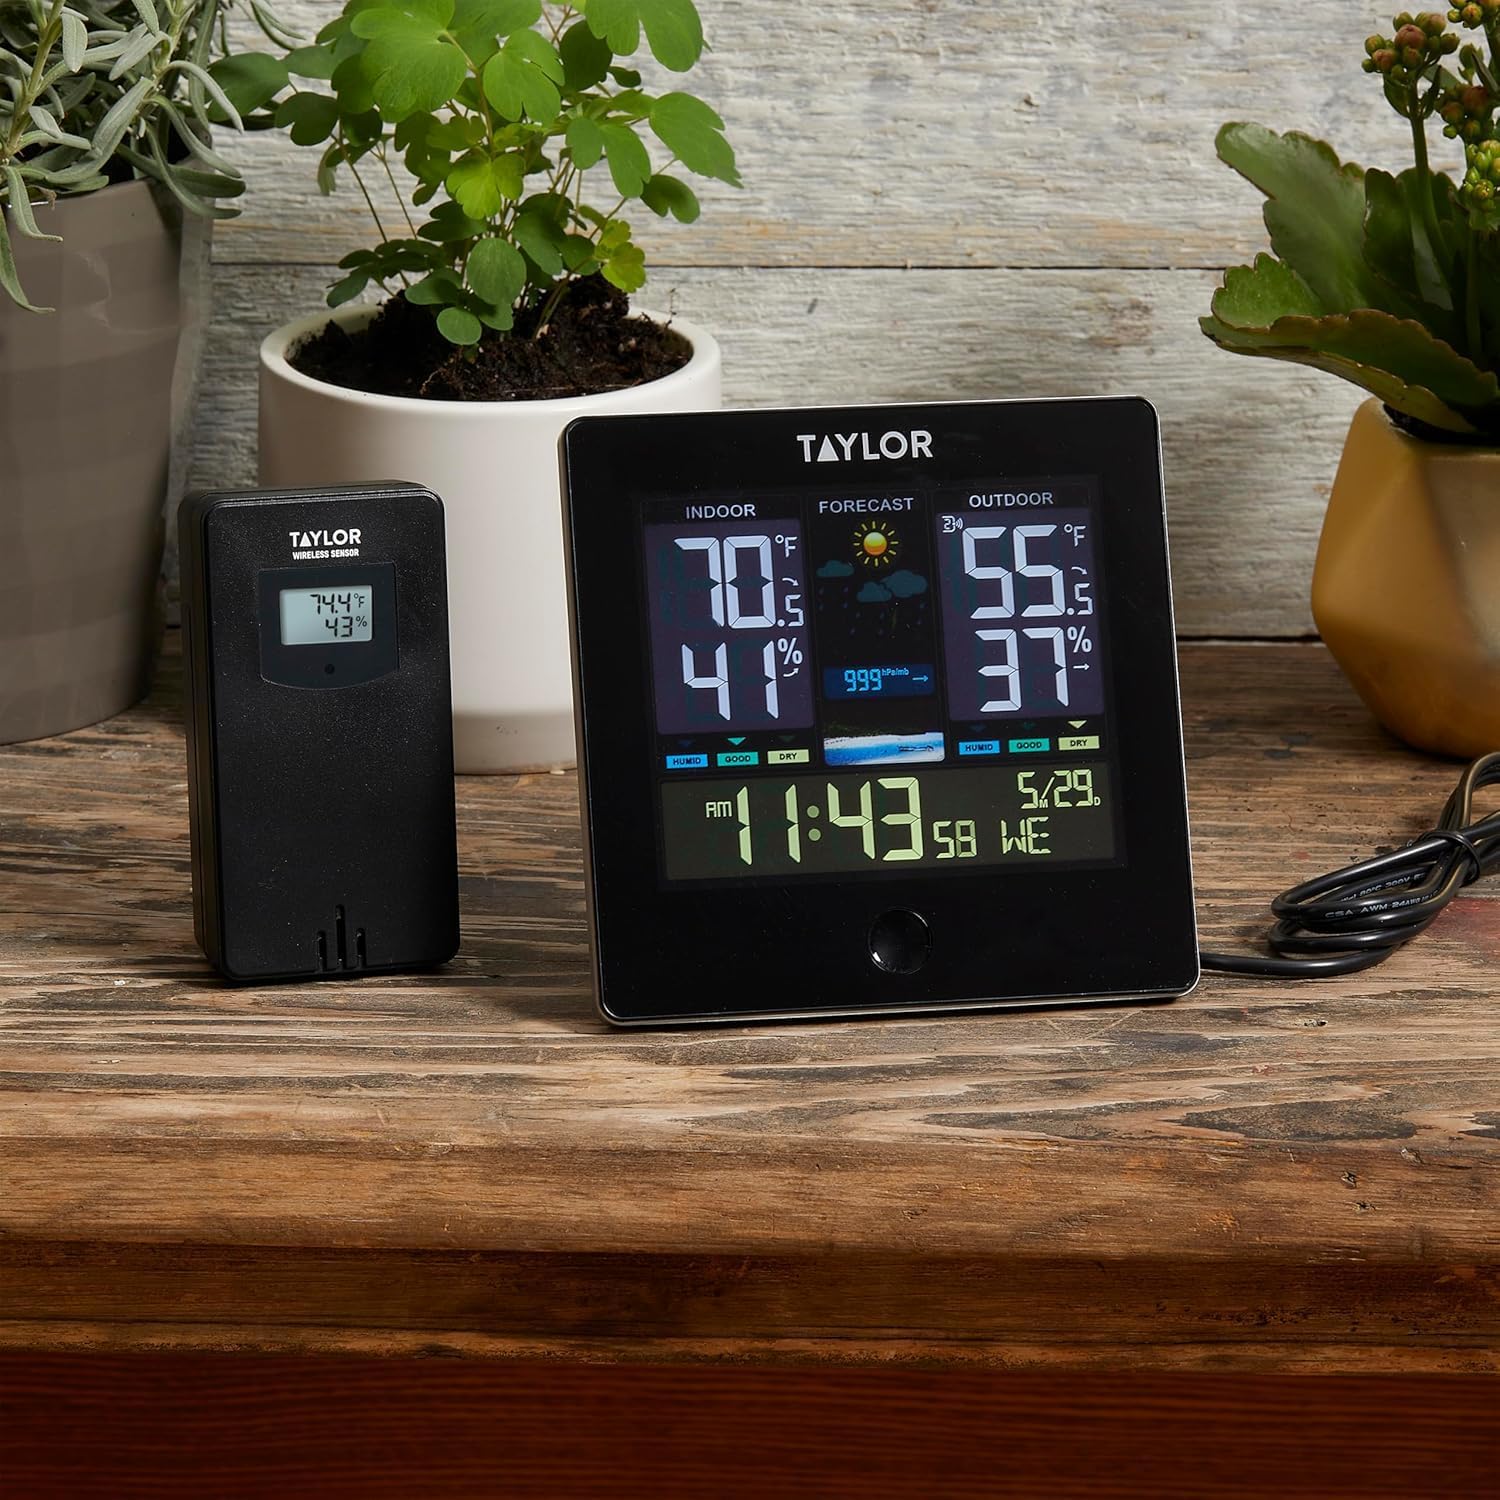
Image: A close-up view of the main unit and wireless sensor, highlighting the USB power connection for the main unit.
3. Sensor Pairing
The main unit and external sensor should automatically pair upon powering on. If pairing does not occur, refer to the "Troubleshooting" section for manual pairing instructions.

Image: An illustration showing the wireless connection between the indoor station (main unit) and the outdoor remote sensor, emphasizing wireless data transmission.
Operating Instructions
1. Time and Date Setting
Use the "SET" button to enter time setting mode. Use the "UP" and "DOWN" buttons to adjust values. Press "SET" again to confirm each setting (hour, minute, year, month, day).
2. Temperature Unit Selection (°C/°F)
Press the "°C/°F" button to toggle between Celsius and Fahrenheit temperature displays.
3. Alarm Setting
Press the "ALARM" button to view the current alarm time. Press and hold "ALARM" to enter alarm setting mode. Use "UP" and "DOWN" to adjust the alarm hour and minute. Press "ALARM" to confirm.
4. Wireless Charging
Place your Qi-compatible smartphone on the designated wireless charging pad on the top of the main unit. The charging indicator will illuminate to confirm charging is active.
5. Weather Forecast
The device automatically calculates and displays a weather forecast based on barometric pressure changes. This forecast is an estimation and may not always match local weather reports.
Maintenance
- Cleaning: Wipe the device with a soft, dry cloth. Do not use abrasive cleaners or solvents.
- Battery Replacement: Replace batteries in both the main unit and external sensor when the low battery indicator appears on the display.
- Storage: If storing the device for an extended period, remove all batteries to prevent leakage.
Troubleshooting
No Outdoor Temperature Reading:
- Ensure the external sensor batteries are correctly installed and not depleted.
- Verify the sensor is within range (up to 100m in open air) and not obstructed by thick walls or metal objects.
- To re-pair: Remove batteries from both units, wait 1 minute, then reinsert batteries into the sensor first, then the main unit. The main unit should search for the sensor.
Inaccurate Readings:
- Ensure the external sensor is placed in a shaded, well-ventilated area, away from direct sunlight, heat sources, or reflective surfaces.
- Allow up to 30 minutes for readings to stabilize after initial setup or battery replacement.
Wireless Charging Not Working:
- Confirm your smartphone is Qi-compatible.
- Ensure the main unit is powered via the USB cable, not just batteries.
- Remove any thick phone cases that might interfere with wireless charging.
- Center the phone properly on the charging pad.
Video: This video demonstrates how to set up a weather station, including button functions for changing units, viewing min/max values, and re-pairing the sensor. While not the exact model, the principles for setting up a weather station are similar and can be helpful for general understanding.
Video: This video illustrates the basic functions and setup of an indoor/outdoor thermometer, including temperature display and time setting. It provides a visual guide to common weather station operations.
Video: This video showcases the features of a wireless indoor/outdoor weather station, demonstrating its display and the interaction between the main unit and the external sensor. It can assist in understanding the device's capabilities.
Specifications
| Feature | Detail |
|---|---|
| Brand | Taylor |
| Model Number | TY9927BCAN |
| Material | Plastic |
| Color | Black |
| Power Source | Batteries (not included) and USB cable (for main unit) |
| Wireless Range | Up to 100m (330ft) in open air |
| Temperature Range (Indoor) | -9.9°C to 50°C (14.2°F to 122°F) |
| Temperature Range (Outdoor) | -40°C to 70°C (-40°F to 158°F) |
| Humidity Range | 1-99% RH |
| Wireless Charging | Qi-compatible |

Image: Diagram showing the dimensions of the main unit and the wireless sensor. The main unit measures 4.72 inches by 4.72 inches. The wireless sensor measures 1.95 inches by 3.77 inches.
Warranty and Support
For warranty information and customer support, please refer to the contact details provided on the product packaging or the manufacturer's official website. Keep your purchase receipt for warranty claims.