1. Introduction
The WGRLIT Digital Radon Detector (Model SA-010) is designed to provide precise measurements of radon levels in your environment. Radon is a naturally occurring radioactive gas that can accumulate in homes and offices, posing health risks. This device offers continuous monitoring with clear, easy-to-read results, empowering you to make informed decisions about your indoor air quality.
2. Product Overview
The WGRLIT Digital Radon Detector features a compact, user-friendly design with an HD LCD display for real-time data. It is equipped with a long-lasting rechargeable battery and a new generation sensor for reliable performance.

Figure 1: WGRLIT Digital Radon Detector with key components labeled. Dimensions are approximately 9.3 cm (width) x 8 cm (height) x 3.2 cm (depth).
Key Components:
- HD LCD Display: Shows radon concentration data.
- 'CHECK' Button: Used for specific functions (refer to operation section).
- ON/OFF Button: Powers the device on or off.
- LED Indicator: Provides visual status updates.
- 'MODE' Button: Toggles between display modes or settings.
- Type-C Charging Port: For recharging the internal battery.
- Air Inlet: Where air samples are drawn into the sensor.
- 'RESET' Button: Resets measurements or settings.
3. Package Contents
Upon opening your WGRLIT Digital Radon Detector package, please ensure all the following items are present:
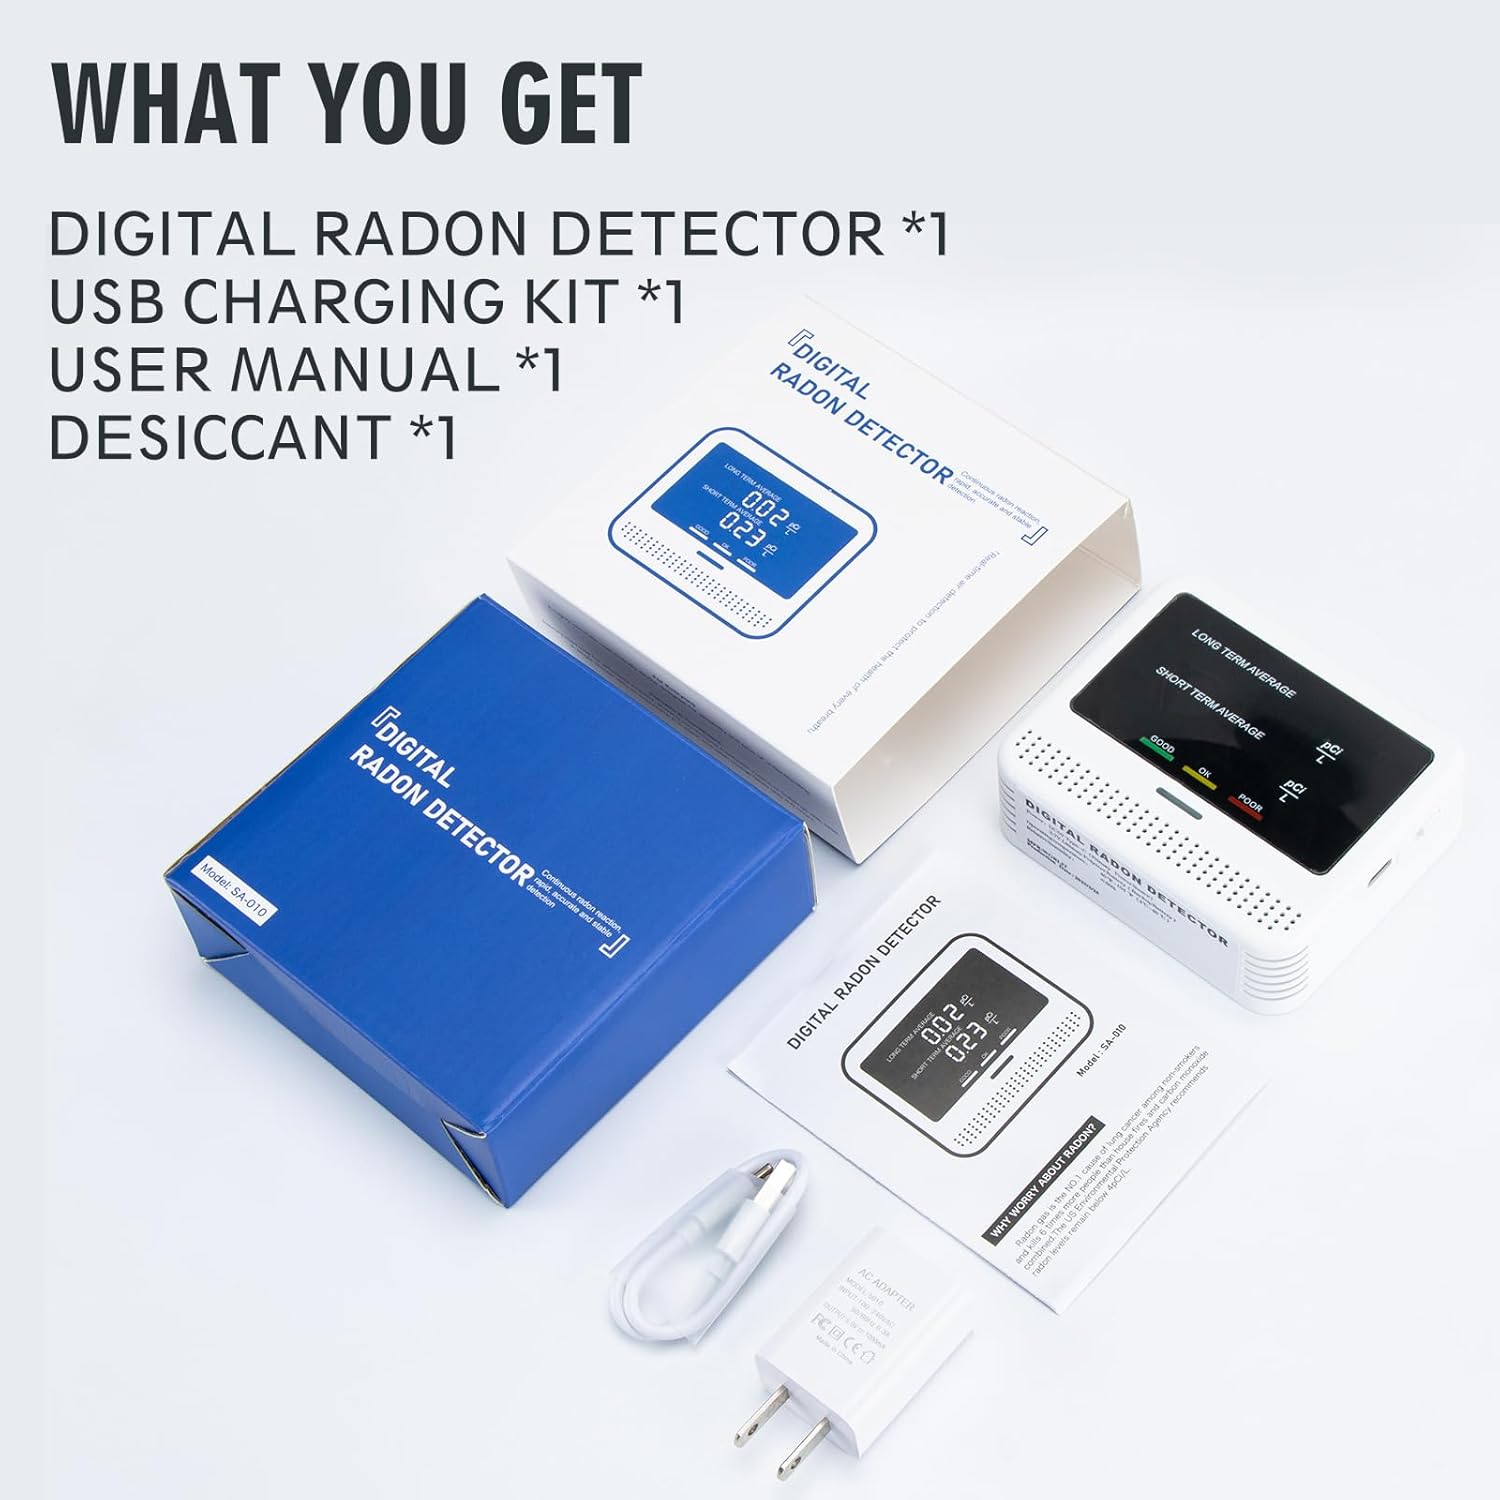
Figure 2: The package includes the Digital Radon Detector, USB charging kit, user manual, and a desiccant packet.
- Digital Radon Detector (Model SA-010) x 1
- USB Charging Kit x 1
- User Manual x 1
- Desiccant x 1
4. Getting Started
4.1 Charging the Device
Before initial use, fully charge the detector. Connect the provided USB charging kit to the Type-C charging port on the device and a suitable power source. A full charge typically takes 4-6 hours and provides 2-3 years of continuous operation due to its low power consumption and automatic screen-sleep function.

Figure 3: The detector's built-in rechargeable lithium polymer battery lasts 2-3 years and recharges in 4-6 hours.
4.2 Initial Placement
For optimal accuracy, place the device in a dry, warm environment at least 50 cm (approximately 20 inches) above ground level. Avoid placing it near windows, vents, or areas with high airflow, as this can affect readings. Ensure the device remains still during operation.
4.3 Powering On and Preheating
Press the ON/OFF button to power on the device. Upon startup, the display will show 'CAL' (Calibration) and count up to a minimum of 50. During this period, the detector is in a self-test status for approximately 30 seconds, and the red and green indicator lights will flash alternately. This preheating phase is crucial for accurate sensor initialization.
5. Understanding the Display and Readings
The HD LCD display provides clear, real-time radon concentration data, including both long-term and short-term average readings.

Figure 4: The detector's display shows both Long Term and Short Term Average radon levels in pCi/L.
5.1 Long Term Average
This value represents the average radon measurement over an extended period, up to one year. It is updated once per day and is used to identify any potential long-term health risks associated with radon exposure.
5.2 Short Term Average
This value alternates between showing the average radon level over the last 24 hours (updated hourly) and over the last 7 days (updated daily). It helps in observing the immediate effects of measures taken to reduce radon levels or to identify short-term fluctuations.

Figure 5: Detailed explanation of Long Term and Short Term Average readings.
5.3 Indicator Lights
The detector features an indicator light that visually represents the radon concentration and potential danger range:

Figure 6: The indicator light changes color based on radon levels.
- Green Light: Indicates 'GOOD' radon levels (Less than 2 pCi/L).
- Yellow Light: Indicates 'OK' radon levels (Between 2 and 4 pCi/L).
- Red Light: Indicates 'POOR' radon levels (More than 4 pCi/L).
6. Operation
6.1 Automatic Screen-Sleep Function
To conserve battery life, the detector is designed with an automatic screen-sleep function. The screen will turn off after a period of inactivity, but the device continues to perform normal detection. Any button press will wake up the screen, allowing you to view the current readings.

Figure 7: The screen-sleep function allows for extended battery life while continuous detection occurs.
6.2 Using the Buttons
- ON/OFF: Press and hold to power the device on or off.
- CHECK: Press to view specific data points or confirm selections (refer to on-screen prompts).
- MODE: Press to cycle through different display modes or settings.
- RESET: Press and hold to reset the short-term or long-term average readings, or to factory reset the device (consult on-screen prompts for confirmation).
7. Tips for Accurate Measurement
To ensure the most accurate radon data from your detector, consider the following guidelines:

Figure 8: Recommendations for optimizing radon measurement accuracy.
- Prioritize Long-Term Monitoring: For optimal accuracy, long-term monitoring provides a more reliable assessment of average radon levels compared to short-term measurements.
- Optimal Placement: Position the device in dry, warm environments at least 50 cm (approximately 20 inches) above ground level.
- Maintain Stillness: Avoid moving the device or making physical contact during operation to ensure measurement integrity.
- Avoid Interference: Keep the detector away from electromagnetic interference sources such as microwaves, refrigerators, or large appliances.
- Suitable Environments: The detector is suitable for various indoor environments including living rooms, basements, offices, and classrooms.

Figure 9: Examples of suitable locations for the radon detector.
8. Maintenance
8.1 General Care
Keep the device clean and free from dust. Use a soft, dry cloth to wipe the exterior. Do not use abrasive cleaners or allow liquids to enter the device. Avoid dropping the detector or subjecting it to strong impacts.
8.2 Battery Life and Recharging
The built-in lithium polymer battery is designed for long endurance. Recharge the device when the battery indicator shows low power. Use only the provided charging kit or a compatible Type-C charger. Do not attempt to replace the internal battery yourself.
9. Troubleshooting
If you encounter issues with your WGRLIT Digital Radon Detector, please refer to the following common troubleshooting steps:
- Device Not Turning On: Ensure the device is fully charged. Connect it to the charger for at least 30 minutes before attempting to power it on again.
- No Readings Displayed: After powering on, the device undergoes a preheating phase ('CAL'). Wait for this process to complete. If no readings appear after several minutes, ensure the device is placed in an open area and not obstructed.
- Inconsistent or Unexpected Readings: Radon levels can fluctuate. Ensure the device is placed according to the 'Tips for Accurate Measurement' section. Avoid moving the device frequently. Allow sufficient time for long-term average readings to stabilize. If readings remain consistently unusual compared to known local data, try resetting the device (refer to 'Using the Buttons' section) and re-monitoring.
- Screen Not Waking Up: Press any button to wake the screen from its automatic sleep mode. If the screen remains unresponsive, try charging the device.
For persistent issues not resolved by these steps, please contact customer support.
10. Specifications
| Feature | Specification |
|---|---|
| Model Number | SA-010 |
| Brand | WGRLIT |
| Product Dimensions | 3.7"D x 1.2"W x 3.2"H (9.3cm x 3.2cm x 8cm) |
| Item Weight | 9.6 ounces |
| Power Source | Battery Powered (Rechargeable Lithium Ion) |
| Battery Life | 2-3 years on a 6-hour charge |
| Sensor Lifespan | 10 years |
| Display Type | HD LCD Display |
| Alarm Type | Visual (LED Indicator) |
| Operating Humidity | 10% - 95% |
| Upper Temperature Rating | 149 Degrees Fahrenheit (65 Degrees Celsius) |
| Material | ABS |
| Included Components | Radon Detector, Charging kit, User Manual |
11. Warranty and Support
For warranty information or technical support, please refer to the contact details provided with your purchase or visit the official WGRLIT website. Keep your purchase receipt as proof of purchase for any warranty claims.