VEGOOS AC341
VEGOOS Mini Smart Portable Projector AC341 User Manual
Model: AC341 | Brand: VEGOOS
1. Introduction
This manual provides essential instructions for the safe and efficient operation of your VEGOOS Mini Smart Portable Projector, model AC341. Please read this manual thoroughly before using the product and retain it for future reference.
2. Safety Information
- Do not look directly into the projector lens when the lamp is on.
- Ensure proper ventilation to prevent overheating. Do not block ventilation openings.
- Use only the power adapter provided with the projector.
- Keep the projector away from water, moisture, and extreme temperatures.
- Avoid placing the projector on unstable surfaces.
- Do not attempt to disassemble or repair the projector yourself. Contact qualified service personnel.
- Keep out of reach of children.
3. Package Contents
Verify that all items are present in your package:
- VEGOOS Mini Smart Portable Projector (Model AC341)
- Power Adapter
- HDMI Cable
- Remote Control
- User Manual
4. Product Overview
Familiarize yourself with the components of your projector.

Image 4.1: Front view of the VEGOOS Mini Smart Portable Projector AC341, showing the lens and main body.

Image 4.2: Side view of the projector highlighting the input/output ports: HDMI, USB, and 3.5mm audio jack.
4.1. Projector Components
- Projection Lens: Emits the image.
- Focus Sensor: Used for automatic focus adjustment.
- Power Button: Turns the projector on/off.
- HDMI Port: Connects to external devices like laptops, gaming consoles.
- USB Port: Connects to USB drives for media playback.
- 3.5mm Audio Jack: Connects to external speakers or headphones.
- Built-in Speakers: Dual speakers for audio output.
- Adjustable Stand: Allows for 0° to 180° projection angle adjustment.
5. Setup
5.1. Initial Power On
- Connect the power adapter to the projector and a power outlet.
- Press the power button to turn on the projector.
- The projector will boot up and display the main interface.
5.2. Adjusting Projection Angle
The projector features a 180° rotatable stand, allowing projection onto walls or ceilings.

Image 5.1: Demonstrates the projector's 180-degree rotation for flexible projection angles, including ceiling projection.
5.3. Automatic Focus and Keystone Correction
The projector supports automatic focus, automatic keystone correction, automatic obstacle avoidance, and automatic screen alignment. These features ensure a clear and properly shaped image.

Image 5.2: Visual representation of the projector's intelligent features including auto-focus, auto keystone correction, auto screen alignment, and auto obstacle avoidance.
If the automatic adjustment is not optimal due to an irregular or dirty projection surface, manual adjustment may be required using the remote control.
6. Operating Instructions
6.1. Navigation and Interface
The projector runs on Android 12, providing a user-friendly interface. Use the remote control to navigate through menus and select applications.
6.2. Screen Size Adjustment (Zoom)
Adjust the projection size from 50% to 100% using the zoom function on the remote control. The projector supports screen sizes up to 200 inches.

Image 6.1: Illustrates various projection sizes (58", 79", 200") at different distances, demonstrating the projector's scalability.
6.3. Media Playback
You can play media from various sources:
- USB Drive: Insert a USB drive into the USB port to access stored videos, photos, and music.
- Streaming Apps: Utilize pre-installed or downloaded Android apps like YouTube, Netflix, Prime Video for online content.
- External Devices: Connect laptops, gaming consoles (PS5), or Smart TVs via the HDMI port.
7. Connectivity
7.1. Wi-Fi Connection
The projector supports 2.4G/5G WiFi 6 for stable and fast internet access. Navigate to the settings menu to connect to your wireless network.

Image 7.1: Depicts the projector's support for both WiFi 6 and 5G WiFi, illustrating seamless wireless connectivity.
7.2. Bluetooth Connection
Connect Bluetooth speakers or headphones for enhanced audio. The projector features dual built-in speakers with Dolby sound support.
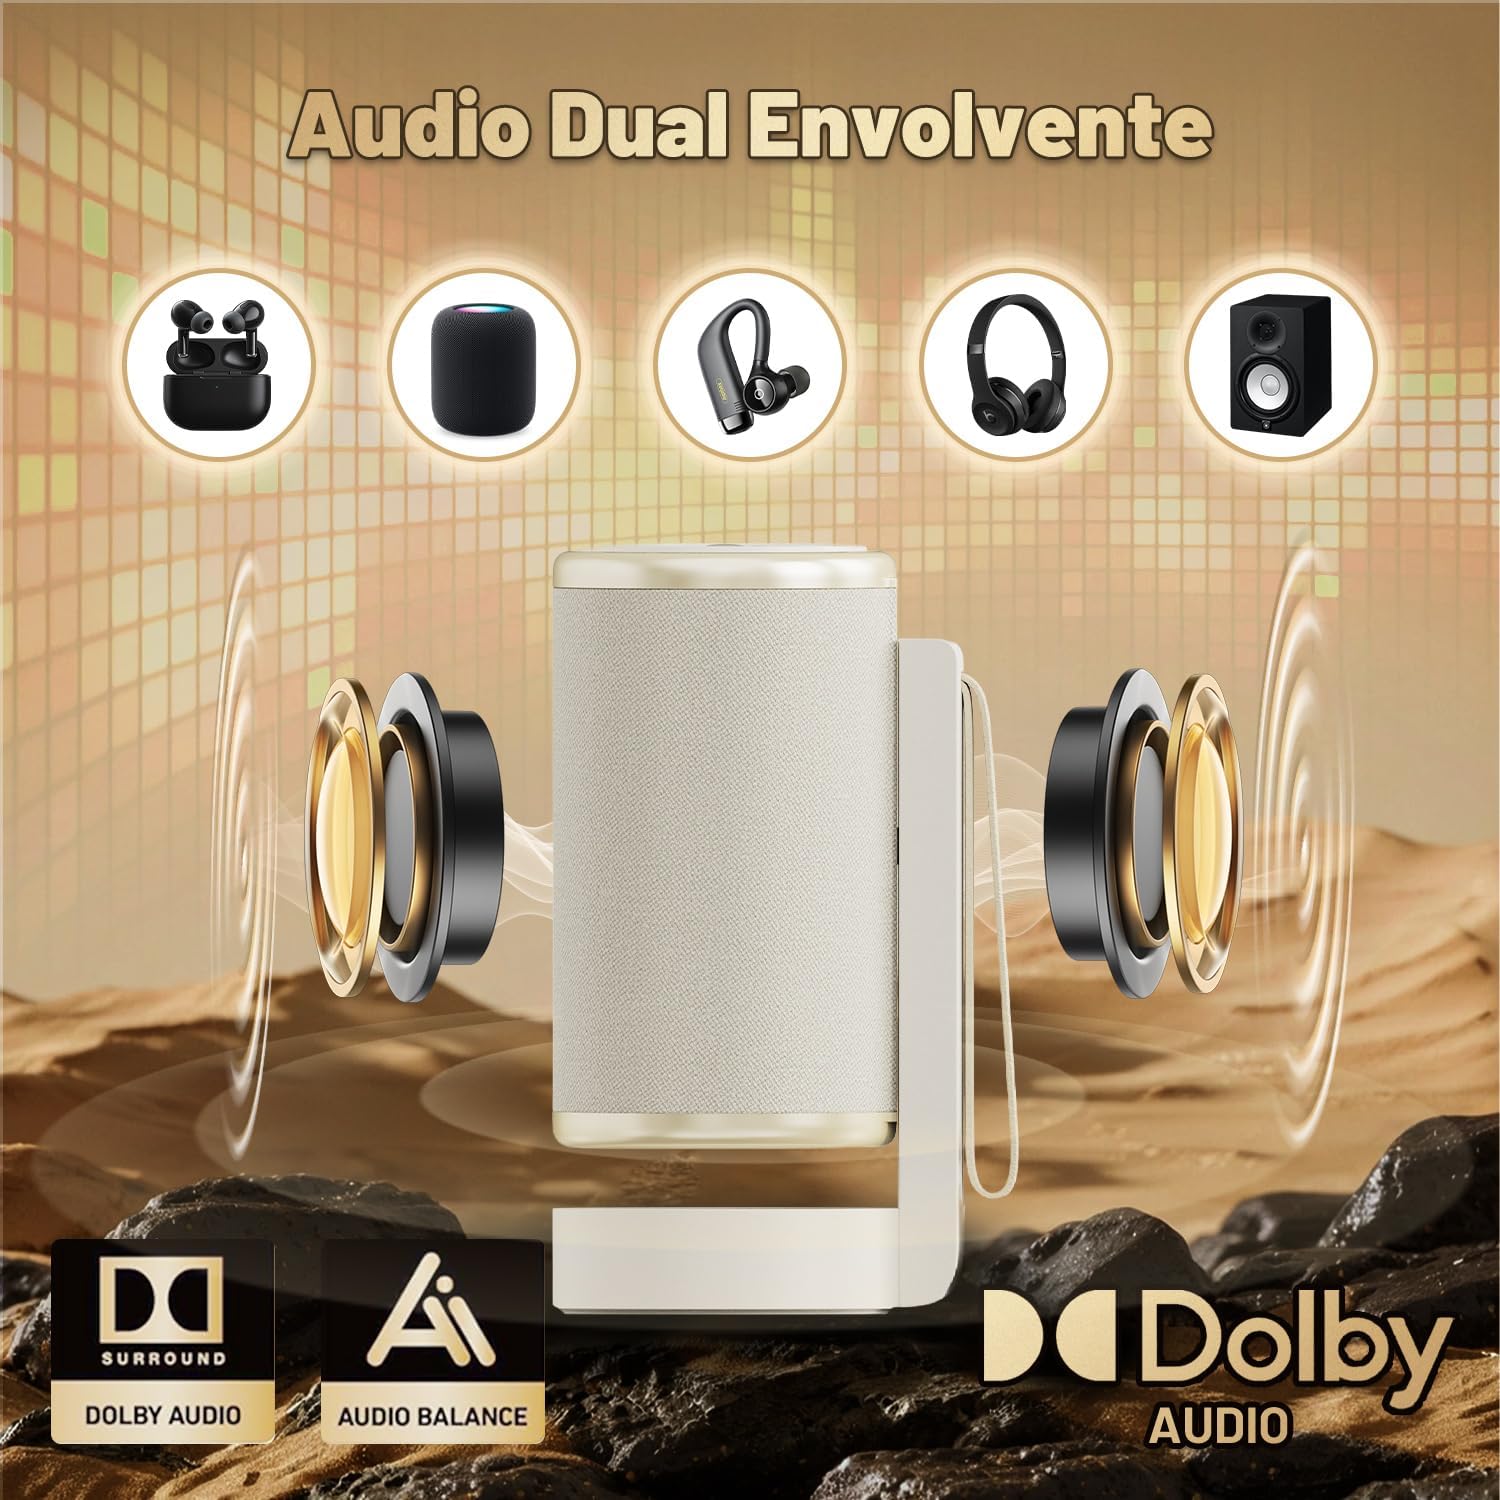
Image 7.2: Highlights the projector's dual surround sound audio capabilities and Dolby Audio support, showing various compatible audio devices.
7.3. Screen Mirroring (AirPlay/Screen Mirroring)
Mirror content from your smartphone (iOS/Android) or laptop wirelessly to the projector. Select the "Duplicate screen" option from the main menu.

Image 7.3: Shows a mobile phone screen being mirrored onto the projector, demonstrating wireless content sharing.
7.4. Wired Connections
The projector includes HDMI and USB ports for connecting various devices.
Image 7.4: Close-up of the projector's side panel, showing the HDMI, USB, and 3.5mm audio jack for wired connections.
- HDMI: Connect to devices such as laptops, game consoles (PS5), TV boxes, or DVD players.
- USB: Connect USB flash drives for direct media playback.
- 3.5mm Audio Jack: Connect external headphones or speakers.
8. Maintenance
8.1. Cleaning the Dust Filter
Regularly clean the dust filter to maintain optimal performance and prevent overheating.
- Ensure the projector is powered off and unplugged before cleaning.
- Locate the dust filter cover (usually at the back or side).
- Gently remove the dust filter.
- Clean the filter using a soft brush or compressed air.
- Reinsert the cleaned dust filter and secure the cover.

Image 8.1: Step-by-step guide on how to remove and clean the projector's dust filter for maintenance.
8.2. Lens Cleaning
Use a soft, lint-free cloth specifically designed for optical lenses to clean the projector lens. Do not use abrasive cleaners or harsh chemicals.
9. Troubleshooting
| Problem | Possible Cause | Solution |
|---|---|---|
| No image displayed | Power cable disconnected; incorrect input source; device not powered on. | Check power connection; select correct input source (HDMI, USB); ensure connected device is on. |
| Blurred image | Out of focus; incorrect keystone correction. | Use the remote control to adjust focus (manual or automatic); adjust keystone correction. |
| No sound | Volume too low; external speakers not connected; incorrect audio output selected. | Increase volume; connect external speakers if desired; check audio settings. |
| Cannot connect to Wi-Fi | Incorrect password; Wi-Fi signal too weak; router issue. | Verify Wi-Fi password; move projector closer to router; restart router. |
| Automatic adjustment not working | Obstacles near the projector; irregular or dirty projection surface. | Ensure no obstacles are blocking the projector's sensors; use a smooth, clean projection surface; perform manual adjustments if necessary. |
10. Specifications
| Feature | Detail |
|---|---|
| Brand | VEGOOS |
| Model Name | AC341 |
| Operating System | Android 12 |
| Display Technology | LCD |
| Native Resolution | 1920 x 1080 Pixels (1080P) |
| 4K Support | Yes |
| Brightness | 330 ANSI Lumens |
| Aspect Ratio | 16:9, 4:3 |
| Refresh Rate | 120 Hz |
| Connectivity | Bluetooth, Wi-Fi (2.4G/5G WiFi 6) |
| Hardware Interface | HDMI, USB, 3.5mm Audio Jack |
| Special Features | 3D Integrated, Auto Focus, Auto Keystone Correction, Auto Obstacle Avoidance, Auto Screen Alignment, 180° Rotatable Stand, Dual Speakers with Dolby Sound |
| Compatible Devices | Laptop, Mobile Phone, PC, PS5, Smart TV |
| Dimensions | 27.3 x 22.3 x 13.9 cm |
| Weight | 1.62 kg |
11. Warranty and Support
For warranty information, technical support, or customer service inquiries, please refer to the contact information provided with your purchase or visit the official VEGOOS website. Keep your proof of purchase for warranty claims.
Ask a question about this manual
Ask about setup, troubleshooting, compatibility, parts, safety, or missing instructions. Manuals+ will review the question and use this page’s manual context to help answer it.