Introduction
This manual provides essential information for the assembly, operation, and maintenance of your OLAKIDS Kids Bike. Please read these instructions carefully before assembly and use to ensure safe and proper functionality.
The OLAKIDS Kids Bike is designed for young riders, featuring a durable steel frame, adjustable seat and handlebar for growing children, and a dual braking system for enhanced safety. It includes a removable doll seat and a front basket for added enjoyment.

Image: The OLAKIDS Kids Bike in Lilac, 18 Inch size, with doll seat and front basket.
Safety Information
Always prioritize safety when riding the bike. Adult supervision is required. Ensure the rider wears a helmet and appropriate safety gear.
- Brake Check: Before each ride, verify that both the handbrake and coaster brake are functioning correctly.
- Tire Pressure: Check tire pressure regularly. Refer to the tire sidewall for recommended pressure.
- Loose Parts: Periodically inspect all nuts, bolts, and quick-release levers to ensure they are securely tightened.
- Chain Guard: The fully enclosed chain guard helps prevent clothing from getting caught and protects against chain contact. Ensure it is always in place and undamaged.
- Rider Height: Adjust the seat and handlebar height so the rider can comfortably reach the ground with their toes and maintain proper posture.

Image: Close-up of the dual braking system, showing the handbrake lever and the coaster brake mechanism.
Package Contents
Your OLAKIDS Kids Bike package includes the following components. Most of the bike is pre-assembled (approximately 85%).
- Bike Frame (with rear wheel and chain guard pre-assembled)
- Front Wheel
- Handlebar Assembly
- Seat Post with Saddle
- Pedals (Left and Right)
- Training Wheels (2)
- Doll Seat
- Front Basket
- Front and Rear Reflectors
- Assembly Tools (wrenches, hex key)
- Streamers

Image: All components of the OLAKIDS Kids Bike laid out, showing the main frame, wheels, seat, handlebars, pedals, doll seat, and basket.
Setup and Assembly
Follow these steps to complete the assembly of your OLAKIDS Kids Bike. Refer to the assembly video for visual guidance.
Video: Detailed assembly instructions for the OLAKIDS Kids Bike.
- Install Front Wheel:
Remove the protective caps and nuts from the front wheel axle. Align the front wheel with the fork, ensuring the axle sits correctly in the dropouts. Secure with the nuts using the provided wrench. (Refer to video: 0:12 - 0:40) - Adjust Front Brake:
Once the front wheel is installed, adjust the front caliper brake. Ensure the brake pads are evenly spaced from the rim and engage smoothly when the handbrake lever is squeezed. Tighten the brake cable anchor bolt. (Refer to video: 0:43 - 0:59) - Install Training Wheels:
Remove the nuts from the rear wheel axle. Slide the training wheel brackets onto the axle, ensuring they are positioned correctly. Re-secure the nuts, tightening them firmly to prevent wobbling. (Refer to video: 1:02 - 1:27)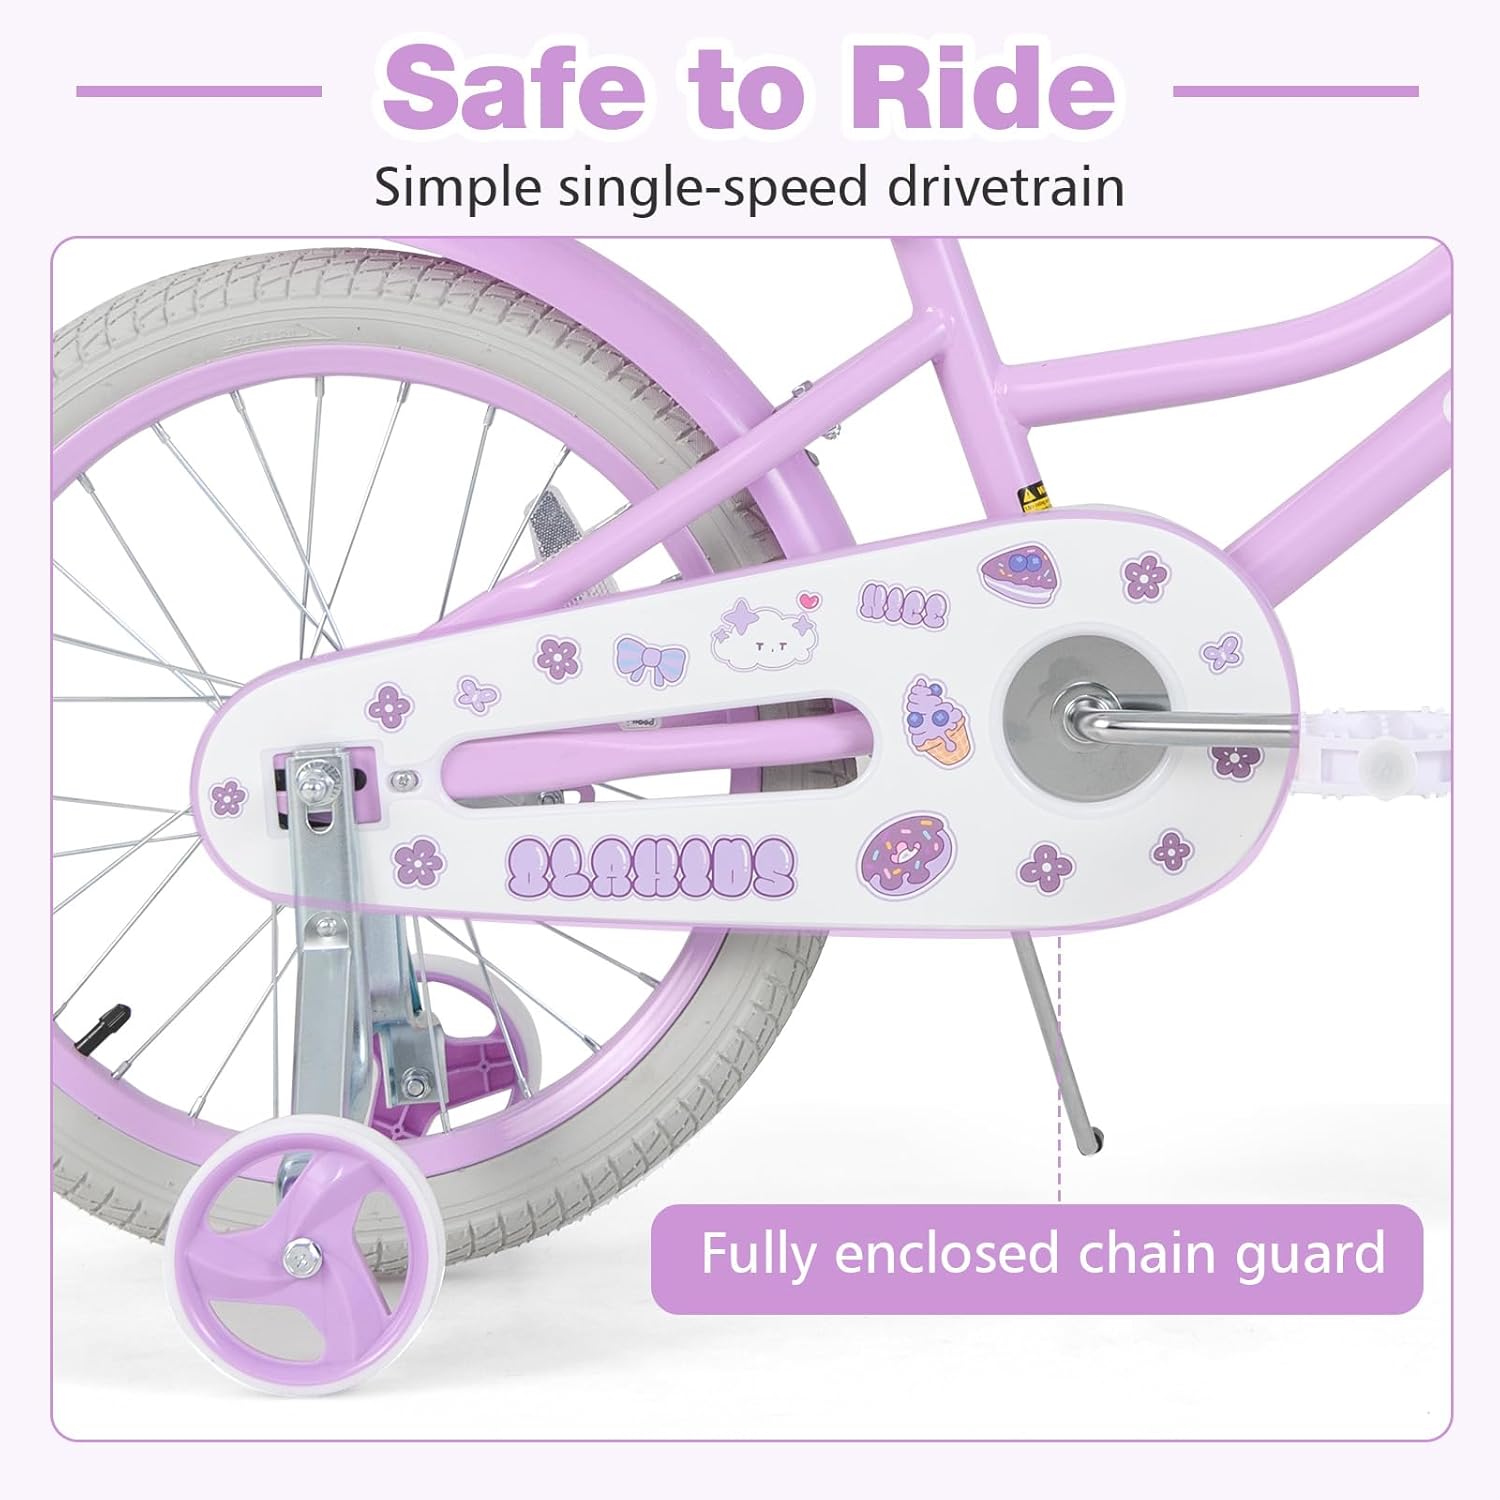
Image: The OLAKIDS Kids Bike with training wheels installed, highlighting the stable structure.
- Install Doll Seat:
Attach the metal bracket to the doll seat using the provided screws and hex key. Then, slide the assembled doll seat onto the rear of the seat post and secure it. (Refer to video: 1:33 - 2:05)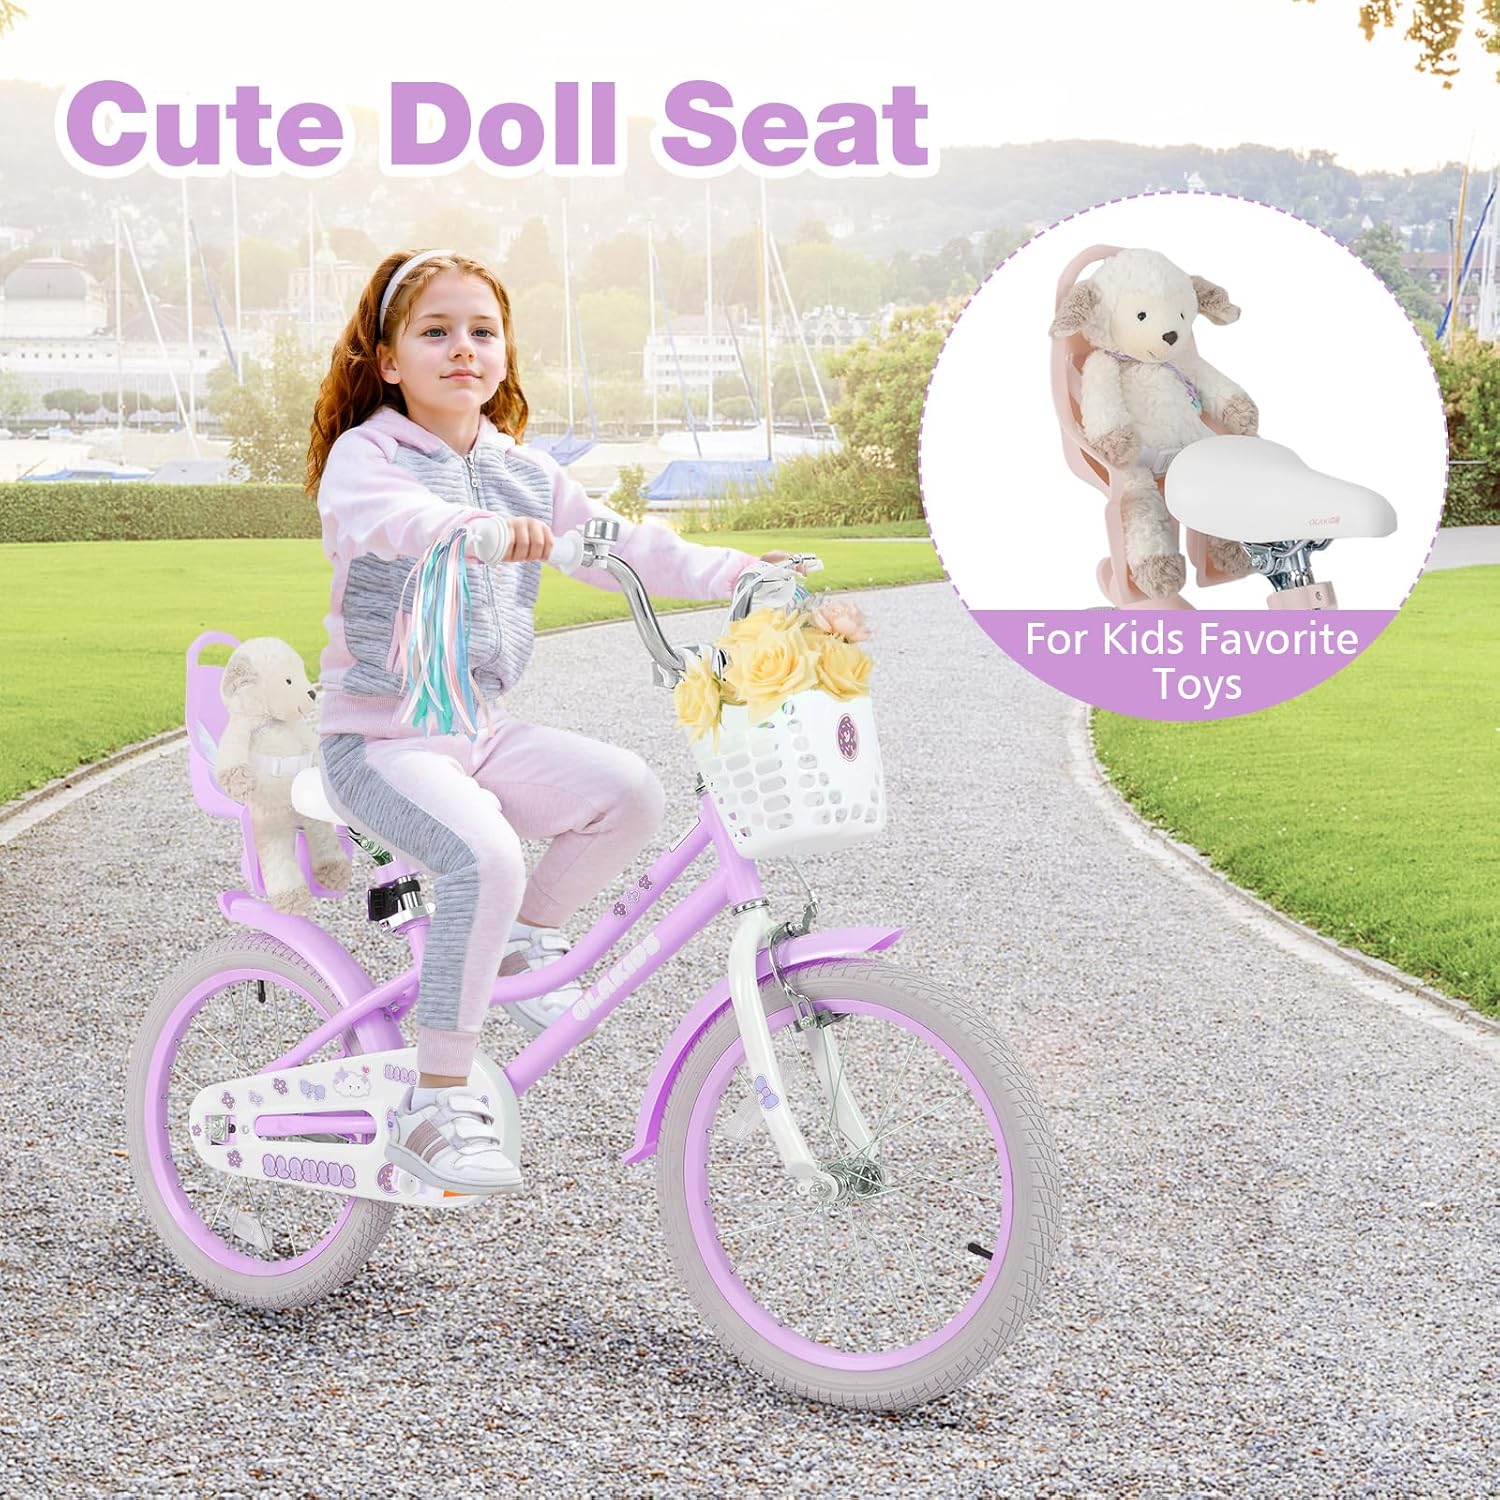
Image: The doll seat attached to the rear of the bike, ready for a toy passenger.
- Adjust Seat Height:
Loosen the quick-release lever or bolt on the seat post clamp. Adjust the seat height to the desired level, ensuring the rider can comfortably reach the ground. Tighten the quick-release lever or bolt securely. (Refer to video: 2:06 - 2:16) - Install Pedals:
Note that pedals are marked 'L' for left and 'R' for right. The left pedal (L) rotates counter-clockwise to tighten, and the right pedal (R) rotates clockwise to tighten. Screw the pedals into the crank arms and tighten them with a wrench. (Refer to video: 2:23 - 2:35) - Install Handlebar:
Insert the handlebar stem into the head tube of the bike frame. Ensure the handlebar is straight and aligned with the front wheel. Tighten the stem bolt securely. (Refer to video: 2:41 - 2:49) - Adjust Handbrake Lever:
Adjust the position of the handbrake lever on the handlebar for comfortable reach. Tighten the clamp screw with a hex key. (Refer to video: 2:50 - 3:10) - Install Front Fender:
Attach the front fender to the fork using the provided bolts and wrench. Ensure it is centered over the wheel. (Refer to video: 4:06 - 4:24) - Install Front Basket:
Attach the basket hangers to the basket. Then, hook the basket onto the handlebar. (Refer to video: 3:33 - 3:58) - Install Reflectors:
Attach the front reflector to the handlebar and the rear reflector to the seat post or rear fender using the provided brackets and screws. (Refer to video: 4:25 - 4:46)
Operating Instructions
Braking System
Your OLAKIDS Kids Bike is equipped with a dual braking system for reliable stopping power:
- Handbrake: The lever on the handlebar controls the front wheel brake. Squeeze gently to slow down or stop.
- Coaster Brake: This brake is activated by pedaling backward. Apply gentle backward pressure on the pedals to engage the rear wheel brake.
Adjusting for Rider Growth
The bike features adjustable components to accommodate your child's growth:
- Seat Height: Adjust the seat post to ensure the rider can touch the ground with their toes while seated. This allows for confident stopping and starting.
- Handlebar Height: The handlebar can be adjusted to provide a comfortable and upright riding position.
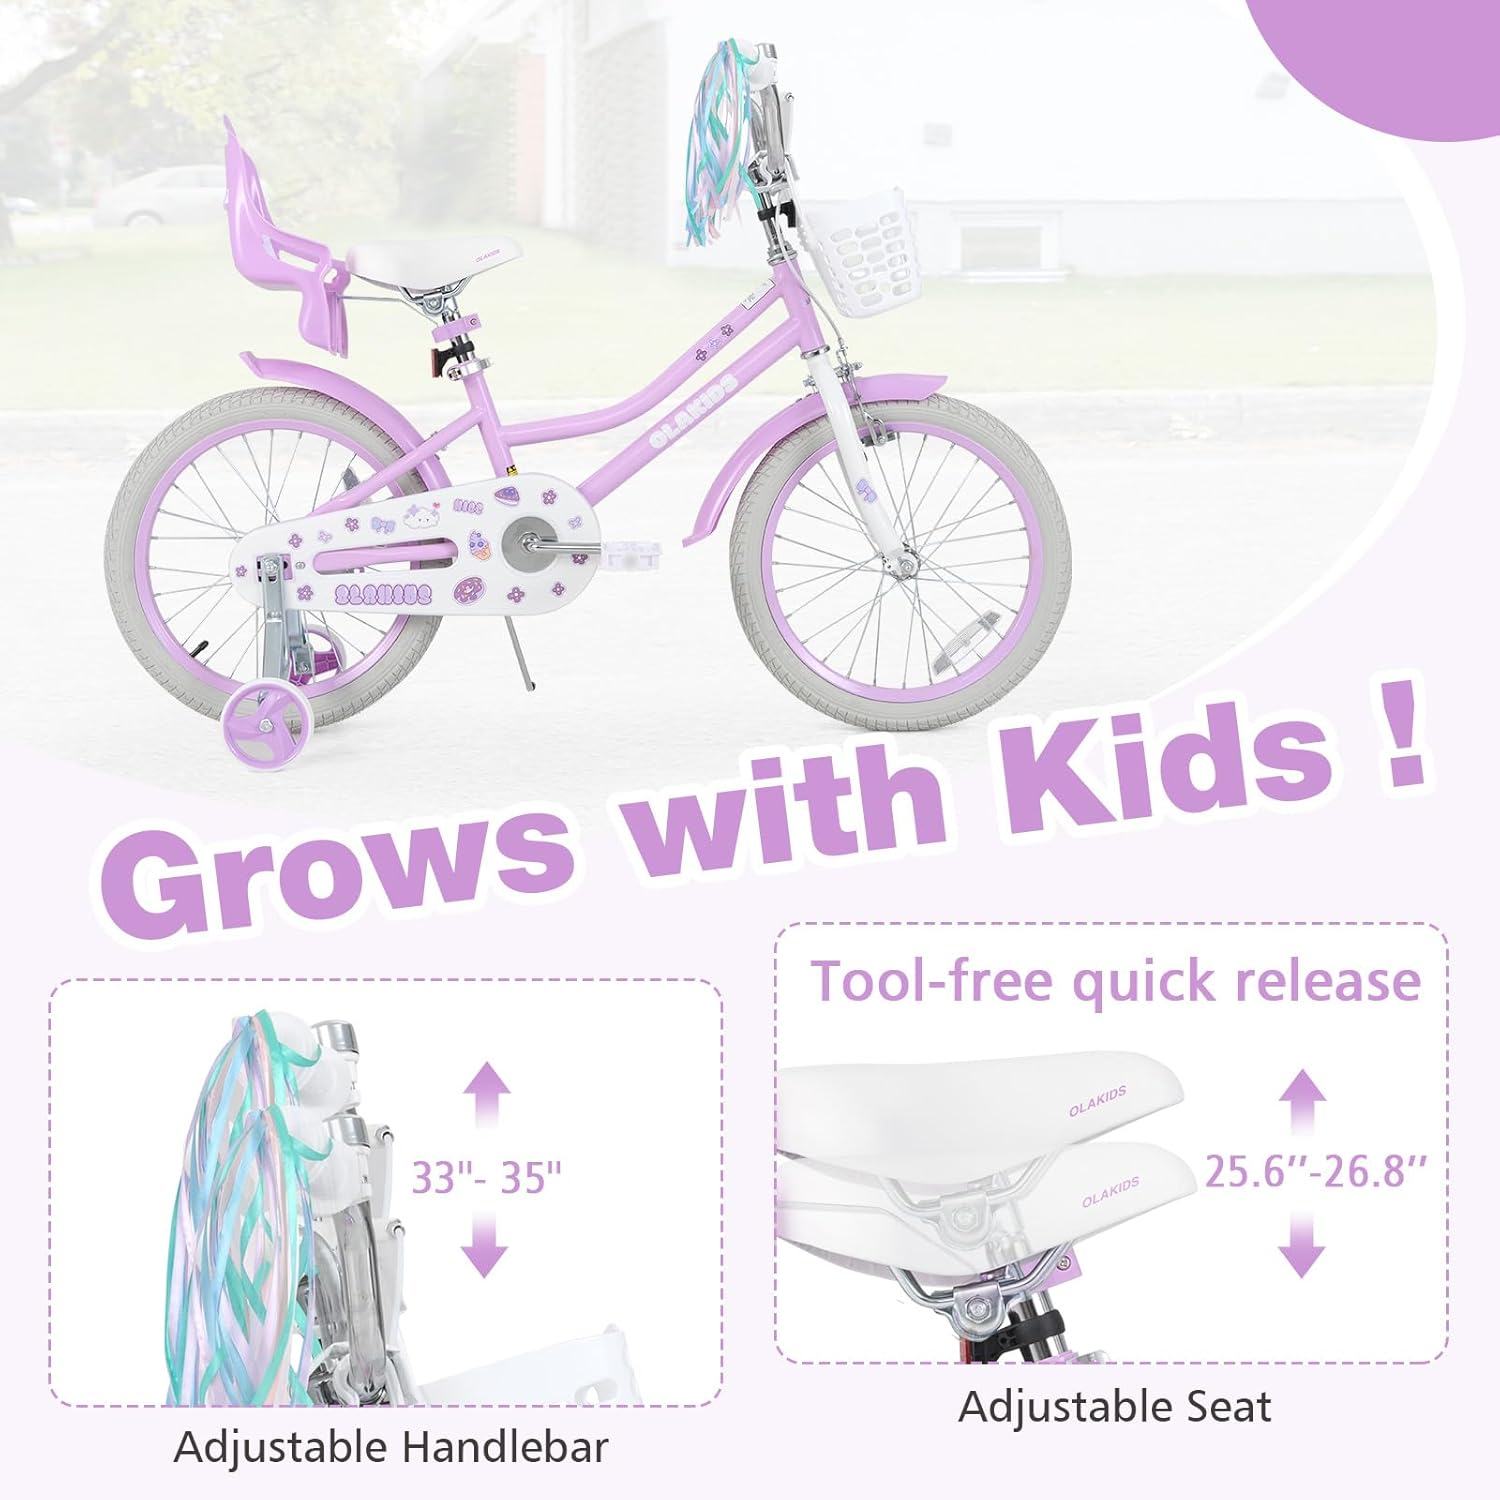
Image: Diagram showing adjustable handlebar and seat height ranges for the OLAKIDS Kids Bike.
Maintenance
Regular maintenance ensures the longevity and safety of your bike.
- Cleaning: Clean the bike regularly with a damp cloth and mild soap. Avoid high-pressure washers.
- Lubrication: Lubricate the chain periodically with bicycle-specific chain lubricant to ensure smooth operation and prevent rust.
- Brake Cables: Check brake cables for fraying or damage. Ensure they move freely and are properly tensioned.
- Tire Care: Inspect tires for wear, cuts, or punctures. Replace worn tires as needed.
- Storage: Store the bike in a dry, covered area to protect it from weather elements.
Troubleshooting
| Problem | Possible Cause | Solution |
|---|---|---|
| Brakes feel weak or unresponsive | Loose brake cable, worn brake pads, misaligned pads | Tighten brake cable, replace worn pads, adjust pad alignment. |
| Training wheels wobble | Loose mounting bolts | Ensure mounting bolts are securely tightened to the rear axle. |
| Pedals are difficult to turn | Chain needs lubrication, pedals are loose or cross-threaded | Lubricate chain, ensure pedals are correctly installed and tightened. |
| Handlebar is loose or turns independently | Stem bolt is loose | Tighten the stem bolt securely. |
| Tires are flat or losing air quickly | Puncture, valve issue, low pressure | Inspect for punctures and repair/replace tube, check valve stem, inflate to recommended pressure. |
Specifications
| Feature | Detail |
|---|---|
| Model Number | TS10240 |
| Bike Type | Kids Bike |
| Age Range (Description) | Little Kid |
| Wheel Size | 18 Inches |
| Colour | Lilac |
| Frame Material | Carbon steel |
| Number of Speeds | 1 |
| Brake Style | Caliper (Handbrake) and Coaster Brake |
| Suspension Type | Dual |
| Special Feature | Adjustable Handlebars |
| Included Components | Basket, Doll Seat, Training Wheels |
| Maximum Weight Recommendation | 143 Pounds |
| Assembly Required | Yes (85% pre-assembled) |
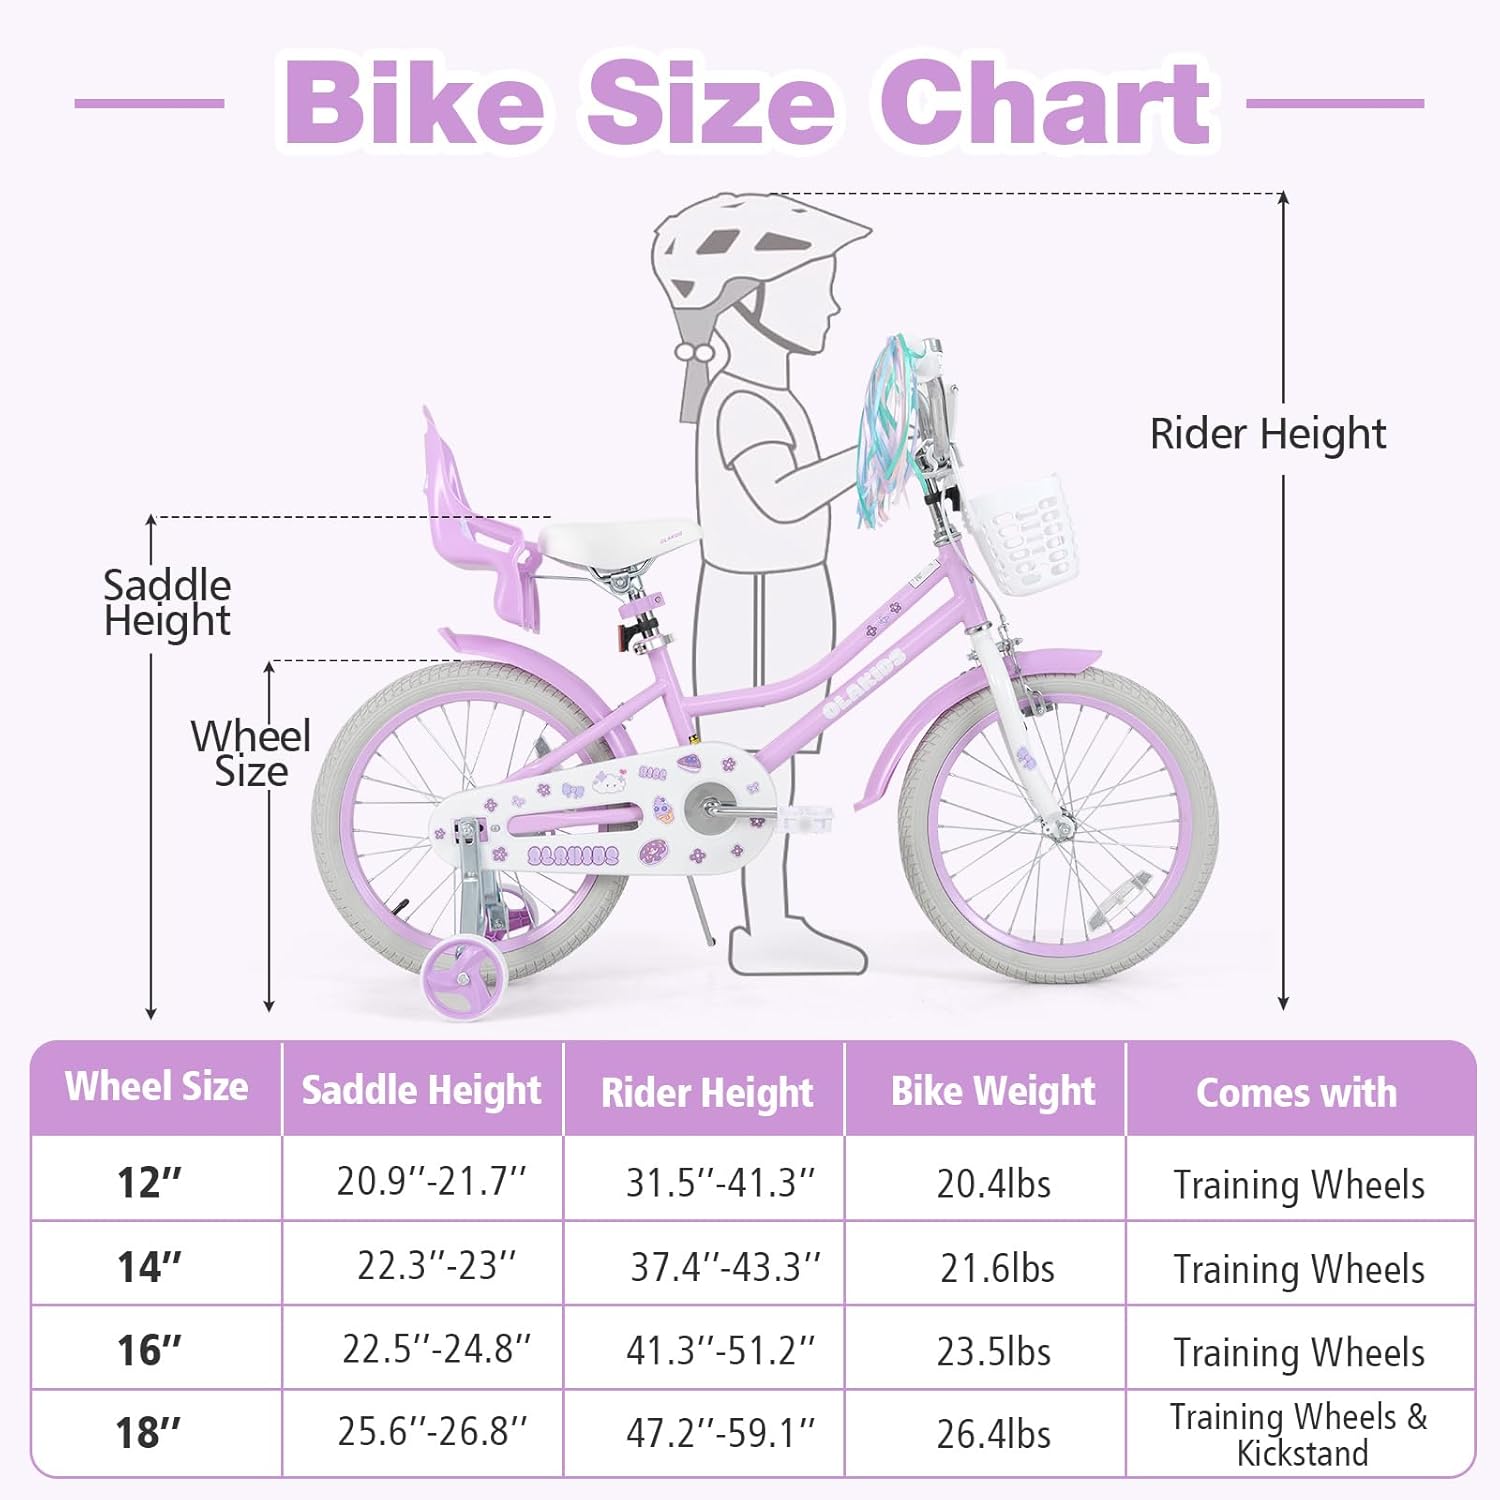
Image: A size chart illustrating recommended rider heights and saddle heights for various wheel sizes of OLAKIDS Kids Bikes.
Warranty and Support
This product comes with a 6-month warranty from the date of purchase.
For any questions, technical assistance, or warranty claims, please contact the manufacturer:
Manufacturer: Olakids
Contact Information: AKUSTIK, 11250 POPLAR AVE BLDG C, FONTANA
Please retain your proof of purchase for warranty validation.