1. Safety Information
Please read and understand all safety warnings and instructions before operating this electric pressure washer. Failure to follow the warnings and instructions may result in electric shock, fire, and/or serious injury.
Proposition 65 Warning: This product may contain chemicals known to the State of California to cause cancer and birth defects or other reproductive harm. Wash hands after handling.
General Safety Precautions:
- Always wear appropriate personal protective equipment, including safety glasses, gloves, and hearing protection.
- Ensure the power cord and plug are in good condition before each use. Do not use if damaged.
- Never point the spray gun at people, pets, or electrical outlets.
- Keep children and bystanders away from the operating area.
- Do not operate the pressure washer in the rain or wet conditions.
- Always disconnect the power supply before performing any maintenance or cleaning.
- Use only manufacturer-approved accessories and replacement parts.
2. Product Components
Familiarize yourself with the parts of your WorkBless Electric Pressure Washer for proper assembly and operation.

Image: Product Components. This image displays the main unit of the WorkBless Electric Pressure Washer with labels pointing to its key parts: Handle, Foam Cannon Holder, Power Cord Holder, ON/OFF Switch, Water Outlet (Connect Pressure Hose), Wheel, Water Inlet (Connect Garden Hose), High-pressure hose holder, and Spray Gun and Lance Holder.
Included Parts:
- Main Unit: The core pressure washer body with motor, pump, wheels, and integrated holders.
- Handle: For easy transport and maneuverability.
- Spray Gun: The handheld device used to direct the high-pressure water.
- Spray Lance: Extends the reach of the spray gun.
- Angle-Adjustable Nozzle: Allows customization of spray patterns without changing nozzles.
- High-Pressure Hose (23 FT): Connects the main unit to the spray gun.
- Power Cord (18 FT): For electrical connection.
- Foam Cannon: Attaches to the spray gun for applying detergent.
- Water Inlet Connector: For connecting a garden hose to the water inlet.
- Screwdriver & Screws: For handle assembly.
- Nozzle Cleaning Needle: For clearing blockages in the nozzle.

Image: Package Contents. This image shows all the items included in the WorkBless Electric Pressure Washer package: the electric pressure washer unit, spray gun, spray lance, angle-adjustable nozzle, foam cannon, high-pressure hose, water inlet connector, screwdriver, nozzle cleaning needle, and four screws.
3. Setup & Assembly
Follow these steps to assemble and prepare your pressure washer for first use.
3.1. Handle Installation
- Align the handle with the designated slots on top of the main unit.
- Insert the handle firmly into place.
- Secure the handle using the provided screws and screwdriver.
3.2. Water Inlet Filter Attachment
- Locate the water inlet at the rear of the pressure washer.
- Attach the inlet filter to the water inlet by screwing it clockwise until secure.
3.3. Hose Connections
- Inlet Hose (Garden Hose): Connect your garden hose (not included) to the water inlet filter. Ensure a tight connection to prevent leaks.
- High-Pressure Hose: Connect one end of the high-pressure hose to the water outlet on the front of the pressure washer. Move the button on the bottom of the pressure washer to the left while inserting or moving the high-pressure hose.
- Connect the other end of the high-pressure hose to the spray gun.
3.4. Spray Gun and Lance Assembly
- Insert the spray lance into the spray gun. Press inward and rotate clockwise to securely install.
- To detach, press inward and rotate counter-clockwise.
3.5. Foam Cannon Attachment
- Fill the foam cannon bottle with appropriate detergent.
- Insert the detergent bottle into the spray gun. Turn clockwise to attach and counter-clockwise to detach.
3.6. Power Connection
Plug the power cord into a grounded electrical outlet. Ensure the ON/OFF switch is in the 'OFF' position before plugging in.
Video: WorkBless Pressure Washer Installation. This video demonstrates the step-by-step installation process of the WorkBless Electric Pressure Washer, including attaching the handle, connecting hoses, and assembling the spray gun with the foam cannon.
4. Operating Instructions
Learn how to effectively use your WorkBless Electric Pressure Washer for various cleaning tasks.
4.1. Starting the Pressure Washer
- Ensure all connections are secure and the water supply is turned on.
- Turn the ON/OFF switch to the 'ON' position.
- Squeeze the trigger on the spray gun to begin spraying.
4.2. Adjustable Angle Nozzle
The pressure washer features an adjustable angle nozzle, eliminating the need to switch between multiple nozzles. Simply twist the nozzle to change the spray pattern from a concentrated stream to a wide fan spray, suitable for different cleaning needs.

Image: Multiple Spray Modes. This image illustrates the versatility of the adjustable nozzle, showing different spray patterns suitable for cleaning cracks and caked stains, driveways and hard surfaces, decks and wooden surfaces, and vehicles and windows. It also highlights a warning about cleaning a clogged nozzle with the provided needle.
4.3. Dual Water Supply Options
Your pressure washer offers flexibility with two water supply methods:
- From a Tap: Connect a standard garden hose directly to the water inlet.
- Self-Drawing from a Bucket: For self-priming, ensure the inlet pipe is less than 6.56 feet (2 meters) long. Place the inlet hose into a bucket of water, and the pump will draw water from it.
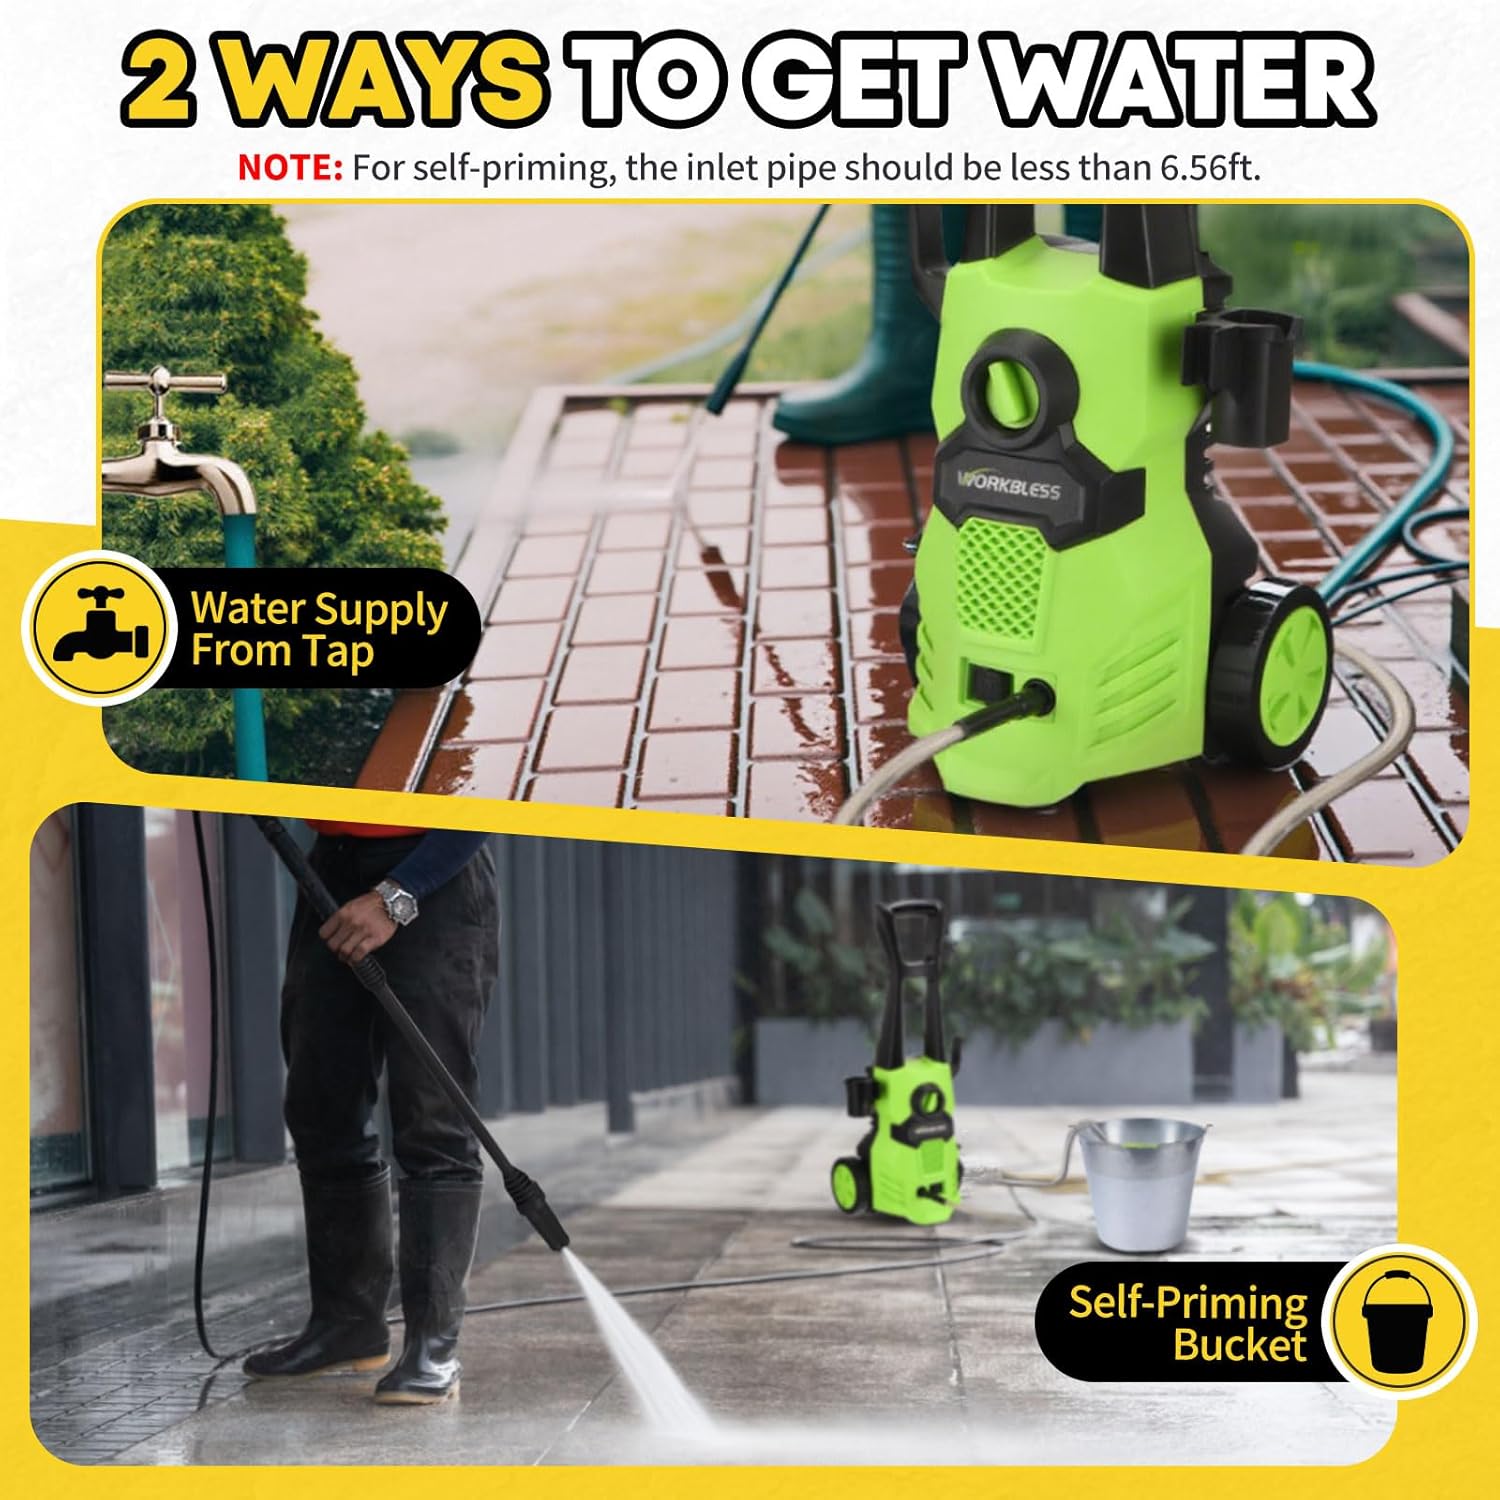
Image: Two Ways to Get Water. This image demonstrates how to connect the pressure washer to a standard water tap and how to use the self-priming feature by drawing water from a bucket. A note indicates that for self-priming, the inlet pipe should be less than 6.56 feet.
4.4. Using the Foam Cannon
The included foam cannon enhances cleaning by evenly spraying detergent onto surfaces. This is ideal for car washing and cleaning outdoor furniture.
- Fill the foam cannon bottle with your preferred pressure washer-safe detergent.
- Attach the foam cannon to the spray gun as described in Section 3.5.
- Activate the pressure washer and spray the detergent onto the desired surface.
- Allow the detergent to soak for a few minutes (refer to detergent instructions), then rinse with clear water.
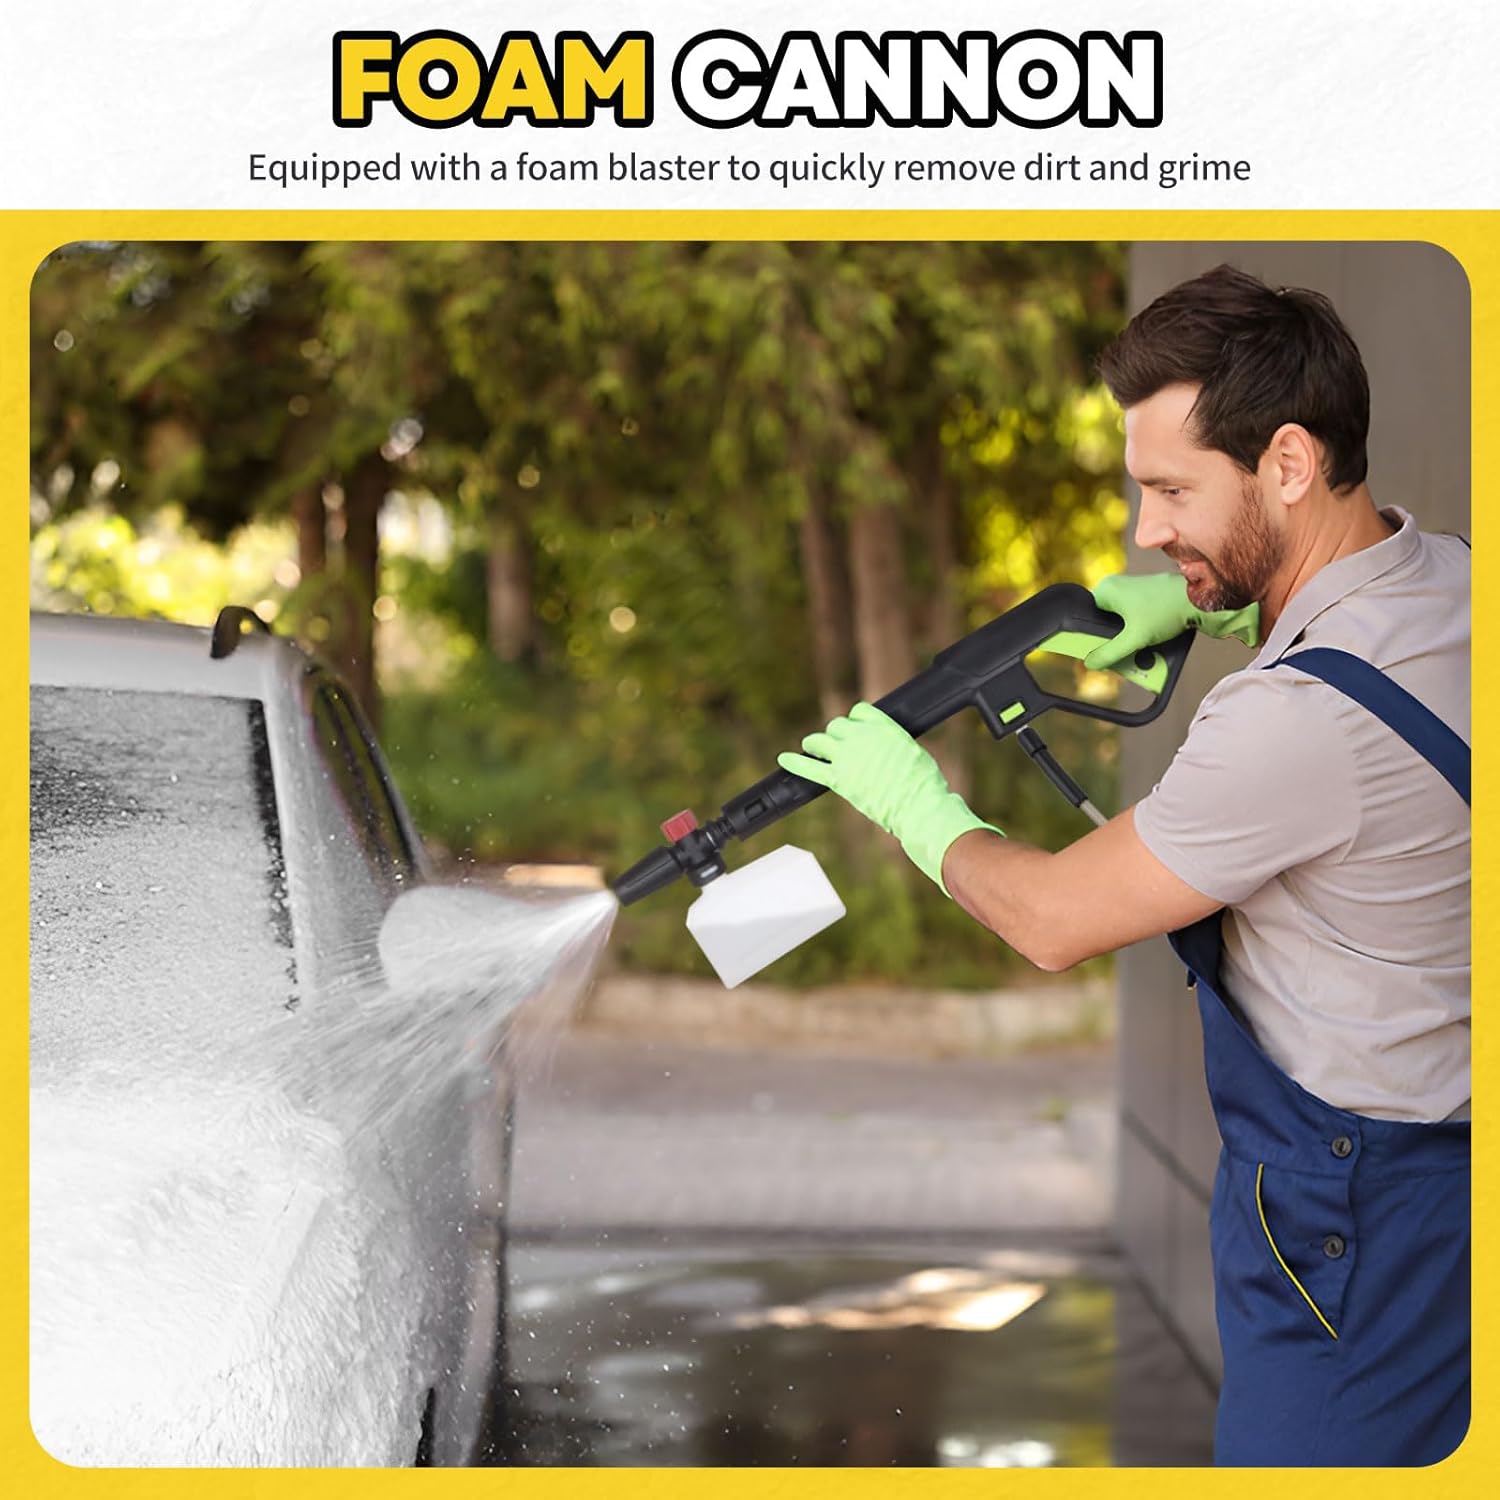
Image: Foam Cannon in Use. This image shows a person using the foam cannon attachment with the WorkBless Electric Pressure Washer to apply foam to a car, demonstrating its use for vehicle cleaning.
4.5. Safety Lock Mechanism
The spray gun is equipped with a safety lock to prevent accidental activation. When the safety lock is engaged, the high-pressure water gun cannot be activated. Always engage the safety lock when not actively spraying or when transporting the unit.
5. Maintenance
Regular maintenance ensures the longevity and optimal performance of your pressure washer.
5.1. Nozzle Cleaning
A clogged nozzle can cause the machine to fail to start or reduce pressure. If this occurs:
- Disconnect the power supply and water source.
- Remove the nozzle from the spray lance.
- Use the provided nozzle cleaning needle to remove any debris that is clogging the nozzle opening.
- Rinse the nozzle with water and reattach it.
5.2. Storage
The pressure washer is designed for easy storage. After each use:
- Drain all water from the unit, hoses, and spray gun to prevent freezing damage.
- Wrap the power cord around the dedicated hook.
- Place the spray gun and lance in their designated holder.
- Store the high-pressure hose on its holder.
- Store the unit in a dry, frost-free location.

Image: Portable Design. This image shows the WorkBless Electric Pressure Washer being easily transported using its handle and wheels, highlighting its user-friendly and compact design for storage and mobility.
6. Troubleshooting
Refer to this section for solutions to common issues you might encounter.
| Problem | Possible Cause | Solution |
|---|---|---|
| Pressure washer does not start | No power supply; ON/OFF switch is off; Clogged nozzle. | Check power connection; Turn ON/OFF switch to 'ON'; Clean the nozzle with the cleaning needle. |
| Low water pressure | Insufficient water supply; Clogged nozzle; Air in the pump. | Ensure water supply is fully open; Clean the nozzle; Bleed air from the pump by running water through it without the motor on until a steady stream emerges. |
| Water leaks from connections | Loose connections; Damaged O-rings. | Tighten all hose connections; Inspect and replace any damaged O-rings. |
| Motor runs but no water sprays | No water supply; Clogged inlet filter; Air in the pump. | Check water supply; Clean inlet filter; Bleed air from the pump. |
7. Specifications
Key technical specifications for the WorkBless Electric Pressure Washer WB0301.
| Feature | Specification |
|---|---|
| Model Number | WB0301 |
| Maximum Pressure | 4000 PSI |
| Flow Rate | 2.6 GPM |
| Product Dimensions | 10.24 x 15.35 x 12.2 inches |
| Item Weight | 14.39 pounds |
| Power Source | Battery Powered (Note: Product description states 'Electric Pressure Washer', but specifications list 'Battery Powered'. Please verify power source.) |
| Color | Green |
| Manufacturer | WorkBless |
Note: The product description indicates 'Electric Pressure Washer', while the specifications list 'Battery Powered'. Please confirm the correct power source for your specific model.
8. Warranty & Support
For warranty information, product support, or to purchase replacement parts, please refer to the warranty card included with your product or visit the official WorkBless website. Keep your purchase receipt as proof of purchase for warranty claims.
WorkBless Store: Visit the WorkBless Store on Amazon